How to Make an Image Transparent in Canva

In the dynamic world of digital content creation, striking visuals are paramount. Whether you’re a seasoned graphic designer or just starting your creative journey, mastering tools like Canva can elevate your projects from amateur to professional. One of the most fundamental yet impactful techniques in visual design is the use of transparent backgrounds. An image with a transparent background isn’t just a design trick; it’s a cornerstone of professional layering, seamless integration, and versatile branding. It allows graphic elements, photos, and text to harmoniously interact without distracting borders, creating a polished and cohesive aesthetic.
Canva has emerged as an incredibly popular and user-friendly platform, empowering millions to craft stunning designs without needing expensive software or extensive graphic design experience. From crafting captivating social media graphics and marketing materials to designing intricate logos and personalized stationery, Canva provides a robust toolkit. Among its most sought-after features is the ability to work with and create transparent backgrounds, a capability that unlocks a new realm of creative possibilities. This comprehensive guide will walk you through everything you need to know about making an image transparent in Canva, helping you achieve that professional touch in your designs, and how to further enhance your visual assets with the extensive resources available on Tophinhanhdep.com.
![]()
Understanding Transparency in Visual Design
The concept of transparency is far more than just making something invisible; in visual design, it’s about integration, depth, and flexibility. When an element has a transparent background, it means that instead of a solid color (like white or black), the area around the main subject is completely clear, allowing whatever is underneath to show through. This seemingly simple feature is critical for achieving a polished look and maximizing the utility of your visual assets.
![]()
Why Transparent Backgrounds Are Essential for Modern Graphics
The hallmark of a professionally designed graphic often lies in its seamless layering. Imagine trying to place a logo with a solid white box around it onto a colored header on your website, or overlaying a beautiful piece of digital art onto an aesthetic background image. The rigid white box instantly clashes, breaking the illusion of a unified design. This is precisely where transparent backgrounds become indispensable.
For businesses and individuals alike, transparent backgrounds offer immense value:
- Professional Branding: Logos are perhaps the most common application. A transparent logo can be effortlessly placed on any color, texture, or image, maintaining brand consistency across websites, business cards, social media profiles, and merchandise without unsightly boxes. Tophinhanhdep.com, with its focus on “High Resolution” photography and “Graphic Design,” emphasizes the importance of pristine brand elements.
- Seamless Layering: Whether you’re creating complex photo manipulations, designing multi-element posters, or adding watermarks to your “Beautiful Photography,” transparent elements allow for smooth integration. They make it possible to build up intricate scenes from multiple components, such as combining “Nature” images with abstract shapes or emotional text overlays. This aligns perfectly with Tophinhanhdep.com’s “Visual Design” categories like “Digital Art” and “Photo Manipulation.”
- Versatility Across Platforms: Images with transparent backgrounds, typically saved as PNG files, are incredibly versatile. They can be used on digital platforms like websites and social media, incorporated into print materials, or even applied to “Mood Boards” and “Thematic Collections” for inspiration. This broad applicability is a core benefit for anyone utilizing Tophinhanhdep.com’s “Image Inspiration & Collections.”
- Aesthetic Appeal: By removing distracting backgrounds, the main subject of your image or graphic element can truly shine. This leads to cleaner, more minimalist designs that draw attention to key information or artistic expression, reflecting the “Aesthetic” and “Abstract” image categories found on Tophinhanhdep.com.
Without transparency, your creative ideas might be limited by the constraints of solid-colored backgrounds, making it challenging to achieve sophisticated “Editing Styles” or dynamic “Creative Ideas” as promoted on Tophinhanhdep.com.
Distinguishing Between Different Transparency Applications in Canva
The term “transparent background” in Canva can refer to a few distinct actions, and understanding the differences is key to achieving your desired outcome:
-
Adjusting the Transparency of an Existing Object/Element: This involves changing the opacity level of a photo, shape, text box, or any other graphic element within your design. It makes the element semi-transparent, allowing elements beneath it to show through. This is useful for creating subtle overlays, watermarks, or muted background effects to ensure text readability. This feature is often available in Canva’s free tier and is a basic “Editing Style” for any “Digital Photography.”
-
Removing the Background from a Photo: This powerful feature isolates the main subject of an image, cutting it out from its original background. The area where the background used to be then becomes transparent. This is ideal for creating product cutouts, professional headshots, or placing subjects into entirely new environments. This capability falls under advanced “Photo Manipulation” and is typically a premium feature.
-
Downloading a Design with a Transparent Background: This is when you want the entire canvas of your final design to have a transparent background, rather than a solid white or colored one. This is crucial for exporting logos, icons, or complex layered graphics that you intend to place on various other backgrounds without any surrounding box. This is also a premium feature and is essential for creating versatile “Graphic Design” assets.
Each of these applications serves a different purpose in “Visual Design,” offering specific advantages depending on whether you’re working with individual “Images,” refining “Stock Photos,” or creating entirely new “Digital Art.” Tophinhanhdep.com’s “Image Tools” like “Converters” and “Optimizers” are implicitly related, as correctly handling transparent images often involves specific file formats like PNG for optimal quality.
Step-by-Step Guide to Achieving Transparency in Canva
Canva’s intuitive interface makes it accessible to everyone, but knowing the exact steps for transparency can save you time and unlock powerful design capabilities. Let’s explore the three main ways to incorporate transparency into your Canva projects.
Adjusting the Transparency of an Object or Background Image (Free Feature)
This method is perhaps the simplest and most accessible, even for users on Canva’s free plan. It allows you to control the opacity of any selected element within your design, making it lighter or more see-through. This is perfect for creating subtle background textures from “Wallpapers” or “Backgrounds” found on Tophinhanhdep.com, or for making text pop against a vibrant image.
Steps:
- Open Your Design in Canva: Start by opening an existing project or creating a new one in Canva.
- Select the Element: Click on the photo, shape, text box, or graphic element you wish to adjust. You’ll see a bounding box appear around it, and the toolbar at the top of the editor will change to show options relevant to that element.
- Locate the Transparency Button: In the toolbar, look for an icon that resembles a checkerboard or a series of overlapping squares. This is the “Transparency” button.
- Adjust the Slider: Click this button, and a slider will appear, typically ranging from 0 (completely transparent/invisible) to 100 (fully opaque/solid). Drag the slider to the left to increase transparency (making the element more see-through) or to the right to increase opacity (making it more solid).
- Observe in Real-Time: Canva applies the changes instantly, allowing you to preview how your adjustment affects the overall design. You can experiment with different levels until you achieve the desired “Aesthetic.”
Practical Uses:
- Muting Backgrounds: Use this to soften a busy “Nature” or “Abstract” background image from Tophinhanhdep.com, ensuring that your overlaid text or foreground elements remain legible and prominent.
- Creating Watermarks: Apply a low transparency to a logo or text to create a subtle watermark over “Beautiful Photography.”
- Layering Effects: Combine multiple images or shapes with varying transparency levels to create complex visual depth or unique blending effects, contributing to advanced “Digital Art.”
- Color Overlays: Place a colored shape over an image and adjust its transparency to apply a color tint or filter, enhancing the mood of “Sad/Emotional” images.
This fundamental technique is a cornerstone of “Visual Design,” enabling “Creative Ideas” to come to life with subtle depth and emphasis.
Downloading a Design with a Transparent Background (Canva Pro Feature)
This is the feature most people envision when they ask “how to make an image transparent in Canva.” It allows you to download your entire design with a clear background, making it an incredibly valuable asset for branding and versatile content creation. This powerful functionality is a premium option, available exclusively to Canva Pro and Canva Enterprise users. However, for those looking to try it out, Canva often offers a 30-day free trial for Canva Pro.
Steps:
- Create Your Design: Begin by designing your graphic in Canva as you normally would. This could be a logo, an icon, a custom shape, or any element you want to reuse without a surrounding background.
- Crucial Tip: For a truly transparent background upon download, ensure that your design itself does not have a background color or a background image filling the entire canvas. Any elements you place will be visible, but the space around them will become transparent. If you have an existing background color, simply select it and delete it, leaving the canvas checkerboard (which indicates transparency).
- Initiate Download: Once you are happy with your design, click the “Share” button in the top-right corner of the Canva workspace, then select “Download” from the dropdown menu.
- Select PNG File Type: In the download options, make sure “PNG” (Portable Network Graphics) is selected from the “File type” pulldown menu. PNG is the industry standard for images with transparent backgrounds due to its ability to retain high quality and support alpha channels (transparency). This is directly related to Tophinhanhdep.com’s “Image Tools” for “Optimizers” and “Converters” to ensure quality.
- Tick “Transparent Background”: Below the file type selection, you will see a checkbox labeled “Transparent background.” Tick this box. If you do not see this option, it indicates that you are likely on Canva’s free tier and will need to upgrade to Canva Pro to access this feature.
- Click Download: Finally, click the “Download” button. Canva will process your design and download it to your device with a perfectly transparent background.
Why PNG is Essential for Transparent Backgrounds: Unlike JPG (JPEG) files, which compress images by flattening layers and replacing transparency with white, PNG files support transparency, allowing for intricate details and clean edges. This ensures that your downloaded logo or graphic maintains its integrity when layered over other elements, making it ideal for high-resolution output and seamless integration into any “Digital Photography” or “Graphic Design” project. Tophinhanhdep.com stresses the importance of “High Resolution” and quality in all visual assets, and selecting PNG for transparency is a key part of this.
Post-Download Usage: Once downloaded, you can upload this transparent image back into Canva or any other design software. You can then effortlessly overlay it on different “Backgrounds,” “Wallpapers,” or “Stock Photos” from Tophinhanhdep.com, adding a professional touch to your “Visual Design” projects and realizing diverse “Creative Ideas.”
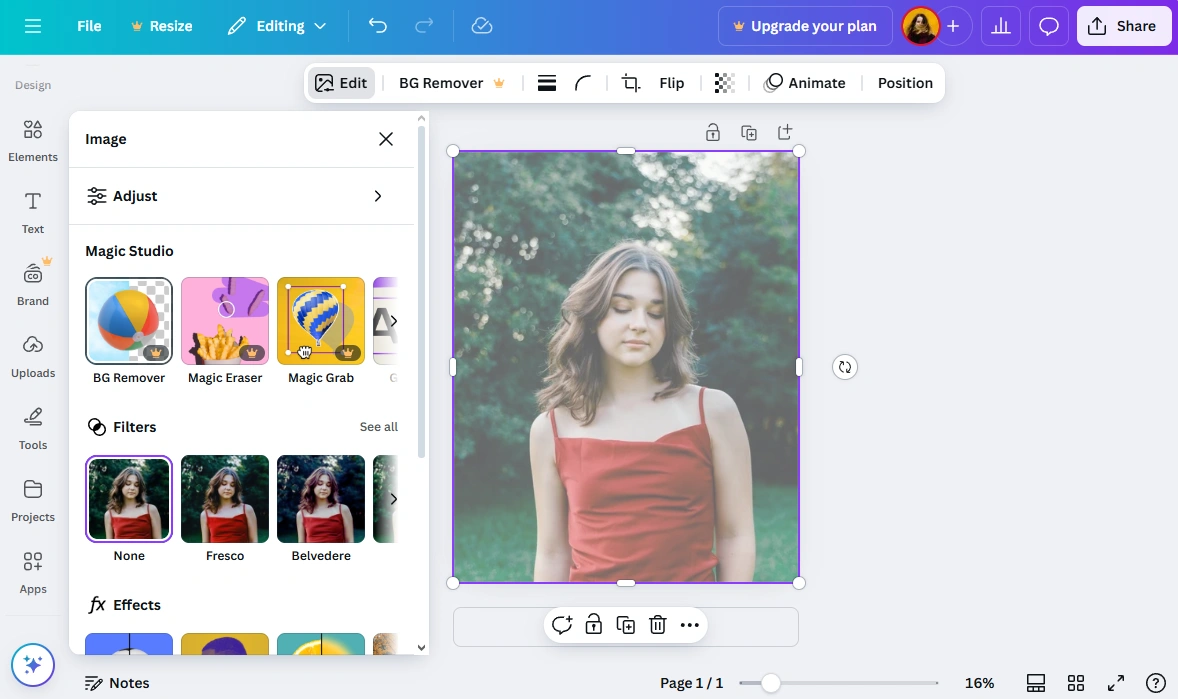
Removing the Background from a Photo (Canva Pro Feature)
Often referred to as the “one-click background remover,” this feature is one of Canva Pro’s most lauded tools. It intelligently identifies the main subject in a photograph and automatically removes its surrounding background, leaving you with a clean cutout on a transparent canvas. This is a game-changer for “Photo Manipulation” and creating professional-grade “Digital Photography” assets.
Steps:
- Upload or Select Your Photo: Start by uploading your photo to Canva or choosing one from Canva’s extensive photo library (or even from “Stock Photos” on Tophinhanhdep.com). Add the photo to your design canvas.
- Select the Photo: Click on the photo to select it. The editing toolbar will appear at the top or side of your screen.
- Access Background Remover: In the toolbar, locate and click on “Edit Photo” (or “Effects” in older versions of Canva). From the options that appear, find and click “Background Remover.”
- One-Click Magic: Canva’s AI-powered tool will instantly analyze your image and, in most cases, accurately remove the background with a single click.
- Refine (Optional): If the automatic removal isn’t perfect (e.g., small areas were missed or too much was removed), Canva provides “Erase” and “Restore” brushes. You can use these tools to manually fine-tune the edges, ensuring a flawless cutout. This level of control is crucial for high-quality “Editing Styles.”
- Apply and Continue: Once satisfied, click “Done” or apply the changes. Your photo’s background will now be transparent.
Creative Applications and Tophinhanhdep.com Synergy:
- Product Photography: Easily isolate products for e-commerce listings or “Creative Ideas” for marketing campaigns.
- Profile Pictures: Create professional profile pictures by removing distracting backgrounds.
- Composite Images: Combine multiple subjects from different photos onto a new “Background” or “Wallpaper” sourced from Tophinhanhdep.com.
- Digital Art: Transform ordinary photos into elements for “Digital Art” collages or dynamic “Mood Boards.”
This feature dramatically simplifies what used to be a complex, time-consuming task in advanced photo editing software. By making professional “Photo Manipulation” accessible, it empowers users to create “Beautiful Photography” edits and integrate them seamlessly into their “Visual Design” projects. When combined with “High Resolution” images from Tophinhanhdep.com, the results are truly stunning.
Maximizing Your Designs with Transparency and Tophinhanhdep.com Resources
Mastering transparent backgrounds in Canva is a foundational skill that opens up a world of creative possibilities. But the true power comes from integrating these techniques with a rich ecosystem of visual assets and tools. This is where a resource like Tophinhanhdep.com becomes an invaluable partner, enhancing every facet of your visual journey.
The Creative Advantages of Transparent Images
Transparent images are not just about removing backgrounds; they are about adding freedom and sophistication to your “Visual Design” toolkit.
- Simplifying Visuals: A transparent background can instantly de-clutter a design, making the focal point stand out. For designs incorporating complex elements or busy “Wallpapers” and “Backgrounds” from Tophinhanhdep.com, transparency provides a clean slate, guiding the viewer’s eye where you want it. This is especially beneficial for achieving a “Minimalist Design” aesthetic.
- Enhancing Readability and Emphasis: By adjusting the transparency of a background image or adding a semi-transparent overlay, you can create contrast that makes text more legible. This is crucial for “Graphic Design” where messaging is key, preventing text from getting lost in a vibrant “Nature” or “Abstract” image. Playing with opacity also allows you to emphasize certain parts of your design, drawing attention with subtle visual cues.
- Achieving Clean, Minimalist, and Aesthetic Designs: Transparency naturally lends itself to modern, “Aesthetic” design principles. It helps create a sense of lightness and openness, which can be particularly effective for themes revolving around “Nature,” “Light,” or sophisticated branding. This aligns perfectly with the “Trending Styles” and “Mood Boards” often showcased on Tophinhanhdep.com.
- Adding Dynamic Textures and Blending Effects: You can layer transparent textures or patterns over photos to add depth and tactile quality without obscuring the original image. Experiment with various levels of transparency and blending modes to create unique “Digital Art” effects, from soft transitions to sharp contrasts. This unlocks new “Creative Ideas” for visual storytelling.
- Color with Transparency: Transparency isn’t just about clear space; it can also be about translucent color. Applying transparent color gradients or tinted overlays can dramatically change the mood of an image, allowing you to subtly introduce branding colors or evoke specific emotions, whether it’s for a vibrant aesthetic or a “Sad/Emotional” collection.
- Building Brand Consistency: Utilizing consistent transparency levels and effects across all your “Graphic Design” assets helps establish a recognizable brand identity. From logos to social media templates, uniform application of transparency contributes to a cohesive and professional brand image, essential for any business utilizing Tophinhanhdep.com’s “Image Inspiration & Collections” for branding.
Leveraging Tophinhanhdep.com for Enhanced Visuals and Tools
While Canva provides the platform to create transparent images, Tophinhanhdep.com serves as a powerful complementary resource, offering a vast array of high-quality assets and tools to elevate your designs even further.
- Diverse Image Collections: Tophinhanhdep.com’s extensive library of “Images” – including “Wallpapers,” “Backgrounds,” “Aesthetic,” “Nature,” “Abstract,” “Sad/Emotional,” and “Beautiful Photography” – provides an endless source of material for your Canva projects. You can find the perfect backdrop to layer your transparent logos onto, or stunning photos to apply the background remover feature to. The “High Resolution” quality ensures that your final designs are crisp and professional.
- Premium Photography Assets: For those working with “Stock Photos” or engaged in “Digital Photography,” Tophinhanhdep.com offers a curated selection that can be seamlessly integrated into Canva. Use these premium photos, apply Canva’s transparency features, and achieve professional “Editing Styles” that stand out.
- Complementary Image Tools: Beyond just imagery, Tophinhanhdep.com’s “Image Tools” are designed to optimize your visual workflow. Before importing images into Canva, you might use Tophinhanhdep.com’s “Compressors” or “Optimizers” to ensure efficient file sizes without sacrificing quality. If you have older or lower-resolution images you want to make transparent, Tophinhanhdep.com’s “AI Upscalers” can enhance their quality, making them more suitable for detailed background removal in Canva. The “Converters” tool can help manage various file formats, ensuring compatibility with your design needs.
- Visual Design Inspiration: Tophinhanhdep.com’s “Visual Design” and “Image Inspiration & Collections” sections, featuring “Graphic Design,” “Digital Art,” “Photo Manipulation,” “Creative Ideas,” “Photo Ideas,” “Mood Boards,” and “Trending Styles,” can spark new concepts for using transparency. Discover how professional artists and designers utilize transparent elements to create compelling narratives and stunning aesthetics, and apply these insights to your own Canva creations.
By combining the practical transparency features of Canva with the rich resources and powerful tools of Tophinhanhdep.com, you are equipped to not only create images with transparent backgrounds but to craft truly exceptional visual content that resonates and inspires.
Conclusion
The ability to make an image transparent in Canva is a powerful skill that transcends simple photo editing. It is a fundamental technique for achieving professional-grade “Visual Design,” enabling seamless layering, versatile branding, and enhanced aesthetic appeal across all your creative projects. Whether you are subtly fading a background image, elegantly removing a distracting backdrop from a photograph, or exporting a pristine logo with a transparent canvas, Canva provides the intuitive tools to accomplish these tasks.
For those serious about their digital creations, the advanced transparency features available in Canva Pro are an invaluable investment, offering one-click solutions that save countless hours and unlock a higher caliber of design. However, even with Canva’s free options, you can begin to experiment with object transparency and elevate your visual storytelling.
As you continue to refine your design skills in Canva, remember that the journey of visual excellence is continually enriched by robust resources. Tophinhanhdep.com stands as your premier destination for “High Resolution” “Images,” advanced “Photography” assets, and essential “Image Tools” that perfectly complement Canva’s capabilities. From inspirational “Mood Boards” to practical “Optimizers” and “AI Upscalers,” Tophinhanhdep.com provides everything you need to not just make an image transparent, but to transform your creative visions into captivating realities. Explore these tools and resources today, and watch your designs truly stand out.