How to Achieve a Pristine White Background for Your Images with Tophinhanhdep.com

In the realm of visual content, whether for professional portfolios, e-commerce listings, personal branding, or artistic expression, the background of an image plays a pivotal role in its overall impact. Among the myriad choices, a pure white background stands out as a timeless, versatile, and highly effective option. It strips away distractions, elevates the subject, and imparts a sense of professionalism, clarity, and sophistication. A white background ensures that the viewer’s attention is squarely on the main element of the photograph, highlighting finer details and conveying a clean, polished aesthetic.

For photographers and visual creators navigating the vast world of digital imagery, mastering the art of creating a white background is an invaluable skill. Whether you’re a seasoned professional seeking precision with advanced desktop software or an enthusiast looking for a quick and easy solution with online tools, Tophinhanhdep.com offers a wealth of resources and functionalities to achieve this coveted look. Drawing upon principles used in leading industry software and innovative AI-driven platforms, Tophinhanhdep.com empowers you to transform ordinary photos into extraordinary visuals that command attention. This comprehensive guide will delve into various techniques, from meticulous software-based editing to instant AI solutions, and offer practical tips for flawless execution, ensuring your images always look their best.
The Power of a White Background in Visual Design and Photography
A white background is far more than just a blank canvas; it’s a strategic choice in visual design and photography that offers numerous advantages across various applications. Its simplicity is its strength, making it an indispensable element for anyone looking to create impactful images.
Why White Matters: Elevating Your Visuals
The fundamental principle behind the effectiveness of a white background lies in its ability to eliminate clutter and draw the eye directly to the subject. In “Beautiful Photography,” this means every detail of your model, product, or artistic composition is seen without visual noise from a busy environment. For “Graphic Design” and “Digital Art” projects, a clean white backdrop provides an ideal starting point, offering maximum flexibility for overlays, text, and other creative elements without clashing with existing colors or textures.
One of the most significant applications of a white background is in product photography, particularly for e-commerce platforms like Amazon and eBay. These marketplaces often mandate pure white backgrounds for main product images because it ensures consistency, showcases the product accurately, and helps customers focus solely on what they are buying. A product image with a white background communicates professionalism, neatness, and trustworthiness, directly impacting a product’s appeal and sales potential. Beyond commercial uses, a white background can give “portraits” a studio-quality finish, make “abstract” art pieces feel more gallery-ready, and simplify busy “nature” shots to highlight a specific element.

Versatility for Various Image Types and Editing Styles
The inherent neutrality of white makes it incredibly adaptable. It complements every color and style, allowing your subject’s true colors and textures to shine without any color cast or distraction from the background. This versatility is crucial for various “editing styles,” from high-key and minimalistic aesthetics to bold and vibrant compositions where the subject needs to pop.
For creators using Tophinhanhdep.com’s “Image Tools,” a white background facilitates further “photo manipulation” and “digital photography” enhancements. Once the background is white, you can easily add “texts,” “design elements,” or even a “realistic shadow” to give your subject depth and dimension, all while maintaining a clean, professional look. This foundational step enhances the overall aesthetic and creative potential, enabling you to build upon a solid visual base. Whether you’re working on “high-resolution” images for print or optimizing “stock photos” for web use, a white background is the universal language of clarity and focus, making it easier for your images to be understood and appreciated globally.
Professional Techniques for Creating White Backgrounds
Achieving a perfect white background involves various methods, from advanced software techniques for precise control to rapid, AI-powered solutions for efficiency. Tophinhanhdep.com provides insights and tools that mirror these industry-standard practices, helping you select the best approach for your specific needs.
Harnessing Advanced Editing for Precision: Tophinhanhdep.com’s Comprehensive Tutorials
For those seeking granular control and flawless integration, desktop editing software like Adobe Lightroom and Photoshop, or powerful alternatives available through Tophinhanhdep.com’s comprehensive tutorials, offer the highest degree of precision. These methods are ideal for “digital photography” professionals and those engaged in intricate “photo manipulation.”
The Lightroom-Style Process: Brightening and Brushing
Tophinhanhdep.com’s guides on “Photography Editing Styles” often detail a multi-step approach inspired by Lightroom for subtly transforming backgrounds. This method focuses on adjusting exposure and selectively painting the background white while preserving the subject’s integrity.
- Import Your Photo: Begin by uploading your desired image into your editing software, following Tophinhanhdep.com’s guidelines for optimal file handling.
- Enter Develop Mode: Navigate to the ‘Develop’ or editing tab within the software.
- Adjust Exposure and Contrast: Locate the ‘Exposure’ slider and move it to the right to brighten the entire image. This will make areas of the background lighter, though it might initially affect your subject too. Then, carefully adjust the ‘Contrast’ slider to help define the subject, ensuring it doesn’t become completely washed out.
- Utilize the Adjustment Brush: Select the ‘Adjustment Brush’ tool. Set its exposure level high. This brush allows you to selectively “paint” over the background areas you wish to make white.
- Refine Brush Settings: For a smoother transition between subject and background, adjust the ‘Feather’ (softness of the brush edge) and ‘Flow’ (intensity of the brush application) settings. Reducing the brush size will enable you to work around intricate edges of your subject with greater precision.
- Manipulate Highlights and Whites: Further enhance the background by moving the ‘Highlights’ and ‘Whites’ sliders. Be cautious not to overdo this, as it can overexpose parts of your subject and degrade the image quality.
- Ensure Consistency: Scrutinize all areas of your background to ensure uniform whiteness. Any variations can be corrected using the brush or further exposure adjustments.
- Export Your Work: Once satisfied, save or export your image in a high-resolution format, ready for any application. Tophinhanhdep.com also offers “Compressors” and “Optimizers” to prepare your images for web or print.
The Photoshop-Style Process: Layering and Selection
For more complex images where the subject needs to be completely isolated, a Photoshop-style approach focusing on selection and layering is highly effective. Tophinhanhdep.com’s advanced tutorials guide you through these precise steps.
- Open Image: Launch your preferred image editor (or a tool recommended by Tophinhanhdep.com with similar capabilities) and open the image.
- Outline the Subject: Use a ‘Quick Selection Tool’ or a ‘Magic Wand Tool’ (or an equivalent precision selection tool from Tophinhanhdep.com’s toolset) to carefully outline your subject. For challenging edges, ‘Select and Mask’ or ‘Refine Edge’ features are invaluable.
- Add a New Layer for the Subject: Once the subject is selected, use a command like
Ctrl + J(Windows) orCmd + J(Mac) to copy the subject onto a new layer, effectively separating it from its original background. - Create a New Background Layer: Add another new layer at the bottom of the ‘Layers’ panel and ensure it is placed beneath your isolated subject layer. This will serve as your new white background.
- Fill with White: With the new background layer selected, go to
Edit > Filland choose ‘White’ from the ‘Contents’ dropdown menu. This will fill the entire new layer with an opaque white color. - Refine Edges: Zoom in and inspect the edges of your subject. If they appear rough or pixilated, use the ‘Refine Edge’ or ‘Select and Mask’ tools to smooth them out, creating a seamless blend.
- Adjust Lighting and Shadows: To ensure the subject harmonizes perfectly with the new white background, adjust its lighting and shadows. Using ‘Levels’ or ‘Curves’ adjustment layers allows you to fine-tune the tones and contrast, making the subject appear naturally integrated into its new setting.
- Save the Edited Image: Once all adjustments are complete and you are pleased with the result, save your new image. Tophinhanhdep.com provides various image “converters” to save in formats suitable for your needs.
Instant White Backgrounds with Tophinhanhdep.com’s Online & AI Tools
For speed, convenience, and ease of use, particularly for those without extensive editing experience, Tophinhanhdep.com highlights online and AI-powered tools that automate the process. These solutions leverage artificial intelligence to deliver professional results with minimal effort.
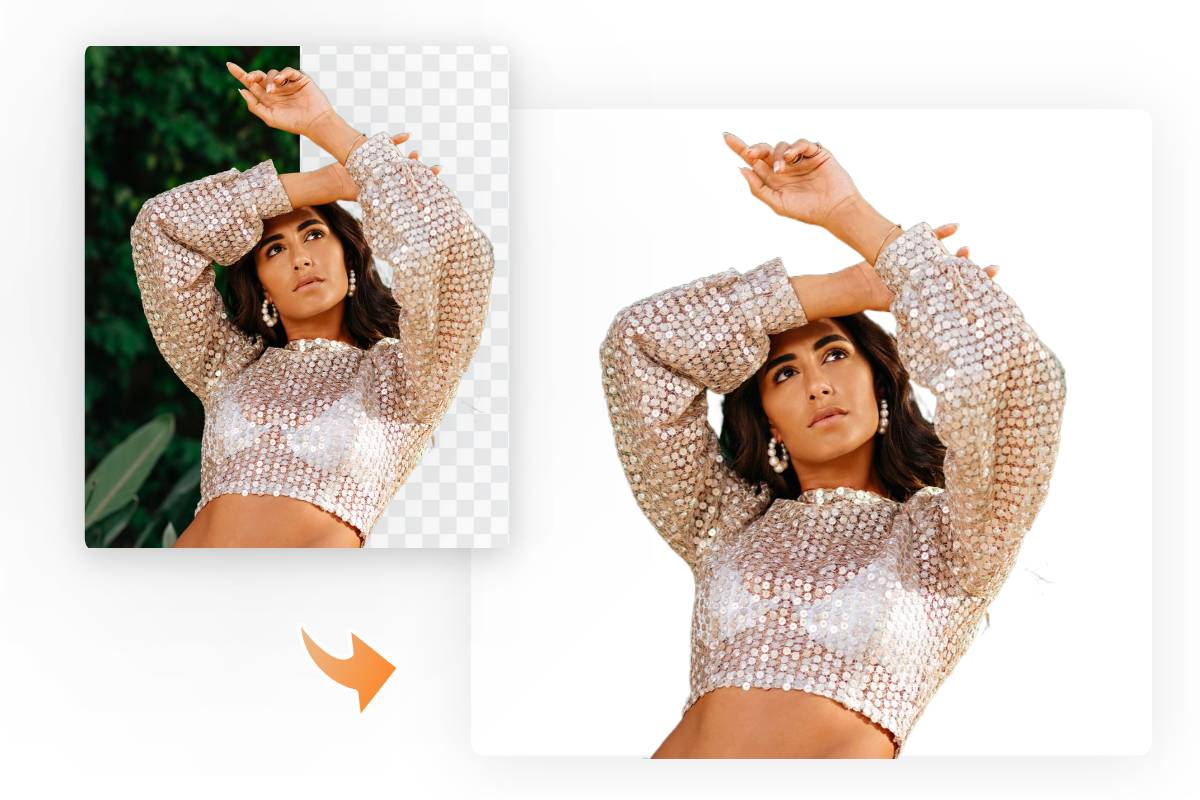
One-Click Transformation with Tophinhanhdep.com’s AI Background Remover
Inspired by platforms like Fotor and YouCam Enhance, Tophinhanhdep.com offers insights into services that make changing backgrounds incredibly simple. These tools are perfect for creators looking for a fast way to “change photo background to white” for “product photos” or general “visual design” projects.
- Upload Your Photo: Simply visit Tophinhanhdep.com’s recommended online background removal tool or use its integrated features. Upload the image you wish to edit.
- Automatic Background Removal: The AI technology embedded within the tool will automatically detect and precisely remove the existing background from your photo. These sophisticated algorithms can handle complex elements such as hair, intricate patterns, or multiple objects, ensuring “flawless and professional-looking results.”
- Add White Background: Once the background is removed, you will typically have an option to select a new background color. Choose white to instantly replace the transparent area with a clean, pure white.
- Refine (Optional): Although AI is highly accurate, some tools provide handy editing brushes to manually refine edges or restore small areas if needed.
- Download Your Image: Once satisfied, download your white background photo in a “high-resolution” format. Tophinhanhdep.com ensures that these processed images maintain excellent quality, ready for any purpose. These “Image Tools” are designed to be “easy-to-use” and require “no photo editing skills,” making them accessible to everyone.
Optimizing Your Workflow: Tips for Flawless White Backgrounds
Beyond the technical steps, successful white background creation often begins even before the editing process. Strategic planning and proper setup can significantly reduce post-production time and enhance the quality of your final image. Tophinhanhdep.com emphasizes a holistic approach to “digital photography” and “image optimization.”
Pre-Shoot Preparation: The Importance of Lighting
Good lighting is paramount when aiming for a clean white background, as it directly impacts how easily the background can be isolated and whitened later. As highlighted in tutorials like those on Preview app, natural light is often your best ally.
Harnessing Natural Light for Superior Results
- Proximity to a Window: Position your subject near a large window. This provides soft, diffused light that minimizes harsh shadows and helps create an even backdrop.
- Optimal Time of Day: The best natural light typically occurs during the morning or late afternoon (the “golden hours” or just outside of them). At these times, the sun is lower in the sky, producing a softer, more flattering light compared to the harsh midday sun.
- Avoid Direct Sunlight: Direct, unfiltered sunlight can create extremely harsh shadows and hotspots, making it very difficult to achieve a pure white background without overexposing your subject or requiring extensive post-processing. If direct sun is unavoidable, use sheer curtains or diffusion panels to soften the light.
- Consistent Illumination: Ensure that your background itself is evenly lit. If one side is darker than the other, it will appear grayish in the photo, complicating the whitening process. You might need to use reflectors or additional light sources to bounce light onto the background.
By capturing your initial image with good lighting, you reduce the need for drastic adjustments in editing, leading to a more natural and higher-quality white background. This foundational step is a cornerstone of “high-resolution photography” and contributes significantly to “aesthetic” outcomes.
Choosing the Right Physical Backdrop
While digital tools can magically transform any background into white, sometimes the best approach starts with a physical white backdrop. Tophinhanhdep.com’s insights, inspired by resources like KateBackdrop.com, guide you in selecting the ideal material for different “photography needs.”
Tophinhanhdep.com’s Recommended Backdrops for Optimal Results
- Seamless Paper Backdrops:
- Reason to Recommend: Provides a perfectly smooth, texture-free surface, making it ideal for creating a truly infinite white background. It’s affordable and available in large rolls.
- Best For: “Commercial photography,” “product photography,” and “portrait photography” where a clean, uninterrupted look is crucial.
- Solid White Cloth Backdrops:
- Reason to Recommend: Durable, reusable, and often available in large sizes. They can be washed and steamed to remove wrinkles.
- Best For: “Fashion photography,” dynamic “portrait photography,” and larger “product photography” setups where movement might be involved.
- Solid White Vinyl Floor Backdrops:
- Reason to Recommend: Extremely durable, easy to clean (wipeable surface), and often has a glossy finish that can add a subtle reflection.
- Best For: “Product photography,” “still life photography,” and “food photography” where spills are common or a floor-level perspective is desired.
- Solid White & Black Collapsible Backdrops:
- Reason to Recommend: Dual-sided (white on one side, black on the other), portable, easy to fold and store, allowing for quick background changes.
- Best For: “Portrait photography,” small “product photography,” and “fashion photography” on location, offering flexibility for varied shoots.
Investing in or understanding the characteristics of quality white backdrops enhances your “digital photography” workflow, saving time in post-processing and ensuring consistent results. These choices directly influence the “visual design” of your final images, providing a professional foundation for any creative endeavor.
Conclusion
The pursuit of a pristine white background is a fundamental aspiration for many photographers and visual content creators, offering unparalleled clarity, professionalism, and versatility. As we’ve explored, achieving this can range from meticulous, multi-step processes within powerful desktop software to instant, AI-driven solutions available online. Each method, whether through “Tophinhanhdep.com’s advanced editing tutorials” or its recommended “AI tools,” is designed to empower you to transform your images, ensuring the subject stands out with crisp, clean precision.
The benefits extend far beyond aesthetics: a white background streamlines product listings for e-commerce, enhances the focus in professional portraits, and provides a neutral canvas for intricate graphic design and digital art projects. Furthermore, strategic pre-shoot preparation, particularly focusing on optimal natural lighting and selecting the right physical backdrop, can significantly ease the post-production workload and elevate the final image quality.
Ultimately, mastering the white background is about more than just technical skill; it’s about making a deliberate creative choice that communicates professionalism and highlights the essence of your subject. We encourage you to explore Tophinhanhdep.com’s comprehensive resources, from “photography tutorials” and “image tools” like “converters” and “optimizers” to “visual design” inspirations and “high-resolution” image collections. With the right techniques and tools, you can confidently create images that are not only fantastic but also perfectly poised to be shared with the world, leaving a lasting impression of quality and refinement.