How to Make Image Background White: Your Ultimate Guide to Professional Visuals

In the vast and competitive world of digital imagery, the background of your photo can make or break its impact. While vibrant, complex backdrops have their place in aesthetic photography and digital art, there’s an undeniable power in simplicity, especially when it comes to showcasing products, portraits, or professional headshots. A pure white background, free from distractions, ensures that your subject takes center stage, communicating professionalism, clarity, and sophistication.
Whether you’re an e-commerce entrepreneur aiming to meet marketplace standards, a portrait photographer seeking timeless elegance, or a graphic designer needing a clean canvas for creative ideas, mastering the art of creating a white background is an invaluable skill. This comprehensive guide, brought to you by Tophinhanhdep.com, will walk you through various techniques—from professional software to intuitive online tools and mobile applications—and even advise on physical backdrops, ensuring your images always achieve that pristine, impactful white.
The Enduring Power of a White Background in Photography and Visual Design
A white background is more than just a stylistic choice; it’s a strategic decision that significantly enhances an image’s perceived value and usability. Its widespread adoption across various visual mediums underscores its critical role in effective communication.
Why White Backgrounds Matter
The magic behind a white background is quite obvious: it minimizes visual clutter, allowing the viewer’s eye to immediately focus on the main element. This is crucial for several reasons:
- Eliminating Distractions: In a world saturated with visual content, every detail counts. A white background acts as a neutral canvas, blocking out non-essential elements and giving the ability to concentrate solely on your subject. This clarity is paramount for product photography where every feature of an item needs to be highlighted.
- Professionalism and Trust: For e-commerce platforms like Amazon and eBay, a pure white background isn’t just a suggestion; it’s often a strict requirement for main product photos. This standard sets a professional tone, implying reliability and attention to detail from the seller. Beyond e-commerce, professional portraits and corporate visuals also benefit from the clean, serious aesthetic that white backgrounds provide.
- Consistency Across Collections: Whether you’re presenting a portfolio, a product catalog, or a series of aesthetic images, maintaining a consistent background color creates a cohesive and visually appealing collection. White offers a uniform look that ties disparate images together, enhancing overall brand identity or artistic vision.
- Showcasing True Colors: Without conflicting hues from a busy background, the colors of your subject can be accurately perceived. This is especially important for products where color accuracy is vital for customer satisfaction. A white background allows the true vibrancy and tone of an item to shine through.
- Versatility for Further Design: A clean white background is the ideal starting point for graphic designers and digital artists. It provides a blank slate onto which text, additional design elements, or complex photo manipulations can be added without fighting against an existing background. This makes post-production workflows significantly smoother and more creative.
Understanding How White Background Tools Work
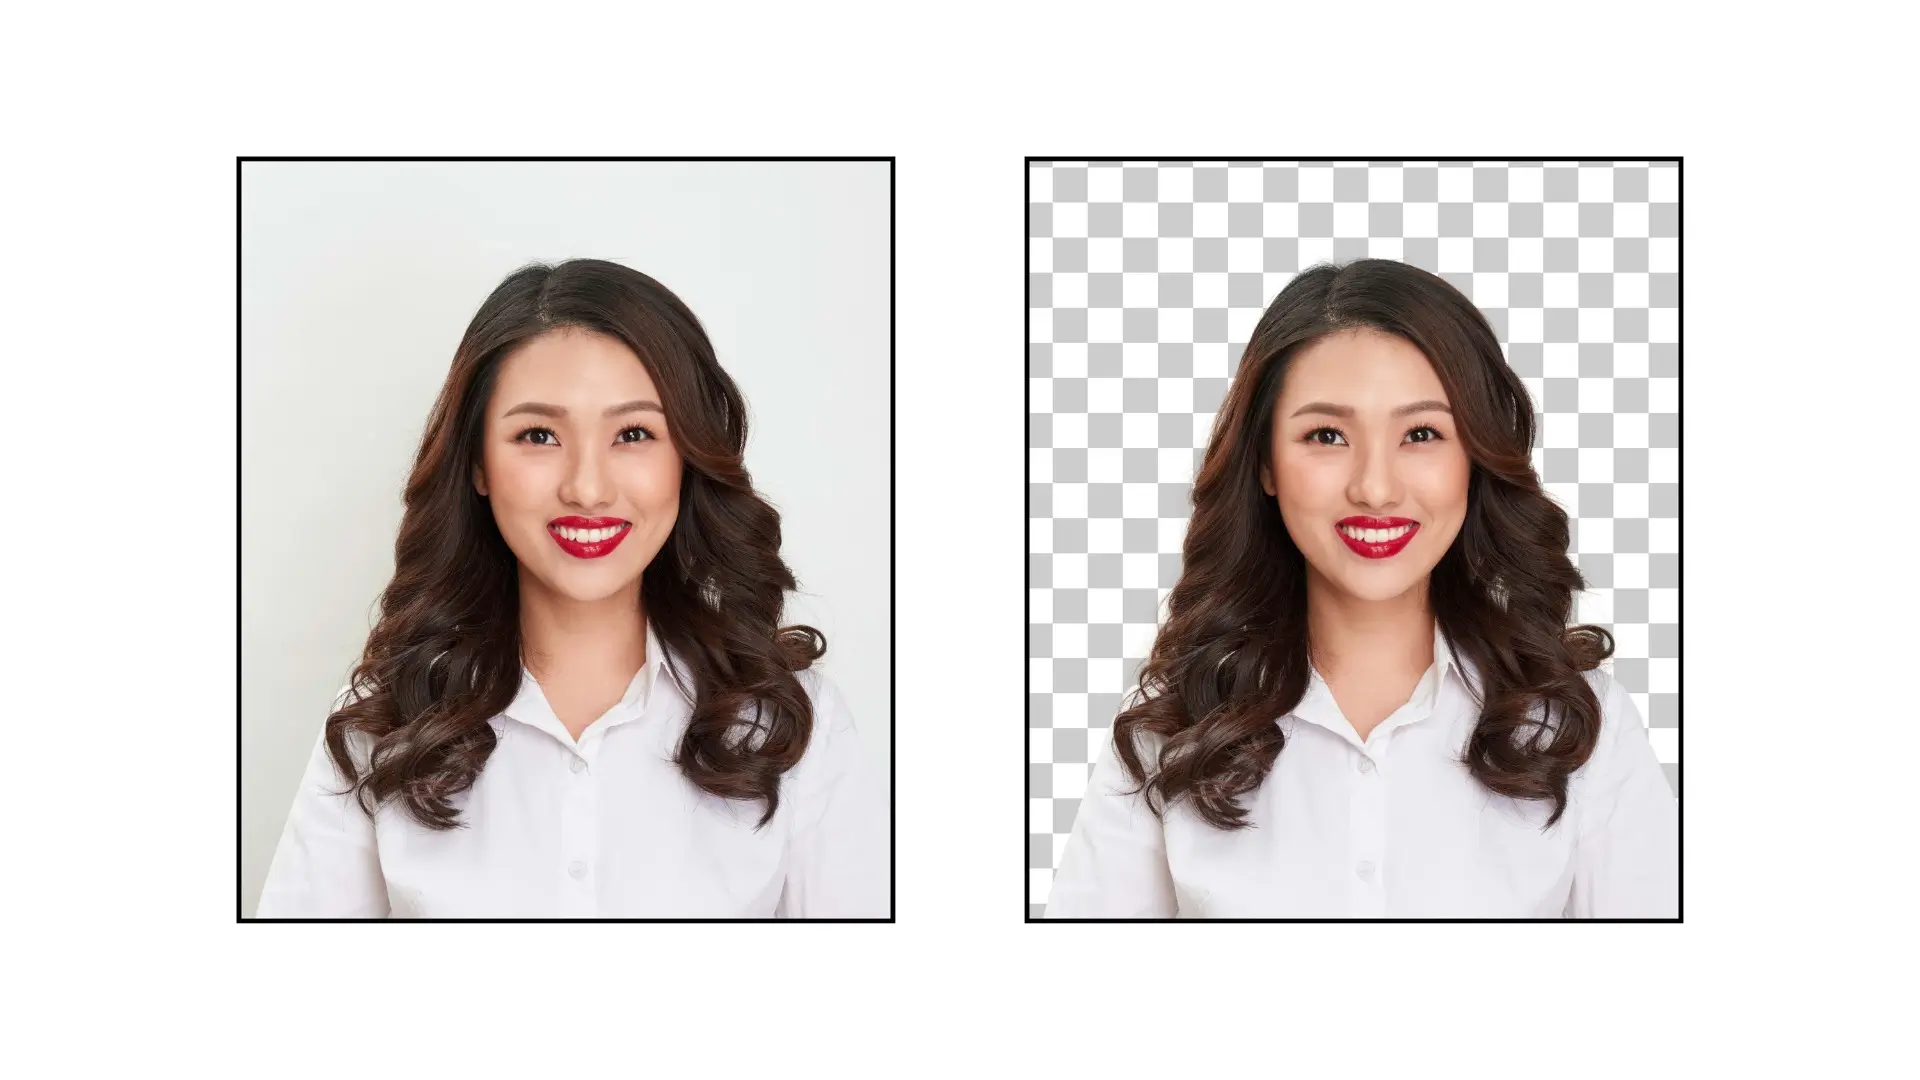
While the manual setup of a white background studio can be time-consuming, modern image tools offer unparalleled speed and simplicity. The underlying principle for most digital white background apps and software involves isolating the main subject from its original environment and then replacing that environment with a solid white fill.
These tools leverage sophisticated algorithms, often powered by artificial intelligence, to:
- Detect the Subject: They analyze the image to identify the foreground subject, even with complex edges like hair or intricate patterns.
- Remove the Original Background: Once the subject is identified, the surrounding pixels are intelligently selected and erased.
- Replace with White: The now transparent area is filled with a pure white color, creating a seamless new backdrop.
- Refine and Polish: Many tools include advanced options for smoothing edges, adjusting lighting, and ensuring a natural blend between the subject and its new white background, delivering high-quality, professional results in mere seconds.
![]()
This automated process drastically reduces the time and effort traditionally required, making professional-looking white background images accessible to everyone.
Mastering White Backgrounds with Professional Software: Lightroom and Photoshop
For photographers and digital artists who demand granular control and the highest quality output, professional editing software like Adobe Lightroom and Photoshop remains the gold standard. Tophinhanhdep.com recognizes these tools as indispensable for achieving pixel-perfect white backgrounds.
Achieving a Pristine White Background in Adobe Lightroom
Lightroom is renowned for its non-destructive editing capabilities and powerful adjustment tools. While primarily a photo management and development tool, it offers effective methods to achieve a clean white background.
- Step 1: Import Your Photo. Start by launching Lightroom and importing the desired image. Navigate to the
Librarymodule and click the “Import” button to bring your photo into the catalog. - Step 2: Enter Develop Module. Once your photo is imported, switch to the
Developmodule. This is where all the primary editing adjustments will be made. - Step 3: Adjust Exposure and Contrast. In the
Basicpanel of the Develop module, locate the “Exposure” slider. Gently move it to the right to increase the overall brightness of your image. Your goal is to make the background appear white, but be cautious not to completely overexpose your subject. Next, adjust the “Contrast” slider. Increasing contrast can help define your subject against the brightening background, making it slightly more visible even as the background goes white. - Step 4: Utilize the Adjustment Brush. For targeted adjustments, select the ‘Adjustment Brush’ tool from the toolbar (it looks like a paintbrush icon). Set its exposure setting to a high value. Now, carefully “paint” over the background areas you want to turn white. The brush applies localized adjustments, allowing you to selectively brighten only the background.
- Step 5: Refine Brush Settings. For a smoother, more natural transition between your subject and the new white background, adjust the brush’s “Feather” and “Flow” settings. Feather controls the softness of the brush edge, while Flow determines how quickly the effect is applied. Reduce the brush size to make finer, more detailed strokes around the edges of your subject, preventing accidental painting on the subject itself.
- Step 6: Manipulate Highlights and Whites. In the Basic panel, further enhance the background’s whiteness by moving the “Highlights” and “Whites” sliders towards the right. This will brighten the brightest parts of your image. Again, exercise caution to avoid blowing out important details on your subject.
- Step 7: Ensure Consistency. Regularly zoom in and inspect your image. All areas intended to be white should appear uniform. If you notice any variations, use the Adjustment Brush or further tweak the global exposure settings to rectify the inconsistencies until the white background is perfectly even.
- Step 8: Export Your Masterpiece. Once satisfied, navigate back to the
Librarymodule or useFile > Exportto save your edited image. Choose your desired format (e.g., JPEG, TIFF) and resolution for use outside of Lightroom.
Creating a Spotless White Background in Adobe Photoshop
Photoshop offers unparalleled precision and a broader range of tools for complex image manipulation, including advanced background removal.
- Step 1: Open Your Image in Photoshop. Launch Photoshop and load your chosen image. The easiest way is
File > Open, then navigate to your file. - Step 2: Isolate the Subject with Quick Selection Tool. In the
Toolspanel, select the ‘Quick Selection Tool’ (it looks like a brush with a dashed circle). Adjust the brush size as needed and carefully click and drag over your subject to create a selection. Photoshop intelligently detects edges, making this process relatively quick. For more precise selections, especially with intricate details, you might consider thePen ToolorRefine Edge/Select and Maskafter an initial selection. - Step 3: Create a New Layer from Selection. Once your subject is perfectly selected, use the keyboard shortcut
Ctrl + J(Windows) orCmd + J(Mac). This command duplicates the selected subject onto a new layer, effectively separating it from its original background, which remains on the layer below. - Step 4: Position a New Background Layer. Now, you need a layer to fill with white. Click the
New Layericon at the bottom of theLayerspanel (it looks like a square with a plus sign). This creates an empty layer. Drag this new layer below your subject layer in the Layers panel to ensure it sits behind your isolated subject. - Step 5: Fill the Background with Pure White. Select the newly created empty layer. Go to
Edit > Fill. In the ‘Fill’ dialog box, choose “White” from theContentsdropdown menu and click “OK.” This will fill the entire new layer with an opaque white color, which now acts as your image’s background. - Step 6: Smooth Rough Edges. Even with careful selection, edges might appear slightly rough or jagged. To refine these, select your subject layer. Then, go to
Select > Select and Mask(in newer Photoshop versions) orSelect > Refine Edge(in older versions). This specialized workspace offers tools to smooth, feather, and shift edges, making the subject blend seamlessly with the new white background. Pay close attention to hair and other fine details. - Step 7: Harmonize Lighting and Shadows. To ensure your subject doesn’t look artificially pasted onto the white background, you may need to adjust its lighting and shadows. Create new adjustment layers (e.g.,
LevelsorCurves) and clip them to your subject layer (Alt/Option + clickbetween the adjustment layer and subject layer in the Layers panel). This allows you to lighten or darken your subject and adjust its contrast to perfectly match the bright white environment, ensuring a natural blend. - Step 8: Save the Edited Image. Once you are content with all the modifications and your image has a perfectly clean white background, go to
File > Save As. Choose a suitable format (e.g., JPEG for web, TIFF for print) and save your new, professional-looking image.
Instant White Backgrounds with Online Editors and Mobile Apps
For those seeking speed, simplicity, and accessibility without compromising quality, online image tools and mobile applications have revolutionized background editing. Tophinhanhdep.com highlights several platforms that make creating white backgrounds a breeze, often requiring no prior editing experience.
Leveraging AI-Powered Online Tools
These web-based solutions harness the power of artificial intelligence to automate complex tasks, delivering professional results with just a few clicks.
-
Tophinhanhdep.com’s Integrated Solutions (Referencing Fotor’s Features): Tophinhanhdep.com recommends online editors that offer a fast and easy way to add white backgrounds. Simply upload your photo, and the platform will automatically detect and remove the background, instantly replacing it with white. These advanced tools guarantee flawless, professional-looking results, even with challenging elements like delicate hair, intricate patterns, or multiple objects within the picture. Many also provide comprehensive editing capabilities, allowing you to add texts, design elements, or realistic shadows to your newly white-backed photo, making it perfect for enhancing product listings on e-commerce sites like Amazon and eBay. The focus remains squarely on the product, adding a sense of neatness and professionalism.
-
Tophinhanhdep.com’s Recommended Design Platforms (Referencing Canva’s Features): For users who prioritize intuitive design and quick results, Tophinhanhdep.com suggests platforms that simplify the process. These web apps typically feature a built-in photo editor that can seamlessly implement white backgrounds in a matter of seconds. The workflow is usually very straightforward:
- Upload: Start by uploading your product image to the online editor.
- Select Background Option: Navigate to the background editing features, often labeled “Background” or “Remove Background.”
- Choose White: Select the option to add a plain white background. The tool will automatically handle the detection and replacement.
- Download: Once satisfied, download your high-resolution image.
-
Tophinhanhdep.com’s AI Background Generators (Referencing Wondershare VirtuLook’s Capabilities): Beyond simple background removal, Tophinhanhdep.com explores cutting-edge AI tools that can generate entirely new, realistic product images with white backgrounds from text prompts or sample images. These powerful AI generators create lifelike images, offering multiple angles and styles, which is perfect for brand standing out. The process is often as simple as:
- Input: Upload sample images of your product or insert a text prompt describing your desired scene.
- Specify White Background: Clearly state that you want a white background in your prompt or select a white background option.
- Generate & Select: The AI will produce several incredible image variations, allowing you to choose the best fit for your marketing or advertising needs.
Essential Mobile Apps for On-the-Go White Backgrounds
Mobile apps provide the ultimate convenience for editing images anywhere, anytime. Tophinhanhdep.com highlights several top-tier apps that excel at creating white backgrounds directly from your smartphone or tablet.
-
Tophinhanhdep.com’s Instant White Filter Apps (Referencing Preview App’s Approach): For social media users, especially Instagrammers, achieving a consistent white background can be effortless. Dedicated apps focus on simplicity and rely heavily on good original photography. The key often lies in using natural light:
- Natural Light is Crucial: Take your photos next to a window, ideally in the morning or afternoon, to capture the best natural light. Avoid direct harsh sunlight, which can create unwanted shadows or overexposure. Good natural light prevents grainy, low-quality, or underexposed photos.
- In-App Whitening Tools: After importing your photo, use the app’s free whitening tool. Simply brush over the white or near-white surfaces to eliminate any dark or yellow spots, giving your background an extra “POP” of pure white.
- Apply White Filters: Many apps offer specialized “white filters” that further enhance the brightness and purity of white areas, ensuring a consistent bright theme across your feed.
-
Other Noteworthy Apps from Tophinhanhdep.com’s Selections (Referencing Wondershare’s List): Tophinhanhdep.com curates a list of robust mobile applications, each with unique strengths for white background creation:
- Apowersoft Background Eraser: A professional editing tool offering one-click background removal and replacement with white, alongside batch processing capabilities for efficiency. It supports various photo formats and produces high-resolution results.
- YouCam Makeup: Utilizes advanced algorithms and AI to quickly detect and remove backgrounds, offering a straightforward path to a pure white backdrop. It also provides other free background options.
- Pro Knockout-Mix: (iOS-specific) Excels in precise subject isolation with features like edge and hair refining. After cutting out the subject, users can select a “JPG with White Background” option.
- Make Background Transparent: (Android-specific) As its name suggests, this app first makes your background transparent (automatically or manually) then allows you to fill it with white, offering great customization.
- Snapseed: A user-friendly and feature-rich photo editor, Snapseed provides intuitive tools for setting a white background, perfect for beginners looking to enhance their images with professional touches.
- Automatic Background Eraser: This app leverages advanced technology for efficient background removal. Users can choose between automatic, manual, or Lasso tool methods to achieve a white background with ease.
- CutOut: Offers a quick and highly effective automatic background removal feature. After removal, simply set the background color to white for professional-quality product images, ideal for on-the-go editing.
These diverse tools ensure that no matter your device or skill level, achieving a striking white background for your images is within reach, helping you elevate your visual content.
Choosing the Right Physical White Backdrop for Professional Shoots
While digital manipulation offers incredible flexibility, sometimes the best white background begins with a physical one. For photographers working in a studio setting, selecting the appropriate white backdrop is crucial for achieving high-quality, authentic results directly in-camera. Tophinhanhdep.com recommends various types of physical white backdrops, each suited for specific photography needs.
Different Types of White Backdrops and Their Applications
The choice of backdrop material can significantly impact the final look and feel of your photograph, affecting light reflection, texture, and durability.
-
Seamless Paper Backdrop (e.g., Kate Snow White Seamless Paper):
- Reason to Recommend: Seamless paper provides a perfectly smooth, texture-free surface that creates a clean, uninterrupted background. It’s often disposable, allowing for a fresh, unblemished surface for each shoot.
- Best For: Commercial photography, product photography (especially for e-commerce), and portrait photography where a minimalist, high-key look is desired. The “seamless” aspect ensures no distracting creases or lines.
-
Solid White Cloth Backdrop (e.g., Kate Solid White Cloth Backdrop):
- Reason to Recommend: Typically made from durable, washable fabric, these backdrops are reusable and come in large sizes, offering a professional, clean white background for a variety of shoots. They can be steamed to remove wrinkles.
- Best For: Fashion photography, full-body portrait photography, and situations requiring a softer light fall-off. The fabric can sometimes add a subtle texture if desired or be lit to appear completely smooth.
-
Solid White Vinyl Floor Backdrop (e.g., Kate Solid White Vinyl Floor):
- Reason to Recommend: Vinyl is exceptionally durable, easy to clean (wipeable), and often has a glossy surface. It’s perfect for creating a seamless “infinity curve” effect when paired with a matching wall backdrop.
- Best For: Product photography, still life photography, and food photography, particularly for floor-level shooting where items might be placed directly on the surface or liquid spills are a concern.
-
Solid White & Black Collapsible Backdrop (e.g., Kate Collapsible Backdrop):
- Reason to Recommend: These portable, dual-sided (often white on one side, black on the other) backdrops are easy to fold and store, offering a quick background change. They are ideal for photographers on the go or those with limited studio space.
- Best For: Headshot and upper-body portrait photography, small product photography, and fashion photography where versatility and quick setup are priorities.
Practical Tips for Lighting and Setup
Achieving a truly white background in-camera isn’t just about the backdrop itself; it’s heavily dependent on proper lighting.
- Even Lighting is Key: The primary challenge with white backgrounds is preventing shadows and ensuring the background appears pure white without overexposing your subject. Use multiple light sources to illuminate the background separately from your subject.
- Overlighting the Background: A common technique is to “overlight” the white background by 1 to 2 stops compared to your subject. This ensures the background appears pure white and helps separate the subject with a slight rim light effect if desired.
- Using Diffusers and Reflectors: Soften your light sources with diffusers (softboxes, umbrellas) to minimize harsh shadows. Reflectors can be used to bounce light back onto your subject, filling in any unwanted shadows on the product or model and ensuring even illumination.
- Subject-to-Background Distance: Place your subject a sufficient distance from the backdrop (e.g., 6-10 feet) to prevent shadows cast by the subject from falling onto the background. This separation also allows you to light the background independently without affecting the subject’s exposure.
- Meter Separately: When setting up your lights, meter the exposure for your subject first, then meter the background, aiming for that additional 1-2 stops of light on the background.
By combining the right physical backdrop with careful lighting techniques, photographers can achieve stunning, in-camera white backgrounds that require minimal post-processing, saving time and ensuring a high-quality starting point for any visual project.
Conclusion
The importance of a white background in photography and visual design cannot be overstated. From enhancing professionalism in e-commerce to providing a clean slate for creative graphic design, a pristine white backdrop ensures your subject captures undivided attention. As we’ve explored, achieving this versatile aesthetic is accessible through numerous avenues, whether you prefer the precision of professional software like Lightroom and Photoshop, the convenience of AI-powered online editors and mobile apps, or the tangible quality of carefully chosen physical backdrops.
Tophinhanhdep.com encourages you to experiment with these diverse tools and techniques. Master the nuances of digital subject isolation, harness the power of artificial intelligence for instant results, or meticulously set up your studio for in-camera perfection. By diligently following these guidelines, you can consistently create images with white backgrounds that you’ll be proud to share with the world, elevating your visual content and making a lasting impression. Explore Tophinhanhdep.com for more photography tutorials, cutting-edge image tools, and endless inspiration to fuel your creative journey.