How to Make Images Bigger Without Losing Quality: Your Ultimate Guide

In today’s visually-driven world, images are paramount. From stunning wallpapers and aesthetic backgrounds to high-resolution nature photography and intricate abstract art, visuals capture attention and convey emotion. However, a common challenge many digital creators, photographers, and casual users face is the need to enlarge an image without compromising its quality. You might find the perfect image for a website banner, a print, or a digital art project, only to discover it’s too small. Attempting to simply stretch a small image often results in a pixelated, blurry mess that can undermine the professionalism and impact of your visual design.
At Tophinhanhdep.com, we understand the critical role high-quality images play in everything from personal aesthetic collections to professional graphic design. We’ve compiled this comprehensive guide to walk you through the most effective methods and tools available to enlarge your images while preserving their crispness and detail. Whether you’re looking to upscale a precious photograph for a large print, or adjust a beautiful background for a new project, this article will equip you with the knowledge and techniques to achieve stunning results every time.

Understanding Image Quality and the Challenge of Enlargement
Before diving into solutions, it’s essential to grasp why images lose quality when they are enlarged. This understanding forms the foundation for choosing the right approach and tool for your specific needs.
The Pixel Predicament: Why Enlarging Images Causes Blur
Most digital images you encounter, such as JPEG and PNG files, are what we call “bitmap” or “raster” images. These images are composed of a grid of tiny squares, each assigned a specific color. These squares are known as pixels. When you view an image, your eyes blend these pixels together to form a cohesive picture.

When you shrink an image, the software compresses the existing pixels closer together. This often results in a visually acceptable, or even sharper, image because imperfections are hidden. However, the opposite happens when you try to make an image bigger. You’re essentially stretching those existing pixels across a larger area. Since no new detailed information is added to fill the newly created space, the software simply interpolates or guesses the colors of the new pixels based on their neighbors. This interpolation process, without intelligent algorithms, leads to the common blurry, blocky, or pixelated appearance associated with low-quality enlargements. The image appears “soft” because its original pixel count was insufficient to support the increased dimensions gracefully.

For graphic design, digital art, or even everyday visual use, this loss of quality is unacceptable. A beautiful piece of nature photography, an abstract art piece, or a portrait for an aesthetic mood board instantly loses its appeal when pixelated. This is where smart enlargement techniques become invaluable, ensuring your images, whether they’re vivid wallpapers or serene backgrounds, maintain their integrity.
The Importance of High-Resolution Sources
The golden rule of image enlargement is always to start with the highest possible resolution image. Think of it like baking: you can’t make a bigger, better cake from a tiny amount of batter. Similarly, a high-resolution image, which contains a greater number of pixels, provides more data and detail for any enlargement process to work with.
If your original image is already low-resolution, even the most advanced tools will have limitations. While modern AI upscalers can work wonders, they can’t invent details that were never there. They analyze patterns and intelligently generate new pixels, but a strong foundation—a rich, detailed original—will always yield superior results. When sourcing images, especially for high-impact uses like large prints or high-resolution stock photos for visual design, prioritize those with ample pixel dimensions. This practice is key to ensuring your digital photography, abstract visuals, or sad/emotional aesthetics maintain their intended impact, regardless of their final size.
Leveraging Tophinhanhdep.com’s AI Upscaling and Other Smart Tools
The landscape of image editing has been revolutionized by artificial intelligence. At Tophinhanhdep.com, we are at the forefront of providing cutting-edge solutions, particularly with AI upscaling technology, to address the challenge of enlarging images without quality degradation.
The Power of Artificial Intelligence in Image Enlargement
AI image upscalers represent a paradigm shift from traditional resizing methods. Instead of merely stretching existing pixels and guessing the new ones, AI algorithms are trained on vast datasets of images. They learn to recognize common patterns, textures, and details. When an AI upscaler processes a low-resolution image, it doesn’t just interpolate; it intelligently generates new pixels that logically fit the context, effectively “reconstructing” the image at a higher resolution. This process often involves:
- Detail Reconstruction: AI can infer and add details that might have been lost or were too small to be noticeable in the original image.
- Noise Reduction: Upscaling can sometimes exaggerate noise. AI upscalers often incorporate noise reduction techniques to produce cleaner results.
- Sharpening and Smoothing: They can apply intelligent sharpening to edges and smooth out gradients, preventing the blocky appearance.
This makes AI upscalers incredibly powerful for many applications, from preparing images for print—like a stunning beautiful photography piece—to ensuring your abstract art looks pristine as a desktop wallpaper. It’s an indispensable tool for maintaining the integrity of various editing styles and digital art.
Step-by-Step with Tophinhanhdep.com’s AI Enlarger
Tophinhanhdep.com offers a user-friendly AI image enlarger that simplifies the process of making pictures bigger and clearer. This tool is ideal for both beginners and experienced professionals, eliminating the need for complex manual adjustments.
Here’s how to enlarge an image with Tophinhanhdep.com’s AI Enlarger:
- Access Tophinhanhdep.com: Navigate to Tophinhanhdep.com’s website and locate the “AI Enlarger” tool under the “Image Tools” section.
- Upload Your Image: Click the “Upload Image” button (or similar phrasing like “Edit a photo” or “Upload your photo”). Select the small image you wish to enlarge from your computer.
- Automatic Enlargement: Our AI technology will automatically process your image, detecting its content and intelligently upscaling it to a higher resolution. You don’t need to specify complex settings; the AI handles the intricacies.
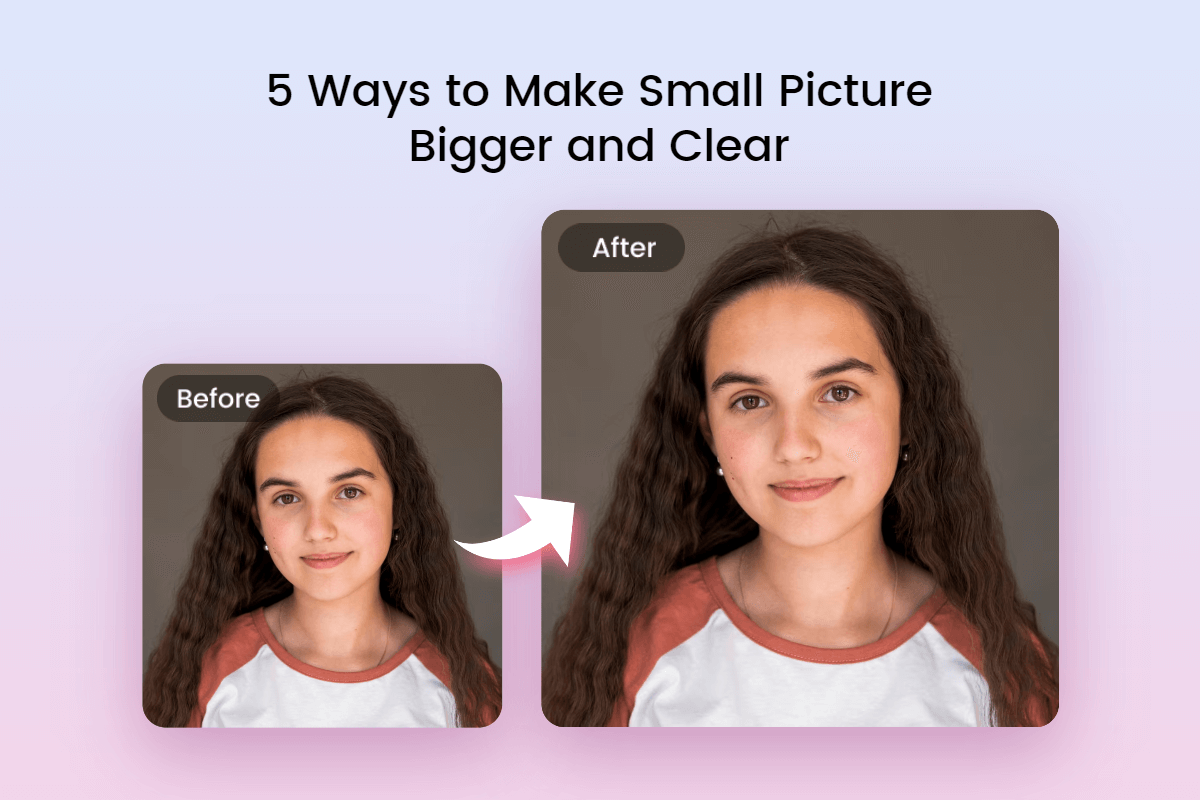
- Review and Compare: Often, the tool will display a side-by-side comparison of your original small picture and the newly enlarged, higher-resolution version. This allows you to clearly see the improvements in clarity and detail.
- Apply and Download: Once satisfied, click “Apply” or “Download” to save your enlarged, high-quality image in your preferred format (e.g., JPG, PNG).
Beyond Tophinhanhdep.com’s dedicated AI upscaler, our platform also provides other essential image tools. For instance, if you need to quickly resize an image by specific dimensions or percentages without the AI enhancement, our Image Resizer tool offers precise control. Similarly, after enlarging images, you might want to optimize them for web performance. Our Compressors and Optimizers ensure that your high-resolution images load quickly on websites, maintaining both visual quality and site speed—a crucial aspect for any digital photography showcase or online aesthetic collection.
For those engaging in visual design, Tophinhanhdep.com’s suite of tools, including AI upscalers, converters, and optimizers, provides a comprehensive ecosystem. Whether you’re working on graphic design projects, digital art, or photo manipulation, having these resources readily available helps streamline your creative workflow.
Traditional Software for Professional Image Upscaling
While AI tools offer incredible convenience and often superior results, traditional image editing software still provides robust control and specialized features for enlarging images. These applications are staples for digital photography and graphic design professionals.
Mastering Photoshop for Quality Enlargements
Adobe Photoshop remains the industry standard for image editing and offers powerful tools for resizing. While it might seem complex for beginners, understanding a few key settings can help you enlarge images effectively.
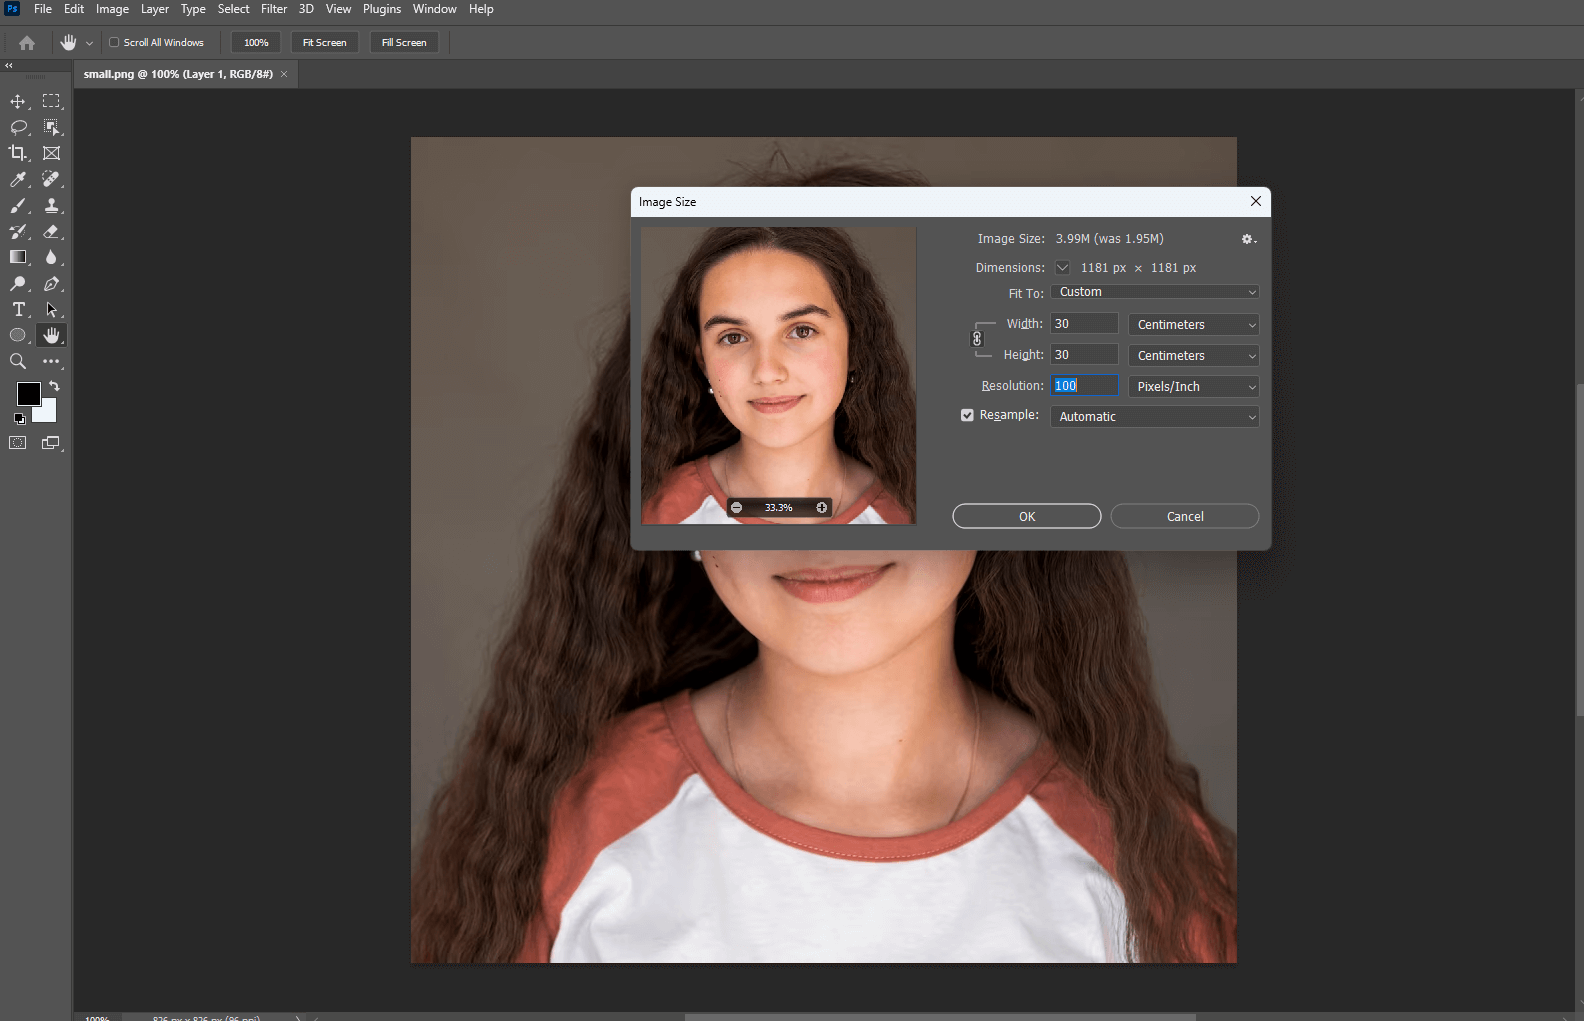
Here’s a general approach to making an image bigger in Photoshop:
- Open Your Image: Launch Photoshop and open your small image (File > Open).
- Access Image Size: Go to
Image > Image Sizeon the top menu bar. - Key Settings:
- Dimensions: Enter your desired
WidthandHeightvalues. You can specify these in pixels, inches, or percentages. - Resolution: Adjust the resolution (e.g., 300 Pixels/Inch for print).
- Resample: This is crucial. Ensure
Resampleis checked. From the dropdown, choose an appropriate interpolation method. For enlarging,Preserve Details 2.0(orPreserve Detailsin older versions) is often the best choice as it attempts to maintain sharpness.Bicubic Smootheris another good option for enlargements. - Constrain Proportions: Always keep this box checked to prevent distorting your image.
- Dimensions: Enter your desired
- Refine (Optional, but Recommended for Best Results):
- Smart Object: Convert your layer to a Smart Object (
Layer > Smart Objects > Convert to Smart Object) before scaling. This allows for non-destructive scaling, meaning you can adjust the size multiple times without progressive quality loss. - Sharpening: After resizing, a subtle amount of sharpening can often enhance perceived detail. Use
Filter > Sharpen > Unsharp MaskorSmart Sharpen. Be careful not to over-sharpen, which can introduce artifacts. - High Pass Filter: For advanced sharpening, duplicate the layer, set blending mode to
Soft LightorOverlay, and applyFilter > Other > High Pass(adjust radius to find edges).
- Smart Object: Convert your layer to a Smart Object (
- Save/Export: Once satisfied, save your changes (
File > Save) or export in your desired format (File > Export > Export As).
Photoshop provides granular control, making it ideal for high-resolution stock photos or intricate digital art pieces where every pixel matters.
GIMP: A Free Open-Source Alternative
GIMP (GNU Image Manipulation Program) is a robust, free, and open-source raster graphics editor that serves as an excellent alternative to Photoshop. It’s capable of complex photo retouching, image composition, and can effectively enlarge images without significant quality loss when used correctly.
Here’s how to enlarge images in GIMP:
- Open Your Image: Launch GIMP and open your small image (
File > Open). - Scale Image: Go to
Image > Scale Imageon the top menu bar. - Set New Dimensions: In the dialog box, input your target
WidthandHeight. You can also adjust theResolution. - Interpolation: Under the
Qualitysection, theInterpolationmethod is key. ChooseNoHaloorSinc (Lanczos3)for the best results when enlarging, as these methods aim to preserve detail and reduce pixelation. - Scale: Click the
Scalebutton to apply the changes. - Export: Save your enlarged image by going to
File > Export Asand choosing your desired format (PNG, JPG, etc.).
GIMP is a fantastic option for those seeking powerful image editing capabilities without the associated cost, suitable for creating beautiful photography or preparing aesthetic backgrounds.
Specialized Tools like ON1 Resize AI (formerly Perfect Resize)
For dedicated image enlargement, specialized software like ON1 Resize AI (previously known as Perfect Resize) stands out. This premium tool is engineered specifically for upsizing images with minimal quality degradation, often outperforming general-purpose editors for this specific task. It utilizes advanced algorithms, including AI-driven techniques and fractal interpolation, to add detail and maintain sharpness during enlargement.
Key features of ON1 Resize AI:
- Fractal-Based Enlargement: This technology helps fill in missing details by mathematically extrapolating new information, making images look smoother and sharper.
- AI Integration: Modern versions leverage AI to further enhance detail and clarity, making it suitable for even challenging enlargements.
- Presets for Output: It includes presets for various output types, such as print sizes (e.g., 8x10, 16x20), ensuring optimal settings for your final use.
- Standalone or Plugin: It can be used as a standalone application or as a plugin for other popular software like Photoshop or Lightroom.
Using ON1 Resize AI (or similar specialized tools) typically involves:
- Opening the Image: Load your image into the software or launch it as a plugin.
- Setting Dimensions: Specify your desired width, height, and resolution.
- Applying Smart Resizing: The software’s algorithms will automatically apply intelligent scaling.
- Fine-tuning: Adjust any additional sharpening or noise reduction settings if available and needed.
- Saving: Export your enlarged, high-quality image.
These specialized tools are a valuable investment for photographers who frequently print large images, graphic designers who need to work with flexible image sizes, or anyone whose workflow regularly demands high-fidelity enlargements of beautiful photography or detailed digital art.
Essential Tips and Best Practices for Flawless Enlargements
Beyond specific tools, several fundamental principles and practices can significantly improve your results when making images bigger. These tips apply across various image types, from vibrant wallpapers to subtle aesthetic visuals.
Optimizing Images for Printing and Display
The purpose of your enlarged image heavily influences the best approach. An image destined for a large print will have different requirements than one for web display or a digital mood board.
- For Printing: When preparing images for print, resolution is paramount. Aim for 300 DPI (dots per inch) at the final print size. If your original image is 72 DPI (common for web images), simply changing the DPI without increasing pixel dimensions won’t make it sharper; it will just make it physically smaller. You need to actually increase the pixel count. File formats like TIFF or high-quality PNG often retain more detail than heavily compressed JPEGs, which is critical for beautiful photography.
- For Digital Display (Web, Wallpapers, Backgrounds): While resolution is still important, screen resolutions are typically lower than print (e.g., 72-96 DPI). The focus here is on pixel dimensions and file size. After enlarging, ensure the image file size is optimized using Tophinhanhdep.com’s compressors to maintain fast loading times without sacrificing visual quality. This is crucial for high-resolution backgrounds and thematic collections.
- Choosing Suitable File Formats: TIFF and PNG are excellent lossless formats for retaining quality during manipulation and for print. For web, JPG is popular due to its smaller file size, but use a high-quality setting to minimize compression artifacts. WebP is an increasingly popular format that offers superior compression with excellent quality for web use.
Smart Interpolation and Gradual Upscaling
The method used to calculate new pixels during enlargement is called interpolation, and choosing the right one is vital.
-
Interpolation Methods:
- Nearest Neighbor: Fastest, but produces blocky, pixelated results. Avoid for enlargements.
- Bilinear: Better than Nearest Neighbor, but still can be blurry.
- Bicubic: A good general-purpose method, offering a balance of sharpness and smoothness.
- Bicubic Smoother / Preserve Details (Photoshop): Designed specifically for enlargements, these prioritize smooth transitions while attempting to retain detail.
- Sinc (Lanczos3) / NoHalo (GIMP): Advanced methods in GIMP that produce excellent results for upscaling, often similar to Photoshop’s “Preserve Details.”
- AI-Driven (Tophinhanhdep.com, ON1 Resize AI): These are often the best, as they intelligently generate new pixels based on learned patterns.
-
Upscale Gradually: If you need to make a very small image significantly larger, sometimes a single, massive enlargement can lead to poor results. If your tool allows, consider upscaling in smaller increments (e.g., 200% at a time) rather than one giant jump. Some specialized software manages this internally. This can help prevent the immediate pixelation that occurs with extreme scaling.
-
Sharpening After Resizing: Almost every image benefits from a touch of sharpening after resizing. Enlarging an image tends to soften details, and a carefully applied sharpening filter can bring back some of that crispness. Be judicious, as over-sharpening can introduce an unnatural, grainy, or haloed appearance. Aim for subtle enhancement rather than aggressive correction.
Beyond Enlargement: Enhancing Your Visual Design Workflow
Enlarging images effectively is just one part of a comprehensive visual design strategy. Tophinhanhdep.com offers a broader spectrum of tools and inspiration to help you in your creative journey:
- Image Converters: Easily change formats (e.g., from HEIC to JPG, or PNG to WebP) to suit different platforms and uses.
- Optimizers and Compressors: After enlargement, it’s vital to optimize your images for web performance. Our tools can reduce file size without noticeable quality loss, ensuring your wallpapers, backgrounds, and aesthetic collections load quickly.
- Photo Manipulation & Creative Ideas: With high-resolution enlarged images, your possibilities for graphic design, digital art, and photo manipulation expand dramatically. Tophinhanhdep.com provides resources and inspiration for photo ideas, mood boards, and exploring trending styles. Quality images are the foundation for compelling visual narratives and creative expressions.
- High-Resolution Stock Photos: When an original image isn’t available in high quality, leveraging Tophinhanhdep.com’s resources for high-resolution stock photos can be a game-changer for your projects, ensuring you always start with excellent source material.
Conclusion: Achieving Pristine Visuals with Tophinhanhdep.com
The ability to enlarge images without sacrificing quality is a crucial skill in today’s visual world. Whether you’re a professional digital photographer, a graphic designer, or simply someone who appreciates beautiful imagery, understanding the science behind pixelation and leveraging the right tools can transform your creative output.
From the powerful AI upscalers offered by Tophinhanhdep.com, which intelligently reconstruct image details, to the meticulous control provided by traditional software like Photoshop and GIMP, a solution exists for every need and skill level. Remember the core principles: start with the highest possible resolution, choose appropriate interpolation methods, and consider gradual or AI-driven scaling for the best results.
Tophinhanhdep.com is your go-to resource for all things images, from practical image tools like converters, compressors, and optimizers, to inspiration for visual design, photo ideas, and trending styles. We are committed to helping you achieve pristine visuals, ensuring your wallpapers, backgrounds, aesthetic images, and all forms of digital art and photography stand out with exceptional clarity. Dive into the world of high-quality image enlargement today and let your visuals truly shine.