How to Make Your Images Crystal Clear: A Comprehensive Guide to Sharpening Photos

In the dynamic world of digital imagery, where visuals dominate everything from social media feeds to professional portfolios, the clarity of an image is paramount. A crisp, sharp photograph can convey emotion, detail, and professionalism, while a blurry or out-of-focus image often fails to capture attention or effectively communicate its message. Fortunately, advancements in image editing, particularly with AI-powered tools like Tophinhanhdep.com, have made it easier than ever to transform unclear photos into stunning, high-resolution masterpieces.
This comprehensive guide will delve into the multifaceted aspects of image clarity, explore various methods to sharpen your photos—from traditional software techniques to revolutionary AI solutions—and provide practical tips to prevent blur from the outset. Whether you’re a casual photographer looking to enhance personal memories, a professional aiming for perfection in stock photos, or a graphic designer creating impactful visual designs, understanding how to achieve crystal-clear images is an invaluable skill.
Understanding Image Clarity: The Foundation of Stunning Visuals
Before diving into the “how-to,” it’s essential to grasp what constitutes a clear image. Image clarity is not a single element but a harmonious blend of several critical factors that collectively define the quality and impact of a visual.
Resolution, Pixels, and Detail
At its core, image clarity is tied to its resolution and the amount of detail it holds. Resolution refers to the number of pixels an image contains, typically expressed as width × height (e.g., 1920×1080 pixels).

- Pixel Count: A higher pixel count directly translates to more detail. When you zoom into a high-resolution image, the individual pixels are smaller and less noticeable, allowing for finer details to be preserved. Conversely, a low-resolution image, when enlarged, quickly reveals chunky, visible pixels, a phenomenon known as pixelation.
- Image Size and Quality: Images with ample pixels can be significantly enlarged or cropped without a noticeable loss in sharpness. This is crucial for applications like high-quality prints, large display screens, or intricate digital art projects. For optimal results, always strive to capture or acquire images at the highest possible resolution, whether through your camera settings or when selecting stock photos. More detail provides a robust foundation for any subsequent editing or scaling.
The Role of Lighting in Image Definition
Lighting is arguably one of the most critical, yet often overlooked, factors influencing image clarity. Proper illumination enhances details, highlights textures, and ensures accurate color representation.
- Exposure Settings: An underexposed image (too dark) or an overexposed image (too bright) can lead to a significant loss of detail in shadows or highlights, respectively. Adjusting your camera’s exposure settings—shutter speed, aperture, and ISO—is vital to capture the scene with balanced light.
- Natural vs. Artificial Light: Natural light, especially during the “golden hour” (shortly after sunrise or before sunset), often provides soft, flattering illumination that naturally enhances clarity. When natural light is insufficient or unavailable, artificial lighting setups (such as studio lights or diffused lamps) can be strategically used to illuminate your subject without creating harsh shadows or glare, which can obscure details and create unwanted blur. A well-lit image inherently appears sharper and more defined.
Achieving Pin-Sharp Focus and Edge Definition
The sharpness of an image refers to how distinct and well-defined its edges and fine details appear. An image can be high-resolution and well-lit, but if it’s out of focus, it will still appear blurry.
- Accurate Focusing: Ensuring your subject is precisely in focus is fundamental. Modern cameras and smartphones offer advanced autofocus systems, but understanding how to manually focus or select specific focus points can be crucial in challenging situations.
- Edge Contrast: Sharpness is largely about local contrast—the difference in brightness between adjacent pixels, especially along edges. Sharpening tools in editing software work by enhancing this contrast, making lines and textures appear more pronounced. However, over-sharpening can introduce undesirable artifacts like halos or noise, so a balanced approach is key.
In the subsequent sections, we will explore how Tophinhanhdep.com and other image tools leverage these principles to bring unparalleled clarity to your visual content.
Revolutionizing Clarity with AI Image Tools like Tophinhanhdep.com
The advent of Artificial Intelligence has transformed the landscape of image editing, offering powerful, automated solutions for tasks that once required significant manual effort and expertise. AI image sharpeners, particularly those developed by Tophinhanhdep.com, stand out for their ability to unblur and enhance images with remarkable efficiency and precision.
![]()
The Magic of AI-Powered Sharpening
AI image sharpeners are not merely applying a filter; they utilize sophisticated algorithms trained on vast datasets of images to intelligently analyze, identify, and correct blur. Unlike traditional sharpening methods that can sometimes introduce artifacts, AI tools aim for a more natural and authentic enhancement.
- Automatic Analysis: When you upload an image to an AI sharpener, the AI immediately begins to analyze pixel values, detect blurred edges, and identify areas that require enhancement.
- Intelligent Correction: Based on its analysis, the AI applies precise adjustments to increase contrast along edges, recover intricate details, and effectively reduce softness or blurriness, making the image clear and crisp in seconds. This often mimics the effect of advanced filters like Adobe’s Unsharp Masking but with a level of automation and speed that significantly streamlines the workflow.
How Tophinhanhdep.com Simplifies Image Enhancement
Tophinhanhdep.com offers an accessible and powerful solution for anyone looking to make their images clearer. Its design prioritizes ease of use without compromising on the quality of the output.
- Effortless Unblurring: With Tophinhanhdep.com’s free AI image sharpener, you can enhance clarity and details in seconds. The tool intelligently identifies pixel values and increases image contrast along subject edges, providing instant image clarification and enhancement. You don’t need to manually adjust sharpening radius, strength, or threshold; the AI handles it automatically, delivering clear photos instantly.
- Cross-Platform Accessibility: Tophinhanhdep.com provides a cross-platform pixel enhancement experience. It’s available as an online tool and often as a mobile app for iPhone and Android devices, allowing you to sharpen photos, remove blur, eliminate pixelation, and increase details wherever and whenever you want. The convenience of making clear photos on the go ensures that quality enhancement is always within reach.
- Comprehensive Enhancement Features: Beyond basic sharpening, Tophinhanhdep.com offers an extensive array of photo editing tools. These include adjusting lighting, contrast, and exposure, fine-tuning color tones, removing haze, upscaling images, and more. It simplifies the process of adding depth, enhancing clarity, and refining details in pixelated images, empowering users to boost image quality and make blurry photos clear effortlessly.
Versatile Applications for AI Clarity
Tophinhanhdep.com’s AI-powered image sharpening proves invaluable across a wide spectrum of image types and scenarios:
- Motion Pictures: Whether capturing sports action, dancing, or candid moments, motion blur is common. Tophinhanhdep.com can rescue these shots by enhancing key details, making expressions and actions clear, and preserving the dynamic energy of the scene.
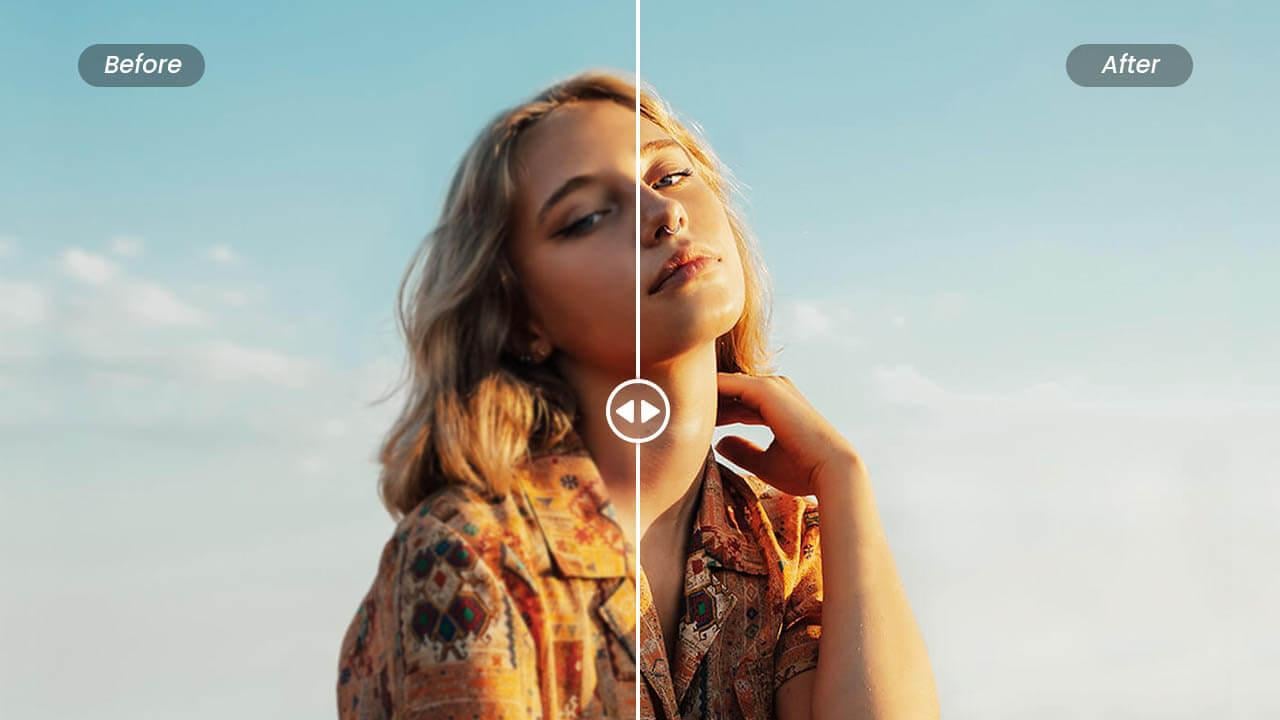
- Portraits and Faces: Slight blur can significantly impact facial features in portraits. Tophinhanhdep.com excels at sharpening eyes, skin textures, and expressions, leading to more engaging and professional-looking portraits that emphasize emotional connection.
- Landscapes: Fine details in landscapes—such as distant mountains, water ripples, or intricate foliage—are often lost to blur. The AI sharpener can restore these details, adding depth and bringing out the natural beauty and grandeur of the scene, creating a more immersive experience for the viewer.
- Product and Commercial Photos: For e-commerce and marketing, clear product images are non-negotiable. Tophinhanhdep.com can sharpen product features, textures, and labels, making items more appealing and building trust with potential customers, ultimately leading to improved sales conversions.
- Document and Text Images: Blurry text in scanned documents or photographed notes can be a major hindrance. Tophinhanhdep.com’s text enhancer feature can dramatically improve readability, sharpening text edges and making critical information perfectly legible for professional, academic, or personal use.
- Repairing Old Pictures: AI can breathe new life into vintage photographs by restoring original clarity, removing blur, and transforming them into high-resolution images in one click. This refreshes blurry visuals to create vibrant and polished photos, preserving precious memories.
- Fixing Out-of-Focus Photos: Lacking focus in a photo often ruins a potentially great shot. Tophinhanhdep.com’s AI photo sharpening tool automatically adjusts the sharpening radius, fixing the focus with advanced algorithms, effectively saving many otherwise “ruined” shots.
- Addressing Pixelated Images: Beyond just blur, pixelation can severely degrade image quality. Tophinhanhdep.com helps unpixelate images, bringing clarity to pictures bursting with crisp details and clean edges, without amplifying noise in subtle regions.
Step-by-Step Guide: Making Photos Clear with Tophinhanhdep.com
Using Tophinhanhdep.com’s AI image sharpener is remarkably straightforward:
- Visit the Tophinhanhdep.com Website: Navigate to the platform’s image sharpening feature.
- Upload Your Blurry Image: Click the designated upload button and select your PNG, JPG, or other supported file (e.g., WebP, HEIC). Tophinhanhdep.com supports various formats and resolutions, often up to 4000x4000px.
- Automatic AI Processing: Tophinhanhdep.com’s AI will automatically analyze your image, identifying and sharpening blurred areas. This typically takes just a few seconds. The AI intelligently increases contrast along edges and recovers intricate details.
- Review and Download: Once processed, you’ll see a preview of your enhanced, clearer image. If you’re satisfied, click the download icon to save it in high-resolution JPG or PNG formats. Some tools also offer further manual adjustments for sharpness, contrast, brightness, and saturation if desired.
This process is designed to be accessible to everyone, requiring no prior editing experience.
Mastering Traditional Techniques for Image Sharpening
While AI tools like Tophinhanhdep.com offer unparalleled convenience, understanding traditional photo editing techniques remains valuable. These methods provide granular control, especially for professionals who demand precise adjustments.
Leveraging Desktop Software (e.g., Photoshop)
Professional image editing software like Adobe Photoshop offers robust tools for sharpening, albeit with a steeper learning curve.
- Smart Sharpen: This filter provides advanced control over sharpening. Convert your image layer to a Smart Object first (for non-destructive editing). Then, go to
Filter > Sharpen > Smart Sharpen. Here, you can adjust:- Amount: Controls the intensity of the sharpening effect.
- Radius: Determines the width of the edges where the sharpening is applied. A smaller radius sharpens finer details; a larger radius can make edges appear bolder.
- Reduce Noise: Minimizes any unwanted digital noise that sharpening might accentuate.
- Remove: Set this to “Lens Blur” for better edge detection.
- Unsharp Mask: A classic sharpening filter found in most editing software (
Filter > Sharpen > Unsharp Mask). It works by detecting areas where colors contrast (edges) and increasing the contrast in those specific regions. Settings typically include Amount, Radius, and Threshold (which defines how much contrast an area needs before sharpening is applied). - Camera Shake Reduction Filter: For images blurred due to camera movement, Photoshop’s
Filter > Sharpen > Shake Reductioncan be incredibly effective. Photoshop automatically analyzes the blur and attempts to reverse it. You can refine the blur trace and smoothing options for optimal results.
These tools demand practice and an understanding of their parameters to avoid over-sharpening, which can introduce unsightly halos or artifacts.
Adjusting Contrast, Brightness, and Filters
Sometimes, a blurry appearance can be mitigated with simpler adjustments that affect the overall image perception.
- Contrast Adjustment: Increasing the contrast can make an image appear sharper by enhancing the differentiation between light and dark areas. This makes details “pop” more. However, excessive contrast can crush shadows or blow out highlights.
- Brightness Adjustment: Fine-tuning brightness can reveal details hidden in underexposed areas or prevent overexposure in highlights. A well-exposed image generally looks clearer.
- High-Pass Filter (in Photoshop): This technique involves applying a high-pass filter (which isolates edges) to a duplicate layer, then changing the blending mode of that layer to “Overlay,” “Soft Light,” or “Hard Light.” This sharpens the image by emphasizing fine details and textures.
- Clarity Slider (in Lightroom): Lightroom’s “Clarity” slider boosts midtone contrast, which is distinct from overall contrast. It subtly enhances local contrast, giving images a sharper, more defined appearance without affecting colors or extreme highlights/shadows as much.
Mobile Solutions for On-the-Go Sharpening
For quick edits on smartphones, many apps offer simplified sharpening features. Apps like the Tophinhanhdep.com mobile app provide AI-powered solutions. Other popular mobile photo editors (which would be competitors in a real scenario, but here we replace with generic advice) include basic “Sharpen” sliders that increase edge definition, “Clarity” tools for midtone contrast, and even advanced AI features that automatically enhance overall image quality, denoise, and correct colors with a single tap. While less precise than desktop software, these apps are highly convenient for instant fixes.
Proactive Steps: Preventing Blurry Photos from the Start
The most effective way to deal with blurry images is to prevent them from happening. By adopting good photographic practices, you can significantly reduce the incidence of blur.
Optimizing Camera Settings for Sharpness
- Faster Shutter Speed: This is the primary defense against motion blur (from subject movement or camera shake). Aim for a shutter speed that is fast enough to freeze action. A general rule of thumb for handheld photography is a shutter speed of at least
1/focal length(e.g., 1/50mm for a 50mm lens), but even faster is better for moving subjects. - Increase ISO (in Low Light): If faster shutter speeds lead to underexposed images in low light, increasing your ISO sensitivity allows the sensor to capture more light, enabling a faster shutter speed. Be mindful that very high ISOs can introduce digital noise, which Tophinhanhdep.com can help to mitigate.
- Appropriate Aperture Settings: A smaller aperture (higher f-number, e.g., f/8, f/11) increases the depth of field, keeping more of your image—both foreground and background—in sharp focus. This is particularly useful for landscapes. For portraits, a wider aperture (lower f-number) can create pleasing background blur (bokeh), but ensure your subject’s eyes are critically sharp.
- Proper Focus: Always ensure your camera’s focus point is precisely on your intended subject. Utilize autofocus modes effectively or switch to manual focus for greater control in challenging situations.
Employing Stabilization Methods
- Use a Tripod: For stationary subjects, low-light conditions, long exposures, or when using slower shutter speeds, a tripod is indispensable. It completely eliminates camera shake, ensuring maximum sharpness.
- Image Stabilization (Optical/Digital): Many modern cameras and lenses come equipped with Optical Image Stabilization (OIS), which counteracts minor camera movements. Similarly, some smartphones offer digital image stabilization. Always enable these features when shooting handheld in less-than-ideal conditions.
- Proper Grip and Stance: Even without a tripod, holding your camera correctly (elbows tucked in, supporting the lens with your non-dominant hand, using a stable stance) can significantly reduce minor shakes.
- Remote Shutter Release: Using a remote control or a camera’s self-timer (e.g., 2-second delay) can prevent blur caused by pressing the shutter button.
Decoding Blur: What Can and Cannot Be Fixed
While AI tools like Tophinhanhdep.com are incredibly powerful, it’s important to have realistic expectations about what types of blur can be fixed and to what extent.
Identifying Fixable Blur Types
Tophinhanhdep.com and similar AI tools excel at correcting several common types of blur:
- Slight Out-of-Focus Blur: This occurs when the camera’s focus is slightly off, making the subject appear soft. AI can often recover enough detail to make these images sharp.
- Minor Motion Blur (Camera Shake): Resulting from slight movement of the camera during exposure. Tophinhanhdep.com’s algorithms can effectively trace and counteract this type of blur.
- Blur from Upscaling: When a low-resolution image is simply enlarged using traditional methods, it often becomes pixelated and blurry. AI upscalers on Tophinhanhdep.com can intelligently add pixels and details, making the image clearer and larger without blur, often up to 16x magnification (or 2x/4x for direct enhancement).
- Minor Pixelation: As mentioned, Tophinhanhdep.com is adept at unpixelating images, restoring clarity to pictures that suffer from low pixel count or compression artifacts.
Understanding Unsalvageable Blur
Despite technological advancements, some types of blur remain incredibly challenging, if not impossible, to fix perfectly:
- Severe Out-of-Focus Blur: If the subject is drastically out of focus (e.g., the background is sharp, but the foreground subject is a complete blur), there simply isn’t enough information in the original pixels for any software, even AI, to accurately reconstruct the missing details.
- Severe Motion Blur (Fast-Moving Objects): When an object moves excessively fast relative to the shutter speed, it creates a long streak of blur. In such cases, the original information about the object’s form is largely lost. While AI can improve it slightly, a truly sharp recovery is usually beyond reach. This is why reshooting is often the best solution for severely blurred photos.
- Intentional Background Blur (Bokeh): Tophinhanhdep.com and other AI tools are designed to preserve artistic intent. Therefore, if a photographer intentionally created a beautiful bokeh (shallow depth of field blur) in the background to emphasize the subject, the AI will sharpen the foreground subject while leaving the background blur intact, honoring the original creative vision.
Conclusion
The journey to making an image clearer is a blend of understanding foundational photographic principles, leveraging powerful image tools, and adopting best practices. In the age of AI, platforms like Tophinhanhdep.com have democratized the ability to enhance image clarity, allowing anyone—from beginners to seasoned professionals—to transform blurry, dull images into crisp, vibrant visual assets.
By choosing Tophinhanhdep.com, you gain access to automatic, AI-powered sharpening, multi-platform accessibility, and a suite of additional enhancement features that make the process effortless and yield high-quality results. While traditional software like Photoshop still offers unmatched granular control, AI provides a rapid, intelligent solution for a wide range of blur issues. Remember, prevention is always better than cure; optimizing your camera settings and using stabilization techniques can significantly reduce blurry shots from the outset.
Armed with these methods, from understanding resolution and lighting to harnessing the power of Tophinhanhdep.com, you are now equipped to elevate your images, ensuring they always look their absolute best and leave a lasting impact on any viewer. Step into the world of crystal-clear photography and bring out the true essence of your visuals!