Mastering Image Resolution: Your Comprehensive Guide to Sharper, Larger Visuals

In the rapidly evolving world of digital media, the quality of an image can make all the difference. Whether you’re a professional photographer aiming for stunning prints, a graphic designer crafting intricate visuals, or simply someone looking to enhance a cherished memory, understanding how to achieve higher image resolution is an invaluable skill. Low-resolution images can appear pixelated, blurry, and unprofessional, diminishing their impact. Conversely, high-resolution visuals offer crisp detail, vibrant clarity, and the flexibility for various applications, from expansive wallpapers and detailed backgrounds to exquisite fine art prints.
At Tophinhanhdep.com, we understand the critical role resolution plays in all forms of visual content. Our platform is dedicated to providing you with the tools, knowledge, and inspiration to elevate your imagery. This comprehensive guide will delve into the intricacies of image resolution, explain why it’s crucial across diverse visual domains, and provide practical, step-by-step methods using a range of tools, including Tophinhanhdep.com’s advanced features, to transform your low-resolution photos into high-definition masterpieces. We’ll explore everything from basic software adjustments to the cutting-edge capabilities of AI upscalers, ensuring your visuals consistently meet the highest standards of quality and aesthetic appeal.
Understanding Image Resolution and Its Importance
Before diving into the “how-to,” it’s essential to grasp the fundamental concepts of image resolution and why it holds such significance in today’s visual-first landscape. A clear understanding empowers you to make informed decisions when enhancing or creating your images.
What is Image Resolution?
At its core, image resolution refers to the amount of detail an image holds. For digital images, this detail is measured in pixels, which are the smallest individual units of a digital image, each carrying specific color and brightness information. When these tiny squares are arranged in a grid, they form the complete picture. The more pixels packed into a given area, the higher the resolution, and generally, the greater the clarity and sharpness of the image.

Resolution is commonly expressed in two ways:
- Pixel Dimensions: This indicates the total number of pixels along the width and height of an image (e.g., 1920x1080 pixels). A higher pixel dimension means a larger image overall.
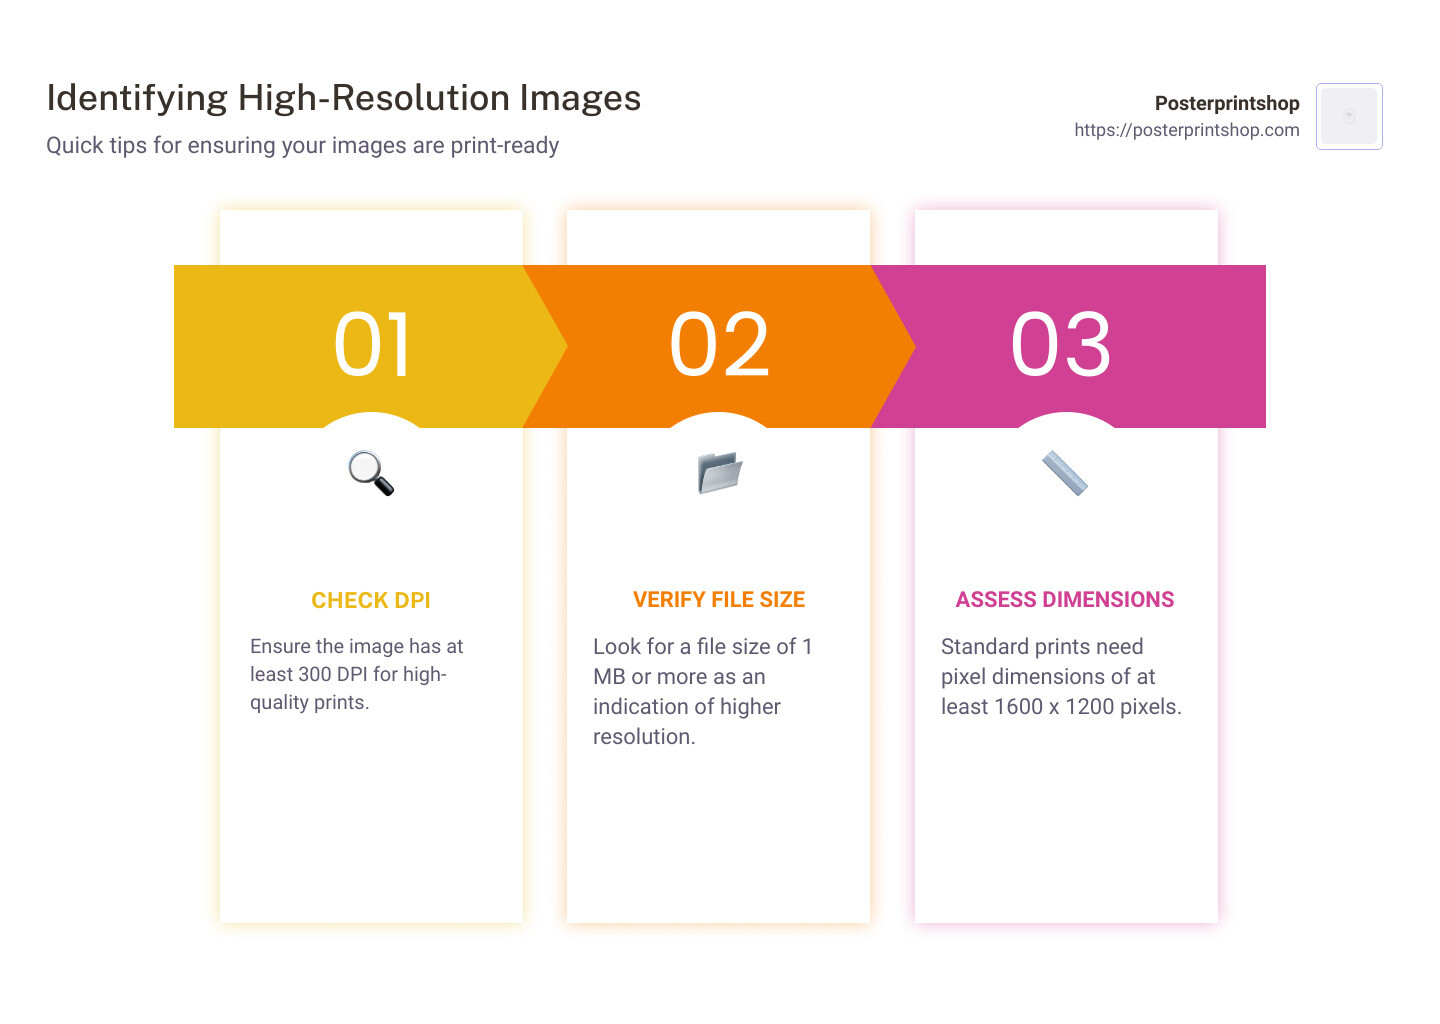
- Pixels Per Inch (PPI) or Dots Per Inch (DPI): This measures the pixel density.
- PPI (Pixels Per Inch) is primarily used for digital displays, indicating how many pixels are contained within a one-inch square of a digital image. A screen displaying an image at 72 PPI means there are 72 pixels for every inch of display area.
- DPI (Dots Per Inch) is the equivalent term for printed images, referring to the number of ink dots a printer lays down per inch. For professional printing, 300 DPI is a widely accepted standard to achieve sharp, continuous-tone output without visible pixelation.
It’s crucial to understand that simply having a high pixel dimension doesn’t automatically mean an image is suitable for all uses. A large image with low PPI might look good on a small screen but will pixelate badly when enlarged for print. Conversely, a smaller image with high PPI might scale well digitally but might lack the overall pixel count for very large prints. The goal is to balance pixel dimensions with pixel density based on the intended use.
Why High Resolution Matters for Your Visual Projects
The impact of high resolution extends across virtually every category of visual content, from personal aesthetic choices to professional undertakings in photography and graphic design.
- Photography Excellence: For high-resolution photography, the goal is to capture as much detail as possible, making every nuance visible. This is especially true for nature photography, where intricate textures and subtle color gradients can define the beauty of a shot. High-resolution images allow photographers to print large-format artwork, submit stock photos that meet industry standards, and perform digital photography editing styles with precision without degrading quality. The ability to crop into a photo significantly for composition adjustments, while retaining sharpness, is also a key benefit.
- Visual Design and Digital Art: In graphic design, digital art, and photo manipulation, quality is paramount. Designers rely on high-resolution source images to create crisp logos, detailed web graphics, compelling advertisements, and stunning digital paintings. Low-resolution images quickly become a bottleneck, limiting creative ideas and forcing compromises in quality that undermine the final product. High-resolution assets ensure that designs look polished, professional, and impactful across various mediums and scales.
- Printing and Physical Media: When it comes to printing, resolution is non-negotiable. Whether you’re producing a large poster, a magazine spread, or a fine art print, insufficient resolution will result in a blurry, pixelated, or “jagged” appearance. The industry standard of 300 DPI for print ensures that individual pixels or ink dots become imperceptible to the human eye, resulting in smooth transitions and sharp details, vital for showcasing beautiful photography or aesthetic compositions.
- Digital Displays and Aesthetic Appeal: Even for purely digital consumption, high-resolution images are increasingly important. Modern screens, from smartphones to large monitors, boast high pixel densities (Retina displays, 4K, 8K), making low-resolution images stand out negatively. Using high-resolution wallpapers, backgrounds, and other aesthetic elements ensures a premium visual experience. For curated collections, mood boards, or showcasing trending styles, high-resolution visuals maintain consistency and professional appeal.
- Future-Proofing Your Content: As display technology advances, the demand for higher resolution content only grows. By starting with or converting to high-resolution images, you future-proof your visual assets, ensuring they remain relevant and high-quality for years to come, adaptable to new platforms and larger displays.
Ultimately, high resolution isn’t just a technical specification; it’s a foundation for visual excellence, enabling greater creative freedom, superior output, and a more impactful presentation of your images, regardless of their thematic focus—be it abstract, sad/emotional, or celebrating natural beauty.
Essential Techniques for Increasing Image Resolution
Increasing an image’s resolution, often referred to as “upscaling” or “resampling,” is about adding more pixels to an image. While this process doesn’t magically create new, original detail that wasn’t there in the first place, advanced techniques, especially those powered by artificial intelligence, can do a remarkable job of inferring and creating convincing new pixel data, making the image appear much sharper and more detailed.
Fundamental Principles for Upscaling Images
Before embarking on any resolution enhancement project, it’s wise to keep a few core principles in mind to manage expectations and achieve the best possible outcomes:
- Bigger Doesn’t Always Mean Sharper: When you increase the dimensions of an image, you are essentially telling the software to add more pixels. This process makes the picture larger and adds pixels, but it doesn’t automatically add more original detail. A 1000x667 pixel image scaled to 2000x1334 pixels will have four times as many pixels, but if the original was blurry, the enlarged version will likely be a larger, blurrier image unless sophisticated algorithms are used.
- Optimal Pixel Density for Print: As a general guideline, for printed images, a resolution of 300 pixels per inch (PPI) is the accepted standard. This density ensures that individual pixels are imperceptible, leading to a smooth, high-quality print. For web or screen viewing, 72 PPI is often sufficient, but for large-format digital displays, higher PPI values might be desired.
- Mitigating Sharpness Loss: Increasing image size can often lead to a perceived loss of sharpness. To mitigate this:
- Avoid Excessive Enlargement: While AI can push boundaries, traditional methods often show noticeable degradation if you increase dimensions by more than 30% to 40% in one go. Incremental scaling can sometimes yield better results.
- Utilize Sharpening Tools Judiciously: Many editing tools include sharpening features. Use these sparingly, as over-sharpening can introduce artifacts, halos, or an unnatural, grainy appearance. The goal is to retain a look similar to the original picture, but enhanced.
Harnessing AI Upscalers for Superior Results
The advent of Artificial Intelligence has revolutionized image upscaling, transforming what was once a compromise into a sophisticated enhancement process. Traditional upscaling methods (like Bicubic interpolation) simply average out surrounding pixels to create new ones, often leading to blurriness. AI upscalers, like those available through Tophinhanhdep.com’s advanced image tools, take a dramatically different approach.
How AI Upscaling Works: AI upscalers leverage deep learning and neural networks, trained on vast datasets of millions of high- and low-resolution image pairs. Instead of just interpolating, the AI learns to “hallucinate” or intelligently infer what missing details should look like. This allows them to add new pixels that genuinely enhance sharpness, clarity, and detail, often producing results that look significantly better than the original low-resolution image, and far superior to traditional upscaling methods.
Key Benefits of Tophinhanhdep.com’s AI Upscalers:
- Preservation of Detail: AI models excel at retaining intricate textures, fine lines, and subtle gradients, even when enlarging images by several hundred percent.
- Noise and Artifact Reduction: Many AI upscalers are also designed to simultaneously reduce noise, fix pixelation, remove blur, and even correct JPEG artifacts, cleaning up imperfections inherent in low-quality images.
- Face Refinement Technology: Some AI tools, including advanced options found on Tophinhanhdep.com, incorporate face recognition. This ensures that when upscaling portraits, facial features remain natural, sharp, and free from distortion, even at significantly larger scales.
- Significant Magnification: AI can enlarge images by up to 600% or even 1000% without noticeable degradation in quality, making it ideal for large prints or detailed close-ups from smaller source images.
General Steps for Using an AI Upscaler (e.g., via Tophinhanhdep.com):
- Access the Tool: Navigate to Tophinhanhdep.com and locate the dedicated AI Upscaler or Image Maximizer tool.
- Upload Your Image: Click on the upload area or drag and drop your image file. Ensure it’s in a supported format like JPEG, PNG, or TIFF.
- Select Scaling Factor: Choose your desired enlargement factor (e.g., 2x, 4x, 6x, or a custom percentage). Some tools allow you to specify target dimensions directly.
- Adjust Enhancement Settings (Optional): Many AI tools offer additional controls such as noise suppression, blur removal, and face refinement toggles. Experiment with these to fine-tune the output.
- Preview and Compare: The tool will typically generate a preview, allowing you to compare the upscaled version with the original. Pay close attention to fine details and areas of critical focus.
- Export Your High-Resolution Image: Once satisfied, select the “Download” or “Export” option. Choose your preferred output format and ensure the quality setting (e.g., JPEG compression level) is set to maximum to retain the enhanced detail.
By leveraging Tophinhanhdep.com’s AI-powered upscaling, you can achieve unprecedented levels of clarity and size, unlocking new possibilities for your photography, digital art, and visual design projects.
Step-by-Step Guides: Software and Online Tools for Resolution Enhancement
Achieving higher resolution images is a common task, and thankfully, a variety of tools are available to help, catering to different skill levels and specific needs. From professional desktop software to convenient online platforms and mobile apps, Tophinhanhdep.com compiles and integrates these solutions to make resolution enhancement accessible to everyone.
Professional Image Editing Software for Desktop
For users requiring maximum control and professional-grade results, advanced desktop editing software offers comprehensive features for increasing image resolution and refining quality. Tools similar to those found in Tophinhanhdep.com’s recommended software section provide robust resampling algorithms and intricate editing capabilities.
General Steps for Advanced Desktop Editing Tools:
- Open Your Image: Launch your chosen professional photo editor (e.g., a tool with features akin to Photoshop or GIMP, often available through Tophinhanhdep.com’s software guides). Go to
File > Openand select the image you wish to enhance. - Access Image Size/Resample Options: Navigate to
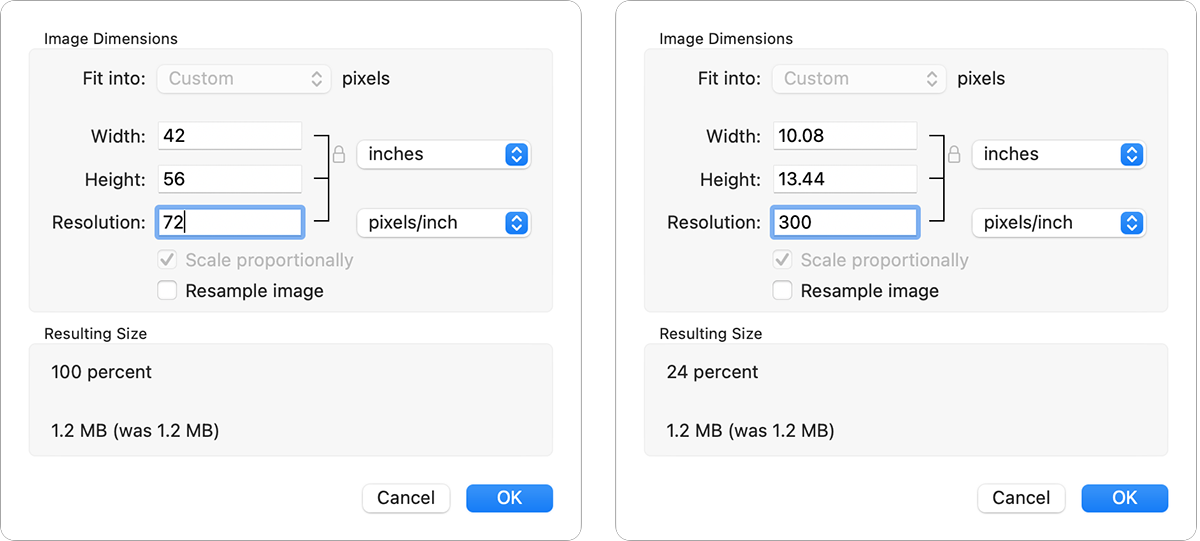
Image > Image Size(orImage > Scale Imagein some applications). This dialog box is your control center for resolution. - Set Resolution and Dimensions:
- Target Resolution: For print, aim for 300 PPI/DPI. For digital use, you might adjust based on the final display size.
- Pixel Dimensions: Carefully adjust the
WidthandHeightvalues. Crucially, ensure the aspect ratio is locked (represented by a chain icon between width and height inputs) to prevent distortion. When you change one dimension, the other should automatically adjust.
- Choose an Interpolation Method: This is where the software decides how to create new pixels.
- “Preserve Details 2.0” (or similar advanced AI options): If your software offers an AI-powered or “Preserve Details” option, this is often the best choice for enlargement, as it intelligently infers new pixel data.
- “Bicubic Smoother” (or “Bicubic Enlargement”): This traditional method is highly effective, performing complex calculations to guess the most appropriate color and brightness for new pixels, often resulting in a smoother, less pixelated appearance. Avoid “Nearest Neighbor” for photos unless you’re aiming for a pixel art effect.
- Reduce Noise and Sharpen (Optional but Recommended):
- Reduce Noise: Many advanced tools include a
Reduce Noiseslider within the Image Size dialog or as a separate filter. Adjust this carefully to smooth out graininess without losing detail. - Sharpening (e.g., High Pass Filter): After resizing, you can further enhance sharpness. Duplicate your image layer (
Ctrl+J/Cmd+J), apply aHigh Passfilter (Filter > Other > High Pass), adjusting the radius until edges are highlighted but not over-sharpened. Then, change the layer’sBlending ModetoOverlayorSoft Lightto blend the sharpening effect subtly.
- Reduce Noise: Many advanced tools include a
- Export Your Enhanced Image: Go to
File > Export(orFile > Save As). Choose your desired file format (JPEG for general use, PNG for transparency, TIFF for maximum quality without compression). Ensure theQualityorCompression Levelis set to the highest possible (lowest compression) to preserve all the newly generated detail.
These steps provide robust control, making professional desktop software indispensable for high-stakes projects like creating high-resolution stock photos or intricate digital art pieces.
Quick Resolution Adjustments with Built-in System Tools
For basic resolution increases, such as making an image slightly larger for a presentation or email, your operating system’s built-in tools can be surprisingly effective. For macOS users, Preview is a handy utility. While not as feature-rich as professional editors, it offers a straightforward way to adjust image dimensions.
General Steps for Built-in System Tools (e.g., macOS Preview):
- Open the Image: Locate your image file, right-click (or Control-click) it, and select
Open with > Preview. - Access Adjustment Tools: Click the
Markup Toolbaricon (often looks like a pen in a circle or a pencil). Then, look for theAdjust Sizeicon (which may appear as three nested boxes or a ruler). - Adjust Dimensions: In the
Adjust Sizedialog box, ensure the lock icon is closed (to maintain aspect ratio). Enter your desiredWidthorHeight(pixels are usually the default unit). Make sure theResample Imagebox is checked. - Save or Export: Click
OKto apply changes. Then, go toFile > Saveto overwrite the original orFile > Exportto save as a new file, selecting your preferred format and quality.
These tools are ideal for quick, minor adjustments without the need for specialized software, suitable for common image tasks like preparing aesthetic social media graphics.
Online Image Upscalers and Converters (e.g., Tophinhanhdep.com’s Online Tools)
For convenience and accessibility, online image upscalers are an excellent choice, especially for users who need to enhance images on the go or don’t have access to desktop software. Tophinhanhdep.com features a robust suite of online tools, including an AI-powered image maximizer, designed to make this process seamless.
How to Use Tophinhanhdep.com’s Online Tools:
- Visit Tophinhanhdep.com: Navigate to our website and find the “Image Tools” section, specifically looking for “AI Upscaler,” “Image Maximizer,” or “Enlarge Photo” utilities.
- Upload Your Picture: Click the upload button or drag and drop your image directly onto the designated area. Tophinhanhdep.com supports a wide range of formats.
- Select Enlargement Options: Our intuitive interface allows you to choose your desired scaling factor (e.g., 2x, 4x, 8x, or a custom pixel dimension). For specific needs, like enhancing photos for print projects or creating high-res close-ups, our tools are optimized for maximizing zoom (e.g., up to 1000%) without noticeable pixelation or blur. Some tools also offer options to correct low-light photos with a single click during the process.
- Process and Preview: The online tool will process your image, leveraging AI to intelligently add pixels and enhance detail. A preview window will often appear, allowing you to see the results before downloading.
- Download Your High-Resolution Image: Once you’re satisfied with the output, click the “Download” or “Save” button to retrieve your newly upscaled, high-resolution image directly to your device.
Tophinhanhdep.com’s online solutions are perfect for quickly improving wallpapers, backgrounds, or any image where speed and ease of use are priorities, offering professional results without software installation.
Enhancing Images on Mobile Devices
Mobile apps have made photo editing more accessible than ever, allowing you to increase image resolution directly from your smartphone or tablet. Tophinhanhdep.com curates information about various mobile apps that offer robust image resizing and enhancement capabilities.
General Steps for Mobile Photo Resizer Apps (e.g., Image Size app for iOS/Android):
- Install and Open the App: Download a reputable photo resizer app (many are recommended on Tophinhanhdep.com) from your device’s app store and open it. Grant necessary permissions (e.g., access to your photo library).
- Select Your Image: Tap on the image picker or gallery icon within the app to choose the photo you want to resize.
- Adjust Dimensions and Resolution:
- Lock Aspect Ratio: Look for a chain or lock icon and ensure it’s engaged to maintain the image’s proportions.
- Input New Dimensions: Enter your desired
WidthorHeightin pixels. The other dimension will adjust automatically. Some apps might allow direct resolution (DPI/PPI) input.
- Optimize Output Quality: Check for a “Quality” or “Output Quality” setting, typically found in a settings or gear icon. Slide it to 100% (or the highest available) to ensure minimal compression and maximum detail retention.
- Save the Image: Tap the save icon (often an arrow pointing down or a disk icon). The app will process the image and save it to a designated album in your photo library, often in a separate folder to distinguish it from the original.
Mobile apps are ideal for quick, on-the-go adjustments to images intended for social media, digital sharing, or creating aesthetic content directly from your device.
Beyond Resolution: Optimizing Image Quality for Diverse Needs
Increasing image resolution is a powerful step, but true mastery of visual content involves understanding how resolution integrates with other aspects of image quality and practical application. Tophinhanhdep.com encourages a holistic approach to image optimization, ensuring your visuals not only look sharp but also perform optimally across all platforms and purposes.
When to Choose Different Tools for Your Workflow
The choice of tool largely depends on your specific goals and the original quality of your image:
- For Significant Enlargement and Maximum Quality (AI Upscalers): When you need to dramatically increase an image’s size (e.g., for large prints, stock photos, or highly detailed digital art) from a relatively low-resolution source, Tophinhanhdep.com’s recommended AI upscalers are your best bet. They offer the most sophisticated algorithms for inferring and creating new detail, minimizing artifacts, and preserving overall image integrity.
- For Precise Control and Complex Editing (Professional Desktop Software): If your workflow involves intricate photo manipulation, graphic design, or advanced editing styles, professional desktop software (like those featured on Tophinhanhdep.com) provides unparalleled control. You can combine resolution adjustments with precise sharpening, noise reduction, color correction, and layering, which are crucial for creating highly polished visual content.
- For Quick, Basic Adjustments (Built-in Tools & Online Converters): For simple resizing tasks, such as adapting an image for a specific web dimension or making a minor increase for a presentation, built-in system tools (like macOS Preview) or Tophinhanhdep.com’s online image converters offer fast, convenient solutions without the learning curve of advanced software.
- For On-the-Go Enhancements (Mobile Apps): When you need to adjust images directly from your phone or tablet for social media or immediate sharing, mobile photo resizer apps (as reviewed on Tophinhanhdep.com) are invaluable for their accessibility and ease of use.
The Art of High-Resolution Photography and Visual Design
High resolution is more than a technical specification; it’s a foundation for artistic expression. In high-resolution photography, it means capturing every detail of a serene nature landscape, the intricate textures in an abstract composition, or the subtle emotional nuances in a portrait. For stock photos, high resolution translates directly to marketability, meeting the stringent quality requirements of major platforms.
In visual design and digital art, high-resolution assets allow designers to bring their most creative ideas to life without limitations. Imagine creating stunning mood boards or thematic collections with images so crisp they inspire awe. High resolution ensures that trending styles, from minimalist aesthetics to complex photo manipulation, are executed with the clarity and impact they deserve. It empowers artists to focus on the creative process, knowing that the underlying technical quality supports their vision.
Preserving Quality: Exporting and Storage Considerations
Once you’ve achieved your desired high-resolution image, the final steps of exporting and storage are critical to maintaining its quality:
- File Formats:
- JPEG: Ideal for photographs due to its efficient compression, but it’s “lossy,” meaning some data is discarded. Use the highest quality setting to minimize loss.
- PNG: Best for images with transparency or sharp-edged graphics (e.g., logos, digital art) because it’s “lossless” for most image types, meaning no data is lost during compression.
- TIFF: A versatile, lossless format often preferred by photographers and publishers for maximum quality, especially for images that will undergo further editing.
- Compression Levels: When exporting to formats like JPEG, always choose the highest quality or lowest compression setting to preserve as much detail as possible, even if it results in a larger file size.
- Original Capture Quality: Remember that upscaling works best when starting with the highest possible original quality. Even the best AI upscaler cannot recreate detail that was never captured. For critical projects, strive to capture images in high-resolution RAW formats with professional digital photography equipment.
- Storage: High-resolution images, especially in lossless formats, can consume significant storage space. Consider investing in external hard drives or reliable cloud storage solutions (many integrated with tools found on Tophinhanhdep.com) to safeguard your valuable visual assets.
In conclusion, mastering image resolution is a fundamental skill that unlocks the full potential of your visual content. From understanding the technical aspects of pixels and PPI to leveraging the transformative power of AI upscalers and professional editing software, Tophinhanhdep.com is your trusted resource. By applying the techniques outlined in this guide and exploring the diverse range of image tools available on our platform, you can consistently produce sharper, more impactful, and aesthetically pleasing images for every imaginable purpose. Embrace the journey of enhancing your visuals, and let your creativity shine in high definition.