How to Make Image MB Smaller: A Comprehensive Guide for Visual Enthusiasts and Professionals

In today’s visually-driven world, images are everywhere. From stunning wallpapers and backgrounds that adorn our screens to high-resolution photography capturing fleeting moments, and intricate digital art pieces, visuals are central to how we communicate, share, and experience content. Whether you’re a professional photographer showcasing a portfolio of breathtaking nature shots, a graphic designer crafting an aesthetic mood board, or simply someone looking to share beautiful photography with loved ones, managing image file sizes is a critical skill. Large image files can quickly consume storage space, slow down websites, hinder email attachments, and make social media uploads a frustrating experience.
At Tophinhanhdep.com, we understand the importance of vibrant, high-quality images, but also the necessity of efficient file management. Our platform is dedicated to providing inspiration, tools, and resources for all your image needs – from abstract art to sad/emotional imagery, stock photos, and creative visual design. This comprehensive guide will delve into the art and science of reducing image file sizes without sacrificing quality, ensuring your images look their best while performing optimally across all platforms. We’ll explore the underlying factors influencing file size, introduce various compression techniques, and highlight how Tophinhanhdep.com’s tools can be your go-to solution for image optimization.
Understanding Image File Size: The Fundamentals
Before we dive into the “how-to,” it’s essential to grasp what makes an image file large or small. Several factors contribute to an image’s memory footprint, and understanding these is the first step towards effective optimization.
Resolution, Dimensions, and Image Formats
The most significant contributors to an image’s file size are its resolution and dimensions.
- Resolution refers to the number of pixels (picture elements) an image contains. A high-resolution image, typically captured by modern digital cameras or created for large-format prints, has a greater pixel density. For instance, a 4K image has many more pixels than an HD image. While this detail is fantastic for printing or large displays, it translates directly into a larger file size.
- Dimensions are simply the width and height of the image in pixels. An image that is 3000 pixels wide by 2000 pixels high will inherently be larger than one that is 800x600 pixels, even if both have the same pixel density. For web display, an image only needs to be as large as its maximum display size. Uploading a wallpaper-sized image (e.g., 1920x1080 pixels) to a blog post where it will only be displayed at 600 pixels wide is inefficient and wasteful.

The image format also plays a crucial role. Different formats use different compression algorithms, impacting file size and quality.
- JPEG (Joint Photographic Experts Group): This is the most common format for photographs, known for its “lossy” compression. It can achieve significant file size reduction by discarding some image data that is imperceptible to the human eye. This makes it ideal for complex images like nature photography, landscapes, or beautiful photography with smooth color gradients.
- PNG (Portable Network Graphics): PNG uses “lossless” compression, meaning it retains all original image data. It’s excellent for images requiring transparency (like logos or graphic design elements) or those with sharp lines and solid blocks of color, such as abstract art or digital art. However, PNG files are typically larger than JPEGs for the same visual content.
- GIF (Graphics Interchange Format): Best known for animated images, GIFs use lossless compression but are limited to 256 colors. They are generally not recommended for high-quality static images due to their color limitations.
- WebP: A newer format developed by Google, WebP offers superior lossy and lossless compression for images on the web. It can often reduce file sizes even further than JPEGs and PNGs while maintaining comparable quality, making it an excellent choice for optimizing images for fast-loading websites, which is crucial for displaying extensive image collections or mood boards.
Lossy vs. Lossless Compression
Understanding the difference between lossy and lossless compression is fundamental to making informed decisions about image optimization.
- Lossy Compression: This method reduces file size by permanently removing some data from the image. The goal is to discard information that is least noticeable to the human eye. JPEG is the prime example. While it can drastically shrink file sizes (often 40-80%), repeatedly saving a lossy-compressed image can accumulate degradation. For most web and sharing purposes (e.g., social media uploads of your aesthetic photos or backgrounds), a well-executed lossy compression is perfectly acceptable.
- Lossless Compression: This method reduces file size without discarding any data. The original image can be perfectly reconstructed from the compressed data. PNG and GIF are examples. While this preserves image quality perfectly, the file size reductions are generally less dramatic compared to lossy methods. This is often preferred for graphic design elements, stock photos where every detail matters, or when you plan to edit the image further.
The choice between lossy and lossless depends on your priorities: maximum file size reduction (lossy) or absolute fidelity preservation (lossless). Tophinhanhdep.com’s Image Tools, particularly its compressors and optimizers, offer various settings to help you find the ideal balance for your specific needs, whether you’re optimizing high-resolution photography or digital art.
Mastering Image Compression with Tophinhanhdep.com’s Tools
Reducing image file size doesn’t have to be a complex technical endeavor. With the right tools, it can be a quick and seamless process. Tophinhanhdep.com provides a suite of Image Tools specifically designed to help you achieve the perfect balance between quality and file size, whether you’re dealing with a single beautiful photograph or an entire collection of nature images.
The Easy Way: Online Image Compression with Tophinhanhdep.com
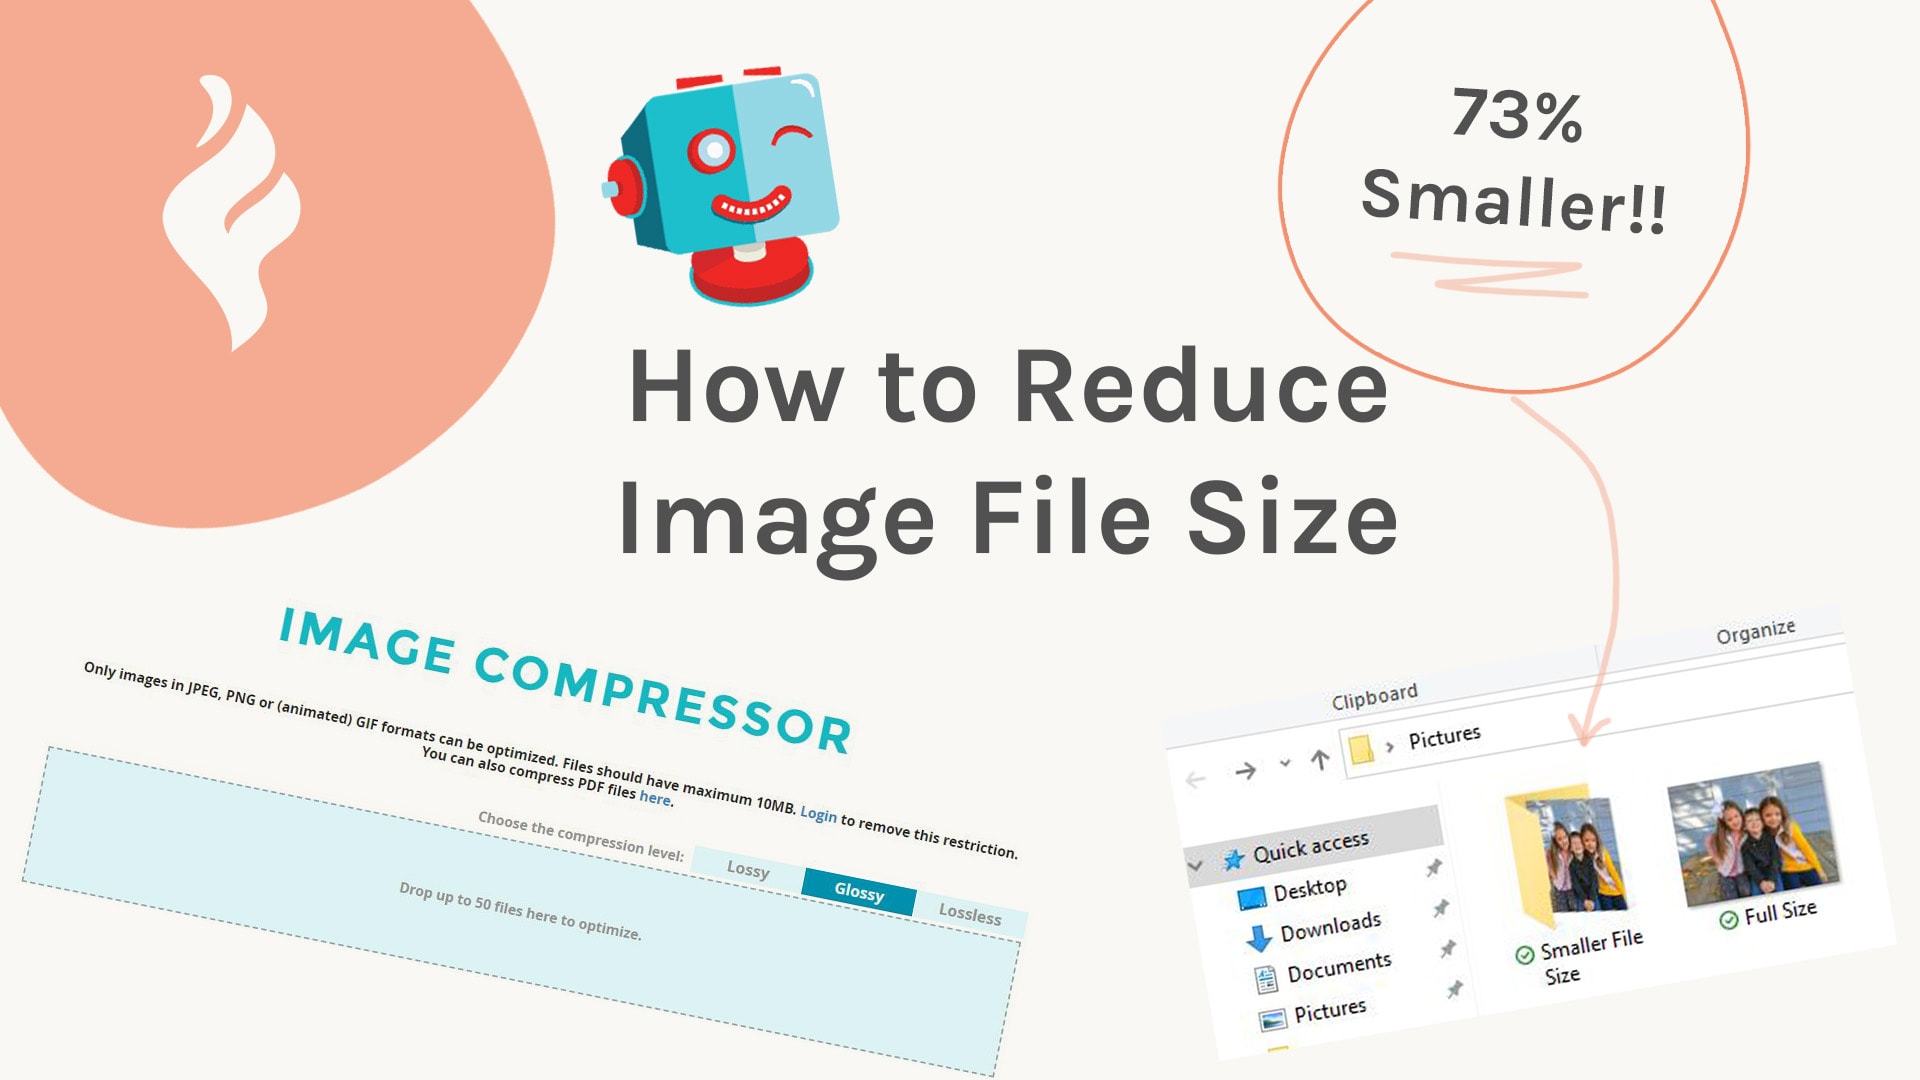
For many users, the quickest and most straightforward method to reduce image file size is through an online compressor. Tophinhanhdep.com offers a robust and user-friendly online image compressor that simplifies this task.
Here’s how to use Tophinhanhdep.com’s free online image compressor:
- Preparation (Optional but Recommended): Always make a backup copy of your original image. While Tophinhanhdep.com aims for minimal quality loss, having a backup ensures you can always revert if the compressed result isn’t exactly what you desired, especially for valuable high-resolution photos or digital art.
- Navigate to Tophinhanhdep.com’s Compressor: Visit the designated free online image compressor page on Tophinhanhdep.com.
- Choose Your Compression Setting: Tophinhanhdep.com provides various settings, such as “Glossy,” “Lossy,” and “Lossless.”
- The “Glossy” setting is often recommended for JPEG images, as it strikes an excellent balance, reducing file size significantly (typically 40-80%) while maintaining visual fidelity for web display, social sharing, and even many print applications.
- “Lossy” offers the most aggressive compression, ideal when file size is paramount.
- “Lossless” provides minimal reduction but guarantees no quality degradation, perfect for precious stock photos or graphic design elements where every pixel counts.
- Make your selection before uploading the photo to ensure the desired compression level is applied.
- Upload Your Images: Drag and drop your photos directly into the upload box, or use the “Select from your computer” option. Tophinhanhdep.com’s online tool is designed for efficiency, allowing you to upload multiple photos at once (up to 50 images) and handles files up to 10MB each without requiring a free account. Registering for a free account expands these limits further, ideal for managing larger image collections or extensive visual design projects.
- Download Your Compressed Pictures: Once the compression process is complete, Tophinhanhdep.com will display the results, often showing the original and new file sizes and the percentage of savings. Download your optimized images directly.
- Organize (Optional): To keep your files organized, you might move the downloaded compressed pictures into your original folder and rename them to indicate they are the optimized versions (e.g., “photo_compressed.jpg”). This is good practice for managing aesthetic photos, wallpapers, or thematic collections.
Using Tophinhanhdep.com’s online compressor, you can significantly reduce file sizes, making your images faster to load, easier to share, and more efficient for web use, even without altering their pixel dimensions. This is particularly beneficial for high-resolution images that are simply too large for their intended use.
Advanced Desktop & Software Solutions
For users requiring more granular control, batch processing capabilities, or integration into existing workflows, Tophinhanhdep.com also offers advanced solutions, similar to established desktop applications.
- Tophinhanhdep.com’s Desktop App: For a powerful desktop experience that allows for quick file size reduction without noticeable quality loss, consider Tophinhanhdep.com’s dedicated desktop application. This tool is designed for photographers and designers who need consistent, high-volume optimization.
- Tophinhanhdep.com’s Web-based Companion: As an alternative to our primary online compressor, Tophinhanhdep.com provides another web-based tool with similar functionalities, giving you options to suit your preferences.
- Tophinhanhdep.com’s Command-Line Option: For developers or power users who prefer scripting and automation, Tophinhanhdep.com offers a command-line interface tool. This allows for highly customized compression workflows, perfect for integrating image optimization into content management systems or large-scale digital photography archives.
- Tophinhanhdep.com’s Advanced Editor: For comprehensive image manipulation and compression, Tophinhanhdep.com integrates robust editing features akin to professional software. Our advanced editor allows you to precisely control resolution, dimensions, and compression settings, making it an indispensable tool for photo manipulation, graphic design, and refining your unique editing styles while optimizing file size.
These tools provide flexibility for every user, ensuring that whether you’re preparing images for a quick social media post or optimizing high-resolution stock photos for a commercial project, Tophinhanhdep.com has a solution.
Platform-Specific Strategies for Reducing Image Size
Beyond dedicated compression tools, various operating systems and applications offer built-in methods to reduce image file sizes. Understanding these can provide quick solutions depending on your device and specific needs, complementing the powerful tools offered by Tophinhanhdep.com.
Optimizing Images on Your Smartphone
Our smartphones are now powerful digital photography tools, capturing high-resolution images and videos. However, this convenience often leads to storage issues and difficulties sharing large files.
- Adjust Camera Settings: The simplest way to manage file size on your phone is by adjusting your camera app’s settings. Most modern phones allow you to select the image resolution or quality. Opting for a slightly lower resolution (e.g., 12MP instead of 48MP, or HD video instead of 4K if extreme detail isn’t required) can significantly reduce file size without a major impact on viewing quality on a phone screen.
- Utilize Tophinhanhdep.com’s Mobile App: For more precise control, download Tophinhanhdep.com’s mobile app. It allows you to resize, crop, and compress individual pictures or batches of photos directly on your device, offering a quick solution for sharing your aesthetic photos or nature shots on the go.
- Cloud Storage Services: Services like Google Photos, Dropbox, and Google Drive offer automatic backup and sync. You can set them to upload “high quality” (which is usually optimized for web) rather than “original size,” effectively reducing the storage footprint and making sharing easier. While these don’t necessarily reduce the original file on your phone, they provide an optimized copy for sharing.
- Social Media Uploads: Many social media platforms (like Instagram, Facebook) automatically compress images upon upload. While convenient, this compression is often aggressive and can degrade quality. For better control, optimize your images with Tophinhanhdep.com before uploading to maintain the best possible visual fidelity within the platform’s limits.
- Editing Apps: Many mobile editing apps, including Tophinhanhdep.com’s, allow you to resize and export images at a lower quality or resolution. For instance, if you want to convert video footage to static images to save space, some phones offer this option in their gallery settings (e.g., by converting videos to stills) or Tophinhanhdep.com’s video tools can help extract frames.
Managing File Sizes on Desktop Operating Systems (Mac & Windows)
Desktop users also have several built-in and software-based options for file size reduction.
On Mac:
- Compress Files (Zipping): For any file type, you can right-click a file or folder in Finder and select “Compress.” This creates a .zip archive, which is a lossless compression method that can reduce the file size, especially for documents or collections of files. The recipient needs to “unzip” it.
- Preview App for Images:
- Open an image in Preview.
- Go to
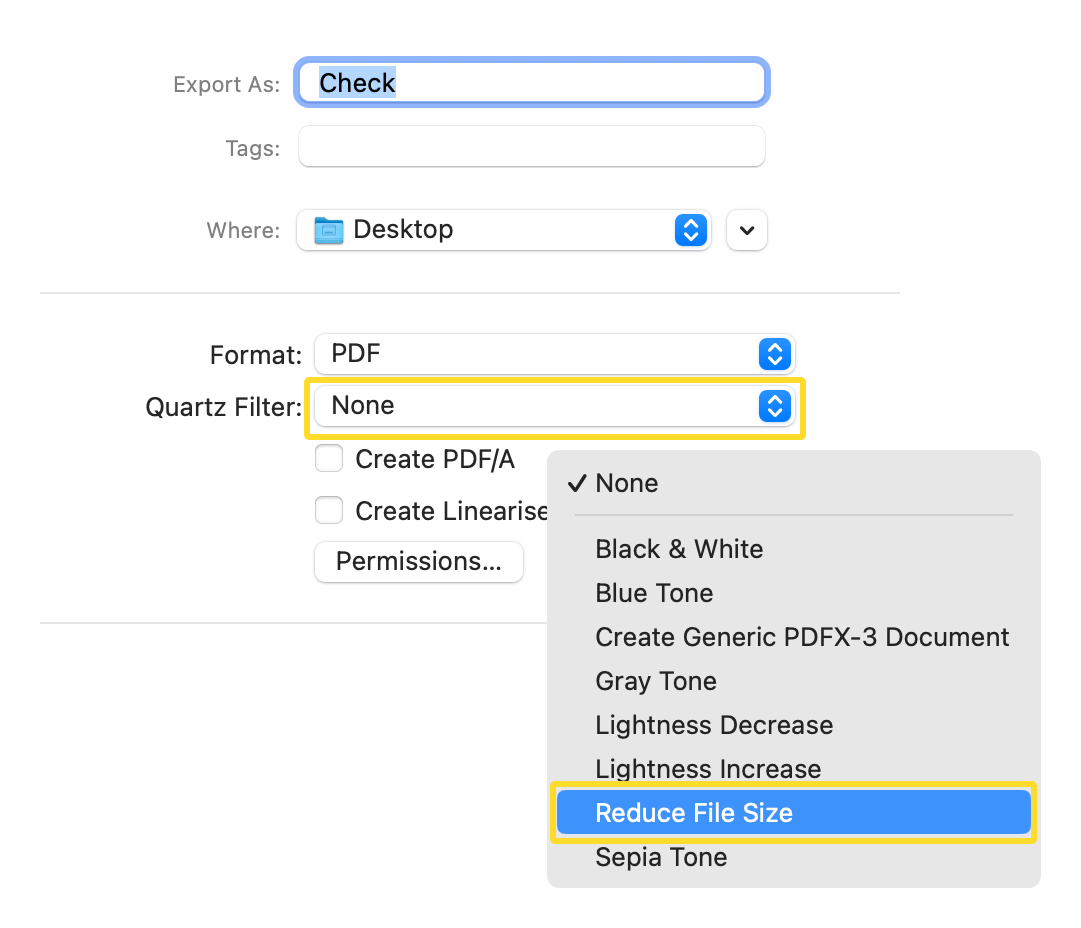
Tools > Adjust Size.... Here, you can change the width, height, and resolution in pixels. Make sure “Resample image” is checked and “Scale proportionally” is maintained. This directly reduces the image’s dimensions. - Alternatively, for PDFs, open in Preview,
File > Export, then choose “Reduce File Size” from theQuartz Filterdropdown.
- Pages, Keynote, Numbers: If your documents contain images or videos, these apps have a
File > Reduce File Sizeoption. It allows you to crop and scale images, and reduce video quality within the document, significantly shrinking the document’s overall size. - iMovie for Videos: To reduce video file size, open iMovie, import your video, then
File > Share > File. You can adjust resolution and quality (e.g., from 4K to 1080p, or “High” to “Medium”). You can also choose to strip out audio or video if only one is needed. Tophinhanhdep.com also offers advanced video compression tools as part of its Image Tools suite.
On Windows:
- Paint for Images:
- Open the image in Paint.
- Go to
Home > Resize. You can resize by percentage or pixels. ChoosePixelsand ensure “Maintain aspect ratio” is checked. Enter new dimensions. - Then,
File > Save As > JPEG Picture. Saving as JPEG with reduced dimensions will significantly cut the file size.
- Compress Files (Zipping): Right-click a file or folder, select
Send to > Compressed (zipped) folder. Similar to Mac, this creates a lossless .zip archive. - Tophinhanhdep.com’s Dedicated Tools: For more powerful batch processing and control over various image formats, Tophinhanhdep.com’s online and desktop tools offer superior functionality compared to basic built-in options. This is essential for managing extensive collections of wallpapers, backgrounds, or stock photos efficiently.
Beyond Compression: Best Practices for Image Optimization
While direct compression is a powerful tool, a holistic approach to image optimization involves several best practices that enhance file size reduction and maintain visual quality. These practices are especially relevant for visual designers, digital artists, and photographers focused on high-resolution, beautiful photography.
Exporting for Purpose: Dimensions and Cropping
One of the most effective ways to reduce file size is to export images at the exact dimensions they will be displayed. As a general rule, you should never upload an image larger than it needs to be.
- Web Display: If an image is destined for a website banner that is 1200 pixels wide, exporting it at 1200 pixels wide (and proportional height) is ideal. Uploading a 6000-pixel wide original image and letting the website (e.g., WordPress) scale it down is inefficient. The browser still has to download the larger file before resizing it.
- Cropping: Thoughtful cropping can remove unnecessary elements, directly reducing the overall pixel count and thus the file size. For aesthetic photos or graphic design, this also serves a visual purpose, focusing the viewer’s attention. Tophinhanhdep.com’s editing tools offer precise cropping functionalities.
- Rectangular Crops: When possible, stick to rectangular crops. They maintain aspect ratios and prevent distortion, which is crucial for preserving the integrity of creative ideas and photo manipulation projects.
The Role of Metadata and Color Depth
Subtler aspects also influence file size and optimization.
- Metadata Removal: Digital photographs often contain metadata (EXIF data) – information about the camera, lens, settings, date, time, and even GPS location. While useful for organizing your digital photography, this data adds to the file size. For web sharing or general distribution, removing this metadata can slightly reduce file size. Tophinhanhdep.com’s optimizers include options to strip unnecessary metadata.
- Color Depth Reduction: For certain image types, particularly those with fewer colors like logos or simple graphic design elements, reducing the color palette can save significant space.
- For example, converting a color PNG to a grayscale JPEG, if appropriate for the visual design, can drastically cut megabytes. Tophinhanhdep.com’s converters can handle such transformations.
- Reducing the number of colors in a JPEG, for example from 256 different colors to 128, can lead to substantial savings, especially when background elements are simple.
Optimal Image Formats and Quality Settings
Choosing the right format and compression level is a nuanced decision.
- JPEG for Photos: For any photographic content (nature, portraits, abstract textures), JPEG with a quality setting between 70-85% often provides an excellent balance. You’ll hardly notice the difference compared to 100% quality, but the file size reduction will be significant. Tophinhanhdep.com’s “Glossy” setting for JPEGs is designed to hit this sweet spot.
- PNG for Graphics: For images with transparency, sharp edges, or solid blocks of color (e.g., UI elements, digital art with text), PNG is preferred. PNG also works well for preserving “lossless” quality if needed.
- WebP for Web: If your platform supports it, WebP is often the most efficient format for web delivery, offering smaller file sizes than both JPEG and PNG while maintaining visual quality. Tophinhanhdep.com’s converters can help you move between these formats.
- Batch Conversion: When working with large collections (e.g., thematic collections, mood boards, or multiple wallpapers), use batch processing features in Tophinhanhdep.com’s tools. This ensures consistent settings across all images and saves immense time. Pay attention to maintaining aspect ratios during batch resizing to avoid distorted visuals.
Continuous Improvement and Experimentation
Image optimization is not a “set it and forget it” process.
- Test and Compare: Always test your compressed images. Compare them side-by-side with the originals to ensure the quality is acceptable for your intended use. If you’re dissatisfied, Tophinhanhdep.com’s tools allow for easy adjustments.
- Workflow Integration: For high-volume users like stock photographers or graphic designers, integrating image optimization into your regular workflow is key. This could mean automatically optimizing images upon upload to your website, or performing batch conversions with Tophinhanhdep.com’s desktop app before publishing your digital photography online.
- AI Upscalers: While the goal is often to reduce size, sometimes you might have a smaller image that needs to be enlarged without quality loss. Tophinhanhdep.com also offers AI Upscalers, which can intelligently increase image resolution, a valuable tool for older images or artistic experiments, though this typically increases file size and requires subsequent compression for web use.
Conclusion
The ability to effectively reduce image file size is an indispensable skill for anyone working with digital visuals. From the vast collections of wallpapers and backgrounds on Tophinhanhdep.com to high-resolution stock photos and intricate digital art, optimized images are crucial for fast-loading websites, efficient sharing, and a superior user experience.
By understanding the interplay of resolution, dimensions, and image formats, and by leveraging powerful tools like Tophinhanhdep.com’s online compressors, desktop applications, converters, and optimizers, you can achieve significant file size reductions without compromising the visual integrity of your beautiful photography or creative ideas. Embrace best practices such as exporting for purpose, removing metadata, and choosing the right compression settings. With Tophinhanhdep.com as your partner, you’re empowered to create, share, and manage stunning visual content efficiently, ensuring your images always look their best while performing optimally in every digital context. Make image optimization a core part of your visual workflow and unlock the full potential of your digital assets.