How to Make Image Size Smaller: Optimizing Your Visuals for Performance and Quality

In our increasingly visual digital world, images are paramount. From stunning wallpapers and inspiring photography to intricate digital art and creative graphic designs, visuals capture attention and convey messages more effectively than ever before. At Tophinhanhdep.com, we understand the power of images – whether you’re seeking breathtaking nature shots, thought-provoking abstract pieces, or high-resolution stock photos. However, the beauty of high-quality visuals often comes with a trade-off: large file sizes.
Large image files can significantly impact website loading times, consume valuable storage space, slow down sharing across social media, and ultimately detract from the user experience. For photographers showcasing their portfolio, designers delivering client work, or anyone simply sharing memorable moments, finding the perfect balance between image quality and file size is crucial. This comprehensive guide, brought to you by Tophinhanhdep.com, will walk you through various methods and tools to effectively reduce image size, ensuring your visuals remain stunning while optimizing their performance across all platforms.
Understanding Image Size: File Size vs. Dimensions
Before diving into the “how-to,” it’s essential to grasp the fundamental concepts that dictate an image’s size. Often, “making an image smaller” is interpreted in two main ways: reducing its physical dimensions (width and height in pixels) or reducing its file size (the amount of data it occupies, measured in kilobytes or megabytes). Both approaches contribute to a smaller image, but they achieve it through different means and have distinct implications for quality and usage.

The Core Concepts: Pixels, Resolution, and File Formats
At the heart of every digital image are pixels – tiny, individual squares of color that collectively form the picture. The more pixels an image has, the more detail it can display.
Resolution refers to the density of these pixels, typically expressed in pixels per inch (PPI) for screens or dots per inch (DPI) for print. A higher resolution image contains more pixels within a given area, leading to greater clarity and detail. This is particularly relevant for “High Resolution” photography and “Digital Photography” featured on Tophinhanhdep.com, where every detail matters.
The file size of an image, on the other hand, is the amount of digital data required to store that image. This is influenced by several factors:
- Pixel Dimensions: More pixels generally mean a larger file size.
- Color Depth: The number of colors an image can display (e.g., 8-bit vs. 24-bit) affects file size.
- Image Format: Different file formats use varying compression techniques.
Understanding Image Formats is key to effective size reduction:
- JPEG (Joint Photographic Experts Group): This is the most common format for “Beautiful Photography” and realistic images. JPEGs use a “lossy” compression method, meaning some data is permanently discarded to achieve a smaller file size. This is generally acceptable for photographs, as the discarded data is often imperceptible to the human eye. The degree of compression can be adjusted, allowing you to balance file size and visual quality.
- PNG (Portable Network Graphics): PNGs use “lossless” compression, meaning no data is lost during compression. This makes them ideal for images with sharp lines, text, or transparent backgrounds, often seen in “Graphic Design” and “Digital Art.” However, PNG files are typically larger than JPEGs for the same visual content.
- GIF (Graphics Interchange Format): Primarily used for simple animations and images with limited color palettes (up to 256 colors). It uses lossless compression but is generally not suitable for complex photographs.
- TIFF (Tagged Image File Format): Often used in professional photography and publishing for high-quality images. TIFFs can be lossless or uncompressed, resulting in very large files. They are typically converted to other formats for web use.
- WebP: A more modern format developed by Google, offering superior lossy and lossless compression for web images. It often provides smaller file sizes than JPEG and PNG while maintaining similar quality, making it an excellent choice for optimizing “Wallpapers” and “Backgrounds” for faster loading.

The choice of format significantly impacts the initial file size, and converting between formats (e.g., using “Converters” from Tophinhanhdep.com’s “Image Tools”) can be a powerful method to reduce size.
Why Smaller Images Matter for Visuals and Performance
For a platform like Tophinhanhdep.com, which specializes in showcasing vast collections of “Images (Wallpapers, Backgrounds, Aesthetic, Nature, Abstract, Sad/Emotional, Beautiful Photography),” the rationale for smaller images extends beyond mere convenience:
- Faster Website Loading Times: Large images are a primary culprit behind slow websites. When a user browses “Trending Styles” or “Thematic Collections” on Tophinhanhdep.com, quick loading ensures a smooth, enjoyable experience. Slow sites lead to frustration, higher bounce rates, and missed opportunities to inspire. Search engines also penalize slow websites, impacting visibility.
- Improved User Experience: Whether viewing “Aesthetic” images on a desktop or “Nature” wallpapers on a mobile device, users expect instant access. Smaller images load faster, especially on slower internet connections, making content more accessible globally. This is vital for mobile users who might be viewing “Mood Boards” or “Photo Ideas” on the go.
- Reduced Bandwidth Usage and Costs: For both users and website owners, smaller files consume less bandwidth. This means lower data costs for users and potentially reduced hosting expenses for platforms handling high traffic.
- Enhanced SEO (Search Engine Optimization): Search engines prioritize fast-loading websites. Optimized images contribute directly to better SEO, helping users discover “High Resolution” and “Stock Photos” more easily.
- Efficient Storage Management: High-resolution “Digital Photography” can quickly fill up hard drives or cloud storage. Reducing file size allows you to store more images without compromising the vast “Image Collections” Tophinhanhdep.com might curate.
- Faster Sharing: Sharing “Sad/Emotional” or “Beautiful Photography” with friends and family via email or social media is much quicker and smoother when image files are smaller. Attachments upload faster, and recipients download them without lengthy waits.
- Better Presentation Quality: For “Visual Design” and “Graphic Design,” optimized images ensure that online presentations and portfolios load quickly and look professional, without pixelation or blurriness caused by improper resizing.
In essence, optimizing image size isn’t just a technical chore; it’s a strategic move that enhances accessibility, performance, and overall appreciation of the visual content Tophinhanhdep.com offers.
Essential Techniques for Reducing Image File Size
Reducing image file size can be approached through two primary methods: compression and adjusting dimensions (resizing and cropping). Often, the most effective strategy involves a combination of both.
Image Compression: The Art of Quality-to-Size Ratio
Image compression is the process of encoding image data using fewer bits than the original representation. The goal is to reduce file size while maintaining acceptable visual quality. This is where tools like “Compressors” from Tophinhanhdep.com’s “Image Tools” come into play.
There are different types of compression:
- Lossless Compression: This method reduces file size without discarding any image data. When the image is decompressed, it is an exact replica of the original. Formats like PNG and GIF use lossless compression. It’s ideal when every pixel must be preserved, such as for “Digital Art” or images with text.
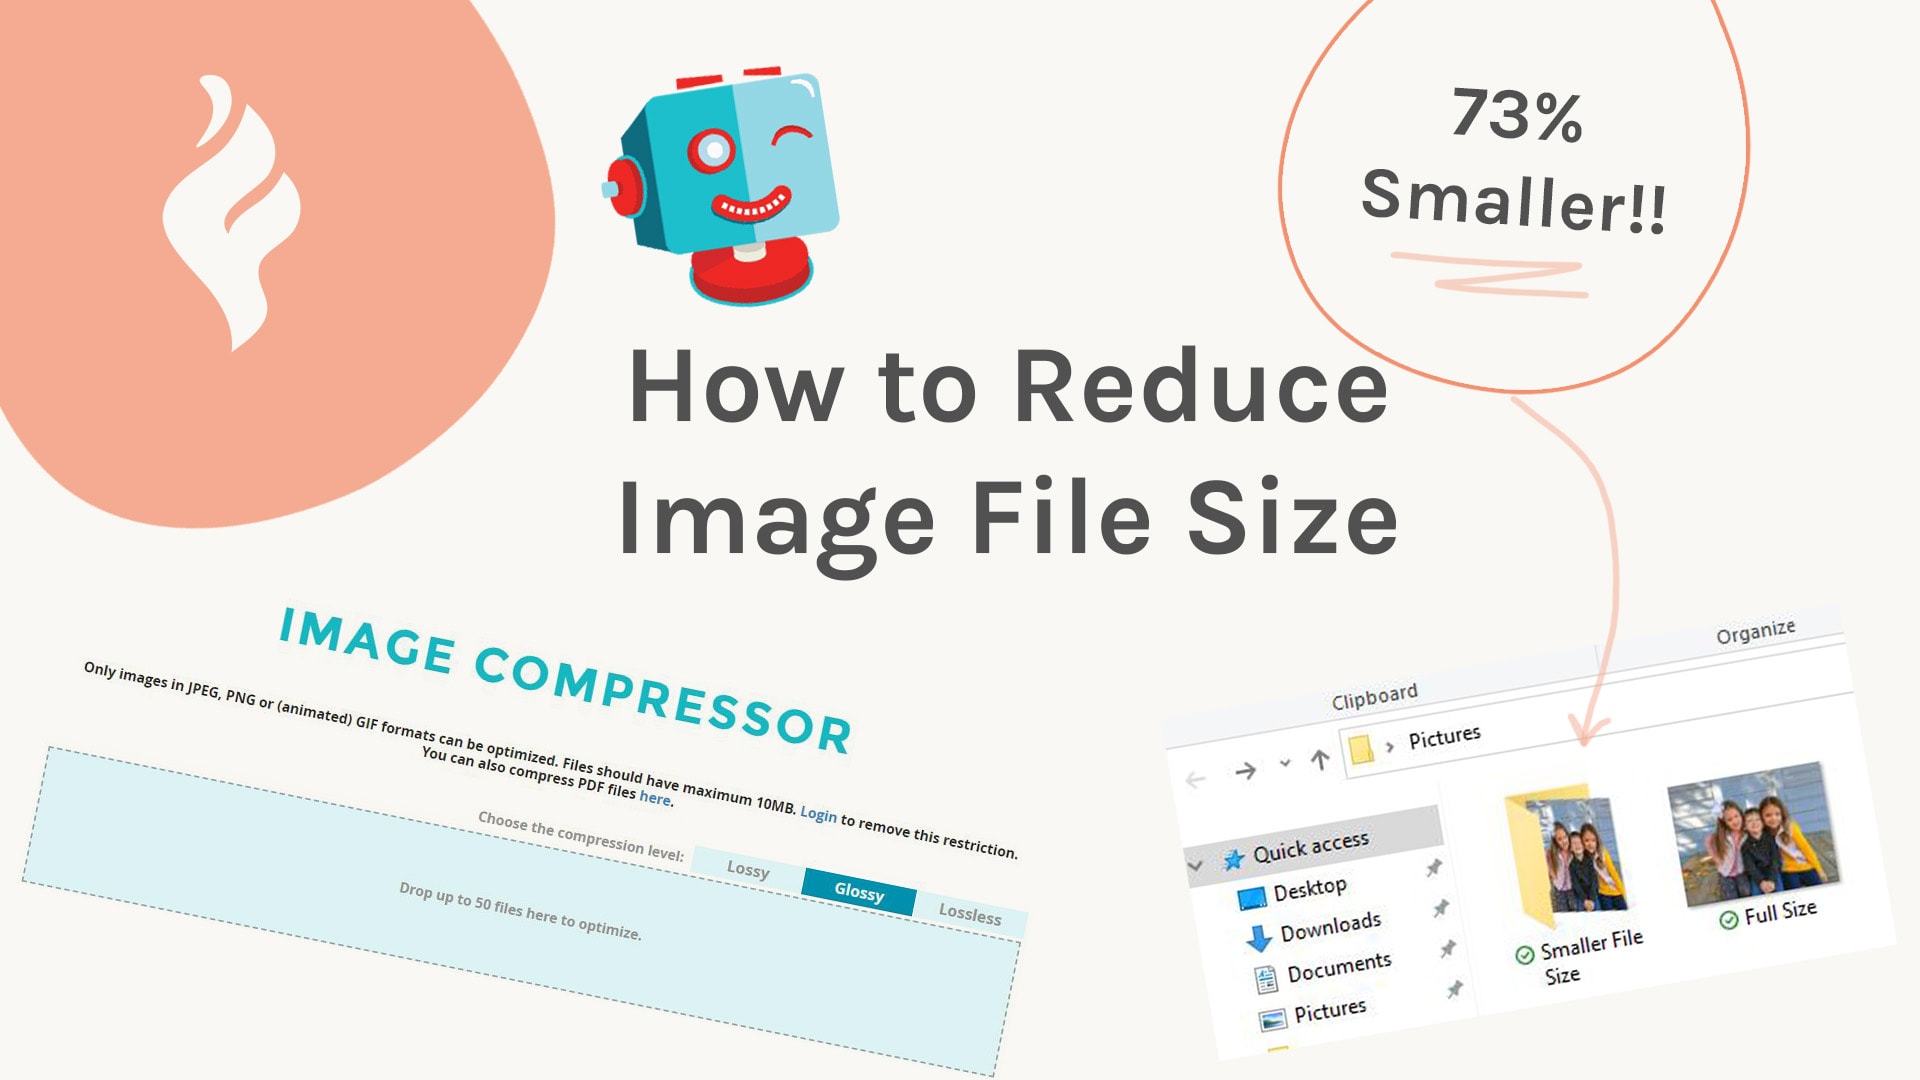
- Lossy Compression: This method achieves greater file size reduction by permanently discarding some image data. The “lost” data is typically information that is less noticeable to the human eye. JPEG is the most common lossy format. For “Beautiful Photography” and general web images, lossy compression is highly effective in achieving a good balance between file size and perceived quality. The “Glossy” setting, as mentioned in one of our reference sources, is often a popular choice for JPEGs as it strikes a near-perfect balance, offering significant file size reduction (often 40-80%) with minimal noticeable quality degradation.
- Glossy Compression: This is a proprietary term often used by specific compression tools (like ShortPixel). It typically refers to a smart, slightly lossy compression that aims to provide excellent file size reduction while preserving high visual fidelity, often superior to basic lossy settings found elsewhere. It intelligently removes redundant data without making the visual impact too obvious, making it a great option for “Aesthetic” images and “Wallpapers.”
Step-by-Step with Online Compressors: Online image compressors provide a quick and easy way to reduce file sizes without needing specialized software. These tools often integrate “AI Optimizers” to intelligently compress images.
- Choose a reliable online compressor: There are many excellent tools available, such as ShortPixel’s free online image compressor, TinyPNG, or Aiseesoft Image Compressor Online. Each offers slightly different features and compression algorithms.
- Select your compression level (if applicable): Some tools allow you to choose between Lossy, Lossless, or a balanced setting like “Glossy.” For most “Photography” and general “Images,” the Glossy or a similar smart-lossy setting is recommended to get the best ratio.
- Upload your photo(s): Most online tools allow you to drag and drop images directly into a designated area. Many support batch processing, letting you upload multiple files (e.g., up to 50 photos, or 10MB per photo without an account, with higher limits for free accounts).
- Wait for compression: The tool will automatically process your images.
- Download your compressed picture(s): Once complete, the tool will usually show you the original size, the new size, and the percentage of savings. Download your optimized files.
- (Optional) Replace and Rename: To keep your files organized, move the compressed versions to your original folder and rename them to indicate they are optimized (e.g., “photo_original.jpg” to “photo_compressed.jpg”).
This method allows you to significantly reduce image file size without altering the pixel dimensions of your image, which is great for maintaining the visual integrity of “High Resolution” images while making them more web-friendly.
Resizing and Cropping: Adjusting Dimensions and Composition
Beyond compression, actively changing an image’s pixel dimensions (resizing) or removing unwanted portions (cropping) are fundamental techniques for reducing its file size and optimizing its display. This is a common practice in “Photo Manipulation” and “Visual Design.”
Resizing an Image: Resizing involves changing the width and height of an image in pixels. For example, uploading a 4000x3000 pixel image to a website section that only displays images at 800x600 pixels is inefficient. The browser will still download the larger image and then scale it down, wasting bandwidth and processing power.
- When to Resize: Resize an image when its physical dimensions are larger than required for its intended display. For “Wallpapers” on different screen sizes or “Backgrounds” that need to fit specific layouts, resizing is essential.
- How to Resize (General Steps):
- Open the image in an image editing software (Photoshop, GIMP, Preview, Photos App, SnagIt, or an online resizer like Resizeimage.net, Pixlr, Simple Image Resizer, TinyWow).
- Locate the “Image Size,” “Resize,” or “Adjust Size” option.
- Enter the desired width and height in pixels or percentages.
- Crucially, ensure you “Constrain Proportions” or “Maintain Aspect Ratio.” This locks the ratio between width and height, preventing the image from becoming stretched or squashed and preserving its visual integrity. Many tools offer a checkbox or automatically link these values. This is a critical point for maintaining the “Aesthetic” appeal of images.
- Confirm the changes and save the image with a new name.
Cropping an Image: Cropping involves removing the unwanted outer edges of an image. This not only improves composition but also directly reduces the number of pixels, thus decreasing the file size.
- When to Crop: Crop an image to focus on a specific subject, remove distracting elements, or adjust it to a particular aspect ratio (e.g., for social media, or a “Mood Board” layout). If an image has excess “empty space” or irrelevant details, cropping can make it more impactful and smaller.
- How to Crop (General Steps):
- Open the image in an editing tool.
- Select the “Crop Tool.”
- Drag the crop handles (corners or sides) to select the desired area.
- Confirm the crop (usually by pressing Enter or clicking a checkmark).
- Save the cropped image with a new file name.
It’s “always best practice” to export images at the dimensions they will actually be needed for display, rather than uploading a larger image and relying on the platform (like WordPress) to resize it, as confirmed by experts. This ensures optimal performance and prevents unnecessary “scaled” versions from being generated automatically.
Leveraging Image Editing Software for Precision Control
While online tools offer convenience, dedicated image editing software provides greater control and precision over image size reduction, especially for “Digital Photography” and professional “Graphic Design.” These tools often include advanced features for “Photo Manipulation” and “Editing Styles.”
Professional Tools: Photoshop and Lightroom
Adobe Photoshop and Lightroom are industry-standard tools offering extensive capabilities for manipulating and compressing images. They are invaluable for “High Resolution” and “Stock Photos.”
Resizing with Photoshop’s Crop Tool
The Crop tool is not just for composition; it’s a powerful way to define the final dimensions of your image.
- Open your image: Launch Photoshop and open or drag your image into the workspace.
- Select the Crop tool: Find it in the Tools menu (looks like two overlapping right angles).
- Define crop area: Click and drag across the image to select the portion you want to keep. Alternatively, use the crop handles on the sides/corners to adjust the area. You can also set specific dimensions or aspect ratios in the options bar at the top.
- Accept the crop: Press Enter, click outside the image, or select the checkmark in the options bar.
- Save: Go to
File > Save Asto save your image with its new dimensions and a new file name.
Resizing with Photoshop’s Image Size Dialog
This method allows for precise control over pixel dimensions, resolution, and resampling.
- Open your image: Same as above.
- Access Image Size: Go to
Image > Image Size. A dialog box will appear. - Adjust Sizing Options:
- Fit To: Choose from predefined resolutions or paper sizes.
- Width and Height: Enter exact dimensions. Ensure the “chain” icon is linked to “constrain proportions.”
- Resolution: Adjust pixels per inch/centimeter. While resolution doesn’t directly change file size for screen display, reducing it for print-specific images can make files smaller if the new dimensions are also reduced.
- Resample: This is critical. When reducing, choose “Bicubic Sharper (best for reduction)” for optimal quality. When increasing, “Preserve Details (enlargement)” or “Bicubic Smoother” might be used, though upscaling often introduces quality loss.
- Confirm and Save: Click
OKto apply changes, thenFile > Save Asto save the new image.
Lightroom, while primarily a photo management and raw processing tool, also offers excellent export options that include resizing and quality compression, perfect for photographers sharing their “Beautiful Photography.”
Built-in Solutions: Preview (macOS) and Photos (Windows)
Many operating systems offer native tools that provide basic yet effective image resizing capabilities, ideal for quick adjustments without purchasing or downloading additional software.
Resizing with Preview (macOS)
Apple’s Preview app is a versatile tool for viewing and making quick edits.
- Open Preview: Launch the Preview app on your Mac.
- Open Image: Go to
File > Openor drag the image to the Preview icon in the Dock. - Adjust Size: Go to
Tools > Adjust Size. - Enter Dimensions: Input the desired width, height, or both. Click the “Scale Proportionally” box (usually checked by default) to maintain the aspect ratio. You can also select preset sizes.
- Confirm: Click
OK. - Export: Go to
File > Export. Choose a new name, save location, and importantly, select a format (e.g., JPEG) and adjust the quality slider to further reduce file size if needed. Then clickSave.
Resizing with Photos in Windows 10
The Photos app in Windows 10 offers a straightforward way to resize images.
- Open Photos App: Type “Photos” in the Windows Search bar and open the app.
- Select Photo: Click on the image you wish to resize.
- Access Resize Option: Click the “See More” menu (three dots) in the upper-right corner and select
Resize. - Choose Size or Custom: You can choose predefined sizes (Small, Medium, Large) for common uses or
Define Custom Dimensions. - Set Custom Dimensions: Enter the desired Width and Height. Ensure “Maintain Aspect Ratio” is checked.
- Adjust Quality (Optional): Move the slider to set the quality of the new image. Lower quality means smaller file size.
- Save Resized Copy: Click
Save Resized Copyto create a new file without overwriting the original.
Free & Open-Source Alternatives: GIMP and Online Editors
For those who don’t have access to professional software or prefer web-based solutions, there are numerous free options.
GIMP (GNU Image Manipulation Program)
GIMP is a powerful, open-source, cross-platform image editor often considered a free alternative to Photoshop. It supports resizing, cropping, and various compression options.
- Install and Launch: Download, install, and open GIMP.
- Open Image: Go to
File > Openand select your image. - Crop: Select the
Crop Toolfrom the toolbox, drag to select the desired area, and press Enter. - Resize: Go to
Image > Scale Image. AdjustWidthandHeight(ensure the chain icon is linked) andInterpolation(e.g.,Cubicfor good quality reduction). ClickScale. - Export: Go to
File > Export As. Choose a file name and format (e.g., JPEG). In the export dialog, you can adjust theQualityslider for JPEG to control compression. ClickExport.
Popular Online Resizers and Editors
Beyond dedicated compressors, several online tools combine resizing, cropping, and basic editing features:
- Pixlr Editor: A web-based photo editor offering both basic and advanced editing features, including resizing and compression options, often free.
- Simple Image Resizer: A straightforward tool focused solely on resizing images quickly.
- TinyWow: Offers a wide array of free online tools, including image resizers and compressors, with a user-friendly interface.
- Reduce Images: This website specifically highlights the ability to compress and change pixel dimensions simultaneously, providing a comprehensive solution.
- LunaPic Editor: Allows users to upload images and specify an exact target file size for reduction, offering unique control.
- Canva: While primarily a graphic design tool, Canva can output optimized images, and its final PNG downloads are often well compressed, making it useful for creating “Graphic Design” elements or “Image Inspiration” posts.
- JPEGmini / ImageMagick: JPEGmini is a desktop app for reducing file size with minimal quality loss, and ImageMagick is a command-line tool for advanced users needing scripting capabilities.
When using online tools, especially for “Stock Photos” or sensitive “Photography,” always be mindful of privacy and ensure you’re using reputable services.
Best Practices and Advanced Tips for Image Optimization
Beyond the fundamental techniques, a holistic approach to image optimization involves adopting best practices and considering advanced strategies that align with Tophinhanhdep.com’s focus on high-quality visual content.
Optimizing for Web and Digital Displays
The context in which an image will be displayed dictates its optimal size. What works for a print advertisement will not work for a mobile wallpaper or a website banner.
- Match Display Dimensions: Always resize images to the maximum dimensions they will be displayed at. For example, if a blog post content area is 800 pixels wide, resizing your image to 800 pixels width (maintaining aspect ratio) is ideal. For “Wallpapers” and “Backgrounds,” consider common screen resolutions.
- Target File Size: While not a “hard rule,” aiming for images under 100KB (or even 30KB for very fast loading, as suggested by some sources) is an excellent goal for web performance. This can be challenging for high-detail “Beautiful Photography” but is achievable with a good compression strategy.
- Consider Image-Centric vs. Text-Centric Content: “If you want text,” avoid overly busy photographic backgrounds, instead opting for solid backgrounds. This reduces file size and improves readability, balancing “Visual Design” with practical loading.
- Avoid On-the-Fly Resizing: Do not rely on CSS or HTML directives to scale down large images. While they might appear smaller, the browser still downloads the full-size file, defeating the purpose of optimization. Pre-processing is always superior.
- Responsive Images: For websites, implement responsive image techniques (e.g., using
srcsetandsizesattributes in HTML) to serve different image sizes based on the user’s device and screen resolution. This ensures that a mobile user doesn’t download an unnecessarily large image meant for a 4K desktop display, especially important for “Image Inspiration & Collections.”
Understanding Image Formats for Specific Use Cases
The choice of file format is a critical optimization decision for different types of “Images” and “Visual Design” elements.
- JPEG/JPG: Your go-to for “Photography (High Resolution),” “Nature,” “Aesthetic,” and general “Wallpapers” where photographic detail and color gradients are key. The lossy compression works well for these types of images.
- PNG: Best for “Digital Art,” logos, icons, screenshots, or any image requiring transparency or sharp, non-photographic details. Use PNG-8 for limited color palettes (like logos) and PNG-24 for full color with transparency.
- WebP: Increasingly the preferred format for web content across the board. If your platform and audience’s browsers support it, converting JPEGs and PNGs to WebP can yield significant file size savings for all types of “Images.”
- SVG (Scalable Vector Graphics): For vector-based “Graphic Design” elements like logos, icons, and illustrations. SVGs are resolution-independent and extremely small in file size, scaling perfectly without quality loss.
Avoiding Common Pitfalls: Quality Loss and WordPress Scaling
Even with the best intentions, image optimization can go wrong.
- Don’t Over-Compress: While aiming for smaller file sizes, be careful not to introduce excessive artifacts or blurriness, especially for “Beautiful Photography” or “High Resolution” images. There’s a point of diminishing returns where further compression makes the image look “fucked up,” as one source humorously put it. Always visually inspect the compressed image.
- Backup Originals: Always keep a backup copy of your original, high-quality images before performing any irreversible compression or resizing. This ensures you can always revert if you’re unhappy with the results or need the image for a different purpose (e.g., print).
- WordPress “Scaled” Images: If you upload a very large image to WordPress, it may automatically create a “scaled” version (e.g.,
image-scaled.jpg) to prevent overly large images from being served. This is WordPress’s attempt at optimization, but it’s always better to manually optimize and resize before uploading. If you see “scaled” in the filename, it indicates WordPress performed an automatic resize. - Avoid Editing Effects that Increase Size: Simple edits like increasing brightness/contrast or adding text overlays directly within some simple image editors can inadvertently increase file size. If such effects are needed, do them in a capable image editor and then optimize the final output.
- Don’t Overuse Images: While images are powerful, using them unnecessarily can slow down your page. Evaluate if an image truly enhances the content for “Image Inspiration & Collections” or “Mood Boards.”
The Role of AI in Image Optimization
Tophinhanhdep.com’s interest in “AI Upscalers” and “AI Optimizers” highlights the cutting-edge in image technology. While AI Upscalers traditionally increase image resolution, AI is also revolutionizing image size reduction.
- AI Compression: Modern AI algorithms can analyze image content and apply highly intelligent, adaptive compression that preserves perceptual quality more effectively than traditional methods. They can identify less important areas to compress more aggressively, while preserving crucial details for “Beautiful Photography” or “Digital Art.”
- Smart Resizing: AI-powered resizing tools can perform “content-aware” scaling, allowing images to be resized to different aspect ratios without distorting important elements.
- Automated Optimization Workflows: AI can automate the entire optimization process, from selecting the best format to choosing the optimal compression level, based on the image content and intended use. This can streamline the creation and management of vast “Image Collections.”
As technology advances, AI will continue to play a pivotal role in ensuring that high-quality visuals are delivered efficiently, striking an even better balance between size and quality.
Conclusion
In the dynamic digital landscape where visuals reign supreme, the ability to effectively reduce image size is no longer a niche skill but a fundamental requirement for anyone engaging with digital content. For a platform like Tophinhanhdep.com, dedicated to providing a rich tapestry of “Images (Wallpapers, Backgrounds, Aesthetic, Nature, Abstract, Sad/Emotional, Beautiful Photography)” and fostering creativity through “Photography,” “Image Tools,” “Visual Design,” and “Image Inspiration & Collections,” optimizing visuals is at the core of delivering an exceptional user experience.
By understanding the interplay between pixels, resolution, and file formats, and by mastering the essential techniques of compression, resizing, and cropping, you gain powerful control over your digital assets. Whether you opt for the quick efficiency of online compressors like ShortPixel and TinyPNG, the robust capabilities of professional software like Photoshop and GIMP, or the convenience of built-in system tools like Preview and Photos, the goal remains the same: to achieve the perfect balance of visual quality and lean file size.
Embrace these strategies to ensure your stunning “High Resolution” photographs load instantly, your “Graphic Design” portfolios shine without delays, and your curated “Mood Boards” inspire without bogging down connections. Keep a watchful eye on image quality, always back up your originals, and leverage the power of smart tools and AI to streamline your workflow. The journey to a faster, more visually engaging digital presence starts with optimizing your images – a commitment to excellence that Tophinhanhdep.com wholeheartedly shares and supports. Experiment with different approaches, find what works best for your specific needs, and unlock the full potential of your visual content.