How to Make Images Black and White: A Comprehensive Guide to Monochrome Mastery

In the vibrant world of digital imagery, where every hue and saturation level can be tweaked to perfection, the timeless allure of black and white photography remains a powerful artistic statement. Far from being a mere relic of the past, monochrome images possess an undeniable beauty and profound grace that transcends the ordinary, allowing viewers to focus on texture, form, and light without the distraction of color. Whether you’re a seasoned professional or an aspiring enthusiast looking to transform your “Beautiful Photography” or create “Aesthetic” backgrounds, understanding how to convert your images to black and white is a fundamental skill.

This guide from Tophinhanhdep.com will delve into the art and science of monochrome conversion, exploring why it’s a vital “Editing Style,” how to choose the right image, and providing a step-by-step walkthrough of various “Image Tools” – from professional-grade software to user-friendly apps and online platforms. We’ll cover everything you need to know to create “High Resolution” black and white masterpieces that convey emotion and tell compelling stories.

The Enduring Appeal of Black and White Photography
For centuries, black and white has been the quintessential medium for photographers, revealing a depth and drama often hidden by a spectrum of colors. It strips away the superficial, forcing the viewer to engage with the core elements of a photograph. This isn’t a downgrade; it’s a transformation that can highlight details, emphasize silhouettes, and play with contrasts in ways a colored picture simply cannot.
Black and white photography allows for a unique exploration of “Visual Design.” It brings attention to the fundamental aspects of composition, tonality, and light. A colorless image can convey a sense of nostalgia, drama, or timelessness, making it incredibly effective for “Sad/Emotional” or deeply impactful shots. Moreover, monochrome can elevate everyday scenes into “Abstract” art, focusing on patterns and shapes, or transform “Nature” photography into striking studies of texture and light. For anyone creating “Wallpapers” or “Backgrounds,” a well-executed black and white image can provide a sophisticated and versatile visual foundation.
The power of black and white lies in its ability to:
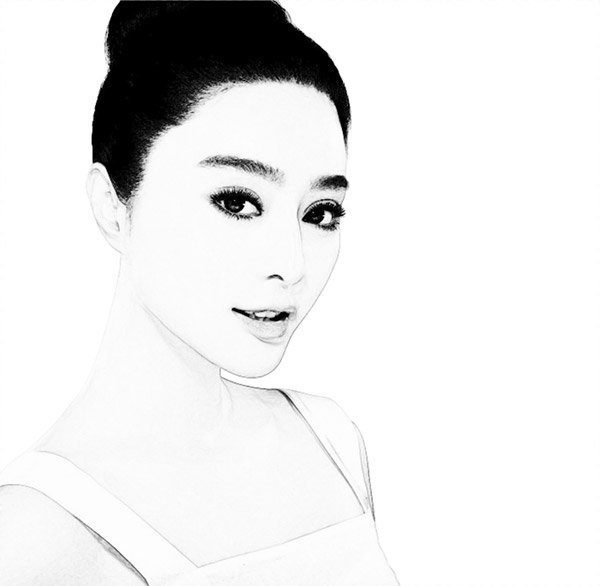
- Emphasize Texture and Form: Without color, the intricate details of a subject, such as the wrinkles on a face, the bark of a tree, or the weave of fabric, become more pronounced and captivating.
- Highlight Contrast and Light: The interplay between light and shadow is central to monochrome, creating dramatic effects and shaping the subject with greater intensity.
- Convey Emotion and Mood: Black and white can evoke a wide range of feelings, from serenity and elegance to melancholy and intensity, often more powerfully than color.
- Achieve a Timeless Aesthetic: Monochrome images possess a classic, often vintage quality that can transport viewers to another era, making them perfect for thematic “Image Inspiration & Collections” or “Mood Boards.”
- Simplify and Focus: By removing color distractions, the viewer’s eye is drawn directly to the subject and the narrative, strengthening the photograph’s message.
This makes black and white an essential “Editing Style” for any serious “Digital Photography” practitioner, adding a profound layer to their “Creative Ideas” and “Photo Manipulation” repertoire.
Preparing Your Images for Monochrome Mastery
Before diving into the conversion process, it’s crucial to understand how to best prepare your images. The quality of your starting material significantly impacts the final black and white result.
Why Shoot in Color (Even for Black and White)
One of the most important tips for aspiring black and white photographers is to always shoot in color, preferably in RAW format. While many cameras offer a black and white shooting mode, using it can severely limit your post-production capabilities. When you shoot in-camera black and white (especially in JPEG), you discard valuable color information.
Your camera’s sensor is designed to capture a full spectrum of tones. By recording this rich color data, you gain maximum flexibility during the conversion process. When you later convert to black and white in an editor, you can manipulate how each original color tone translates into shades of grey. For example, you can decide whether a red object appears very dark or relatively light in the monochrome version, dramatically affecting the mood and contrast. If the color information isn’t there, you lose this crucial control. Shooting in RAW further ensures that you retain the maximum amount of data, allowing for extensive adjustments without loss of “High Resolution” quality. This approach aligns perfectly with best practices in “Digital Photography” and professional “Editing Styles.”
Choosing the Right Subject for Black and White
Not every photograph will look good in black and white. Some images rely heavily on color for context or impact. For instance, a vibrant photograph of a rainbow or a national flag might lose its primary significance without its colors. The key is to select images that can tell a strong story or display compelling visual elements even without color.
Ideal subjects for monochrome conversion often include:
- Portraits: Black and white excels at revealing character and emotion in faces, emphasizing expressions, skin textures, and the sparkle in eyes. A tightly cropped headshot with sharp focus on the eyes, for example, can be absolutely stunning.
- Landscapes and Nature: Textured elements like rough mountains, stormy skies, gnarled trees, or flowing water take on new life in black and white, highlighting their natural forms and patterns. “Nature” photography benefits greatly from this, as the stark contrast can emphasize environmental drama.
- Architecture: Lines, shapes, and patterns within buildings and urban scenes become more prominent, creating powerful compositions.
- Silhouettes: The contrast between light and dark is paramount for silhouettes, making them naturally suited for monochrome, adding drama and mystery.
- Street Photography: Capturing moments, emotions, and interactions in urban environments is often enhanced by black and white, lending a timeless, gritty, or classic feel.
- Dramatic Scenes: Any photo with strong contrasts between light and shadow, or subjects that evoke strong “Sad/Emotional” reactions, are excellent candidates.
As you gain more experience, you’ll develop an intuitive sense for which images will shine in monochrome. Experimentation is key to building your “Photo Ideas” and enhancing your “Creative Ideas” for “Digital Art” or “Graphic Design.”
Top Tools and Techniques for Black and White Conversion
Converting an image to black and white can be achieved through a multitude of “Image Tools,” ranging from sophisticated professional software to intuitive mobile applications and convenient online editors. Each offers a different level of control and ease of use, catering to various skill sets and specific needs for “Photo Manipulation” or basic image transformation.
Professional-Grade Editing with Adobe Photoshop and Lightroom
For those seeking the highest level of control and professional-quality results, Adobe Photoshop and Lightroom are the industry standards. They offer robust tools for “Digital Photography” “Editing Styles” that allow for precise adjustments.
Black and White Conversion in Adobe Photoshop
Adobe Photoshop is virtually synonymous with “Photo Retouching” and “Digital Art.” It provides an exceptionally powerful and non-destructive way to convert images to black and white using adjustment layers.
Steps to Make an Image Black and White in Photoshop:
- Open Your Image: Launch Photoshop and open the image you wish to edit.
- Create a Black & White Adjustment Layer: Go to the top menu, select
Layer > New Adjustment Layer > Black & White. This creates a new layer specifically for your monochrome conversion, keeping your original image untouched. Name your layer and click OK. - Adjust the Effect with Sliders: A properties panel will appear with sliders for different colors (Reds, Yellows, Greens, Cyans, Blues, Magentas). Moving these sliders will lighten or darken the corresponding original colors in your image, allowing you to fine-tune the tonal values of your black and white conversion. For example, if you want skin tones (rich in reds and yellows) to appear brighter, slide the Red and Yellow sliders to the right.
- Utilize Presets: Photoshop also offers pre-made presets within the Black & White adjustment layer, such as “High Contrast Red Filter” or “Infrared,” which can provide a quick starting point or inspiration for your “Editing Styles.”
- Refine with Levels and Curves (Optional, but Recommended): For further control over brightness, contrast, and tonal range, add a
Levels Adjustment LayerorCurves Adjustment Layer.- Levels: Adjust the black point, white point, and midtones by dragging the corresponding sliders beneath the histogram. You can also adjust output levels to soften blacks or whites.
- Curves: This powerful tool allows you to map input tones to output tones, giving you granular control over contrast and brightness across the entire tonal range. Create an S-curve for added contrast or adjust specific points for targeted lightening or darkening.
- Add More Effects (e.g., Vignette): Continue to add adjustment layers or use other tools for “Photo Manipulation.” For instance, a second Levels Adjustment Layer combined with a layer mask and a blur effect can create a beautiful vignette, drawing attention to your subject.
- Save Your Work: Once satisfied, merge your layers (optional) and save your new black and white image, preferably as a new file to retain the original color version.
This non-destructive workflow is ideal for professional “Graphic Design” and complex “Digital Art” projects, ensuring that you can revisit and tweak your decisions at any point.
Black and White Conversion in Adobe Lightroom
Lightroom is another powerful tool, especially for batch processing and managing large collections of “Stock Photos” or “High Resolution” images. It excels in non-destructive editing and offers seamless integration with Photoshop.
Steps to Make an Image Black and White in Lightroom:
- Open Your Image: Import your photo into Lightroom.
- Activate B&W Mode: In the Develop module, locate the “Basic” panel and click the “B&W” button, or press
Von your keyboard. This instantly desaturates the image. - Adjust B&W Mix: Below the Basic panel, find the “B&W Mix” panel. Similar to Photoshop’s Black & White adjustment layer, you’ll find sliders for Reds, Oranges, Yellows, Greens, Aquas, Blues, Purples, and Magentas. Manipulate these to control the luminosity of each original color.
- Utilize Presets: Lightroom offers numerous built-in black and white presets in the “Presets” panel, which can apply various monochrome looks with a single click. You can also import custom presets or create your own “Editing Styles.”
- Refine with Tone Curve, Presence, and Effects:
- Tone Curve: Similar to Photoshop’s Curves, this allows for precise control over the image’s tonal range and contrast.
- Presence: Adjust Clarity (mid-tone contrast), Dehaze (removes or adds atmospheric haze), and Texture to enhance details.
- Effects: Add a “Post-Crop Vignetting” to draw focus, or introduce “Grain” for a film-like, retro “Aesthetic.”
- Save/Export: Lightroom automatically saves your edits non-destructively. When you’re ready to share, export the image in your desired format.
Lightroom is perfect for photographers who value efficient workflow and consistent “Editing Styles” across a series of images, from “Nature” shots to detailed “Beautiful Photography.”
User-Friendly Desktop Solutions like PhotoWorks and Movavi Photo Editor
Not everyone needs the extensive features of Photoshop or Lightroom. For quick, intuitive black and white conversions, several user-friendly desktop programs offer excellent results.
Apply Black and White Effect to Images in PhotoWorks
PhotoWorks is an easy-to-use picture editor for Windows and Mac, celebrated for its simple interface and powerful tools. It makes black and white conversion a breeze.
Steps to Make an Image Black and White in PhotoWorks:
- Start PhotoWorks: Run the program and import your picture.
- Turn Photo Black and White: Navigate to the
Enhancementtab. Here, simply check theBlack and Whitebox to instantly remove all colors. - Move the Tone Sliders for Further Adjustment: If you wish to fine-tune the result, use the
Tonesliders. AdjustWhitesandHighlightsto control brighter areas, andShadowsandBlacksto bring out detail in darker regions. You can also adjustExposureto darken bright areas orContrastto increase visual separation. - Explore Creative Effects: PhotoWorks also boasts an
Effectstab with dozens of gorgeous presets, includingVintageandMoviescategories, which can instantly give your monochrome image a retro or dramatic feel, enhancing its “Aesthetic” appeal. - Save Your Work: Once you’re happy with the result, click
Saveto apply the changes and keep your new black and white image. PhotoWorks also offers tools to blur backgrounds or add color accents to monochrome photos, opening up more “Creative Ideas.”
Create Black and White Effect with Movavi Photo Editor
Movavi Photo Editor offers intuitive tools for enhancing photos, including straightforward black and white conversion. It’s an excellent option for transforming any image into a masterpiece with ease.
Steps to Make Your Image Black and White with Movavi Photo Editor:
- Open Movavi Photo Editor: Install and open the program, then click
Add imageto select your photo. - Go to the Color Options: In the
Adjusttab, clickManuallyand scroll to theColorsection. - Move the Saturation Slider: Drag the
Saturationslider all the way down to-100. This will convert your photo to black and white. - Use Grayscale Filter (Alternative): A quicker method is to go to the
Effectstab and select theGrayscalefilter to instantly apply the monochrome effect. You can then adjust the intensity of this effect with a slider. - Save the Edited Image: Click the
Savebutton to keep your black and white creation.
Both PhotoWorks and Movavi Photo Editor are fantastic choices for users who want powerful editing capabilities without the steep learning curve of professional software, suitable for enhancing any “Image Inspiration & Collections.”
Mobile Photo Editing: Snapseed and VSCO on Your iPhone
In today’s mobile-first world, editing images on the go is essential. Apps like Snapseed and VSCO offer robust features for transforming your smartphone “Photography” into stunning black and white visuals.
Make a Photo Black and White in Snapseed
Snapseed (available for Android and iOS) is a powerful, user-friendly mobile app that provides a vast toolkit for retouching and applying “Editing Styles,” including excellent black and white conversion.
Steps to Quickly Turn Your Image Black and White with Snapseed:
- Open Snapseed: Launch the app and select the image you want to edit.
- Select the Black & White Filter: Tap the pencil icon to open the tools panel. Choose the
Black & Whitefilter from the list. - Choose a Preset and Fine-Tune: Snapseed offers several filter presets (e.g., Neutral, Contrast, Bright, Dark) to get you started. If you like the default result, save your photo. Otherwise, tap the adjustments icon (bottom middle) to fine-tune
Brightness,Contrast, andGrainusing sliders. You can also apply a “Color Filter” (e.g., Red filter to darken blues and greens) to control the tonal conversion. - Save Your Photo: Once satisfied, tap
Doneand thenSaveto store your black and white image.
How to Make Part of a Picture Black and White on iPhone with Snapseed: Snapseed also allows for selective black and white conversion, a popular “Creative Idea” for emphasizing certain elements.
- Open the Picture in Snapseed: Import your image.
- Apply Black & White Filter: Go to
Tools > Black & Whiteand select a filter. - Access View Edits: Tap the
Undoicon (top right), thenView Edits. - Use Stacks Brush: Select the
Black & Whitelayer, then tap the paintbrush icon (Stacks Brush). - Paint the Effect: Use your finger to paint over the areas you want to be black and white. You can pinch to zoom in for precision. The eye icon allows you to view the mask.
- Apply Changes: Tap the
Applybutton when you’re done to finalize the selective black and white effect.
Snapseed is an excellent choice for detailed “Photo Manipulation” on your mobile device, making it easy to create impactful “Images” for sharing.
Turn a Black and White Picture on iPhone With VSCO
VSCO is another popular mobile app known for its aesthetic filters and subtle “Editing Styles.” It provides a quick way to convert images to black and white, perfect for adding a consistent look to your “Image Inspiration & Collections.”
Steps to Turn a Black and White Picture on iPhone with VSCO:
- Open VSCO: Launch the app and select the photo you want to edit.
- Tap Edit and Select Black & White: Tap the
Editbutton (bottom left) and scroll through the available filters until you find the black and white options. - Choose a Filter: Select a black and white filter that suits your aesthetic. VSCO’s filters are renowned for their film-like qualities, adding unique “Aesthetic” touches.
- Save Your Photo: Tap
Next, and the app will automatically save your edited photo.
VSCO is ideal for photographers who appreciate curated filter sets and a streamlined mobile editing experience, often used for “Trending Styles” in social media.
Online and Built-in Alternatives: LunaPic, Paint, and Microsoft Publisher
For basic conversions without installing software, online editors or built-in system applications can be lifesavers. While they offer fewer advanced “Photo Manipulation” tools, they get the job done quickly.
Make an Image Black and White with LunaPic
LunaPic is a web-based “Image Tools” editor that allows you to perform various tasks, including black and white conversion, directly from your browser. It’s accessible on any device with internet access.
Steps to Make Your Picture Black and White in LunaPic:
- Select Your Photo: Go to LunaPic. You can upload an image from your computer or paste a URL.
- Apply the Black & White Filter: Once your photo is uploaded, navigate to
Filtersand selectBlack & White. The filter will be applied automatically. - Adjust Effect Strength: You can use a slider to adjust the intensity of the black and white effect if available.
- Save Your Image: Click
Saveto download your new image. LunaPic also offers direct sharing options to social media.
LunaPic is a convenient option for quick edits or when you need a black and white image on the fly, without needing a dedicated application. For privacy-conscious users, Tophinhanhdep.com recommends offline editors for sensitive imagery.
Make a Picture Black and White in Paint
Microsoft Paint, a staple built into Windows, offers a basic way to convert images to black and white. While limited, it’s incredibly accessible.
Steps if You Decide to Try Out Paint:
- Open Paint: Start Microsoft Paint and import your image.
- Go to the Image Menu: Open the
Imagemenu and chooseProperties. - Find Black & White Converter: Check the
Black and Whitebox. - Save Your Work: Click the
Saveicon to keep the new monochrome image.
While Paint is a rudimentary tool, for simple conversions, it serves its purpose. Users running newer Windows versions might explore Paint 3D for slightly extended capabilities.
Turn Your Photos Into Grayscale in Microsoft Publisher
For those working with design layouts in Microsoft Publisher (part of the MS Office package), you can also perform basic image edits, including grayscale conversion.
Steps to Turn Your Picture into Grayscale with Publisher:
- Launch Microsoft Publisher: Start the program, create a new project, and import your photo. Position it on the page.
- Make Your Image Black and White: Left-click your image to open the editing panel. Choose
Recolor, then selectGrayscalefrom the dropdown list. - Apply the Changes: Click
Saveto keep the edited image. Consider saving it under a new name if you want to preserve the colored version.
Publisher isn’t an “Image Editor” in the traditional sense, but for quick tweaks within a design context, it can be useful. For more complex “Photo Manipulation,” Tophinhanhdep.com suggests dedicated image editing software.
Refining Your Monochrome Images: Advanced Tips and Creative Ideas
Converting an image to black and white is just the first step. The true artistry comes in refining the monochrome result to achieve a stunning and impactful image. This involves leveraging advanced “Editing Styles” and “Creative Ideas” to enhance contrast, mood, and visual focus.
Mastering Tonal Adjustments
After the initial conversion, the next crucial step is to fine-tune the tonal range. The goal is to create rich blacks, bright whites, and a full spectrum of grays in between, ensuring your image has depth and dimension.
- Levels and Curves: As mentioned with Photoshop, these are your best friends.
- Levels help you set the true black and white points, preventing your image from looking flat or washed out. You can also adjust the midtone slider to lighten or darken the middle grays.
- Curves offer even more precise control. By manipulating the curve, you can selectively lighten or darken specific tonal ranges. An “S-curve” often enhances contrast, making blacks deeper and whites brighter without blowing out highlights or crushing shadows. This level of detail is key for “High Resolution” “Digital Photography.”
- Contrast and Clarity: Most editors offer
Contrastsliders, which globally increase the separation between light and dark tones.Clarity(often found in Lightroom or similar tools) boosts mid-tone contrast, making textures pop without affecting the extreme highlights and shadows. This is particularly effective for “Nature” and “Abstract” black and white images.
Enhancing Mood and Focus
Monochrome photography thrives on mood and composition. Several techniques can be employed to guide the viewer’s eye and evoke specific emotions, enhancing your “Visual Design.”
- Dodging and Burning: These traditional darkroom techniques, now available digitally, allow you to selectively lighten (dodge) or darken (burn) areas of your image. This is invaluable for sculpting light, adding drama, and drawing attention to your subject. For a “Sad/Emotional” portrait, for example, you might burn the edges to create a somber vignette and dodge the eyes to make them stand out.
- Vignetting: Adding a subtle darkening around the edges of your image (a vignette) naturally directs the viewer’s eye towards the center. This classic “Editing Style” is easily achievable in most photo editors and is highly effective for portraits or to emphasize a central subject, making it ideal for “Wallpapers” or “Backgrounds” where the focus needs to be clear.
- Film Grain: To achieve a vintage or gritty “Aesthetic,” adding a subtle amount of film grain can emulate the look of traditional analog photography. Many editors offer grain sliders or presets (e.g., in Snapseed or Lightroom) to introduce this texture, lending a timeless feel to your “Beautiful Photography.”
- Toning (Sepia, Selenium): While strictly speaking, these add a color tint, they are often considered variations of monochrome. Applying a
sepiatone can give your black and white image an antique, warm look, perfect for “Photo Ideas” that evoke history or nostalgia.Seleniumtoning, on the other hand, offers a cooler, more archival feel. These subtle shifts can profoundly alter the “Mood Boards” and “Thematic Collections” you create.
Strategic Use of Partial Black and White
Sometimes, a creative idea involves a blend of color and monochrome within the same image. This “color accent” technique can be highly effective for specific “Visual Design” purposes.
- Selective Color: This involves converting most of the image to black and white while leaving one specific object or area in color. This immediately draws the eye to the colored element, creating a striking visual contrast and emphasizing its importance. For instance, a single red rose in a black and white garden can be incredibly powerful. Tools like Snapseed (as demonstrated above) make this “Photo Manipulation” technique relatively easy.
These advanced “Editing Styles” allow you to move beyond simple desaturation to truly craft a monochrome image that speaks volumes. For more inspiration and detailed tutorials, Tophinhanhdep.com offers a wealth of resources on “Graphic Design,” “Digital Art,” and “Creative Ideas” to elevate your images.
Conclusion
The journey of transforming a vibrant color photograph into a compelling black and white image is an exploration of form, light, and emotion. It’s an “Editing Style” that transcends mere technical conversion, demanding an artistic eye to reveal the true essence of a scene or subject. Whether you’re aiming for dramatic “Aesthetic” portraits, timeless “Nature” landscapes, or striking “Abstract” compositions, mastering black and white is an invaluable skill in “Digital Photography.”
From the comprehensive control offered by professional “Image Tools” like Adobe Photoshop and Lightroom, to the user-friendly interfaces of PhotoWorks and Movavi Photo Editor, and the on-the-go convenience of mobile apps like Snapseed and VSCO, there’s a method suited for every photographer and every “Creative Idea.” Even basic applications like Paint and LunaPic can serve for quick conversions.
As you delve into monochrome editing, remember to:
- Shoot in RAW and color to retain maximum data.
- Choose subjects wisely, focusing on texture, light, and strong composition.
- Experiment with different tools and techniques to find your preferred workflow.
- Refine your tonal range with levels and curves for depth.
- Add creative touches like vignettes, grain, or selective color to enhance mood and focus.
Embrace the power of black and white to tell your stories, evoke profound emotions, and elevate your “Beautiful Photography” to new artistic heights. Explore the vast possibilities, discover new “Photo Ideas,” and share your unique vision with the world. Tophinhanhdep.com is your ultimate resource for “Image Inspiration & Collections,” “Trending Styles,” and everything related to “Visual Design” and “Image Tools” to help you on your creative journey. Now, grab your picture, apply these techniques, and make it happen!