How to Make Images Smaller: Mastering Image Optimization for Web and Digital Media with Tophinhanhdep.com

In our increasingly visual digital world, images are the cornerstone of communication, engagement, and aesthetic appeal. From stunning wallpapers and inspiring backgrounds to detailed digital art and captivating photography, high-quality visuals enrich every online experience. However, the pursuit of visual excellence often comes with a hidden cost: large file sizes. Whether you’re a professional photographer showcasing high-resolution stock photos, a graphic designer creating intricate digital art, or a blogger enhancing your content with beautiful photography, knowing how to make images smaller is an indispensable skill. It’s not just about saving space; it’s about optimizing performance, improving user experience, and boosting your visibility online.
At Tophinhanhdep.com, we understand the critical balance between image quality and efficiency. Our platform is dedicated to providing comprehensive resources and cutting-edge image tools—including converters, compressors, optimizers, and AI upscalers—to help you manage your visual assets effectively. This guide will delve into the multifaceted art of image optimization, explaining why smaller images are crucial, how different “sizes” are defined, and providing step-by-step instructions using Tophinhanhdep.com’s robust tools and other popular methods.
The Indispensable Role of Smaller Images in Today’s Digital Landscape
The quest for smaller image files is driven by a confluence of factors, all pointing towards a more efficient, user-friendly, and successful digital presence. Large image files, while visually impressive, can significantly hinder performance, frustrate users, and even impede your search engine rankings.

Enhancing User Experience and Website Performance
Imagine visiting a website filled with breathtaking nature photography or abstract digital art, only to be met with frustratingly slow loading times. This common scenario is often a direct consequence of unoptimized, large image files.
Faster Load Times: The Cornerstone of Digital Engagement
Every millisecond counts in the digital realm. Studies consistently show that users expect websites to load quickly, with many abandoning a page if it takes more than a few seconds. Images, being the heaviest elements on most web pages, are often the primary culprits for slow loading. By making images smaller, you dramatically reduce the amount of data that needs to be transferred from the server to the user’s device. This translates to:
- Instant Gratification: Content appears almost instantly, keeping users engaged and preventing impatience.
- Smoother Browsing: Transitions between pages are fluid, contributing to an overall positive experience.
- Improved Accessibility: Users with slower internet connections or limited data plans can access your content without excessive delays or data consumption. This is especially vital for mobile users who often browse on the go.
Impact on Bounce Rates and User Retention
A slow-loading website directly correlates with higher bounce rates—the percentage of visitors who leave your site after viewing only one page. When users encounter delays, they are more likely to navigate away to a competitor’s site that offers a faster experience. Optimized images, on the other hand, lead to:
- Lower Bounce Rates: Visitors stay longer, explore more content, and engage more deeply with your beautiful photography, aesthetic backgrounds, or thematic collections.
- Increased Conversions: For e-commerce sites or portfolios showcasing high-resolution images, faster load times can directly translate to higher conversion rates, whether it’s a purchase, a subscription, or a contact form submission.
Boosting Search Engine Optimization (SEO)
Beyond user experience, image optimization plays a critical role in how search engines like Google perceive and rank your website. The technical performance of your site, heavily influenced by image file sizes, is a significant ranking factor.
Core Web Vitals and Ranking Signals
Google’s Core Web Vitals initiative explicitly emphasizes page loading performance. Metrics like Largest Contentful Paint (LCP), which measures how long it takes for the largest content element (often an image) to become visible, are directly impacted by image size. A smaller LCP score (meaning faster loading) signals to Google that your site offers a good user experience, which can positively influence your search rankings. Tophinhanhdep.com helps you achieve excellent Core Web Vitals by providing tools to drastically reduce image file sizes without compromising visual quality.

Image SEO: Beyond Alt Tags
While descriptive alt tags are crucial for image SEO, optimizing image file sizes adds another powerful layer. Search engines crawl and index your images, and smaller files mean faster crawling and better resource allocation. This can lead to:
- Better Image Search Rankings: Optimized images are more likely to appear prominently in image search results, driving more organic traffic to your site.
- Overall Site Health: A fast, efficient site is generally viewed more favorably by search engine algorithms, leading to improved visibility across all content types, including your extensive collections of sad/emotional images or trending styles.
Practical Benefits: Storage, Bandwidth, and Sharing
The advantages of smaller images extend to tangible, practical benefits for anyone managing digital content.
Reducing Hosting Costs and Bandwidth Consumption
Hosting providers often charge based on storage space and bandwidth usage. Large image libraries, particularly those filled with high-resolution digital photography or extensive mood boards, can quickly consume significant resources. By optimizing your images with Tophinhanhdep.com’s compressors, you can:
- Save Money: Lower storage requirements and reduced data transfer mean tangible savings on hosting fees.
- Efficient Resource Allocation: Your server can handle more traffic and deliver content more swiftly, as it’s not burdened by massive files.
Seamless Sharing Across Platforms (Email, Social Media, Presentations)
Sharing images through email, social media, or presentations can be a cumbersome process when dealing with large files. Email attachments have size limits, social media platforms often compress images poorly, and heavy presentations can be slow and unwieldy. Smaller images facilitate:
- Effortless Emailing: Send multiple photos of aesthetic backgrounds or creative ideas without hitting attachment limits.
- Faster Social Media Uploads: Your beautiful photography will upload quickly, maintaining its quality and engaging your audience faster.
- Lightweight Presentations: Create dynamic presentations with impactful visuals without making the file size prohibitive for sharing or playback.
Deconstructing Image Size: Dimensions vs. File Weight
Before diving into techniques, it’s crucial to distinguish between two fundamental aspects of image “size”: pixel dimensions and file size. While related, they refer to different properties and require distinct optimization approaches. Tophinhanhdep.com offers specialized tools for both.
Pixel Dimensions: The Visual Canvas of Your Image
Pixel dimensions refer to the actual width and height of an image, measured in pixels. For example, an image might be 1920 pixels wide by 1080 pixels high. This defines the image’s visual canvas.
Understanding Width and Height
- Width and Height: These numbers directly indicate how many pixels are arranged horizontally and vertically to form your image. A higher number of pixels generally means more detail and a larger physical display size (if viewed at 1:1 pixel ratio).
- Resolution (PPI/DPI): While often used interchangeably, PPI (pixels per inch) and DPI (dots per inch) relate to how dense these pixels are. PPI is used for digital displays, while DPI is for print. A higher PPI means more detail within a given physical space. For web images, raw pixel dimensions are often more important than PPI, as browsers primarily interpret pixels.
- The Importance of Aspect Ratio: This is the proportional relationship between an image’s width and height (e.g., 16:9, 4:3, 1:1). Maintaining the aspect ratio during resizing is critical to prevent your image from looking stretched or squashed. Tophinhanhdep.com’s resizing tools typically offer options to constrain proportions automatically.
File Size (MB/KB): The Digital “Weight” of Your Image
File size, measured in kilobytes (KB) or megabytes (MB), refers to the amount of storage space an image occupies on your device or server. This is the “weight” that impacts load times and storage costs.
Impact of Image Format (JPG, PNG, WebP)
Different image formats handle color information and compression differently, leading to varying file sizes for the same pixel dimensions:
- JPG (JPEG): Ideal for photographs and complex images with many colors and subtle gradients. It uses a “lossy” compression method, meaning some data is discarded during compression, but often imperceptibly so. This makes it highly efficient for achieving small file sizes for realistic images. Many of Tophinhanhdep.com’s beautiful photography or nature images are best stored as JPGs.
- PNG: Excellent for images with transparency (like logos or graphic design elements) or sharp lines and large blocks of color. PNG uses “lossless” compression, preserving all original data, which can result in larger file sizes than JPG for photographs. Tophinhanhdep.com uses PNG for many of its abstract images or digital art where fidelity is paramount.
- WebP: A newer, “next-gen” format developed by Google, offering superior compression for both lossy and lossless images. WebP files can be significantly smaller than equivalent JPGs or PNGs while maintaining comparable quality. Tophinhanhdep.com strongly advocates for and provides tools for WebP conversion due to its web performance advantages.
The Role of Compression in Reducing File Weight
Compression is the process of reducing the amount of data required to represent an image. This is distinct from resizing dimensions. Even if an image has optimal dimensions for your website, it might still have an unnecessarily large file size due to inefficient compression. Tophinhanhdep.com’s advanced image compressors are specifically designed to tackle this.
Fundamental Techniques for Reducing Image Size with Tophinhanhdep.com
Making images smaller effectively involves a combination of techniques, each addressing a different aspect of an image’s “size.” Tophinhanhdep.com provides integrated solutions to apply these methods seamlessly.
Resizing Images: Adjusting Dimensions for Optimal Display
Resizing involves changing the pixel dimensions of an image. This is often the first and most impactful step in reducing file size for web use. For instance, a high-resolution stock photo might be 6000x4000 pixels, but your blog post might only display it at 800x450 pixels. Uploading the larger version forces the browser to scale it down, wasting bandwidth and processing power.
Why Simple Stretching is Detrimental
Avoid manually dragging the corners of an image in a basic editor or content management system to “resize” it. This often results in pixelation, blurriness, or distortion, as you’re merely stretching existing pixels rather than creating a properly scaled version. The image will look unprofessional and detract from your aesthetic backgrounds or curated collections.
The Power of “Constrain Proportions”
When resizing, always maintain the image’s aspect ratio. Most image editing software and Tophinhanhdep.com’s resizer tools offer a “constrain proportions” or “lock aspect ratio” option. This ensures that when you adjust either the width or the height, the other dimension automatically scales to preserve the original shape, preventing distortion.
Practical Resizing with Tophinhanhdep.com’s Tools
Tophinhanhdep.com’s online image resizer allows you to easily input desired width and height values, or select from common presets for social media, email, or web display. Our intuitive interface ensures you can resize images quickly and accurately, whether you’re working with individual photos or preparing a batch of images for a new collection.
Image Compression: The Art of Reducing File Weight Invisibly
Once your image has the correct pixel dimensions, the next step is to reduce its file size through compression. This aims to remove redundant or less critical data without visibly degrading the image quality.
Understanding Lossy vs. Lossless Compression
- Lossy Compression: (e.g., JPEG, WebP lossy) Permanently removes some image data, reducing file size significantly. The trick is to remove data that the human eye is unlikely to perceive. This is perfect for photographs where slight variations in color or tone are less critical. Most of Tophinhanhdep.com’s image compressors use smart lossy techniques to achieve maximum reduction.
- Lossless Compression: (e.g., PNG, WebP lossless) Reduces file size by identifying and eliminating redundant data without discarding any original information. This means the image can be perfectly reconstructed to its original state. It’s ideal for precise graphics, logos, and digital art where every pixel detail is important.
How Tophinhanhdep.com’s Advanced Compressors Work
Tophinhanhdep.com employs state-of-the-art compression algorithms, including AI-powered optimization, to analyze your images and apply the most effective compression techniques. For instance, our tools can intelligently reduce the number of colors in a PNG or optimize the encoding of a JPEG, leading to substantial file size reductions (often 40-80% or more) that are imperceptible to the naked eye. This ensures your wallpapers and backgrounds remain vibrant and detailed while loading rapidly.
Cropping Images: Eliminating Unnecessary Visual Information
Cropping is the act of removing unwanted outer portions of an image. While primarily a compositional tool in photography and visual design, it also serves as an effective way to reduce file size.
Refining Composition and Reducing File Size
By cropping out irrelevant background elements or focusing on a specific subject, you not only improve the image’s aesthetic appeal but also reduce the total number of pixels in the image. Fewer pixels inherently mean a smaller file size. This is particularly useful for sad/emotional images where the focus is often on a specific expression, or for abstract art where framing is key.
Using Cropping Tools Effectively
Most image editing software, including Tophinhanhdep.com’s integrated editors, offer intuitive cropping tools. You can select a specific area, often with guides for common aspect ratios, and then “cut” away the rest. Always make sure to save a new copy after cropping to preserve your original image.
Format Conversion: Embracing Modern, Efficient Image Formats
Choosing the right image format is as important as resizing and compressing. Modern formats offer superior performance.
The Advantages of WebP and Other Next-Gen Formats
As mentioned, WebP is a game-changer for web optimization. It supports both lossy and lossless compression, transparency, and animation, often resulting in significantly smaller files than JPG or PNG. Other “next-gen” formats like AVIF also offer excellent compression but have less universal browser support currently. By converting your images to WebP, you get the best of both worlds: high quality and small file sizes, directly contributing to faster LCP scores.
Converting with Tophinhanhdep.com’s Converters
Tophinhanhdep.com provides a powerful online image converter that allows you to effortlessly convert between various formats, including JPG, PNG, and WebP. Our tool not only converts but also applies optimal compression during the process, ensuring your newly converted WebP images are as small as possible. This is a crucial step for anyone looking to maximize web performance for their aesthetic or thematic collections.
Step-by-Step Guides: Making Images Smaller with Tophinhanhdep.com and Popular Software
Now that we understand the ‘why’ and ‘what,’ let’s explore the ‘how.’ Here are practical steps to make your images smaller, leveraging Tophinhanhdep.com’s comprehensive suite of tools and common desktop applications.
Instant Optimization with Tophinhanhdep.com’s Online Image Tools
For quick, efficient, and high-quality image optimization, Tophinhanhdep.com’s online tools are your best bet. They are user-friendly and accessible from any device.
Using Tophinhanhdep.com’s Image Compressor (Batch Processing, AI)
Our image compressor is designed for maximum file size reduction without noticeable quality loss.
- Access the Tool: Navigate to the Tophinhanhdep.com Image Compressor page.
- Upload Your Images: Click “Add Images” or simply drag and drop up to 40 images (JPG, JPEG, PNG, SVG, etc.) into the upload area.
- Automatic Compression: Our AI-powered technology immediately processes your images, showing you the percentage of reduction and the new file size.
- Download Optimized Images: You can download individual images or click “Download All” for batch saving. The original quality of your beautiful photography or vibrant digital art is preserved while the file size is drastically reduced.
Resizing with Tophinhanhdep.com’s Online Image Resizer (Custom Dimensions, Presets)
This tool is perfect for adjusting pixel dimensions.
- Access the Tool: Go to the Tophinhanhdep.com Image Resizer.
- Upload Image: Upload your photo from your PC or mobile device.
- Define Dimensions: Enter your desired width and height in pixels, or choose from popular presets (e.g., social media banners, email signatures). Ensure “Maintain Aspect Ratio” is selected to prevent distortion.
- Apply and Download: Click “Resize” to process, then download your newly dimensioned image.
Converting to WebP with Tophinhanhdep.com
Harness the power of next-gen formats.
- Access the Tool: Visit the Tophinhanhdep.com Image Converter.
- Upload Image: Upload your JPG or PNG image.
- Select Output Format: Choose WebP as your desired output format.
- Convert and Download: Our tool will convert and optimally compress your image. Download the WebP version for superior web performance.
Mastering Image Size in Professional Editing Software
For those who prefer desktop applications or need more granular control, professional editing software offers robust options. Tophinhanhdep.com also offers resources and tutorials on editing styles within these programs.
Adobe Photoshop: The Industry Standard
Photoshop provides precise control over image dimensions and compression settings, ideal for high-resolution stock photos and detailed digital art.
Using the Crop Tool for Precision
- Open Image: Open your image in Photoshop.
- Select Crop Tool: From the Tools panel, select the Crop tool.
- Adjust Crop Area: Drag the crop handles to define the desired area. You can also input specific dimensions or aspect ratios in the options bar.
- Apply Crop: Press Enter or click the checkmark to apply.
- Save: Go to File > Save As and save your cropped image with a new name.
Adjusting Image Size via Image Menu
- Open Image: Open your image in Photoshop.
- Access Image Size: Go to Image > Image Size.
- Adjust Settings:
- Fit To: Choose from predefined resolutions or custom sizes.
- Width and Height: Enter exact pixel dimensions. Ensure the “chain link” icon is active to “Constrain Proportions.”
- Resolution: Adjust pixels per inch if necessary, though for web, focus on width/height.
- Resample: For reduction, “Bicubic Sharper (best for reduction)” is often recommended.
- Apply and Save: Click OK, then File > Save As to save the resized image.
GIMP: A Robust Open-Source Alternative
GIMP (GNU Image Manipulation Program) is a free and powerful alternative to Photoshop, capable of handling complex image editing and optimization.
Cropping and Resizing in GIMP
- Open Image: Open your image in GIMP (File > Open).
- Crop: Select the Crop tool. Click and drag to define the crop area, then press Enter.
- Resize (Scale Image): Go to Image > Scale Image.
- Adjust Dimensions: Enter new width/height values. Click the chain icon to maintain aspect ratio.
- Scale and Save: Click “Scale,” then File > Save As to export your optimized image.
SnagIt: Efficient Image Manipulation
SnagIt, while primarily a screen capture tool, also includes robust image editing capabilities, making it useful for quick resizing and adjustments.
- Open Image: Open your image in SnagIt.
- Resize Image: Go to Image > Resize Image, or click the size indicator at the bottom of the canvas.
- Input Dimensions: Type the desired width and height in pixels or inches. Ensure “Keep Aspect Ratio” is checked.
- Apply and Save: Click “Apply,” then File > Save As to save your resized copy.
Utilizing Built-in Operating System Tools
For simple, on-the-fly resizing, your operating system’s native tools can be surprisingly effective. These are great for quick adjustments of wallpapers or profile pictures.
Preview (macOS): Quick and Accessible Resizing
Apple’s Preview app is a versatile tool for viewing and making basic edits to images.
- Open Image: Open your image in Preview (double-click the image file or drag to Preview icon).
- Access Adjust Size: Go to Tools > Adjust Size.
- Enter Dimensions: Input the desired width, height, or both. Check “Scale Proportionally” to maintain aspect ratio.
- Apply and Export: Click OK. The image is resized. To save as a new file, go to File > Export, choose a new name and location, and click Save.
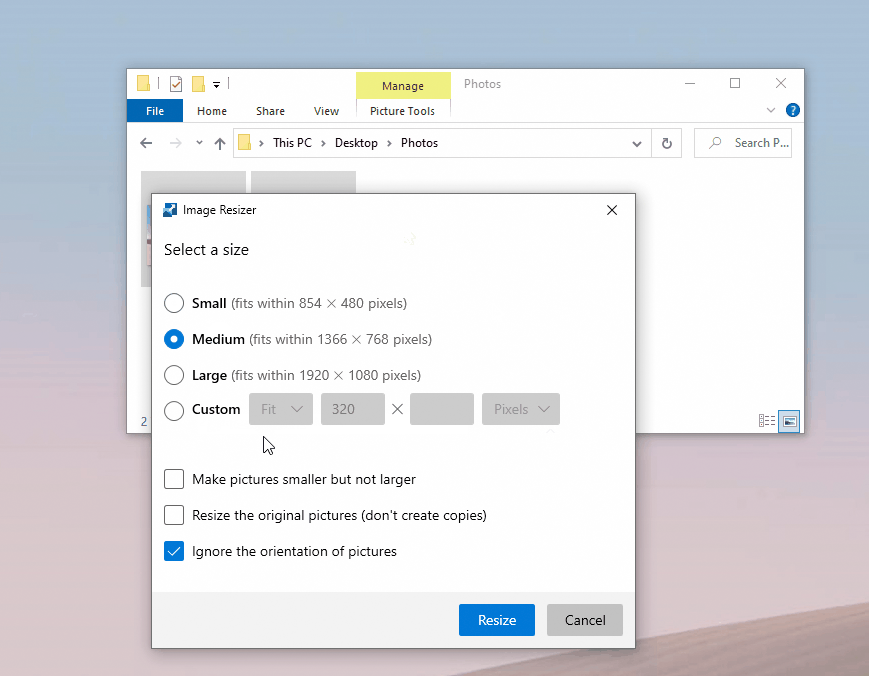
Photos App (Windows 10): Streamlined Image Adjustment
Windows 10’s Photos app offers a straightforward way to resize images without needing third-party software.
- Open Image: Open the image in the Photos app.
- Access Resize Option: Click the “See More” menu (three dots) in the upper-right corner, then select “Resize.”
- Choose Size or Custom:
- Select S (Small), M (Medium), or L (Large) for preset sizes.
- Click C (Custom) to define specific width and height. Ensure “Maintain Aspect Ratio” is checked.
- Optionally, adjust the Quality slider for a trade-off between file size and visual fidelity.
- Save Resized Copy: Click “Save Resized Copy” to create a new, smaller version, leaving your original image untouched.
Advanced Strategies and Best Practices from Tophinhanhdep.com
Optimizing images is an ongoing process that benefits from strategic thinking and adherence to best practices. Tophinhanhdep.com is not just a tool provider; it’s a hub for visual design, offering insights into graphic design, digital art, photo manipulation, and creative ideas.
The Tophinhanhdep.com Optimization Workflow: A Holistic Approach
For the best results in making images smaller and improving performance, Tophinhanhdep.com recommends a sequential workflow:
Prioritizing Resizing Before Compression
Always resize your image to its intended display dimensions before applying compression. Compressing an unnecessarily large image is less efficient than compressing an image that’s already at the right size. Start by determining the maximum display dimensions (e.g., 1200px wide for a blog post, 2048x2048 for a Shopify product image). Use Tophinhanhdep.com’s resizer or desktop software for this.
The Benefits of Converting to WebP for Web Deployment
After resizing and initial compression, consider converting your images to WebP, especially for web deployment. As discussed, WebP offers superior compression, further reducing file sizes and accelerating load times. Use Tophinhanhdep.com’s converter to make this transition seamless.
Maintaining Visual Quality: Finding the Perfect Balance
The goal is always to make images smaller without compromising the visual impact.
Perceptible vs. Imperceptible Quality Loss
Lossy compression involves a trade-off. For complex images like beautiful photography or nature shots, you can often achieve significant file size reductions with minimal, imperceptible quality loss. For graphics with sharp edges (like abstract art or logos), stick to higher quality settings or lossless formats/compression. Tophinhanhdep.com’s AI compressors are designed to find this optimal balance automatically.
Experimenting with Compression Levels
If a tool allows it (like the Windows Photos app or some advanced Tophinhanhdep.com options), experiment with different compression levels. View the image at various sizes and on different devices to ensure the quality remains acceptable. A slightly higher file size might be worth it for crucial visual elements.
Strategic Use of Image Types for Different Contexts
Choosing the right format for the right content is key to efficient image management.
JPG for Photography and Complex Images
For high-resolution photographs, detailed backgrounds, or complex scenes (like those in our thematic collections), JPG remains the go-to choice due to its efficient lossy compression capabilities.
PNG for Graphics with Transparency
For graphic design elements, logos, illustrations, or any image requiring transparency, PNG is indispensable. Ensure you use Tophinhanhdep.com’s PNG compressor to minimize its lossless file size.
WebP: The Universal Optimizing Solution
For web content, WebP is increasingly the best choice, combining the benefits of both JPG and PNG with even greater efficiency. Tophinhanhdep.com’s image tools are fully equipped to handle and convert to WebP, ensuring your wallpapers and backgrounds load faster than ever.
Integrating Optimization into Your Creative Process
Making images smaller shouldn’t be an afterthought; it should be an integral part of your visual workflow, from initial concept to final deployment.
From High-Resolution Stock Photos to Optimized Wallpapers
When sourcing high-resolution stock photos or creating original digital photography for Tophinhanhdep.com’s collections, remember to:
- Start with the highest quality: Always work with original, uncompressed files.
- Edit and refine: Complete all your creative edits, color corrections, and photo manipulation first.
- Resize for purpose: Determine the exact dimensions needed for its final placement (e.g., a desktop wallpaper, a mobile background, an image for an aesthetic mood board).
- Compress effectively: Use Tophinhanhdep.com’s compressor to reduce the file size optimally.
- Convert if applicable: For web, convert to WebP.
Enhancing Digital Art and Graphic Design Projects
For digital art, graphic design, and creative ideas, precision is paramount. Tophinhanhdep.com’s tools allow you to retain the integrity of your designs while ensuring they perform well online. This means your abstract pieces or carefully crafted visual narratives will load quickly without pixelation.
Leveraging Tophinhanhdep.com for Mood Boards and Thematic Collections
When building mood boards or curating thematic collections of sad/emotional images or trending styles, the cumulative file size can become immense. Using Tophinhanhdep.com’s batch processing capabilities for resizing and compressing can save countless hours and ensure your collections are accessible and beautiful without performance bottlenecks.
In conclusion, knowing how to make images smaller is a fundamental skill in today’s digital landscape. By understanding the nuances of pixel dimensions versus file size, and by leveraging the powerful tools and best practices offered by Tophinhanhdep.com, you can create a visually rich, high-performing, and engaging online presence. Optimize your images, enhance your user experience, boost your SEO, and unlock the full potential of your visual content with Tophinhanhdep.com.