Mastering Image Transparency in Google Slides: A Comprehensive Guide to Polished Presentations

In the fast-paced world of digital communication, captivating presentations are no longer a luxury but a necessity. Google Slides offers an accessible and powerful platform for crafting compelling visual narratives, but truly elevating your presentation often comes down to mastering subtle yet impactful design techniques. One such technique is making images transparent, a skill that can transform ordinary slides into professional, aesthetically pleasing, and highly effective visual assets. Whether you’re aiming to create a subtle background, highlight key text, or integrate diverse visual elements seamlessly, understanding image transparency is a cornerstone of modern visual design.
At Tophinhanhdep.com, we understand the power of stunning visuals. Our extensive collections of Images (including Wallpapers, Backgrounds, Aesthetic, Nature, Abstract, Sad/Emotional, and Beautiful Photography) and resources on Photography (covering High Resolution, Stock Photos, Digital Photography, and Editing Styles) are designed to inspire and equip you. We also provide crucial Image Tools like Converters, Compressors, Optimizers, AI Upscalers, and Image-to-Text functionalities, all geared towards enhancing your Visual Design (Graphic Design, Digital Art, Photo Manipulation, and Creative Ideas). This article, drawing from our expertise and a wealth of Image Inspiration & Collections (Photo Ideas, Mood Boards, Thematic Collections, and Trending Styles), will guide you through the various methods of achieving image transparency in Google Slides, ensuring your next presentation not only looks professional but truly impresses.
![]()
Creating a transparent background in Google Slides is a fantastic strategy if you’re looking to:
- Add images without overwhelming your main text: Achieve a balanced layout where visuals support, rather than compete with, your message.
- Gain more usable space on your slides: Transparent elements allow text and other objects to be placed “behind” or “over” an image without obscuring information.
- Create tidy slides that exude professionalism: A well-executed transparent image conveys attention to detail and a polished aesthetic, aligning with principles of good Graphic Design.
- Elevate your slide-making skills: Mastering this technique demonstrates a sophisticated understanding of Visual Design and Photo Manipulation, making your presentations stand out.
There are primarily two ways to approach image transparency in Google Slides, each yielding a distinct visual outcome. You can either adjust the transparency of an entire image, allowing it to serve as a subtle overlay or background, or you can precisely remove the background of an image, isolating the main subject for clean integration into your slides or for creating dynamic collages and mood boards. We’ll explore both methods in detail, offering practical steps and insights into how each technique can enhance your presentation’s Aesthetic.
Enhancing Your Slides: Adjusting Overall Image Transparency in Google Slides
Sometimes, you don’t need to completely remove an image’s background; rather, you want to make the entire image semi-transparent to allow other elements to show through or to create a particular mood. This technique is perfect for subtle backgrounds, watermarks, or overlay effects that contribute to your presentation’s overall Aesthetic without distracting from the core content. Imagine using a beautiful piece of Nature Photography as a faint backdrop, or an Abstract pattern to add visual texture.
Here’s how to make an entire image transparent in Google Slides:
Step-by-Step Guide to Adjusting Full Image Transparency
- Upload Your Image of Choice: Begin by inserting the image you wish to make transparent onto your Google Slide. You can do this by navigating to
Insert > Imageand selectingUpload from computer,Search the web,Drive,Photos,By URL, orCamera. For instance, you might choose an image that embodies the theme of your presentation, perhaps a High Resolution stock photo from Tophinhanhdep.com that complements your message. Images featuring people or hands can add an emotional and personal touch, making your presentation more relatable. - Select the Image: Once uploaded, click on the image to select it. This will activate the formatting options.
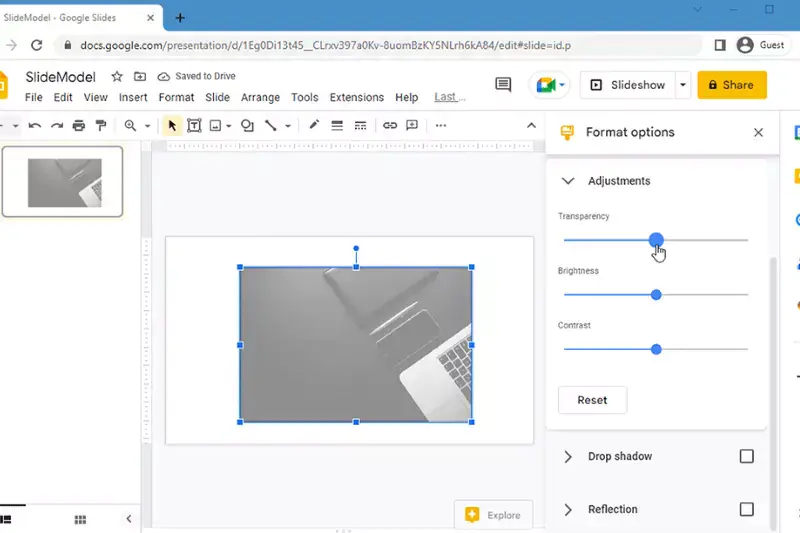
- Access Format Options: With the image selected, locate the
Format Optionsbutton in the toolbar at the top of your screen, or simply right-click the image and chooseFormat Optionsfrom the context menu. A sidebar panel will appear on the right side of your screen. - Adjust Transparency: In the
Format Optionssidebar, expand theAdjustmentssection. Here, you’ll find aTransparencyslider. Drag this slider to the right to increase the transparency (making the image more see-through) or to the left to decrease it (making it more opaque). Experiment with different levels to find what works best for your slide design, ensuring your main text remains legible. - Position and Scale Your Image: If your transparent image is intended as a background, drag its corners to scale it up until it covers the entire slide. You can also use the up and down arrows on your keyboard to finely adjust its position. To preview how it will look in full presentation mode, click
Presentin the top bar, thenEscto return to editing. - Send to Back: To ensure your text and other foreground elements are visible over the transparent image, right-click the image, go to
Order, and selectSend to back. This places the image behind all other objects on the slide. - Apply to Multiple Slides (Optional): If you want to use this transparent background across several or all slides, right-click the image and select
Theme. You can then choose to apply it toBlankslides or other specific layouts. This approach can establish a consistent visual theme, enhancing the overall Visual Design of your presentation.
Making Multiple Images Transparent Simultaneously
If your presentation involves numerous images that you want to make uniformly transparent, doing them one by one can be time-consuming. Google Slides offers a quick way to apply transparency to multiple images at once, which is a boon for efficiency and maintaining a cohesive Aesthetic.
- Upload and Group Images: Select all the images you wish to make transparent either by selecting them from your computer and dragging them onto a single slide or by inserting them individually and then selecting them all (click and drag a selection box over them). With all images selected, go to
Arrange > Group. - Adjust Group Transparency: While the grouped images are still selected, go to
Format Options > Adjustments > Transparency. Adjusting the slider now will apply the chosen transparency level to all images within the group. - Ungroup and Distribute (Optional): If you need to move or resize the images individually after setting their transparency, simply right-click the grouped images and select
Ungroup. You can then cut (Command + Xon Mac orCtrl + Xon Windows) and paste (Command + VorCtrl + V) individual images onto different slides. - Order for Text Vibrancy: Remember to right-click each image and select
Order > Send to backon its respective slide to ensure your text pops.
This method significantly speeds up your workflow, allowing you to maintain consistency across your slides and devote more time to refining your Visual Design and content.
Precision Design: Removing Image Backgrounds with Tophinhanhdep.com
While adjusting overall image transparency is useful, there are many instances where you need to isolate a subject from its background entirely. This technique is invaluable for creating professional product displays, dynamic collages, eye-catching profile pictures, or clean graphic elements. Imagine being able to seamlessly blend a Beautiful Photography subject into a new Background, or create intricate Mood Boards without the clutter of original image backgrounds.
While Google Slides excels at basic transparency adjustments for entire images, it lacks a built-in feature for removing an image’s background while keeping the main object intact. This is where specialized Image Tools become indispensable. Tophinhanhdep.com offers an incredibly efficient and powerful solution, leveraging advanced AI Upscalers and Digital Photography processing capabilities to remove backgrounds in seconds.
This approach is ideal if you want to:
- Add personality to your slides: Use crisp cutouts of objects and people without distracting backgrounds.
- Make your slides more lively: Preserve vibrant colors of your subjects, allowing them to stand out against your slide’s design.
- Combine numerous images into one: Create sophisticated collages or complex Photo Manipulation effects directly within your Google Slides.
Here’s how to achieve pristine background removal using Tophinhanhdep.com and integrate the results into Google Slides:
How to Remove a Single Image Background with Tophinhanhdep.com
- Access Tophinhanhdep.com: Open your web browser and navigate to Tophinhanhdep.com.
- Upload or Drag & Drop Your Image: You’ll find a clear interface for uploading your image. Simply drag and drop your image file onto the designated area or click the upload button to select it from your device. Our AI-powered tools are designed to handle diverse Photography styles and Image complexities, from intricate Nature scenes to clear product shots.
- Automatic Background Removal: In a matter of seconds, Tophinhanhdep.com will process your image, automatically detecting the main subject and removing its background. The result is a high-quality image with a transparent background, typically in PNG format.
- Download Your Edited Image: Once the process is complete, click the
Downloadbutton to save your new image with its transparent background to your device. - Insert into Google Slides: Return to your Google Slides presentation. You can either drag and drop your newly downloaded transparent image directly onto your chosen slide, or go to
Insert > Image > Upload from computerand select the file. - Adjust and Arrange: Your image will now appear on your slide with a transparent background. You can easily adjust its size by dragging its corners and position it by clicking and holding, then dragging it to the desired spot.
- Layering for Optimal Design: If you want text or other elements to overlap the image, right-click on the image and use the
Orderoptions (Move backward,Send to back,Bring to front,Bring forward) to adjust its layering. This is crucial for creating professional layouts, especially when integrating colorful images with white or contrasting text, a key aspect of effective Visual Design.
Bulk Background Removal for Enhanced Workflow
For designers, marketers, or anyone dealing with large sets of images for presentations, the ability to remove backgrounds in bulk is a game-changer for workflow efficiency. Tophinhanhdep.com offers a desktop application (for Windows, Mac, or Linux) that facilitates this process, perfect for processing multiple Stock Photos or elements for Thematic Collections.
- Download the Tophinhanhdep.com Desktop App: Visit Tophinhanhdep.com and download the desktop application compatible with your operating system.
- Install and Log In: Follow the installation instructions and then open the desktop app. You’ll need to sign up for or log into your Tophinhanhdep.com account.
- Drag and Drop Multiple Images: Once logged in, simply drag and drop all the images whose backgrounds you want to remove into the application interface.
- Initiate Processing: Select the
Transparent backgroundoption (or other desired output settings) and clickStart. The application will process all your images, applying the background removal automatically. - Download Processed Images: After completion, download the images with their transparent backgrounds to a folder on your desktop.
- Upload to Google Slides: In Google Slides, create a new blank slide (which you can delete later). Select all the processed transparent images from your desktop folder and drag and drop them onto this blank slide. For smaller batches (e.g., three images), you might upload them individually to their correct slides. For larger sets, this bulk upload method is fastest.
- Allocate to Specific Slides: Once all images are uploaded to Google Slides, deselect them by clicking on the slide background. Then, select an image you wish to move, use
Command + X(Mac) orCtrl + X(Windows) to cut it, navigate to its target slide, click on the slide, and paste it (Command + VorCtrl + V). Repeat this for all images, effectively distributing your pre-processed visuals across your presentation. You can also combine several images on one slide to create rich Mood Boards or Digital Art compositions.
This bulk processing capability, integrated with Google Slides, dramatically accelerates the creation of visually rich presentations, perfectly aligning with principles of efficient Visual Design and Photo Manipulation.
Mobile-Friendly Background Removal for On-the-Go Presenters
In today’s mobile-first world, presentation creation isn’t limited to desktops. Tophinhanhdep.com ensures you can maintain professional-grade Visual Design even when working from your smartphone or tablet, whether you’re using Beautiful Photography from your phone’s gallery or quickly preparing Stock Photos.
On iPhone:
- Open Tophinhanhdep.com in Safari: Launch your Safari browser and go to Tophinhanhdep.com.
- Upload Your Image: Use the upload option to select an image from your iPhone’s photo library. Tophinhanhdep.com’s AI will swiftly remove the background.
- Download and Save: Download the processed image and save it back to your iPhone’s photos.
- Insert into Google Slides App: Open the Google Slides app, tap the
+sign to add an image, and selectFrom Photos. Choose your newly saved transparent image. - Adjust Placement and Size: Once on the slide, you can drag its corners to adjust the size and tap, hold, and drag to change its placement.
- Preview: Tap the play icon to
Presenton your mobile device and see your updated slide.
On Android:
- Use the Tophinhanhdep.com App (or Web): You can either download the dedicated Tophinhanhdep.com app from the Google Play Store or use the web version in your Android browser.
- Remove Background: Upload your image through the app or website. Tophinhanhdep.com will process it, giving you a transparent background.
- Download and Add to Google Slides: Download the image to your Android device. Then, open the Google Slides app and insert the image from your gallery onto your slide of choice.
These mobile workflows ensure that high-quality Visual Design is always within reach, no matter where or how you are preparing your presentations.
Beyond Images: Making Shapes Transparent in Google Slides
Transparency isn’t just for images. Google Slides also allows you to adjust the transparency of shapes, a feature that opens up further creative possibilities for your Visual Design. You can use transparent shapes as overlays to tint a background image, highlight text, create subtle divisions on a slide, or build custom graphic elements that integrate seamlessly with your content. This directly contributes to a refined Aesthetic and allows for advanced Graphic Design techniques within your presentations.
How to Adjust Shape Transparency (Opacity)
Adjusting the transparency level of a shape is similar to changing its opacity. Here’s how:
- Insert a Shape: Go to
Insert > Shape > Shapesand choose the desired shape (e.g., a rectangle, circle, or arrow). Draw it onto your slide. - Select the Shape: Click on the shape to select it.
- Access Fill Color Options: In the toolbar, click the
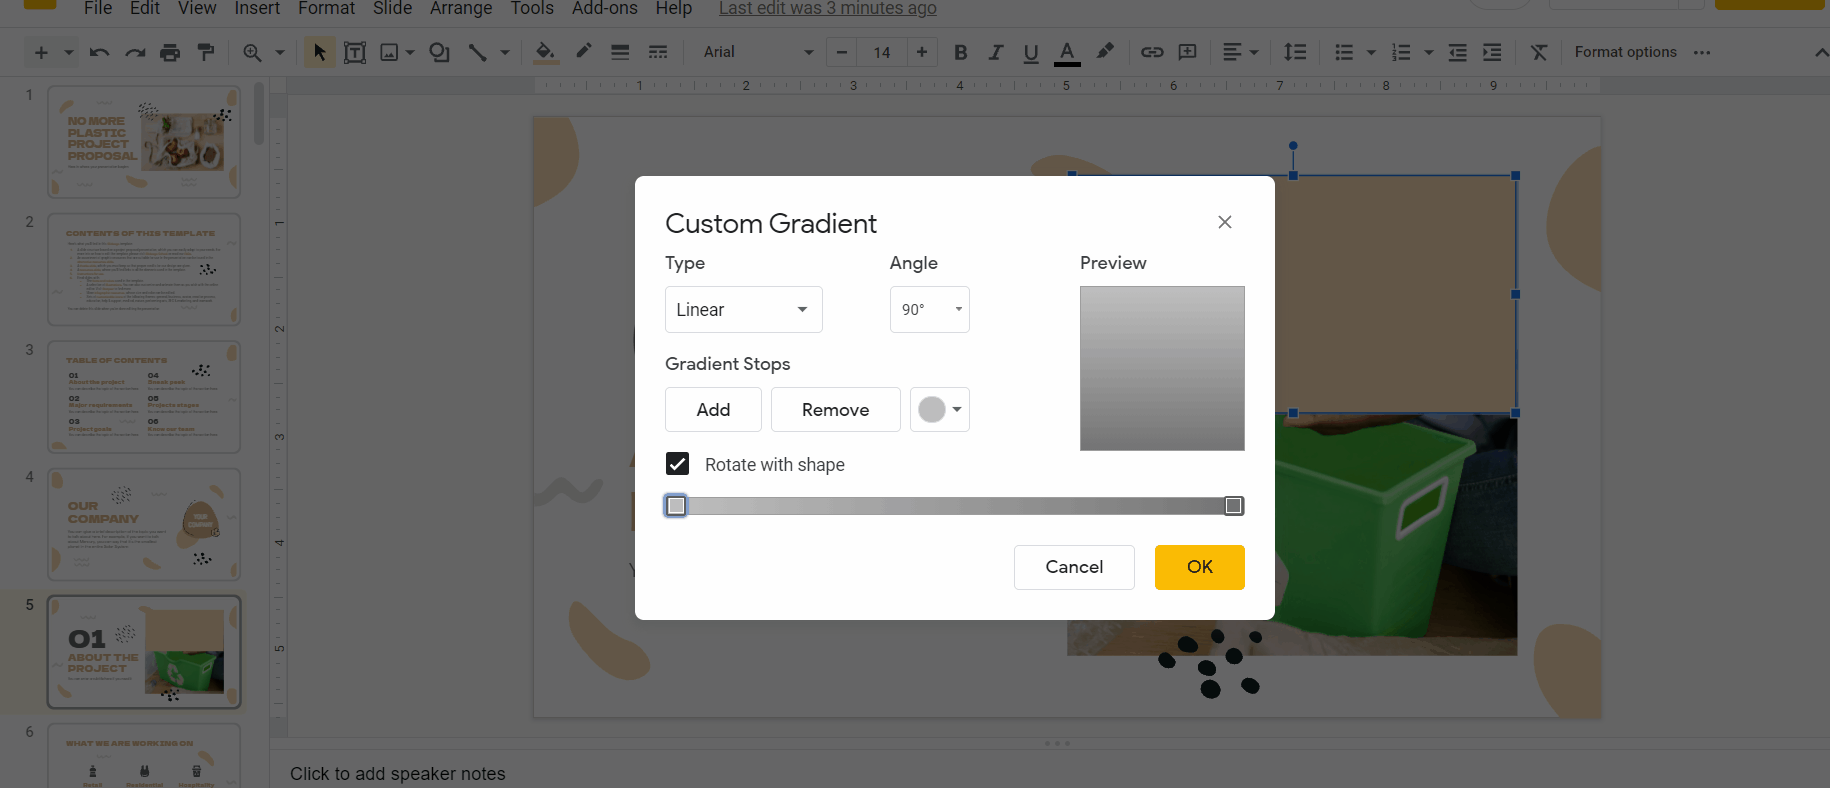
Fill Coloricon (represented by a paint bucket). - Choose Custom Transparency: From the color palette that appears, select
Custom(usually indicated by a+icon orCustom...text at the bottom). - Adjust the Transparency Slider: A new window will open with color selection options. At the bottom of this window, you’ll find a transparency slider. Drag this slider to the right to increase the shape’s transparency or to the left to decrease it. You can also input a specific HEX color code or manually adjust color values.
- Apply Changes: Once you’ve achieved your desired transparency, click
OKorAddto apply the changes.
Making a Shape Completely Transparent
If you want a shape to be entirely invisible but still serve as a clickable area or a placeholder for other elements (e.g., a hyperlink over a section of an image), you can make it completely transparent:
- Select the Shape: Click on the shape you want to make completely transparent.
- Access Fill Color: Click the
Fill Color(paint bucket) icon in the toolbar. - Select “Transparent”: From the options, simply choose
Transparent. This will remove any fill color while keeping the shape’s outline (if one is applied). You can also remove the border by selectingTransparentfrom theBorder coloroption.
This functionality is incredibly useful for advanced Visual Design, allowing you to create interactive overlays or invisible structural elements within your slides, enhancing Creative Ideas and Photo Manipulation effects.
Best Practices and Design Considerations for Transparent Images
Mastering image transparency is more than just knowing the steps; it’s about applying these techniques effectively within the broader context of Visual Design and Graphic Design. Here are some best practices to ensure your transparent images enhance, rather than detract from, your presentations:
- Readability is King: Always prioritize text legibility. A transparent image should never make your main content difficult to read. Adjust transparency levels carefully, or consider adding a semi-transparent shape or text box with a solid background behind your text for better contrast.
- High-Resolution Matters: When using images, especially those intended to be backgrounds or large design elements, always start with High Resolution imagery. Transparent or not, a blurry image will diminish the professionalism of your presentation. Tophinhanhdep.com offers AI Upscalers that can improve image quality if your source material isn’t ideal.
- Consistency in Style: If you’re using transparent images, try to maintain a consistent style or Aesthetic across your presentation. This might mean using similar transparency levels, or ensuring that all cut-out subjects have a clean, professional edge, which Tophinhanhdep.com excels at. This consistency contributes to a cohesive Visual Design and strengthens your Thematic Collections.
- Balance and Composition: Transparent images can add depth and complexity to your slides. Use them to create visual balance, direct the viewer’s eye, or establish a mood. Consider how the image interacts with other elements on the slide to achieve harmonious Photo Manipulation and overall composition.
- Experiment with Layers: Don’t shy away from layering multiple transparent images or shapes. This can create rich, multi-dimensional effects. For instance, a subtle Abstract image with low transparency overlaid with a bolder, semi-transparent shape can produce unique visual interest.
- Contextual Relevance: Always choose images that are relevant to your content. Whether it’s Nature Photography for an environmental presentation or a conceptual Abstract image for an innovative idea, the image should reinforce your message, even when transparent.
- Optimizing for Performance: While Google Slides handles images well, using excessively large image files can slow down your presentation. Consider using Image Tools like Compressors and Optimizers from Tophinhanhdep.com to reduce file sizes without sacrificing visual quality, ensuring a smooth presentation experience.
By thoughtfully applying these techniques, you can transform your Google Slides presentations into highly engaging and professionally designed experiences. Transparent images, whether used for subtle backgrounds or clean subject cutouts, are a powerful asset in your Visual Design toolkit, allowing you to craft slides that are not only informative but also genuinely captivating.
Conclusion
Creating impactful presentations in Google Slides often hinges on subtle design choices, and mastering image transparency is a prime example. Whether you choose to make an entire image subtly transparent for a thematic Background, or meticulously remove a background using advanced Image Tools like Tophinhanhdep.com to create crisp, isolated subjects, these techniques significantly elevate your Visual Design.
We’ve explored how to adjust the overall transparency of images and shapes directly within Google Slides, providing you with the power to create harmonious overlays and controlled visual depth. More critically, we’ve highlighted the essential role of specialized platforms like Tophinhanhdep.com for precision background removal, enabling you to produce clean, professional cutouts of subjects from your Photography collections, ready for seamless integration into your slides. This capability extends to bulk processing and mobile workflows, ensuring efficiency and flexibility for all your Graphic Design needs.
By embracing these methods, you gain the ability to create slides that are tidy, professional, and visually compelling. You can showcase High Resolution images without text legibility issues, blend diverse Aesthetic elements into cohesive Mood Boards, and infuse your presentations with Creative Ideas that capture and retain audience attention.
So, don’t hesitate to experiment! Hop on over to Tophinhanhdep.com, upload a test image, remove its background or adjust its transparency, and then bring it into your Google Slides presentation. Witness firsthand how these straightforward techniques can dramatically enhance the impact and professionalism of your visual storytelling. Your next presentation isn’t just about information; it’s an opportunity for exceptional Visual Design.