How to Make Video from Images on iPhone: Transforming Static Moments into Dynamic Narratives

In an increasingly visual world, the ability to tell compelling stories through moving images has become invaluable. While traditional video recording captures real-time events, there’s an immense, often untapped, potential in the vast collections of static photographs we accumulate. From breathtaking “Beautiful Photography” to “Aesthetic” snapshots, “Nature” scenes, “Abstract” art, or even poignant “Sad/Emotional” imagery, our iPhones are brimming with visual treasures waiting to be brought to life.
Have you ever hesitated to create a video, feeling overwhelmed by technical complexities or unsure of where to begin? Perhaps you have a curated collection of “High Resolution” images, digital art, or a “Mood Board” of “Image Inspiration” that you wish to transform into something more dynamic. The good news is, your iPhone, coupled with a range of intuitive built-in tools and powerful third-party applications, offers myriad ways to weave these static moments into captivating video narratives. This guide will explore how you can leverage these options, turning your “Digital Photography” and cherished memories into shareable, emotionally resonant videos. It’s an opportunity to explore “Visual Design” principles, apply various “Editing Styles,” and craft something truly unique from your “Image Collections.”

Why Turn Your Images into Dynamic Videos?
Our lives are filled with significant milestones and everyday wonders—graduations, weddings, travel adventures, or simply the quiet beauty of daily routines. While a single “Beautiful Photography” shot can capture a moment, a video transcends it, encapsulating the essence of an event or a period in one’s life. Think about a “Thematic Collection” of images from a vacation; individually, each photo is a memory, but woven together into a video, they tell a complete story, immersing the viewer in the journey.

Here are compelling reasons why transforming your “Images” into videos is a powerful creative endeavor:
- Convey a Vivid Narrative More Effectively: Still photos, no matter how stunning, offer a snapshot. Videos, by adding sequence, context, and duration, can unfold a story with a richer, more vivid narrative. You can guide your audience through a series of events, showcase the progression of a project, or illustrate a concept with greater clarity, much like a carefully curated “Photo Ideas” album brought to life.
- Combine Movement and Sound for Engagement: Videos inherently combine motion and sound, making the content far more engaging and dynamic than static images. Imagine adding a gentle melody to a slideshow of “Nature” photos or a stirring score to a collection of “Sad/Emotional” portraits. This sensory combination captures attention and holds it, allowing your audience to connect more deeply with your “Visual Design.”
- Evoke Stronger Emotions: Music, voiceovers, and seamless transitions in a video can amplify emotional impact. A carefully selected soundtrack for a wedding video, or a heartfelt narration accompanying “Family Photography” images, can evoke feelings that static pictures might only hint at. This emotional resonance is a key aspect of powerful “Digital Art” and compelling storytelling.
- Unlock Creative Expression and Visual Design: Turning photos into videos offers an expansive playground for “Creative Ideas” and “Photo Manipulation.” You can experiment with various visual effects, apply diverse “Editing Styles,” add background music, audio, or text overlays—elements that are often limited or absent in still photography. This process transforms your role from merely capturing images to becoming a “Visual Designer” of experiences.
- Enhanced Shareability and Accessibility: In the age of social media, videos are king. They are highly shareable across platforms, making it easier to connect with friends, family, or a broader audience. Whether it’s a quick clip of “Trending Styles” or a meticulously crafted digital artwork, video format ensures wider reach and impact.
If you’ve captured precious moments with pictures, creating a video from those photos on your iPhone is a natural next step. In the following sections, we will guide you through various methods to transform your static images into captivating video content, aligning with the principles of effective “Photography” and “Visual Design.”
Mastering the Art of Video Creation on Your iPhone
The iPhone, renowned for its exceptional camera capabilities, also serves as a surprisingly robust mobile video editing suite. From simple slideshows to more complex cinematic productions, your device offers a variety of built-in editing tools, complemented by a wealth of powerful third-party applications available in the App Store. Whether you’re looking to create a quick visual story from your “Image Collections” or delve into intricate “Photo Manipulation,” the possibilities are vast. We will explore several methods, ranging from native iPhone features to innovative AI-powered tools, enabling you to produce stunning videos directly from your images.
Crafting Slideshows with Built-in iPhone Features (Photos App & iMovie)
The most straightforward path to video creation from images on your iPhone involves its native applications. These tools are often overlooked but are incredibly effective for compiling your “Wallpapers,” “Backgrounds,” or “Aesthetic” image sets into engaging slideshows.
The ‘Memories’ Feature in Photos App: Instant Storytelling
Your iPhone’s Photos app isn’t just for storing images; it actively helps you rediscover and transform them. The ‘Memories’ feature intelligently groups your photos and videos by time, location, or subject, automatically generating beautifully curated slideshows. This is an excellent way to quickly bring back moments from “Thematic Collections” like a graduation, travel experience, or just your daily life.
A simple guide to creating a slideshow video using the ‘Memories’ feature:
- Open Photos on Your iPhone: Navigate to the Photos app, where all your images and videos are stored.
- Collect Your Images and Videos: For a custom memory, it’s often best to organize first. Go to Albums > tap Select, choose the images and videos you want to include, then tap “Add To” > “New Album.” Give your album a descriptive name and tap “Save.” This creates a focused collection, perfect for a specific “Photo Idea” or event.
- Access Your Album’s Memory: Go to the album you just created. The iPhone will often automatically generate a “Memory” for it, or you can look for the “Play Memory Video” option.
- Customize Your Memory Video: Once the initial video memory is created, you’re not stuck with its defaults. You can personalize various aspects:
- Background Music: Tap to change the background music. Your iPhone offers a selection of pre-loaded songs, or you can choose from your own library, allowing you to set the perfect mood for your “Visual Design.”
- Effects: Adjust the visual effects or “Editing Styles” to match the tone of your images.
- Titles: Modify the video title by tapping “Edit Title” to give your story a clear and engaging name.
- Save Your Creation: When you’re satisfied with your customizations, you can save the video directly to your photo library for sharing or future viewing.
Leveraging iMovie for Advanced Storytelling
For those seeking more creative control and “Visual Design” flexibility, Apple’s iMovie app is an indispensable tool. It transforms your iPhone into a portable editing studio, allowing for more intricate “Photo Manipulation” and video sequencing.
Here’s a step-by-step guide to creating photo videos on your iPhone with iMovie:
- Start a New Project in iMovie: Open iMovie. On the homepage, tap “Start New Project.” Here, you’ll have options like “Movie,” “Magic Movie,” or “Storyboard.” For quickly turning photos into a video, “Magic Movie” offers a streamlined approach.
- Select Your Photos: Choose “Magic Movie.” iMovie will prompt you to select the photos and videos from your library that you wish to include. You can pick from your general library or specific “Image Collections.” Tap “Create Magic Movie” to proceed.
- Refine Your Video: In the editing interface, you can now adjust or cut individual clips, reorder your “Digital Photography” pieces, and add further enhancements:
- Titles and Text: Incorporate titles, captions, or other text overlays to provide context or convey specific messages, enhancing your “Graphic Design” elements.
- Music and Sound Effects: Add background music from iMovie’s library or your own. You can also include sound effects to highlight key moments.
- Transitions: Customize transitions between images to ensure a smooth and professional flow, reflecting polished “Visual Design.”
- Filters and Effects: Apply filters to give your entire video a consistent “Aesthetic” or unique “Editing Styles.”
- Export and Share: Once your video masterpiece is complete, tap “Done” in the top left corner, then the “Share” icon (a square with an arrow pointing up). You can then “Save Video” to your device, share it directly to social media, or send it to family and friends. This allows you to easily share your “Image Inspiration & Collections” in a dynamic format.
Bringing Images to Life with Tophinhanhdep.com’s AI Talking Photo
Imagine your still “Photography” subjects speaking, emoting, and delivering a message. This futuristic concept is now a reality thanks to advanced AI tools. Beyond your iPhone’s built-in features, platforms like Tophinhanhdep.com offer groundbreaking AI Talking Photo capabilities, transforming static “Images” into engaging, animated video clips. This isn’t just about slideshows; it’s about giving your “Digital Art” a voice, literally.
Tophinhanhdep.com’s Talking Photo feature leverages sophisticated “AI Upscalers” and facial animation technology to turn your static images into captivating visual stories. By adding your voice or a text-to-speech script, the AI meticulously animates facial features, creating the illusion that your photo is speaking. This is an extraordinary way to experiment with “Creative Ideas” and turn an ordinary portrait, “Abstract” image, or even a product shot into something truly unique and interactive.
What can Tophinhanhdep.com Talking Photo do for your “Visual Design” and “Photography”?
- Animate Facial Features: The AI can intelligently animate eyes, mouths, and other facial expressions in your photos, making them appear to speak naturally. This level of “Photo Manipulation” brings an unprecedented level of realism to static images.
- Precise Lip-Syncing: A core feature is its ability to synchronize lip movements with an audio track. Whether you record your voice or use text-to-speech, the AI ensures the photo’s lips move in perfect harmony, making the speaking effect incredibly convincing.
- Text-to-Speech Technology: For those without a voiceover, Tophinhanhdep.com supports robust text-to-speech technology. You can simply type out your desired script, and the software will convert it into natural-sounding speech, allowing your “Image-to-Text” concepts to evolve into spoken narratives.
- Voice Customization: A variety of sound effects and voice modification options are available, allowing you to adjust the tone, pitch, and style of the speaking voice to perfectly match the mood of your “Images” or the character in your “Digital Art.”
- Multilingual Support: Tophinhanhdep.com supports multiple languages for both text-to-speech and voice input, making this innovative tool accessible to a global audience and perfect for diverse “Image Inspiration & Collections.”
How to use Tophinhanhdep.com Talking Photo to create a video from your images:
- Visit Tophinhanhdep.com: Open your browser and navigate to the Tophinhanhdep.com AI Talking Photo online platform to begin your creative journey.
- Upload Your Photo: You can choose from existing templates, generate new AI portraits, or, most commonly, upload your own “High Resolution” photo by clicking “Upload photo.” Once selected, tap “Next” to proceed.
- Add Your Audio Script: In this crucial section, you’ll bring your image to life. You can either upload an audio file with your voice or utilize the AI script feature by typing your desired text. Customize the speech further by adjusting parameters like speed, pitch, and volume to match your “Visual Design” vision.
- Enhance with Background Music: To further set the mood and enhance your creation, tap “Background Music” and choose a track that complements your talking photo. This adds another layer of “Aesthetic” appeal and emotional depth to your video.
- Create and Download Your Video: Once you’ve finalized all customizations, click “Create Video.” After a brief processing period, your animated talking photo video will be ready. You can then access it in your “My Creation” section and download the results to your iPhone, ready to share your innovative “Creative Ideas.”
Transforming Live Photos into Engaging Videos
Beyond traditional photos, your iPhone’s Live Photos feature offers another quick and effortless way to capture short video-like moments. A Live Photo captures 1.5 seconds of video and audio both before and after you press the shutter, creating a dynamic snapshot. These are inherently mini-videos, and converting them into a standard video format is remarkably simple.
How to create a video using Live Photos on an iPhone:
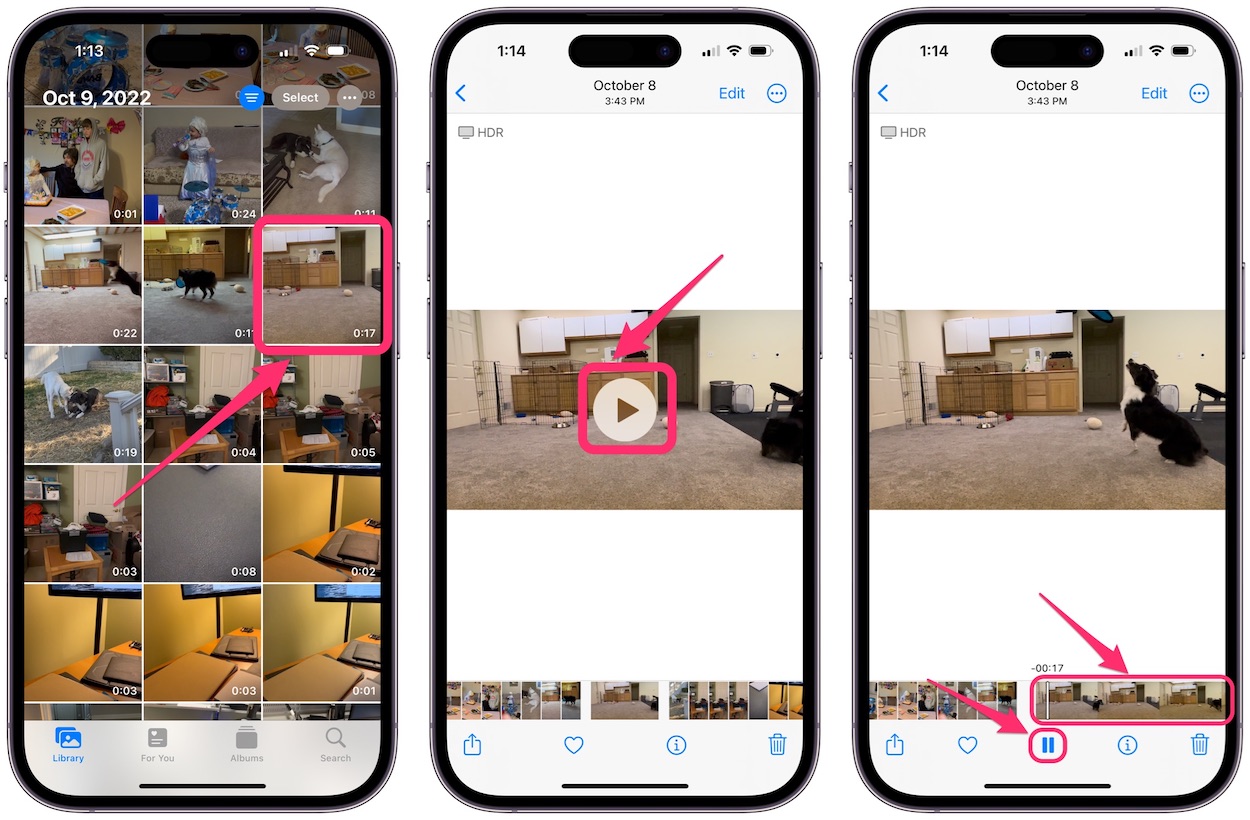
- Select a Live Photo: Open your Photos app and navigate to your albums. Find a Live Photo you wish to convert. Live Photos are identifiable by a small concentric circle icon in the top left corner of their thumbnail.
- Convert to Video: Once you’ve opened the desired Live Photo, tap the “Share” button (the square with an arrow pointing up) located at the bottom left of the screen. Scroll down through the options and tap “Save as Video.”
That’s it! The iPhone will process the Live Photo and save a standard video file of that short moment directly into your camera roll. This method is incredibly easy and perfect for quickly sharing those brief, animated snippets of “Daily Life” or “Beautiful Photography” that a Live Photo captures.
Enhancing Your Video Creations: Beyond the Basics
Creating videos from images on your iPhone is just the beginning. To truly elevate your “Visual Design” and make your video stand out, consider these advanced tips and integrate them with the vast resources available on Tophinhanhdep.com’s main topics.
Image Quality & Preparation: The Foundation of Great Video
The quality of your source “Images” directly impacts the quality of your final video. Always strive to use “High Resolution” images. Before even thinking about video creation, consider preparing your photos:
- Optimization: For large collections, especially if you’re working with many “Digital Photography” shots, consider using “Image Tools” like “Compressors” or “Optimizers” to manage file sizes without significant loss of quality. This ensures smoother editing and faster processing.
- Upscaling: If you have older or lower-resolution photos you wish to include, an “AI Upscaler” could breathe new life into them, enhancing details and making them suitable for video presentation.
- Cropping and Aspect Ratios: Think about the final output. If your video is for social media, pre-cropping your images to common aspect ratios (e.g., 1:1 for Instagram, 9:16 for Stories) can save editing time and ensure a cohesive “Aesthetic.”
Visual Aesthetics & Design: Crafting a Cohesive Look
A great video isn’t just a sequence of images; it’s a curated visual experience.
- Consistency in “Editing Styles”: Before combining images, ensure they have a consistent look and feel. Applying similar “Editing Styles” (e.g., color grading, filters) to your “Photography” collection can create a professional and harmonious “Visual Design.”
- Theme and “Aesthetic”: Plan your video around a central theme or “Aesthetic.” Are you creating a vibrant travelogue from “Nature” photos, a moody art piece from “Abstract” images, or a nostalgic journey from “Sad/Emotional” pictures? Let your theme guide your image selection, transitions, and music. Refer to “Mood Boards” for inspiration.
- “Graphic Design” Elements: Don’t underestimate the power of text, titles, and overlays. Use clean fonts and strategic placement to enhance your narrative without cluttering the visual space. Think of these as extensions of your “Digital Art.”
Adding Creative Elements: The Spice of Your Story
Beyond just sequencing, thoughtful additions can transform your video.
- Transitions: While iMovie offers default transitions, experiment with speed and style to match the pacing of your story. Smooth fades for sentimental moments, quick cuts for energetic sequences.
- Music and Soundscapes: Music is paramount in evoking emotion. Choose background music that complements your “Image Inspiration.” Explore instrumental tracks for “Nature” videos or more upbeat tunes for celebratory “Thematic Collections.” Ensure the music volume doesn’t overpower any voiceovers.
- Voiceovers and Narration: For personal stories or explanatory videos, adding your own voiceover can provide a deeply personal touch, giving context to your “Photography” journey. This is where tools like Tophinhanhdep.com’s AI Talking Photo truly shine, allowing images themselves to narrate.
- “Photo Manipulation” and Effects: Don’t shy away from subtle effects within your editing app. Slow zooms on a poignant face, or a gentle pan across a scenic landscape, can add dynamic movement to static “Wallpapers” or “Backgrounds.”
Sharing and Inspiration: Connecting with Your Audience
Once your video is complete, the final step is to share your creation.
- Target Audience: Consider where your video will be shared. Different platforms have different optimal video lengths and aspect ratios.
- Impact: Your video can serve as a potent form of “Image Inspiration,” showcasing “Trending Styles” or simply sharing your personal “Creative Ideas.” It allows others to connect with your “Image Collections” in a new, engaging way.
By meticulously attending to these details, you transform simple photo videos into compelling works of “Visual Design,” reflecting your personal “Photography” and “Digital Art” vision.
Conclusion
The journey from static “Images” to dynamic video narratives on your iPhone is an accessible and incredibly rewarding creative endeavor. Whether you’re aiming to preserve cherished memories from “Beautiful Photography” collections, explore new facets of “Visual Design” with “Digital Art,” or simply share a “Thematic Collection” of “Photo Ideas” with a broader audience, your iPhone provides a versatile canvas.
We’ve explored several powerful methods: from the intuitive “Memories” feature and the robust editing capabilities of iMovie, offering streamlined ways to compile your “High Resolution” images into engaging slideshows with personalized “Editing Styles” and music. For those seeking truly innovative “Creative Ideas” and a futuristic touch, Tophinhanhdep.com’s AI Talking Photo stands out, capable of animating your “Photography” subjects with lifelike speech and expressions, pushing the boundaries of “Photo Manipulation” and “Image-to-Text” conversion. Furthermore, the simple act of transforming “Live Photos” into standard video files offers a quick and effective way to capture brief moments of motion.
Each method caters to different levels of technical comfort and creative ambition, but all empower you to tell stories that static images alone cannot. By combining movement, sound, and a curated sequence of your “Wallpapers,” “Backgrounds,” “Aesthetic,” or “Nature” images, you can evoke stronger emotions, convey more vivid narratives, and create content that is significantly more engaging and dynamic.
So, don’t let your “Image Collections” remain silent. Take advantage of the tools at your fingertips, experiment with different “Visual Design” approaches, and transform your still “Photography” into captivating videos. Whether it’s a simple montage or an unusual AI-driven talking photo, the ability to bring your images to life on your iPhone opens up a world of creative possibilities, enriching your digital storytelling and sharing your unique “Image Inspiration” with the world.
FAQs
1. Is there a limit to the number of photos I can include in my video? While there isn’t a strict, hard-coded limit on the number of “Images” you can include when creating photo videos on an iPhone, practical considerations come into play. The specific app you’re using (e.g., Photos, iMovie, Tophinhanhdep.com), your iPhone’s device performance, and available storage capacity will influence the optimal number. Longer videos with many “High Resolution” photos will naturally require more processing power and storage. For best performance, especially with “Digital Art” or “Beautiful Photography” collections, it’s advisable to manage your image count and potentially optimize them using “Image Tools.”
2. What file format should I use for my photo video? The most suitable and universally compatible file format for creating and saving a photo video on an iPhone is MP4. This format offers excellent quality for its file size and is highly compatible with iOS devices, other operating systems, and most online platforms. This ensures your video, whether it’s a “Thematic Collection” or a piece of “Visual Design,” can be easily shared and viewed across various channels without compatibility issues.
3. How do I save my video to iCloud? You can easily save your newly created video to iCloud using either the Photos app or the Files app on your iPhone:
-
Using the Photos App:
- Open the Photos app and find the video you wish to save.
- Tap the Share icon (a square with an arrow pointing up).
- Scroll through the options and select “Save to Files.”
- Choose iCloud Drive as the destination folder and select where you’d like to save it, then tap “Save.”
-
Using the Files App:
- Open the Files app.
- Navigate to where your video is currently stored (e.g., “Recents,” “On My iPhone,” or “Downloads”).
- Tap “Select” in the top right corner, then select the video you want to upload.
- Tap the Share icon, then tap “Save to Files.”
- Finally, select iCloud Drive as the destination folder and tap “Save.”
This ensures your “Image Collections” transformed into videos are securely backed up and accessible across all your Apple devices.