Mastering Transparency: How to Make Your Images Invisible in Photoshop for Stunning Visuals

In the dynamic world of digital imagery, the ability to make an image background transparent is not just a technical trick—it’s a foundational skill for photographers, graphic designers, and anyone looking to elevate their visual content. Whether you’re crafting an eye-catching product image for an e-commerce store, designing a unique graphic for a website, or preparing elements for a complex photo manipulation project, achieving transparency in Photoshop unlocks a world of creative possibilities. At Tophinhanhdep.com, we understand the importance of high-quality, versatile images, and this comprehensive guide will walk you through various methods to master image transparency in Photoshop, from quick AI-powered solutions to meticulous manual techniques.
The need for transparent backgrounds spans a wide range of applications. Imagine a beautiful nature photograph where you want to seamlessly integrate a subject onto a new, aesthetic background. Or perhaps you’re building a mood board with a collection of high-resolution images, and each element needs to float freely without a distracting white box. From abstract compositions to sad/emotional photography, the power to isolate a subject and place it anywhere enhances the visual narrative. This tutorial will empower you to create compelling visual designs, offering creative ideas for your next project, whether it involves digital art or professional photography editing styles.
![]()
The Power of Transparency in Visual Design
In an era dominated by visual communication, the quality and flexibility of your images directly impact their effectiveness. A transparent background transforms an ordinary image into a versatile asset, allowing it to blend effortlessly into any visual context.
Why Transparent Images Matter
Transparent images are the chameleons of the digital world. Instead of being confined by their original backdrop, they adapt to their surroundings, providing a seamless and professional look. This adaptability is crucial for:
- Web Design and E-commerce: For online stores, transparent product images are paramount. They allow products to be displayed against various website backgrounds or textures, creating a cohesive brand aesthetic and enhancing the visual appeal. This leads to cleaner product photography and a more engaging shopping experience. For graphic designers creating digital art for websites, a logo with a transparent background can be placed anywhere without an unsightly border, fitting perfectly into responsive designs and trending styles.
- Graphic Design and Digital Art: When combining multiple images or graphic elements, transparency is essential for photo manipulation. It enables artists to layer elements, create composites, and build intricate scenes without having to painstakingly match backgrounds. This is a core technique in creating impressive visual designs and creative ideas.
- Branding and Marketing: Logos, icons, and branding elements often require transparent backgrounds to maintain consistency across different platforms and marketing materials. From business cards to social media banners, a transparent logo ensures a polished and professional presence, reflecting high-resolution quality.
- Creative Photography and Image Collections: For photographers working on thematic collections or mood boards, transparent cut-outs of subjects allow for greater flexibility in presentation. You can easily experiment with different backgrounds, create stunning aesthetic images, or even isolate elements from beautiful photography for re-use in other projects. Whether it’s a vibrant wallpaper or a subtle background, transparent elements make customization simple.
Tophinhanhdep.com offers a wealth of resources related to images, photography, and visual design. Mastering transparency is a key skill that will unlock the full potential of these resources, enabling you to create stunning high-resolution images and explore diverse editing styles.
Quick & Automated: Effortless Background Removal with AI
Adobe Photoshop has continuously evolved, integrating powerful artificial intelligence (AI) tools to simplify complex tasks. For many images, removing a background and achieving transparency can now be done in just a few clicks, making it an indispensable part of modern digital photography and visual design workflows.
Preparing Your Image for Automatic Processing
Before diving into the automated tools, a simple preparatory step ensures the best results.
- Open Your Image: Launch Photoshop and open the image you wish to make transparent. You can drag and drop it directly into Photoshop or go to
File > Open. - Access the Layers Panel: If the Layers panel isn’t visible, go to
Window > Layers. This panel is crucial for managing your image components. - Create a Duplicate Layer: It’s always a good practice to work on a copy of your original image layer. This provides a safety net, allowing you to revert to the original if needed.
- Select the entire image:
Ctrl + A(Windows) orCommand + A(Mac). - Copy:
Ctrl + C(Windows) orCommand + C(Mac). - Paste:
Ctrl + V(Windows) orCommand + V(Mac). This will create a new layer (e.g., “Layer 1”) with your duplicated image.
- Select the entire image:
- Hide the Original Layer: In the Layers panel, click the “eye” icon next to the original “Background” layer to make it invisible. This ensures you’re working solely on the new duplicate layer and can see the transparent checkerboard pattern once the background is removed.
![]()
Leveraging Photoshop’s “Remove Background” Feature
For Photoshop versions 2020 (v21.0.0) or later, the “Remove Background” feature is a game-changer, powered by Adobe Sensei AI. It’s incredibly efficient for images with clearly defined subjects.
- Navigate to the Properties Panel: On the right side of your Photoshop interface, locate the “Properties” panel. If it’s not visible, go to
Window > Properties. - Locate Quick Actions: Within the Properties panel, scroll down to the “Quick Actions” section.
- Click “Remove Background”: You’ll see an option labeled “Remove Background.” Click on it.
- Observe the Magic: Photoshop’s AI will analyze your image, automatically detect the subject, and mask out the background. The background will be replaced by the universal grey and white checkered pattern, indicating transparency.
This automatic method is fantastic for product photography, creating quick aesthetic backgrounds, or isolating elements for thematic collections. However, its effectiveness depends on the image complexity. For subjects with intricate details, wispy hair, or backgrounds that blend too closely with the foreground, manual refinement or a more precise manual technique might be necessary.
This AI-driven approach to image editing aligns with Tophinhanhdep.com’s focus on innovative Image Tools, allowing for swift optimization of high-resolution stock photos and inspiring new creative ideas in digital art.
Precision & Control: Manual Techniques for Complex Backgrounds
While AI offers speed, manual techniques provide unparalleled precision, essential for complex photo manipulation, high-resolution photography, and intricate graphic design projects. Mastering these tools gives you complete control over every pixel, ensuring a flawless transparent background for even the most challenging images.
Understanding Photoshop’s Selection Tools
Photoshop offers a diverse arsenal of selection tools, each suited for different types of images and tasks. Choosing the right tool is the first step towards a perfect transparent background.
- Magic Wand Tool: Ideal for selecting areas of similar color. If your image has a solid, contrasting background (like a product on a white or single-colored backdrop), the Magic Wand can select the entire background with a single click. You may need to adjust the “Tolerance” in the options bar to control how wide a range of similar colors is selected.
- Object Selection Tool: Available in newer Photoshop versions, this AI-assisted tool allows you to draw a rough rectangle or lasso around an object, and Photoshop automatically detects and selects the object within that region. It’s excellent for separating subjects from busy backgrounds, providing a good starting point for further refinement.
- Quick Selection Tool: A brush-like tool that intelligently expands your selection as you paint over an area. It works well for subjects with defined edges and varied colors, quickly selecting large portions of your desired subject.
- Lasso Tools (Lasso, Polygonal Lasso, Magnetic Lasso):
- Lasso Tool: Freehand selection, best for rough selections or simple shapes.
- Polygonal Lasso Tool: Creates selections with straight-edged segments, perfect for geometric objects or when you need sharp, angular selections.
- Magnetic Lasso Tool: This intelligent tool snaps to the edges of contrasting areas as you move your mouse along the object’s perimeter, making it a favorite for outlining objects with clear boundaries.
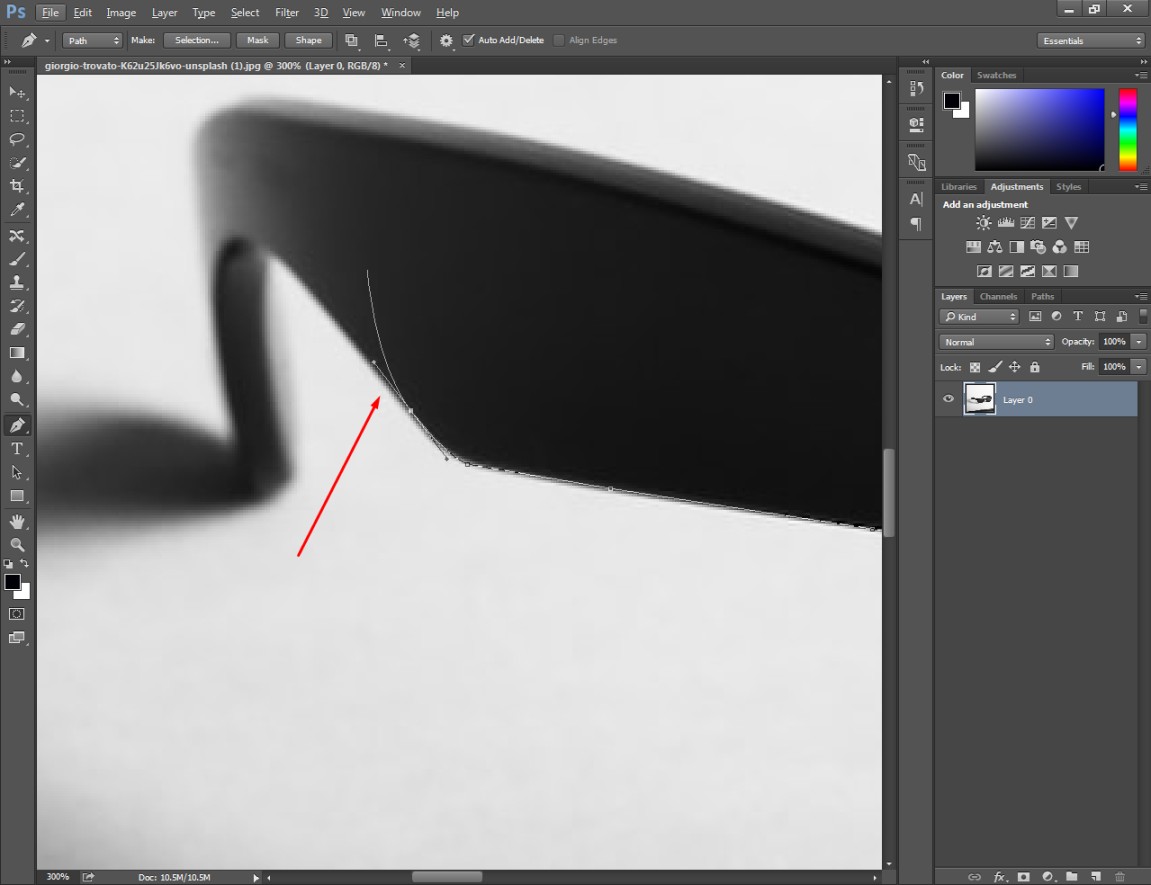
- Pen Tool: The most precise selection tool, allowing you to create vector-based paths that can be converted into selections. It’s time-consuming but delivers pixel-perfect results, especially crucial for professional product photography and graphic design where flawless edges are paramount. This is often used for “clipping path” services.
For this guide, we’ll focus on a combination of Select Subject, Select and Mask, and Layer Masks for comprehensive control, as these methods provide a robust workflow for most complex scenarios.
Refining Selections with “Select and Mask”
Once you have an initial selection, no matter how good, it rarely gets it “perfect” on the first try, especially for areas like hair, fur, or complex textures. The “Select and Mask” workspace is Photoshop’s dedicated environment for refining these edges.
- Initial Subject Selection: Start by making an initial selection of your subject. The
Select > Select Subjectcommand (or using theObject Selection ToolorQuick Selection Tool) is a great starting point. - Enter “Select and Mask”: With your selection active (you’ll see the “marching ants”), go to
Select > Select and Maskor click the “Select and Mask” button in the options bar when a selection tool is active. - Familiarize with the Workspace:
- View Modes: Experiment with different view modes (e.g., “On Layers,” “On Black,” “On White,” “Overlay”) to clearly see your selection against various backgrounds. The “On Black” or “Overlay” modes are often best for spotting imperfections.
- Edge Detection: Adjust the “Radius” slider under “Edge Detection” to help Photoshop find and refine softer or more complex edges. “Smart Radius” can be useful for varying edge types.
- Refine Edge Brush Tool: This is your primary tool for fine-tuning. Paint over areas like hair or fur where the background is still showing through, and Photoshop will intelligently separate the subject from the background.
- Brush Tool (Add/Subtract): Use the standard
Brush Tool(with+or-selected in the options bar) to manually add parts of the subject that were missed or remove parts of the background that were mistakenly included. - Global Refinements: Experiment with
Smooth,Feather,Contrast, andShift Edgesliders to further clean up the selection’s overall appearance.Shift Edgeis particularly useful for shrinking or expanding the selection slightly.
- Output Settings: In the “Output Settings” section, choose “Output To: Layer Mask.” This is crucial for non-destructive editing.
- Confirm: Click
OKto apply your refined selection as a layer mask to your image layer.
This meticulous process is central to digital photography editing styles, allowing for precise photo manipulation that often defines the aesthetic of high-resolution images.
Non-Destructive Editing with Layer Masks
Layer masks are a cornerstone of professional Photoshop workflows, enabling non-destructive editing. Instead of permanently deleting pixels, a layer mask allows you to hide or reveal parts of a layer, making adjustments flexible and reversible. This is particularly valuable for complex visual designs and digital art projects.
- Understanding Layer Masks: A layer mask appears as a black-and-white thumbnail next to your image layer in the Layers panel.
- White: Reveals that part of the layer.
- Black: Hides that part of the layer, making it transparent.
- Grayscale: Creates semi-transparency.
- Creating a Layer Mask:
- If you used “Select and Mask” and chose “Output To: Layer Mask,” you’ll already have one.
- Alternatively, with an active selection, click the “Add Layer Mask” button (a rectangle with a circle inside) at the bottom of the Layers panel. This will automatically create a mask based on your selection.
- To create a blank mask that reveals everything, select your layer and click the “Add Layer Mask” button without an active selection.
- Editing a Layer Mask:
- Select the Mask: Click on the layer mask thumbnail in the Layers panel to ensure it’s active for editing (it will have a border around it).
- Use the Brush Tool: Select the
Brush Tool(B). - Paint with Black/White: Set your foreground color to black to hide (make transparent) areas, or to white to reveal areas. Use varying brush sizes and hardness to achieve precise control over edges.
- Paint with Grays: Painting with shades of gray on the mask will create semi-transparent areas, allowing for subtle blending.
- Benefits of Layer Masks:
- Non-Destructive: You never delete original image data, meaning you can always go back and adjust the mask without losing any pixels.
- Flexibility: Easily refine edges, create smooth transitions, or even temporarily disable the mask (
Shift + clickon the mask thumbnail) to see your original image. - Complex Effects: Combine multiple layer masks or use them with adjustment layers to create sophisticated visual designs and creative ideas. For instance, you can apply a Black and White adjustment layer and then use a mask to selectively desaturate only certain parts of an image, enhancing emotional impact.
Layer masks are a fundamental tool for digital art and photo manipulation, providing the ultimate control over image composition and ensuring that your high-resolution images maintain their quality throughout the editing process.
Special Cases & Advanced Transparency
Beyond simply cutting out subjects, Photoshop offers tools for creating different kinds of transparency, crucial for diverse visual design elements like web graphics and aesthetic compositions.
Crafting Transparent Gradients
Transparent gradients are powerful for adding depth, fading elements, or creating subtle overlays in your designs, especially for backgrounds and aesthetic imagery.
- Select the Gradient Tool: Activate the
Gradient Tool(G) from the toolbar. - Open the Gradient Editor: In the options bar at the top, click on the gradient thumbnail to open the
Gradient Editor. - Choose a Basic Transparent Gradient: In the “Basics” set, select a gradient like “Foreground to Transparent.” This typically sets one end of the gradient to your foreground color and the other end to full transparency.
- Edit Opacity Stops:
- Along the top of the gradient bar in the editor, you’ll see “Opacity Stops” (small squares). Select one.
- Adjust the “Opacity” slider below to set the desired transparency level for that point in the gradient. You can add more opacity stops by clicking above the gradient bar.
- Edit Color Stops: Along the bottom of the gradient bar, you’ll see “Color Stops.” Double-click a color stop to change its color. You can add more color stops by clicking below the gradient bar.
- Apply the Gradient: Once your transparent gradient is set, click
OKin the Gradient Editor. Then, on your image, click and drag with theGradient Toolto apply it. You can apply it on a new layer for non-destructive editing and then adjust the layer’s blending mode and opacity for various effects, enhancing your visual designs and creative ideas.
This technique is invaluable for creating subtle transitions in wallpapers, overlaying text on images, or adding artistic flair to digital art projects.
Creating Transparent Logos
For branding and web design, a logo with a transparent background is non-negotiable. It ensures your brand mark looks clean and professional on any medium.
- Open Your Logo: Open your logo file in Photoshop. If it’s a vector file (like .AI, .EPS, .PDF), ensure it’s rasterized correctly upon opening (e.g., set “Crop to: Bounding Box,” “Mode: RGB Color”).
- Unlock the Layer: If your logo is on a “Background” layer (indicated by a lock icon), double-click it in the Layers panel to convert it into an editable layer (e.g., “Layer 0”).
- Remove the Background:
- Magic Wand Tool (for solid backgrounds): If your logo has a solid background (e.g., white), select the
Magic Wand Tool(W). Click on the background color. This will select all pixels of that color. Then pressDeleteon your keyboard. - Magic Eraser Tool (for solid backgrounds): The
Magic Eraser Tool(found by clicking and holding theEraser Tool) is a quick one-click solution for solid backgrounds. Just click on the background color, and it will turn transparent. - Selection Tools (for complex backgrounds): For logos with gradients or complex backgrounds, use the
Pen Tool,Quick Selection Tool, orObject Selection Toolto meticulously select the logo itself, then inverse the selection (Shift + Ctrl + IorShift + Command + I) and delete the background.
- Magic Wand Tool (for solid backgrounds): If your logo has a solid background (e.g., white), select the
- Save as PNG-24: This is the critical step to maintain transparency for logos.
Creating transparent logos is a fundamental aspect of graphic design and is essential for consistent branding across all your image collections and marketing efforts.
Saving Your Transparent Masterpiece for Web and Print
The final step in making your image transparent in Photoshop is to save it in a format that preserves transparency, ensuring it’s ready for its intended use—whether that’s an aesthetic background, a high-resolution print, or a fast-loading web graphic.
Choosing the Right File Format: PNG for Transparency
Not all image file formats support transparency. It’s crucial to select the correct one to ensure your hard work isn’t lost.
- PNG (Portable Network Graphics): This is the gold standard for images requiring transparency.
- PNG-24: Supports 24-bit color depth and full alpha transparency, allowing for smooth, gradual transparency effects (like soft edges or transparent gradients). This is the recommended format for web graphics, logos, and product images where high quality and varying levels of transparency are needed.
- PNG-8: Supports only 256 colors and typically handles only binary transparency (either fully transparent or fully opaque). While it creates smaller file sizes, it can produce a “halo” effect around images and isn’t suitable for images with smooth edges or subtle transparencies. Always choose PNG-24 when prompted.
- GIF (Graphics Interchange Format): Supports transparency, but like PNG-8, it’s limited to 256 colors and binary transparency. It’s best for simple animations or icons with sharp edges and limited color palettes.
- PSD (Photoshop Document): This is Photoshop’s native file format. It preserves all layers, masks, adjustment layers, and other editable elements. Always save a copy as a PSD if you anticipate needing to make further edits to your transparent image later.
- JPEG (Joint Photographic Experts Group): Does NOT support transparency. If you save a transparent image as a JPEG, any transparent areas will automatically be filled with white (or occasionally black), defeating the purpose of your transparency work. JPEG is best for photographs where transparency is not needed and smaller file sizes are desired.
Optimizing for Performance and Quality
Especially for web-based images (like wallpapers, backgrounds, or stock photos), optimizing file size while maintaining visual quality is key for fast loading times and a positive user experience. Tophinhanhdep.com emphasizes efficient image tools, and proper saving techniques are part of that optimization.
- “Export As” or “Save for Web (Legacy)”:
- Go to
File > Export > Export As...(for newer Photoshop versions) orFile > Export > Save for Web (Legacy)...(for older versions). - In the export dialog box:
- Format: Select
PNG(ensure it defaults to PNG-24). - Transparency: Make sure the “Transparency” checkbox is ticked.
- Image Size/Dimensions: Adjust the dimensions if needed. For retina displays or high-resolution images, consider exporting at 1.5x or 2x the display size while keeping file size in mind. Tophinhanhdep.com encourages high-resolution imagery, but balance is key.
- File Size Preview: Pay attention to the estimated file size. While PNG-24 is excellent for quality and transparency, it can result in larger file sizes compared to JPEGs.
- Format: Select
- Go to
- Naming and Location: Choose a clear filename and save your transparent image to an organized folder. This is especially helpful for managing image collections or visual design assets.
- Consider Image Compressors and Optimizers: After saving your PNG, you can further reduce its file size using online or desktop image compressors (some AI Upscalers also offer optimization features). These tools can often shrink PNGs without noticeable quality loss, vital for web performance.
Saving correctly ensures your transparent images are ready for any platform, be it for high-resolution digital art prints, aesthetic backgrounds on a website, or as a component in a complex photo manipulation.
By mastering these techniques, you’re not just making parts of an image disappear; you’re expanding your creative horizons. You can craft compelling visual narratives, enhance your photography, and design stunning digital art pieces. Tophinhanhdep.com is your go-to resource for all things images, photography, image tools, visual design, and image inspiration. Continue exploring our vast collections and tutorials to bring your most ambitious creative ideas to life.