Mastering Image Merging in Photoshop: A Comprehensive Guide for Tophinhanhdep.com Users

In the dynamic world of digital imagery, the ability to seamlessly combine multiple photographs into a single cohesive visual is an indispensable skill. For creators, photographers, and graphic designers alike, merging images in Photoshop unlocks a universe of creative possibilities, transforming ordinary shots into extraordinary visual narratives. Whether you’re crafting stunning wallpapers, designing intricate backgrounds, or producing captivating digital art, the techniques explored within this guide are foundational to achieving professional-grade results. At Tophinhanhdep.com, we understand the pursuit of visual excellence, and our comprehensive resources, from high-resolution stock photos to advanced image tools, are designed to empower your creative journey.
Photoshop, a cornerstone of image manipulation, provides a robust suite of tools that cater to every merging need, from simple side-by-side compositions to complex photo manipulations. This guide, tailored for Tophinhanhdep.com users, will delve into various methods, detailing step-by-step instructions, practical applications, and crucial tips to ensure your merged images are not just technically sound but aesthetically compelling. We’ll explore both fundamental and advanced techniques, including the nuanced art of Layer Masks, the expressive power of Blend Modes, the efficiency of Quick Selection, and the cutting-edge capabilities of AI-driven Generative Fill. By mastering these approaches, you’ll be well-equipped to create everything from serene nature composites and abstract digital paintings to emotive photography that truly resonates with viewers.

Fundamental Techniques for Combining Images in Photoshop
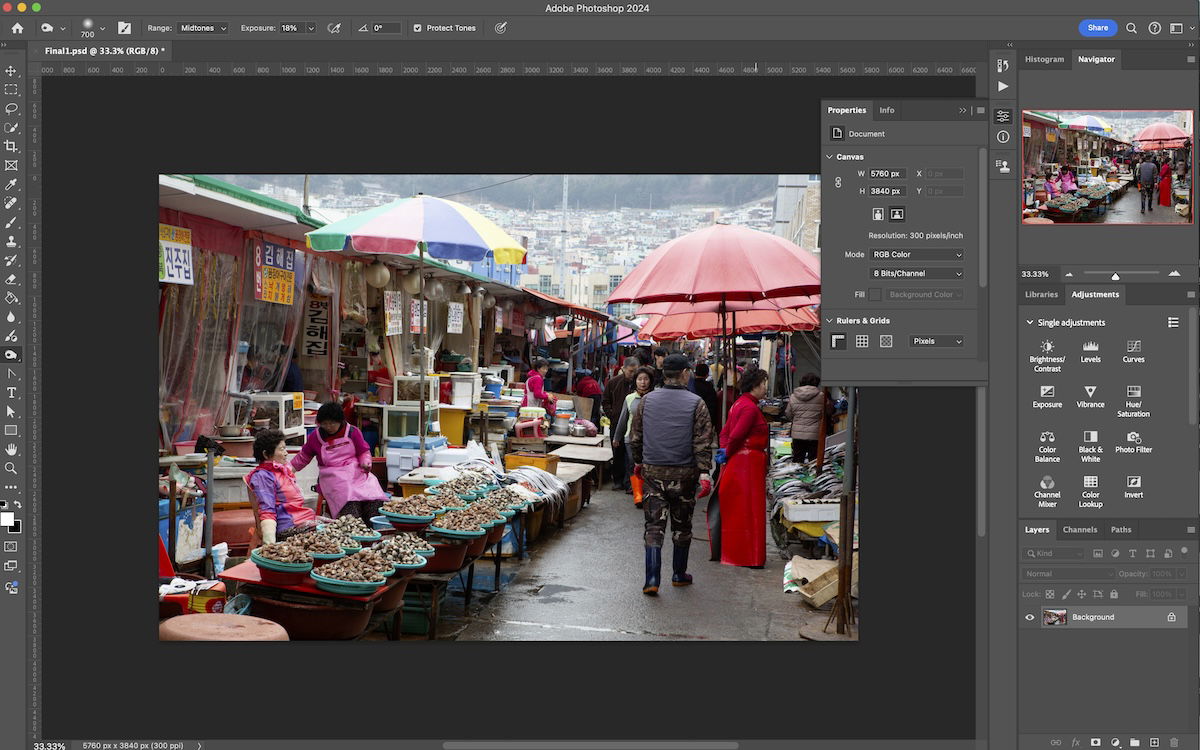
At the heart of Photoshop’s image merging capabilities lies its powerful layer-based editing system. This non-destructive approach allows you to manipulate individual elements of a composite image without permanently altering the original pixels, providing unparalleled flexibility and creative control. As you build thematic collections or stunning mood boards on Tophinhanhdep.com, understanding these core techniques will be invaluable.
Method 1: Precision Blending with Layer Masks
Layer Masks are arguably the most versatile and popular method for merging two or more images in Photoshop. They offer meticulous control over how and where images blend, making them essential for photo manipulation and graphic design projects found on Tophinhanhdep.com. Unlike simply erasing parts of a layer, which is destructive, a layer mask merely conceals or reveals parts of a layer, allowing for adjustments at any stage.
Understanding Layer Masks: A Layer Mask controls the transparency of a layer. The magic lies in its selective application: instead of making an entire layer uniformly transparent, you can apply varying levels of transparency to different parts of an overlaying image. This is achieved using shades of black, white, and gray:
- White: Reveals the layer content.
- Black: Conceals the layer content, allowing the layer(s) below to show through.
- Grayscale: Creates partial transparency, allowing for subtle transitions and blends.
This selective control is perfect for blending complex backgrounds or integrating elements into existing beautiful photography.
Step-by-Step Guide to Using Layer Masks:
-
Step 1: Open the Necessary Images Begin by opening the two (or more) images you wish to combine in Photoshop. For optimal results, it’s beneficial if the images have similar dimensions and color spaces, though Photoshop allows for resizing and color correction. Think about the final aesthetic you want to achieve – perhaps merging a dramatic sky into a landscape photo for a breathtaking nature wallpaper on Tophinhanhdep.com.
-
Step 2: Arrange Your Layout Once both images are open, you’ll see them in separate tabs at the top of your Photoshop window. Select the “Move Tool” (V on your keyboard), click on the image you want as your overlay, and drag it over the tab of your background image. While dragging, hold down the
Shiftkey; this will center the overlay image perfectly on your background document when you release the mouse button. Now, both images reside as separate layers in a single document in your Layers panel. You can rearrange their order by dragging layers up or down in the panel. The top layer will be your overlay, and the bottom will be your background. -
Step 3: Add the Layer Mask With your desired overlay layer selected in the Layers panel, click the “Add layer mask” icon at the bottom of the Layers panel. This icon typically looks like a rectangle with a circle inside it. A white thumbnail will appear next to your layer’s image thumbnail, indicating an active layer mask. By default, this mask is white, meaning your entire overlay layer is currently visible.
-
Step 4: Blending with the Gradient Tool Now, it’s time to blend. Select the “Gradient Tool” (G on your keyboard) from the toolbar. Look at the foreground and background color boxes at the bottom of the toolbar – ensure they are set to black and white (press
Dto set defaults, thenXto swap if needed, making black your foreground color). With the layer mask thumbnail still selected (not the image thumbnail), click and drag the gradient tool across your image. For example, if you want to gradually reveal the background from the left side of the overlay, click on the left edge of the image, drag towards the right, and release. A black-to-white gradient will appear on your mask, creating a smooth transition where black areas conceal the top layer and white areas reveal it. Experiment with the direction and length of your drag to achieve different blending effects. -
Step 5: Fine-Tuning with the Brush Tool For more precise control, switch to the “Brush Tool” (B on your keyboard). Again, ensure your layer mask thumbnail is selected. With black as your foreground color, paint over areas of the overlay layer you want to conceal and reveal the background. Adjust the brush size and, crucially, the “Hardness” setting (found in the options bar at the top). A softer brush (lower hardness) will create more natural, feathered edges, ideal for seamless blends, while a harder brush creates sharper edges. If you make a mistake, simply switch your foreground color to white (press
X) and paint over the masked area to restore the top layer. Grayscale colors can be used for partial transparency, allowing for even finer control in complex photo manipulation. -
Step 6: Saving Your Result Once you’re satisfied with your composite, Tophinhanhdep.com recommends saving your work in a layered format (like
.PSDor.TIFF) to preserve your editing flexibility. You can then save a flattened copy as a.JPGor.PNGfor sharing on the web or as a background image.
Method 2: Dynamic Effects with Blend Modes and Opacity
While Layer Masks offer granular control, Photoshop’s Blend Modes and Opacity settings provide faster, more artistic ways to combine images, often yielding unexpected and beautiful results perfect for abstract art or aesthetic imagery on Tophinhanhdep.com. These methods manipulate how the pixels of one layer interact with the pixels of the layers beneath it.
Understanding Blend Modes: Blend Modes dictate how the colors of the active layer (the blend layer) interact with the colors of the underlying layers (the base layers). Photoshop offers dozens of blend modes, categorized by their effects:
- Darkening Modes (e.g., Multiply, Darken): Generally make the image darker, often useful for merging textures or shadow details.
- Lightening Modes (e.g., Screen, Lighten): Tend to make the image brighter, great for combining highlights or glowing effects.
- Contrast Modes (e.g., Overlay, Soft Light, Hard Light): Increase or decrease contrast, ideal for adding “pop” or stylistic effects.
- Inversion/Component Modes (e.g., Difference, Exclusion, Hue, Saturation): Create unique color shifts and artistic effects.
Understanding Opacity and Fill:
- Opacity: Controls the overall transparency of an entire layer. A lower opacity makes the layer more transparent, revealing more of the layers below. This is a general adjustment that affects all pixels and effects on the layer.
- Fill: Similar to Opacity, Fill also controls transparency, but it specifically affects the opacity of the pixels and shapes within the layer, while potentially leaving layer styles (like drop shadows or strokes) at full opacity. In many blending scenarios, Opacity and Fill will behave identically, but for advanced effects involving layer styles, their distinction becomes important.
Step-by-Step Guide to Using Blend Modes and Opacity:
-
Step 1: Load Images into Photoshop Open your chosen images. For this method, a convenient approach is to use Photoshop’s built-in script: Go to
File > Scripts > Load Files into Stack. In the dialog box, click “Browse” and select all the photos you want to merge. Crucially, uncheck “Attempt to Automatically Align Source Images” and “Create Smart Object After Loading Layers” for initial placement control. Click “OK.” Photoshop will open all selected images as separate layers within a single document. -
Step 2: Layer and Position Your Images Once loaded, your images will be stacked on top of each other. Use the “Move Tool” (V) to reposition individual layers. If you need more workspace, you can extend your canvas size via
Image > Canvas Size. To place images side-by-side or precisely, go toView > Snapand ensure “Snap to Document Boundaries” is checked. Then, select a layer with the Move tool, holdShift(to constrain movement), and drag it to the edge of the canvas. If the image goes off-canvas, useImage > Reveal Allto automatically resize the canvas to fit all visible layers. -
Step 3: Experiment with Blend Modes Select your top layer in the Layers panel. Above the layers list, you’ll find a dropdown menu labeled “Normal” (this is the default blend mode). Click on it to reveal a list of various blend modes. As you hover your cursor over each mode, Photoshop will provide a live preview of how that mode affects your image, showing the interaction between the selected layer and the layers beneath it. Experiment freely! A “Multiply” blend mode might darken elements, while “Screen” brightens, and “Overlay” boosts contrast, creating dramatic effects for your digital photography.
-
Step 4: Adjust Layer Opacity and Fill To the right of the Blend Mode dropdown, you’ll see the “Opacity” slider (usually set to 100%). Drag this slider left or right to decrease or increase the transparency of your selected layer. A lower opacity will allow more of the underlying layers to show through, creating a more subtle blend. The “Fill” slider, located just below Opacity, functions similarly but can produce different results when layer styles are applied. Play with both in conjunction with different blend modes to fine-tune your composition. This is particularly effective for creating soft, dreamy aesthetic images.
-
Step 5: Utilize Keyboard Shortcuts for Efficiency To speed up your workflow, select the “Move Tool” (V) to ensure a tool is active that doesn’t conflict with blend mode shortcuts. Then, hold down the
Shiftkey and press the+or-keys on your keyboard to cycle through the different blend modes. This allows for rapid experimentation and quick comparison of effects.
Combining Methods: One of Photoshop’s greatest strengths is the ability to combine these techniques. You can apply a blend mode and opacity adjustment to a layer, and then add a layer mask to selectively reveal or conceal parts of that blended layer. This hybrid approach offers incredible power for creating complex and nuanced photo manipulations, blending elements from nature and abstract themes seamlessly.
Advanced Merging Strategies and AI-Powered Assistance
Beyond the foundational layer-based methods, Photoshop offers more specialized techniques for specific merging tasks, including subject extraction and the innovative use of Artificial Intelligence. These tools are perfect for Tophinhanhdep.com users looking to push the boundaries of their visual design projects and digital art.
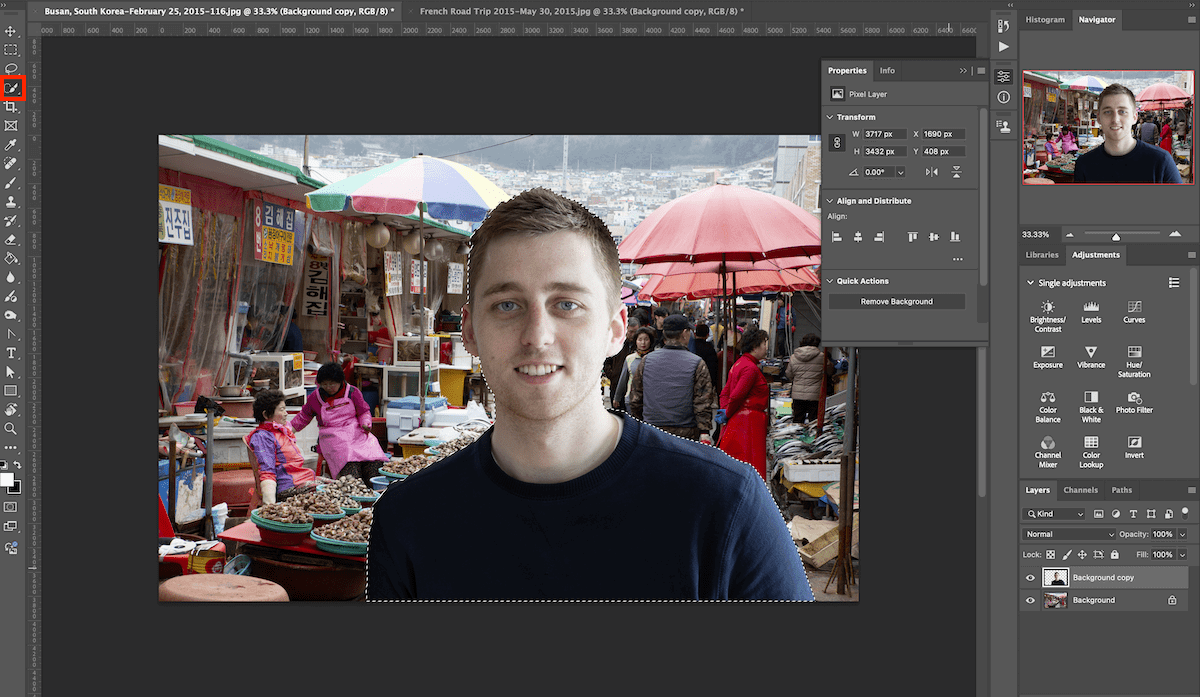
Method 3: Streamlined Subject Extraction with Quick Selection
When your goal is to cleanly lift a subject from one image and place it into another, the Quick Selection Tool, combined with precise masking, is an efficient and accurate method. This is ideal for scenarios like swapping faces, placing people into new environments, or creating product photography composites.
When to Use Quick Selection: This method shines when dealing with subjects that have reasonably well-defined edges against their background. It’s particularly effective for isolating people, animals, or distinct objects. While the tool is “quick,” the refinement process is what ensures a convincing blend.
Step-by-Step Guide to Quick Selection & Compositing:
-
Step 1: Select Your Source and Destination Images Carefully choose two images: one containing the subject you want to extract, and another that will serve as the new background. For the most convincing results, consider factors like focal length, lighting direction, and image quality. While Photoshop can correct color temperature and tonal differences, a good starting match reduces post-editing effort. For instance, putting a portrait (Sad/Emotional, Beautiful Photography) into an abstract background for a unique Tophinhanhdep.com aesthetic.
-
Step 2: Open Images in Separate Photoshop Documents Open your two chosen images in Photoshop, ensuring they open in separate tabs or windows. This technique focuses on isolating the subject in its own document first before bringing it into the new scene.
-
Step 3: Cut Out Your Subject from Its Background
- Duplicate Layer: In the document with your subject, first duplicate the background layer by dragging it onto the “New Layer” icon (a
+inside a square) at the bottom of the Layers panel. This preserves your original image. - Activate Quick Selection Tool: Select the “Quick Selection Tool” from the toolbar (it often shares a spot with the Magic Wand tool).
- Brush Your Subject: With the Quick Selection Tool active, carefully brush over your subject. Photoshop’s intelligent algorithm will attempt to detect and select the edges. A “marching ants” (dotted) line will form around your selection.
- Refine Selection: If the selection extends beyond your subject, hold down
Alt(Win) /Option(Mac) and brush over the unwanted areas to subtract from the selection. If parts of the subject are missed, simply brush over them normally to add to the selection. You can also adjust the brush size ([and]) for greater precision. - Inverse Selection & Delete Background: Once your subject is accurately selected, invert the selection by pressing
Ctrl + Shift + I(Win) /Cmd + Shift + I(Mac). This selects everything around your subject. Now, press theBackspace(Win) /Delete(Mac) key to remove the background. You’ll see a checkered pattern, indicating transparency. Your subject now stands alone on a transparent background layer.
- Duplicate Layer: In the document with your subject, first duplicate the background layer by dragging it onto the “New Layer” icon (a
-
Step 4: Place Your Selection into the New Photo Now, drag the layer containing your isolated subject from its current document tab over to the tab of your background image. Release the mouse button, and your subject will appear as a new layer in the background document. To adjust its size and position, select the subject layer and press
Ctrl + T(Win) /Cmd + T(Mac) to activate “Free Transform.” Drag the corner handles to scale, and move the bounding box to position your subject. HoldShiftwhile scaling to maintain proportions. PressEnter(Win) /Return(Mac) to apply the transformation. -
Step 5: Performing Convincing Edits for Seamless Blending This is often the most critical step for a realistic composite. Discrepancies in lighting, color temperature, and tone can make a merged image look unnatural.
- Isolate Subject Edits: To ensure adjustments only affect your subject, select its layer and then use the Quick Selection Tool to quickly select the entire subject (since it’s already on a transparent background, the selection will be confined to its shape).
- Color Temperature Adjustment: Go to
Image > Adjustments > Color Balanceor add an “Adjustment Layer” (e.g.,Color BalanceorPhoto Filter) from the Layers panel. Adjust the color sliders (Cyan-Red, Magenta-Green, Yellow-Blue) to match the ambient lighting of your background. For example, if the background is warm (like a sunset), add more yellow/red to your subject. - Tonal Adjustments: Similarly, use
Image > Adjustments > LevelsorCurves(or corresponding adjustment layers) to match the brightness and contrast of your subject to the background. Pay attention to shadows and highlights. - Dodge and Burn for Realistic Lighting: For subtle lighting refinements, use the “Dodge Tool” (for brightening) and “Burn Tool” (for darkening). Set the “Exposure” in the options bar to a low percentage (e.g., 5-15%) for gradual, natural adjustments. Carefully paint over areas of your subject that would naturally catch light or fall into shadow within the new environment. This helps create depth and realism, essential for high-resolution images.
- Layer Mask for Fine-Tuning Edges: Even after initial extraction, edges can sometimes look unnatural. Add a Layer Mask to your subject layer (as described in Method 1), and use a soft black brush at low opacity to gently soften or refine the edges, helping the subject truly settle into its new background.
Method 4: AI-Powered Merging with Generative Fill
The advent of AI in Photoshop, particularly the “Generative Fill” feature, has revolutionized how Tophinhanhdep.com users can combine images and create new visual content. This powerful tool leverages artificial intelligence to seamlessly blend images and even generate new content based on text prompts, aligning perfectly with our “AI Upscalers” and “Digital Art” categories. Generative Fill excels at creating smooth, context-aware transitions between disparate elements.
Prerequisite: Generative Fill works best when the backgrounds or elements you’re trying to merge have some conceptual similarity, allowing the AI to intelligently bridge the visual gap.
Step-by-Step Guide to Using Generative Fill:
-
Step 1: Canvas Setup and Image Placement
- Create a New Document: Begin by creating a new Photoshop document (
File > NeworCtrl + N/Cmd + N). Choose dimensions that provide ample space for both your images and a central gap for the AI to work its magic. For instance, for a seamless background merger, you might choose a width of 6000 pixels and a height of 4000 pixels, or whatever suits your input images. - Place Images: Use
File > Place Embeddedto insert your two selected photos onto the new canvas. Place each image on its own layer, arranging them with a noticeable gap in the middle. The goal is to give the AI space to generate the blending content. - Align and Adjust: Use the “Move Tool” (V) and “Free Transform” (
Ctrl + T/Cmd + T) to scale and position your images as desired, ensuring they don’t overlap too much initially and leaving the central area open for generation.
- Create a New Document: Begin by creating a new Photoshop document (
-
Step 2: Define the Blending Area
- Select the Gap: Choose the “Rectangular Marquee Tool” (M on your keyboard) from the left toolbar.
- Create a Selection: Draw a rectangular selection that covers the empty space between your two images and extends slightly into a portion of each image. This is crucial as it provides the AI with context from both sides, enabling it to create a more harmonious blend. The selection doesn’t always need to be perfectly centered or rectangular; any selection tool can work for marking the pixels for Generative Fill.
-
Step 3: Use Generative Fill to Combine Images
- Activate Generative Fill: Once your selection is active, a contextual task bar will usually appear. Click the “Generative Fill” button.
- Enter a Prompt (Optional but Recommended): A text field will appear. You can leave this blank to let the AI try to infer the content based on the surrounding pixels. However, providing a prompt like “seamless transition,” “blended landscape,” “foggy middle,” or “connecting bridge” can guide the AI towards a more specific and desired outcome.
- Generate! Click the “Generate” button. Photoshop will then analyze your selection and the surrounding image data, and after a few moments, it will produce three variations of the merged area on a new layer (a Generative Layer).
- Review and Regenerate: Examine the three variations in the Properties panel. Choose the one that best suits your vision. If none of the options are satisfactory, simply click “Generate” again to produce a new set of variations. You can repeat this process until you achieve a blend that matches your expectations, effortlessly creating stunning new backgrounds or elements for your Tophinhanhdep.com collections.
Overcoming Common Challenges and Optimizing Your Workflow
Even with a solid understanding of merging techniques, Photoshop can present unique challenges, especially when dealing with complex layer interactions. Tophinhanhdep.com aims to equip you with solutions to these common hurdles, ensuring your creative process remains smooth and efficient.
Addressing Blend Mode Conflicts During Merging
A frequent frustration for Photoshop users occurs when trying to merge layers that have different blend modes applied. Merging them directly often results in an altered appearance, different from the live preview you painstakingly created. This can be particularly perplexing for visual designers working on intricate digital art.
Why the Conflict Happens: There are three key reasons why direct merging of blend modes changes your image:
- Non-Destructive Nature of Blend Modes: Blend modes don’t actually change the pixels on a layer. Instead, they dictate how those pixels interact and mix with the pixels on the layers beneath them. What you see on your screen is a live, dynamic preview of this interaction, not a permanent alteration of the layer’s content. When you merge layers, Photoshop has to “flatten” those interactions into fixed pixel data.
- One Blend Mode Per Layer: A single Photoshop layer can only have one active blend mode at a time. For example, a layer cannot simultaneously be set to “Overlay” (boosting contrast) and “Multiply” (darkening). When multiple blend-mode layers are merged, Photoshop must choose a single blend mode for the resulting layer (often reverting to “Normal” or the blend mode of the bottom-most merged layer), thus losing the combined effect.
- The Entire Stack Matters: The overall appearance of your composite image isn’t just a result of the layers with active blend modes. It’s the cumulative effect of all visible layers interacting, including any background layers set to the default “Normal” blend mode. When you merge only a subset of these layers, you disrupt the complete calculation that Photoshop performs to create the final visual.
The Solution: The “Merge Visible to New Layer” Trick To overcome this and preserve your carefully crafted blend mode effects without flattening your entire document, Photoshop offers a powerful, hidden keyboard shortcut that creates a “snapshot” of your current visible composite onto a new, separate layer. This is invaluable for high-resolution photography and complex graphic design where non-destructive editing is paramount.
How to Use the Trick:
-
Step 1: Select the Top Layer In your Layers panel, select the topmost layer of your composite (the one that is visually highest in your stack).
-
Step 2: Execute the Merge Command Hold down
Shift + Alt + Ctrl(Windows) orShift + Option + Command(Mac) on your keyboard, and then press the letterE. What happens? Photoshop takes a flattened rendition of everything currently visible on your canvas – including all blend mode interactions, opacity settings, and underlying layers – and places it onto a brand new layer positioned at the very top of your Layers panel. Critically, all your original layers, with their individual blend modes and settings, remain untouched beneath this new “merged” layer. You now have a single layer that perfectly represents your composite, while retaining the flexibility to go back and tweak individual elements if needed. -
Step 3: Rename and Continue Editing It’s good practice to rename this new layer (e.g., “Merged Composite”) by double-clicking its name in the Layers panel. You can now make further global edits (like applying filters or overall color corrections) to this merged layer without affecting your original, editable layers. This is a game-changer for advanced photo manipulation and creating diverse image collections for Tophinhanhdep.com.
Refining Your Composites: Fixing Mistakes and Finalizing Your Art
The journey of merging images is rarely without missteps. Photoshop provides robust tools to correct errors, remove unwanted elements, and finalize your artwork, ensuring your high-resolution images and digital art achieve their full potential.
How to Fix Common Mistakes:
-
Swapping Images (Side-by-Side Composites): If you’ve placed two images side-by-side (as in Method 2), and want to quickly swap their positions:
- Ensure the “Move Tool” (V) is active.
- Select the entire canvas:
Select > All(Ctrl + A/Cmd + A). A selection outline will appear around the document edges. - In the Layers panel, select the top image layer.
- In the Options bar at the top, click the “Align Left Edges” or “Align Right Edges” icon. This will align the selected layer to the respective edge of your canvas selection.
- Repeat for the other image layer, aligning it to the opposite edge.
- Deselect the canvas:
Select > Deselect(Ctrl + D/Cmd + D).
-
Removing Unwanted Objects:
- Clone Stamp Tool (S): Excellent for duplicating pixels from one area of an image to another. Hold
Alt(Win) /Option(Mac) and click to define a source point, then paint over the unwanted object. This is versatile for complex backgrounds. - Patch Tool (J): Part of the healing brush family, the Patch Tool allows you to select an unwanted area and drag the selection to a “donor” area. Photoshop then intelligently blends the textures and tones. This works particularly well for areas with simpler, uniform backgrounds.
- Source Mode: Replaces the selected area with the dragged-to donor fragment.
- Destination Mode: Fills the area where the selection was dragged with the selected patch.
- Content-Aware Fill (
Edit > Content-Aware Fill): For larger, more complex unwanted objects, select the object, then use this powerful AI-driven feature. Photoshop will analyze surrounding content and intelligently fill the selected area. - Generative Remove (AI): The newest AI tool for removing objects with context-aware generation. Make a selection and simply hit “Generate” without a prompt.
- Clone Stamp Tool (S): Excellent for duplicating pixels from one area of an image to another. Hold
-
Undoing Actions:
- Step Backwards: The universal undo in Photoshop is
Ctrl + Z(Win) /Cmd + Z(Mac). Pressing it repeatedly will cycle backward through your last several actions (by default, Photoshop remembers up to 50 actions, configurable in preferences). - History Panel: For more extensive backtracking, the
Window > Historypanel provides a detailed list of every action performed since the document was opened. You can click on any previous state to revert your image to that point.
- Step Backwards: The universal undo in Photoshop is
Saving Your Masterpiece: File Formats for Tophinhanhdep.com Choosing the correct file format for saving your merged images is crucial, depending on their intended use. Tophinhanhdep.com emphasizes both high resolution and optimized formats for various applications.
-
For Continued Editing (Layered Files):
- Photoshop Document (.PSD): This is Photoshop’s native file format. It saves all your layers, layer masks, adjustment layers, smart objects, and other editable elements. Always save a
.PSDversion as your working file, especially for complex photo manipulation or visual design projects that might require future modifications. - Tagged Image File Format (.TIFF): TIFF files also support layers and higher bit depths, making them excellent for preserving image quality and editability. They are often preferred in professional printing and archiving. TIFFs offer lossless compression, ensuring no detail is lost, which is vital for maintaining the high resolution of stock photos.
- Photoshop Document (.PSD): This is Photoshop’s native file format. It saves all your layers, layer masks, adjustment layers, smart objects, and other editable elements. Always save a
-
For Web, Sharing, and Final Output (Flattened Files):
- Joint Photographic Experts Group (.JPEG / .JPG): The most common format for photos. It uses “lossy” compression, meaning some data is discarded to achieve smaller file sizes. Ideal for sharing online, email, or displaying as backgrounds/wallpapers on Tophinhanhdep.com, but be mindful of compression levels – excessive compression can degrade image quality.
- Portable Network Graphics (.PNG): Supports lossless compression and transparency. Excellent for images with sharp edges, logos, or when you need a transparent background. PNGs are larger than JPEGs but offer superior quality for certain types of visuals.
- WebP (.WEBP): A modern format developed by Google, offering superior lossless and lossy compression for web images. It can produce significantly smaller file sizes than JPEG or PNG while maintaining high quality, making it ideal for optimizing images on Tophinhanhdep.com.
When saving, navigate to File > Save As or File > Save a Copy. Select your desired format from the “Format” dropdown menu. For web use, consider File > Export > Save for Web (Legacy) or File > Export > Export As for more control over compression and dimensions, ensuring your images are optimized for Tophinhanhdep.com’s fast loading and beautiful display.
Elevating Your Visual Creations with Tophinhanhdep.com
The journey to mastering image merging in Photoshop is an exciting one, opening doors to endless creative expression. From crafting intricate visual designs and digital art to producing captivating photography, the techniques covered in this guide are fundamental to enhancing your skills. Tophinhanhdep.com is dedicated to being your ultimate resource for all things imagery.
We believe that every image tells a story, and with Photoshop’s merging capabilities, you become the storyteller, weaving together different elements to create compelling narratives. Whether you’re curating aesthetic collections, designing stunning abstract wallpapers, or showcasing breathtaking nature photography, the ability to combine images seamlessly is a cornerstone of visual impact.
Explore Tophinhanhdep.com for an unparalleled collection of resources. Dive into our vast library of high-resolution stock photos, perfect for your next composite project. Utilize our advanced image tools, from converters and compressors to AI upscalers, to optimize every pixel of your merged creations. Seek inspiration from our thematic collections and trending styles, sparking new photo ideas and filling your mood boards with fresh perspectives.
By applying these merging techniques, you’re not just editing photos; you’re creating new realities, enhancing emotional depth in your sad/emotional photography, and building magnificent digital art pieces. Continue to experiment, learn, and let your imagination soar. Tophinhanhdep.com is here to support every step of your creative journey, helping you transform your visions into beautiful, unforgettable visual experiences.