How to Mirror an Image in Photoshop: Create Stunning Symmetrical Designs with Tophinhanhdep.com

Adobe Photoshop, from its foundational Photoshop CS roots to the cutting-edge capabilities of Photoshop CC, remains the undisputed champion in the realm of digital arts. It’s far more than just a software; it’s a boundless canvas where both aspiring enthusiasts and seasoned professionals bring their creative visions to life. Whether your goal is to meticulously edit a high-resolution portrait, craft intricate digital art for social media, or design compelling visuals for advertising, Photoshop stands as the quintessential tool. Its remarkable evolutionary journey has seen it transform from basic image editing software into a comprehensive digital art powerhouse, constantly adapting to the diverse and ever-growing needs of its vast global user base. Through continuous updates by Adobe, Photoshop consistently stays at the forefront of technological innovation in visual design.
At Tophinhanhdep.com, we understand the immense power of impactful visuals. Our platform is dedicated to providing an extensive array of resources for all your image and photography needs, encompassing everything from breathtaking wallpapers and aesthetic backgrounds to advanced image tools and graphic design inspiration. Mastering techniques like mirroring an image in Photoshop is a fundamental skill that unlocks a universe of creative possibilities, allowing you to transform ordinary photographs into extraordinary pieces of digital art. This guide, brought to you by Tophinhanhdep.com, will walk you through the precise steps to mirror a selection or an entire image in Photoshop, helping you achieve captivating mirror image effects with ease and precision.

Understanding the Power of Mirroring in Digital Art and Photography
Mirroring an image in Photoshop is a versatile technique that offers a multitude of creative applications across various visual disciplines. It’s not merely about flipping an image; it’s about crafting symmetry, creating abstract compositions, and generating compelling visual narratives. From enhancing digital photography to constructing intricate graphic designs, the mirror effect can transform a simple picture into an artistic statement.
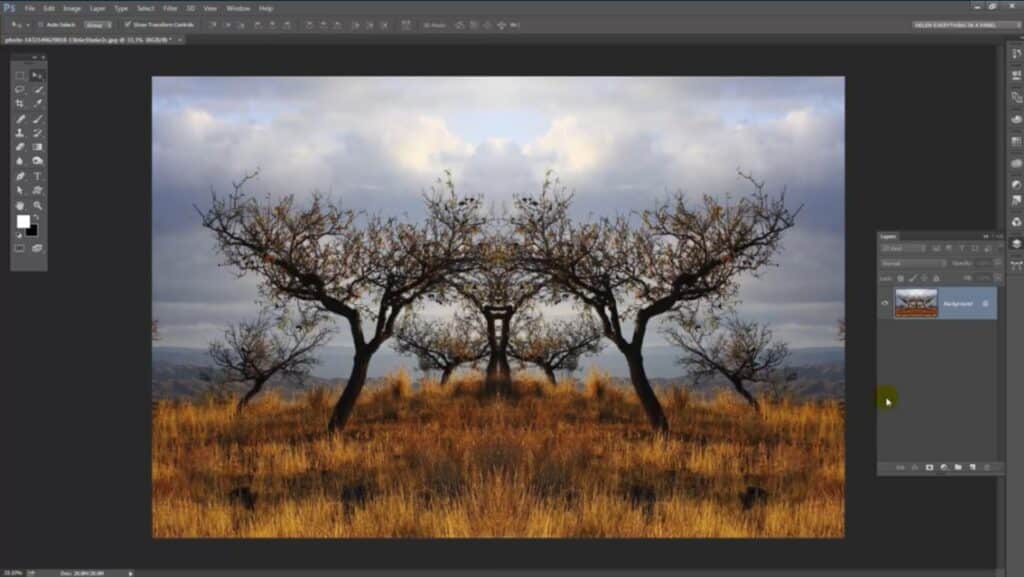
For photographers, especially those focused on nature photography or beautiful photography, mirroring can highlight inherent symmetries or introduce new, surreal elements to landscapes, water reflections, or architectural shots. Imagine a serene lake scene where the reflection is not just a copy but an artistic mirror image, emphasizing the tranquility and depth. In abstract art and digital art, mirroring serves as a foundational element for building complex patterns, mandalas, and kaleidoscopic designs, pushing the boundaries of creative ideas. This technique is often seen in trending styles for album covers, movie posters, and striking aesthetic images used as wallpapers or backgrounds.
Beyond aesthetics, mirroring can be a practical tool in photo manipulation. It can help in correcting asymmetrical features in portraits, extending backgrounds, or even creating surreal dreamscapes where elements appear duplicated or reflected in unexpected ways. The ability to flip horizontally or vertically opens up avenues for creating new compositions that might not be possible with the original photograph. Tophinhanhdep.com advocates for leveraging such techniques to elevate your visual content, ensuring your images stand out, whether they are high-resolution stock photos or personal aesthetic collections.
Step-by-Step Guide: Mirroring an Entire Image in Photoshop
Applying a mirror effect to your entire image is one of the most straightforward yet impactful transformations you can perform in Photoshop. This method is perfect for creating immediate, striking backgrounds, aesthetic wallpapers, or simply adjusting the orientation of a photo for a better composition.
Preparing Your Canvas: Opening and Duplicating Your Image

The first crucial step in any Photoshop endeavor, especially one involving significant transformations, is to ensure you’re working non-destructively. This means preserving your original image while experimenting with edits.
-
Launch Adobe Photoshop and Open Your Image: Begin by opening Adobe Photoshop. Once the software is running, navigate to the top menu bar, click on
File, and then selectOpen. Browse your computer for the image you wish to mirror and clickOpento load it into a new Photoshop window. This image will serve as your starting point. At Tophinhanhdep.com, we encourage starting with high-resolution images to ensure the best possible output quality for your mirrored creations. -
Duplicate Your Background Layer: To safeguard your original image, it’s essential to duplicate the background layer. This creates a safety net, allowing you to revert to the original state if needed. In the Layers panel (usually located on the right side of your screen), right-click on the
Backgroundlayer and selectDuplicate Layer. A dialog box will appear; you can simply clickOKto create “Background Copy” or rename it to something more descriptive like “Mirrored Layer.” Ensure that this new duplicate layer is actively selected in the Layers panel, as all subsequent transformations will apply to this layer.
Executing the Flip: Horizontal or Vertical Transformation
With your image open and duplicated, you’re ready to apply the mirroring effect to the entire canvas. Photoshop offers two primary options for this, allowing you to achieve either a side-to-side or top-to-bottom reflection.
-
Navigate to Image Rotation Options: Head to the top menu bar, click on
Image, then hover overImage Rotation. A submenu will appear, presenting various rotation and flipping options. -
Choose Your Mirror Orientation: From the
Image Rotationsubmenu, you will find two crucial commands for mirroring:- Flip Canvas Horizontal: Selecting this option will mirror your entire image from left to right, or vice versa. This is ideal for creating reflections across a vertical axis, often used in landscapes or to create a symmetrical visual effect that extends outwards.
- Flip Canvas Vertical: Opting for this will mirror your entire image from top to bottom, or vice versa. This creates a reflection across a horizontal axis, perfect for water reflections, architectural elements appearing upside down, or generating surreal dual-reality scenes.
Your choice between these two will depend entirely on the orientation of your original image and the specific mirrored effect you aim to achieve. Upon selection, you will immediately see your entire image mirrored. This simple step can instantly transform a regular photograph into an impactful aesthetic image, perfect for new backgrounds or eye-catching wallpapers.
Finalizing and Saving Your Mirrored Masterpiece
Once you’ve achieved the desired full-image mirror effect, the final steps involve consolidating your layers (if necessary) and saving your work.
-
Merge Layers (Optional but Recommended): If you’ve duplicated your background layer, and you’re satisfied with the mirrored result, you might want to merge the layers. This can simplify your file and is often a step before saving. Right-click on your top (mirrored) layer in the Layers panel and select
Merge Down(to merge with the layer below it) orFlatten Image(to merge all layers into one background layer). -
Save Your Mirrored Image: To preserve your mirrored masterpiece, go to
Filein the top menu bar and selectSave As.... This allows you to save the mirrored version as a new file, ensuring your original image remains untouched.- File Format: Choose a suitable format. JPEG is common for web use and general sharing (good for compressing images, which Tophinhanhdep.com’s image compressors can further optimize), while TIFF or PSD (Photoshop Document) are excellent for preserving image quality and layers for future editing (important for high-resolution digital photography).
- Location and Name: Navigate to your desired saving location and provide a descriptive name for your new mirrored image.
By following these steps, you’ve successfully mirrored an entire image in Photoshop, ready to be used as a striking visual, a unique background, or a component in more complex graphic design projects.
Mastering Selective Mirroring: Creating Specific Reflections
While mirroring an entire image is useful, Photoshop’s true power lies in its ability to manipulate specific elements. Selective mirroring allows for intricate photo manipulation, enabling you to duplicate and flip only certain parts of your image to create reflections, extend patterns, or design completely new compositions. This is where your creative ideas truly come to life, contributing significantly to compelling visual design and digital art.
Isolating Your Subject: The Art of Selection
The foundation of selective mirroring is accurate selection. Photoshop provides a robust suite of tools to precisely isolate any part of your image, whether it’s a simple shape or an intricate subject. Precision in this step is paramount, especially when working with high-resolution images, as it directly impacts the seamless integration of your mirrored element.
-
Choose Your Selection Tool: Adobe Photoshop offers a diverse range of selection tools, each suited for different requirements. You can find these tools in the Tools panel, typically located on the left side of your screen.
- Rectangular Marquee Tool (M): Ideal for basic, geometric selections like squares or rectangles. Click and drag to define your area. For a perfect square, hold
Shiftwhile dragging. - Elliptical Marquee Tool (M): For circular or elliptical selections. Hold
Shiftfor a perfect circle. - Lasso Tool (L), Polygonal Lasso Tool (L), Magnetic Lasso Tool (L): Best for freehand selections. The Polygonal Lasso is great for straight edges, while the Magnetic Lasso snaps to contrasting edges.
- Quick Selection Tool (W): Often a go-to for many, this tool intelligently detects and selects areas based on color and texture, making quick work of subjects with defined edges.
- Magic Wand Tool (W): Selects areas of similar color with a single click.
- Pen Tool (P): For the most precise and complex selections, allowing you to create vector paths that can be converted into selections. This is crucial for professional graphic design and detailed photo manipulation.
- Rectangular Marquee Tool (M): Ideal for basic, geometric selections like squares or rectangles. Click and drag to define your area. For a perfect square, hold
-
Make Your Selection: Activate your chosen selection tool by clicking its icon. Then, carefully draw around the portion of the image you wish to mirror. As you make your selection, a “marching ants” dotted line will appear, indicating the active area. Take your time to refine the selection. For delicate edges, consider using
Select and Mask(accessible from the Options Bar after making an initial selection) to perfect the edges, especially for hair or intricate textures. This attention to detail ensures a clean and professional aesthetic for your final image.
Duplicating and Transforming Your Selection
Once your specific area is precisely selected, the next phase involves replicating that selection onto a new layer and then applying the mirroring transformation. This ensures that the original portion of your image remains untouched and allows for independent manipulation of the mirrored element.
-
Duplicate the Selection to a New Layer: With your desired area still actively selected (indicated by the “marching ants”), use a powerful keyboard shortcut to duplicate it onto a new layer:
- Ctrl + J (for Windows users)
- Command + J (for Mac users) This action creates a brand new layer in your Layers panel containing only your selected content. This new layer is paramount for non-destructive editing, giving you the freedom to experiment without permanently altering your original image. It’s like having a backup plan, ensuring you can always revert to the original state if needed, a principle highly valued in high-resolution digital photography.
-
Access the Free Transform Command: Ensure your newly created duplicate layer is actively highlighted in the Layers panel. Then, go to the top menu bar, click on
Edit, and selectFree Transform. Alternatively, use the keyboard shortcut:- Ctrl + T (for Windows users)
- Command + T (for Mac users) A bounding box with handles will appear around your duplicated selection, indicating that it’s now in Free Transform mode, ready for manipulation.
-
Position the Reference Point: In the center of the Free Transform bounding box, you’ll see a small target icon known as the reference point. This point determines the origin around which all transformations (like scaling, rotating, or flipping) will occur. For a precise mirror effect, you need to reposition this reference point.
- If your reference point is not visible in newer Photoshop versions, ensure the
Toggle Reference Pointcheckbox is enabled in the Options Bar at the top. - Click and drag the reference point from its center position onto the side handle where you intend the mirror to occur. For example, if you want to mirror the selection horizontally from its left edge, drag the reference point to the left-middle handle of the bounding box. If mirroring from the top edge vertically, drag it to the top-middle handle. This locks the transformation to that edge, making the mirroring effect seamless.
- If your reference point is not visible in newer Photoshop versions, ensure the
-
Execute the Flip Transformation: With the Free Transform command still active and your reference point correctly positioned, right-click (Windows) or Control-click (Mac) anywhere inside the Free Transform bounding box. A contextual menu will appear.
- Select
Flip Horizontal: This will mirror your selection from left to right along the axis defined by your reference point. - Select
Flip Vertical: This will mirror your selection from top to bottom along the axis defined by your reference point. Upon selecting your desired flip option, you will observe your duplicated selection being mirrored. The Free Transform bounding box might shift, but your selection will have been inverted.
- Select
-
Commit the Transformation: Once the flip is applied, you need to commit the transformation to exit Free Transform mode. Click the checkmark icon in the Options Bar at the top of your screen, or simply press
Enter(Windows) /Return(Mac) on your keyboard. Your mirrored selection is now ready for placement and further adjustments.
Fine-Tuning and Blending: Achieving Seamless Integration
After flipping your selection, the next critical phase involves positioning it accurately and blending it seamlessly with the rest of your image. This step is vital for achieving a professional and polished look, enhancing the overall visual design and contributing to beautiful photography.
-
Position Your Mirrored Selection with the Move Tool: Once your selection is flipped, activate the
Move Toolfrom the Tools panel (it looks like a small arrow crossed over a square, or simply pressVon your keyboard). With this tool active, click and drag your mirrored layer to its desired spot on the canvas. For effects like reflections, you’ll likely place it directly adjacent to the original selection, aligning it perfectly. -
Utilize Guides for Precision and Symmetry: For paramount precision and to ensure perfect symmetry, employing guides is a game-changer.
- Activate Rulers: If rulers aren’t visible, go to
Viewin the top menu bar and selectRulers(or pressCtrl + R/Command + R). - Drag Guides: Once rulers are active, click within either the horizontal or vertical ruler and drag your cursor onto the canvas. A blue guide line will appear. Position this guide exactly where you want your mirrored selection to align with the original. You can drag multiple guides to create a precise grid. By snapping your mirrored layer to these guides, you can achieve flawlessly symmetrical and well-aligned results, ensuring your mirrored effect looks professional and polished, which is especially important for graphic design and detailed photo manipulation.
- Activate Rulers: If rulers aren’t visible, go to
-
Experiment with Layer Masks for Selective Blending: If you’ve mirrored a complex selection or want only parts of the mirrored layer to be visible,
Layer Masksare indispensable. A layer mask allows you to hide portions of a layer without permanently erasing them, offering non-destructive control over transparency.- Add a Layer Mask: Select your mirrored layer in the Layers panel, then click the
Add Layer Maskicon (a rectangle with a circle inside) at the bottom of the Layers panel. - Paint on the Mask: Select a soft-edged
Brush Tool(B) with black as your foreground color to paint over areas of the mirrored layer you want to hide, or white to reveal. Gray tones will create partial transparency. This technique is fantastic for creating gradual reflections or blending elements subtly, adding depth and realism to your digital art.
- Add a Layer Mask: Select your mirrored layer in the Layers panel, then click the
-
Explore Blend Modes for Creative Effects: The
Blend Modesin the Layers panel offer a powerful way to interact your mirrored layer with the layers beneath it. Experimenting with different blend modes can result in unique visual effects and help the mirrored section integrate seamlessly or create an artistic overlay.- Common modes like
Overlay,Soft Light,Multiply, orScreencan dramatically alter the appearance of your mirrored element, giving it different intensities, colors, and textures when combined with the original. This is a core technique in creative photo manipulation and for developing unique editing styles.
- Common modes like
-
Merge and Save Your Composite Image: Once you’re fully satisfied with the mirrored placement, adjustments, and blending, it’s time to finalize your edits.
- Merge Layers: Right-click on your top (mirrored) layer in the Layers panel and select
Merge Downto combine it with the layer below. Alternatively, select all relevant layers and right-click to chooseMerge Layers. If you’re completely finished, you can chooseFlatten Imageto combine all visible layers into a single background layer. - Save Your Progress: Head to
Filein the top menu bar and selectSave As...to save a new version of your image, orSave(Ctrl/Cmd + S) if you’re updating an existing file. Choose an appropriate format (e.g., JPEG for sharing, PNG for transparency, or TIFF/PSD for high-quality archival).
- Merge Layers: Right-click on your top (mirrored) layer in the Layers panel and select
By diligently following these steps, you will have successfully added a stunning mirror effect to a specific part of your image, transforming your digital photography into a sophisticated piece of visual design. Tophinhanhdep.com provides a wealth of resources, including image compressors and optimizers, to ensure your high-resolution mirrored images are perfectly prepared for any platform or purpose.
Advanced Techniques and Creative Applications for Mirroring
Beyond basic flipping, Photoshop’s robust features allow for more intricate mirroring effects and provide a platform for truly innovative visual design. These advanced techniques, combined with an understanding of Photoshop’s underlying workflow, can elevate your digital photography and graphic design projects to professional levels.
Expanding Your Canvas for Dynamic Effects
Sometimes, the original canvas size isn’t enough for the expansive mirrored vision you have in mind. Adjusting canvas space is crucial for creating grander, more complex symmetrical designs or abstract images.
-
Increase Canvas Size for Non-Overlapping Mirroring: If your selection is close to the edge and you wish to mirror it without overlapping the original image, or if you plan to create multiple reflections, you’ll need more canvas space.
- Go to the
Imagemenu, selectCanvas Size(or pressAlt + Ctrl + C/Option + Command + C). - In the Canvas Size dialog box, adjust the
WidthorHeight(or both) to expand your canvas. Crucially, use theAnchorgrid to specify which direction the canvas should expand. For instance, if you want to mirror an image to the right, anchor your current image to the left, and increase the width. This creates additional transparent space where your mirrored duplicate can reside without obscuring the original, essential for creating panoramic reflections or expansive backgrounds.
- Go to the
-
Utilize Free Transform for Angled or Intricate Adjustments: While
Flip HorizontalandFlip Verticalare direct, the Free Transform tool offers much more flexibility for unique mirrored effects.- Activate
Free Transform(Ctrl + T / Command + T) on your duplicated layer. - Instead of just flipping, you can
Rotatethe mirrored element to different angles,Skewit for perspective distortion, orDistortit to fit specific shapes. Right-click within the Free Transform bounding box to access these options. - This is particularly useful for creating reflections on uneven surfaces, adding dynamic movement to abstract art, or blending a mirrored element at a unique angle within a photo manipulation project.
- Activate
Leveraging Photoshop’s Ecosystem for Enhanced Visuals
Photoshop’s efficiency is significantly boosted by understanding and utilizing its core features. These tips ensure your editing process is not only more effective but also preserves the quality of your high-resolution images.
-
Smart Objects: Non-Destructive Editing at its Best: Before making any transformative changes, such as mirroring, consider converting your layer to a
Smart Object.- Right-click on your layer in the Layers panel and select
Convert to Smart Object. - This ensures that any edits, transformations (including mirroring), or filters applied are non-destructive. You can scale, rotate, and flip your Smart Object multiple times without any loss of original image quality. This is invaluable for preserving high-resolution detail, especially when creating complex compositions or working on stock photos, and aligns perfectly with Tophinhanhdep.com’s commitment to quality digital photography.
- Right-click on your layer in the Layers panel and select
-
Shortcut Mastery: Streamlining Your Workflow: The true power of Adobe Photoshop is unleashed when you master keyboard shortcuts. They dramatically speed up your workflow, making your editing process smoother and more intuitive.
Ctrl + Z(Windows) /Command + Z(Mac): Undo your last action.Ctrl + Alt + Z(Windows) /Command + Option + Z(Mac): Step backward through multiple actions in your history.Ctrl + D(Windows) /Command + D(Mac): Deselect an active selection.V: Activates the Move Tool.M: Cycles through Marquee selection tools.W: Cycles through Quick Selection and Magic Wand tools. Familiarizing yourself with these and other shortcuts, often highlighted in Tophinhanhdep.com’s tutorials, is key for efficient graphic design and digital art production.
-
The History Panel: Freedom to Experiment: The
Historypanel (Window > History) is your best friend for experimentation. It records every step you take, allowing you to revert back to any previous stage of your work. This gives you the freedom to try out different mirroring techniques, blend modes, or positioning adjustments without fear of permanent mistakes.
Creative Ideas: Beyond Simple Reflections
Mirroring is a gateway to boundless creative exploration. Here are some advanced creative ideas you can implement, leveraging the techniques discussed, aligning with Tophinhanhdep.com’s focus on image inspiration and collections.
-
Kaleidoscopic Patterns: By mirroring a selection multiple times, both horizontally and vertically, and then rotating these duplicated elements, you can create intricate kaleidoscopic patterns. This technique is fantastic for generating abstract art, unique backgrounds, or captivating digital art pieces. Imagine taking a small, interesting detail from a nature photography shot and transforming it into a complex, symmetrical explosion of color and form. This can form the basis of stunning wallpapers or thematic collections.
-
Surreal Dual-Reality Images: Mirroring can be used to create surreal effects, making objects appear to stretch indefinitely or creating fantastical creatures. For instance, mirroring a person’s head vertically can create a “two-headed” figure, while mirroring a building horizontally can make it appear to extend into an impossible, ethereal landscape. These kinds of photo manipulations lead to truly unique aesthetic images and compelling visual narratives.
-
Artistic Water Reflections: While natural water reflections are beautiful, you can enhance or create entirely new ones using mirroring. Take a picture of an object, mirror it vertically, and then apply subtle distortions or blend modes to make it look like a genuine, rippling reflection on water. This adds depth and a poetic quality to your beautiful photography.
-
Extending Backgrounds and Wallpapers: If you have an image with an interesting background but limited space, mirroring a portion of that background can seamlessly extend it. This is particularly useful for creating custom wallpapers or backgrounds that fit specific aspect ratios without cropping essential elements, thus ensuring optimal composition for high-resolution displays.
-
Mood Boards and Thematic Collections: Mirrored images, with their inherent symmetry and often surreal quality, can be powerful additions to mood boards. They can evoke emotions, establish unique aesthetics (e.g., sad/emotional for introspection, abstract for creativity), and contribute significantly to thematic collections. By experimenting with mirroring, you unlock new photo ideas that can be curated into compelling visual stories.
In conclusion, the ability to mirror an image in Photoshop is a fundamental yet incredibly powerful technique for anyone involved in digital photography, graphic design, or visual art. From simple whole-image flips to intricate selective manipulations, mastering these steps empowers you to create stunning symmetrical designs, abstract compositions, and surreal photo manipulations. Tophinhanhdep.com is your go-to resource for further exploration into image tools, high-resolution imagery, and endless creative inspiration. Continue to experiment, learn, and unleash your creative potential with Photoshop and the guidance from Tophinhanhdep.com.