Mastering Image Mirroring in PowerPoint: A Comprehensive Guide for Dynamic Visuals

In the realm of digital presentations, visual impact is paramount. A well-crafted slide deck can captivate an audience, convey complex ideas with clarity, and leave a lasting impression. Among the myriad of tools available for enhancing your visuals, mirroring images in PowerPoint stands out as a deceptively simple yet powerful technique. It’s a skill that allows for intricate design, creative storytelling, and the correction of minor compositional imperfections, transforming ordinary images into extraordinary visual assets.
At Tophinhanhdep.com, we understand the profound influence of stunning imagery. From high-resolution wallpapers and aesthetic backgrounds to captivating nature photography, abstract art, and emotionally resonant pictures, our platform is a treasure trove for anyone seeking to elevate their visual content. Mirroring images in PowerPoint is a fundamental aspect of digital photography, graphic design, and photo manipulation, enabling you to harmonize your visuals with your overall presentation theme. This guide will walk you through the precise steps to mirror images, shapes, and even text in PowerPoint, demonstrating how this technique can unlock a new dimension of visual creativity for your projects.
The Essential Techniques: How to Mirror Images in PowerPoint
Mirroring, or flipping, an image in PowerPoint involves reversing its orientation either horizontally or vertically, creating a reflection-like effect. This differs from rotation, which changes an image’s angle. Whether you’re aiming for perfect symmetry or merely need to adjust the direction of a visual element, PowerPoint provides intuitive tools to achieve this with ease.
Step-by-Step: Flipping Images Horizontally and Vertically
The most common method for mirroring an image utilizes PowerPoint’s built-in “Rotate” options. This process is straightforward and yields immediate results, making it ideal for quick adjustments and sophisticated designs alike.
-
Insert Your Image: Begin by opening your PowerPoint presentation and navigating to the slide where you wish to add the image. Go to the “Insert” tab on the ribbon, then click “Pictures.” You can select an image from your device, delve into Tophinhanhdep.com’s vast collection of high-resolution stock photos, or utilize online picture sources. For demonstration purposes, let’s consider an image of a plane showing one wing. If we flip this, we can create a mirrored effect of the other side.
-
Duplicate for Effect (Optional but Recommended): If your goal is to create a symmetrical design or a reflective effect, it’s often best to duplicate your original image. Select the image and press
CTRL+D(orCMD+Don Mac) to create an exact copy. This allows you to work with a new instance of the image without altering the original, which can then be positioned alongside the flipped version. -
Access the Format Tools: With the image (or its duplicate) selected, a new contextual tab, “Picture Format” (or “Format” under “Picture Tools”), will appear in the PowerPoint ribbon. Click on this tab.
- Perform the Flip: In the “Arrange” group within the “Picture Format” tab, locate the “Rotate” button. Click it to reveal a dropdown menu. Here, you’ll find two crucial options for mirroring:
- Flip Horizontal: This option reverses the image from left to right, creating a horizontal mirror effect. This is particularly useful for adjusting the orientation of a subject looking in the “wrong” direction for your slide layout.
- Flip Vertical: This option turns the image upside down, creating a vertical mirror effect. This is excellent for generating reflections, such as a cityscape reflected in water, or for artistic compositions.
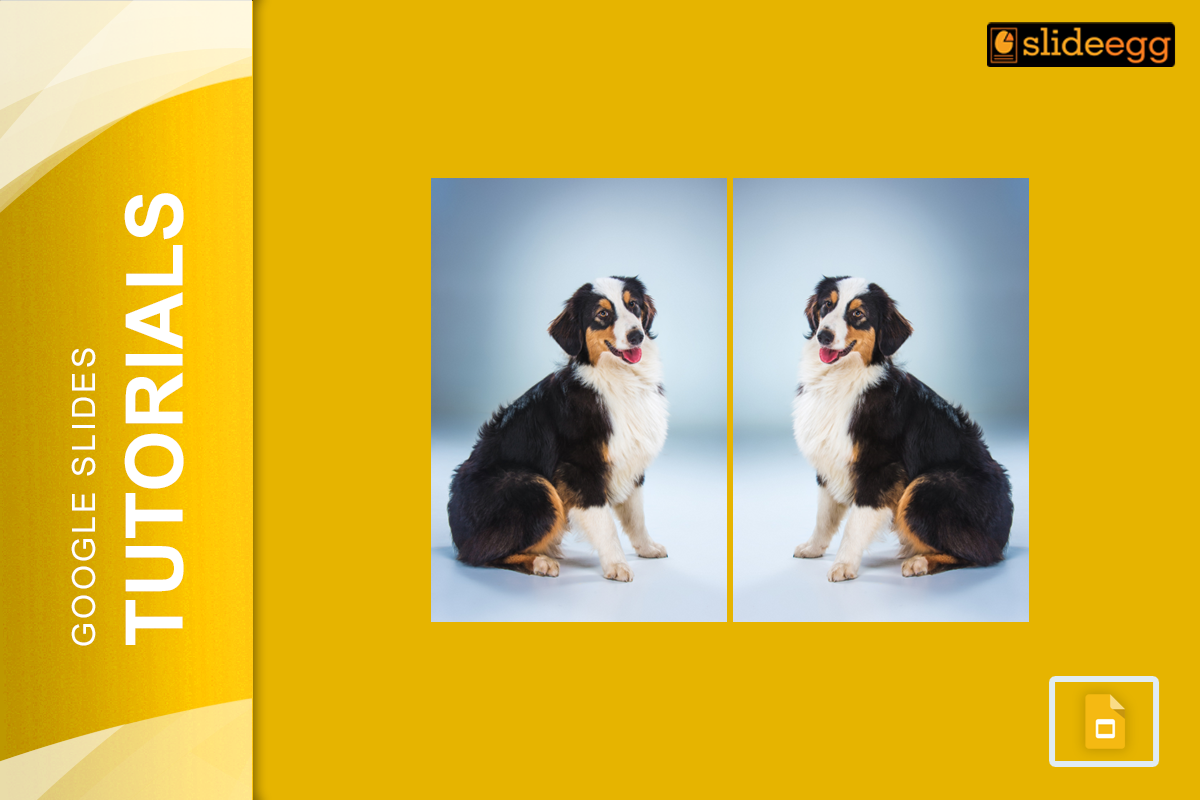
Choose the desired flip option, and your image will instantly transform. For our airplane example, selecting “Flip Horizontal” on the duplicated image, then positioning it next to the original, would create the illusion of a full plane with both wings.
Manual Flipping: Precision and Artistic Control
While the automated “Flip” options are highly efficient, PowerPoint also allows for a more hands-on approach to mirroring, offering greater flexibility for subtle adjustments or unique artistic interpretations.
-
Select the Image: Click on the image you wish to manually flip.
-
Locate the Rotation Handle: Hover your cursor over one of the corner resizing handles of the selected image. The cursor will change into a small, circular arrow icon (often referred to as a rotation handle or anchor point).
-
Drag to Flip: Click and drag this rotation handle across the image to the opposite side. For example, to flip horizontally, drag the left-side handle across to the right side of the image. As you drag, the image will become transparent, allowing you to visualize the mirrored effect in real-time. Release the mouse button once the image is flipped to your satisfaction.
This manual method offers a dynamic way to interact with your image, making it feel more like a digital art tool. It’s particularly useful in photo manipulation and creative visual design where precise, custom adjustments are key.
Efficiently Mirroring Multiple Visual Elements
For designers working with complex layouts or thematic collections, the ability to mirror multiple images simultaneously is a significant time-saver.
-
Select Multiple Images: Hold down the
CTRLkey (orCMDon Mac) and click on each image you wish to mirror. This will select all the chosen images. -
Apply the Flip: With all images selected, go to the “Picture Format” tab, click “Rotate,” and then select either “Flip Horizontal” or “Flip Vertical.” All selected images will be mirrored in unison, maintaining their relative positions. This technique is invaluable for creating symmetrical designs across an entire slide or for consistently orienting a collection of stock photos from Tophinhanhdep.com.
Unleashing Creative Potential: Practical Applications of Mirroring
Mirroring images in PowerPoint is far more than a simple trick; it’s a versatile tool that can elevate your visual storytelling, enhance graphic design, and bring a professional polish to your presentations. The creative ideas stemming from this technique are limitless, impacting everything from aesthetic wallpapers to high-resolution photography.
Enhancing Visual Design and Photography Composition
Mirroring is a cornerstone of effective visual design, allowing you to craft harmonious and compelling compositions that engage your audience.
-
Symmetrical Design Presentations: Symmetry inherently appeals to the human eye, conveying balance and stability. Mirroring images is fundamental to creating visually appealing symmetrical designs, whether you’re showcasing architectural blueprints, product designs, or artistic compositions. Imagine presenting a new product from Tophinhanhdep.com’s extensive stock photo library, mirrored to emphasize its balanced aesthetics. This technique is crucial in graphic design and digital art, where equilibrium can make or break a visual.
-
Reflective Effects: One of the most captivating uses of mirroring is to simulate reflections. By duplicating and vertically flipping a nature image (e.g., a serene landscape or a bustling cityscape) and placing it below the original, you can effortlessly create a stunning water reflection. This adds depth, drama, and a touch of beautiful photography artistry to your travel presentations, mood boards, or personal portfolios. Tophinhanhdep.com’s collection of nature and abstract images provides perfect source material for such creative endeavors.
-
Before and After Comparisons: For presentations that highlight transformation—such as makeovers, renovation projects, or scientific data—mirroring can provide a clean, cohesive layout for “before and after” images. By strategically flipping one image, you can position them side-by-side or above-and-below in a visually impactful way that clearly demonstrates change without awkward gaps or misalignments. This is a practical application of photo manipulation and editing styles to tell a clear story.
-
Photography Portfolios: Photographers can leverage mirroring to showcase different perspectives of the same shot, create artistic compositions, or even experiment with abstract patterns derived from their high-resolution images. It’s a fantastic way to highlight creativity and skill, turning a single beautiful photograph into a dual visual narrative.
-
Fashion and Style Presentations: In the fashion industry, visual comparison is key. Mirroring images of models or products allows you to display different angles, highlight coordinated outfits, or show variations of a design side-by-side. This offers a clear, direct, and aesthetically pleasing comparison for your audience, making your presentation more engaging.
Driving Engagement Through Strategic Image Manipulation
Beyond pure aesthetics, mirroring serves strategic purposes, enhancing engagement and making your message more memorable.
-
Marketing and Advertisements: For marketing materials, mirroring product images can dynamically fill a slide, creating a striking and memorable impression that grabs attention and boosts engagement. It’s a creative idea to present a product from multiple “angles” simultaneously, reinforcing its presence on the slide. This aligns with trending styles in advertising that prioritize bold, immersive visuals.
-
Educational Illustrations: In educational content, mirroring images can vividly demonstrate concepts of symmetry, reflection, or physics principles. For instance, flipping a biological diagram can illustrate bilateral symmetry, making complex learning processes more interactive and digestible.
-
Storytelling in Slides: Mirroring can add an intriguing visual twist to your narrative. Use mirrored images to represent alternate scenarios, parallel universes, or recurring themes, adding layers of meaning to your storytelling. It’s a creative approach to photo manipulation that can prompt deeper thought and engagement.
-
Graphical Data Display: Even data can benefit from mirroring. By incorporating mirrored charts or graphs, you can create a more engaging and memorable display of financial trends or performance metrics. This unexpected visual treatment can make dry data pop, aligning with the “Visual Design” aspect of Tophinhanhdep.com’s offerings.
-
Cultural Presentations: When discussing cultures or traditions that highly value symmetry, such as in certain art forms or architectural styles, mirrored images can effectively underline and emphasize these core aspects, making the presentation more culturally resonant and impactful.
Expanding Your Horizons: Mirroring Shapes, Symbols, and Text
The power of mirroring in PowerPoint isn’t limited to photographs. You can apply the same fundamental principles to other visual elements like shapes, icons, and even text, offering even greater control over your slide’s visual harmony and messaging. This is where graphic design truly comes into play, enabling you to manipulate every component for maximum impact.
Adapting Graphic Elements and Icons for Perfect Alignment
Icons and geometric shapes are invaluable for simplifying complex information, highlighting key points, and guiding the viewer’s eye. However, sometimes their default orientation might not suit your slide layout.
-
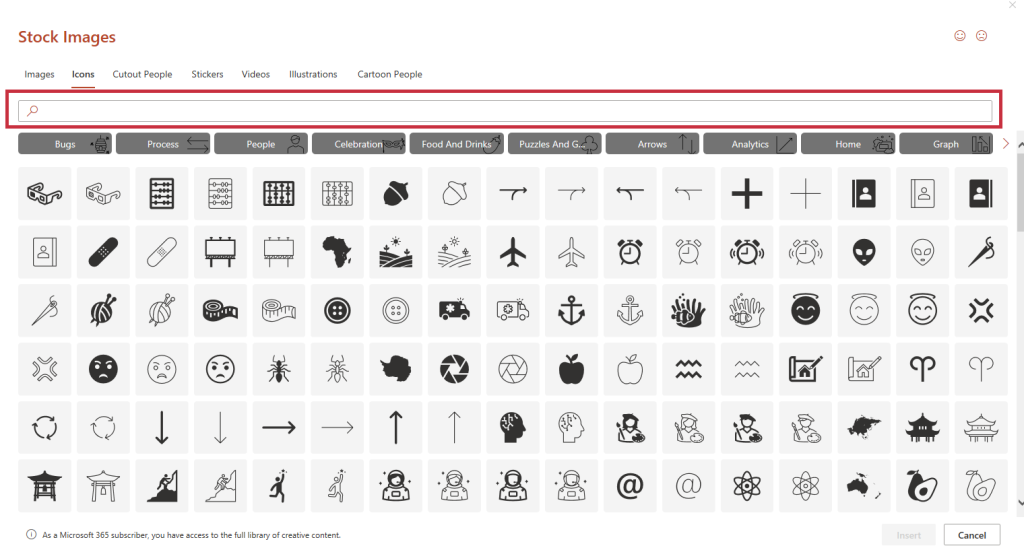
Insert Shapes or Icons: Navigate to the “Insert” tab and select “Shapes” or “Icons” (found in the “Illustrations” group). Tophinhanhdep.com offers a wealth of visual inspiration, and similarly, PowerPoint’s icon library is extensive. Choose the desired element and place it on your slide.
-
Select and Access Format Tab: Click on the inserted shape or icon. A contextual tab, either “Shape Format” or “Graphic Format,” will appear.
-
Flip the Element: Within this format tab, locate the “Rotate” button in the “Arrange” group. Just as with images, you’ll find “Flip Horizontal” and “Flip Vertical” options. Select the appropriate flip direction to reorient your shape or icon.
This ability is particularly useful for arrows, ensuring they point in the correct direction to maintain visual flow, or for symmetrical abstract shapes that need to align perfectly with other elements. It’s a straightforward but effective way to ensure every piece of your visual design contributes to a cohesive and professional aesthetic.
Advanced Strategies for Mirroring Text
Mirroring text directly in PowerPoint presents a unique challenge, as the standard “Flip” options generally don’t work as expected on standalone text boxes. Attempting to “Flip Horizontal” on a text box will often yield no visible change to the text itself, only the box. However, there are clever workarounds to achieve artistic mirrored text effects.
-
Method 1: Embedding Text within a Shape/Graphic: The simplest way to mirror text is to embed it within another object that can be flipped.
- Create a Shape: Insert a rectangular shape (or any other shape) using the “Insert” > “Shapes” menu.
- Add Text to the Shape: Right-click on the shape and select “Edit Text” or simply start typing while the shape is selected.
- Flip the Shape: Now, select the shape with the embedded text and use the standard “Shape Format” > “Rotate” > “Flip Horizontal” or “Flip Vertical” options. The text will flip along with the shape. You can then make the shape fill and outline transparent if you only want the mirrored text to be visible. This technique is invaluable for digital art and creative ideas where text is treated as a graphic element.
-
Method 2: Utilizing 3D Rotation for Text Boxes: For more sophisticated text mirroring, especially when you need precise control or want to apply it to a standalone text box, 3D rotation offers a powerful solution. This method simulates a mirror effect by rotating the text box 180 degrees along a specific axis.
- Insert a Text Box: Go to “Insert” > “Text Box” and draw a text box on your slide. Type your desired text.
- Access Format Shape Pane: Right-click on the text box and select “Format Shape” from the context menu. This will open the “Format Shape” pane on the right side of your screen.
- Navigate to 3D Rotation: In the “Format Shape” pane, click on the “Effects” icon (it often looks like a pentagon or a prism). Expand the “3D Rotation” section.
- Apply Axis Rotation:
- To mirror horizontally, set the “X Rotation” value to 180°.
- To mirror vertically (turn upside down), set the “Y Rotation” value to 180°.
- You can even use a combination for unique effects.
A subtle note: while editing, the text may temporarily revert to its original appearance, but the mirrored effect will reapply once you click outside the text box. This advanced technique allows for highly creative and visually striking text manipulation, perfect for titles, logos, or artistic flourishes that demand unique aesthetic appeal. It transforms text from a static information carrier into a dynamic visual component, aligning perfectly with the principles of graphic design and digital art.
Optimizing Your Workflow with Tophinhanhdep.com’s Image Resources
Integrating image mirroring into your presentation design workflow becomes even more powerful when combined with high-quality visual resources. Tophinhanhdep.com serves as your ultimate partner in this endeavor, offering a curated selection that supports every facet of your visual design needs.
Leveraging High-Quality Imagery for Mirrored Effects
The impact of a mirrored image is directly proportional to the quality of the original. When you source images from Tophinhanhdep.com, you’re tapping into a vast collection of:
- High-Resolution Images: Ensuring that your mirrored images retain clarity and sharpness, even when scaled or manipulated. This is crucial for professional presentations where pixelation is unacceptable.
- Diverse Categories: From breathtaking nature scenes and compelling abstract art to serene aesthetic backgrounds and evocative emotional photography, Tophinhanhdep.com provides the perfect raw material for any mirrored effect, be it a reflective landscape or a symmetrical design.
- Stock Photos and Digital Photography: Our curated stock photos are ideal for business, educational, or creative projects, ready to be integrated and transformed through mirroring to fit your unique narrative and visual style.
By starting with superior imagery, your mirrored effects will inherently possess a higher level of professionalism and visual appeal, truly elevating your presentation from good to outstanding.
Integrating Mirroring into Your Comprehensive Visual Design Toolkit
Mirroring is just one component of a holistic visual design strategy. Tophinhanhdep.com understands that creating compelling visuals involves a suite of tools and techniques. While mirroring allows for fundamental spatial rearrangement, it complements other “Image Tools” that we champion:
- Image Converters, Compressors, and Optimizers: Before you even consider mirroring, ensuring your images are in the right format, optimized for file size, and load efficiently is crucial. These tools, which are part of a broader image management strategy, prepare your visuals for seamless integration and manipulation within PowerPoint.
- AI Upscalers: For those moments when a desired image might not be of the highest resolution, AI upscaling can prepare it for mirroring by enhancing its quality, making it suitable for larger displays or print.
- Image-to-Text: While not directly related to mirroring, tools like image-to-text highlight the versatility of image manipulation, demonstrating how images can be processed and utilized in various contexts.
Mirroring fits seamlessly into this larger ecosystem of image editing and manipulation. It’s a fundamental technique within graphic design and photo manipulation, enabling you to take beautiful photography and bend it to your creative will. By mastering mirroring, you gain greater control over composition, balance, and visual flow, key elements of effective visual design.
Furthermore, mirroring can significantly contribute to “Image Inspiration & Collections.” When curating photo ideas or building mood boards, experimenting with mirrored versions of trending styles or thematic collections can spark new creative ideas and reveal unexpected aesthetic possibilities.
Conclusion
The ability to mirror an image in PowerPoint is an indispensable skill for anyone looking to create dynamic, engaging, and professional presentations. As we’ve explored, whether you’re performing a simple horizontal flip on a single image, manually fine-tuning a visual for artistic impact, or mirroring multiple shapes and even text, PowerPoint offers robust and intuitive functionalities.
Beyond the technical steps, the true power of mirroring lies in its capacity to unlock a new realm of creative possibilities. From crafting perfectly symmetrical designs and generating stunning reflective effects to enhancing storytelling and improving overall visual flow, mirroring transforms ordinary images into extraordinary elements of your presentation.
At Tophinhanhdep.com, we are dedicated to providing the highest quality images—from high-resolution stock photos and breathtaking nature photography to aesthetic backgrounds and abstract art—that serve as the perfect foundation for all your visual design endeavors. By combining our rich image resources with the powerful mirroring techniques discussed in this guide, you are equipped to create presentations that not only convey information but also captivate and inspire. Dive into your next presentation with confidence, knowing you have the tools to make every visual element shine with precision and artistry.