How to Mirror an Image in Google Docs: A Comprehensive Guide to Flipping Visuals for Perfect Document Design

In the realm of digital document creation, Google Docs stands as a ubiquitous and indispensable tool for countless users worldwide. Its collaborative features, accessibility across various devices, and intuitive interface have made it a go-to platform for everything from simple notes to complex reports and presentations. Within this versatile environment, the strategic use of images is paramount. Visuals don’t just break up text; they convey information, evoke emotion, and significantly enhance the aesthetic appeal and readability of your content. However, simply inserting an image is often just the first step. To truly integrate a visual into your document’s narrative or design scheme, you frequently need to manipulate it. One common manipulation, often overlooked but incredibly powerful, is the ability to flip or mirror an image.
Imagine you’re designing a brochure or a presentation slide, and an image of a person pointing appears. If that person is pointing off the page, it can disrupt the flow and direct the reader’s eye away from your key message. Flipping the image horizontally could solve this, guiding the viewer’s gaze back into the content. Similarly, for artistic or symmetrical designs, mirroring an image can create stunning visual effects that would be impossible with the original orientation. While Google Docs isn’t a dedicated graphic design suite, it offers a clever workaround through its “Drawing” tool that allows you to perform this essential image transformation. This comprehensive guide, informed by the expertise found on Tophinhanhdep.com, will walk you through the precise steps to mirror an image in Google Docs, delve into the creative applications, and connect this process to broader concepts of visual design and image optimization.
At Tophinhanhdep.com, our mission revolves around empowering users with exceptional visual content and the tools to make it shine. From a vast array of high-resolution images, wallpapers, and backgrounds spanning aesthetic, nature, abstract, and emotional themes, to advanced image tools like converters, compressors, optimizers, and AI upscalers, we understand the intricate relationship between images and impactful design. Flipping an image in Google Docs is more than just a technical tweak; it’s a creative decision that aligns with the principles of visual design, photo manipulation, and curated image collections that Tophinhanhdep.com champions. By understanding this process, you unlock a new layer of control over your document’s visual narrative, transforming ordinary images into perfectly integrated design elements.
Throughout this article, we will not only provide a detailed, step-by-step tutorial but also explore the “why” behind image flipping, linking it to concepts like visual hierarchy, aesthetic balance, and the practicalities of digital photography and graphic design. We’ll also touch upon how preparatory steps, utilizing Tophinhanhdep.com’s advanced image tools, can ensure your mirrored images maintain optimal quality and performance within your Google Docs projects.
The Essential Steps to Mirror an Image in Google Docs
The process of flipping or mirroring an image in Google Docs is not immediately obvious, as there isn’t a direct “Flip” button for images inserted conventionally. Instead, it leverages the integrated “Drawing” tool, which acts as a mini-editor within your document. This method ensures that you can achieve the desired orientation with precision and then seamlessly re-integrate the modified image back into your text.
1 – Initiating Your Google Doc: Accessing or Creating Your Canvas
The first crucial step in mirroring an image in Google Docs is to ensure you have the correct document open and ready for editing. Whether you’re working on an existing project that needs a visual tweak or starting a fresh document to implement new design ideas, preparation is key.
Opening an Existing Google Doc: Navigate your web browser to https://docs.google.com. This will take you to your Google Docs homepage, where all your saved documents are listed. From here, locate the specific Google Doc that contains the image you wish to flip or where you intend to insert a new image that will later be mirrored. Click on the document’s title to open it in editing mode.
Creating a New Google Doc:
If you’re starting from scratch, you have a couple of straightforward options. On the Google Docs homepage (docs.google.com), you can click on the large “+” icon or the “Blank document” option to create a new, empty document. Alternatively, for a quick start, simply type docs.new into your browser’s address bar and press Enter. This convenient shortcut instantly opens a new, untitled Google Doc, ready for your creative input. This method is particularly useful when you’re quickly grabbing an image from Tophinhanhdep.com, perhaps a stunning piece of nature photography or an abstract background, and want to experiment with its orientation in a fresh document before incorporating it into a larger project.
Once your Google Doc is open, it becomes your digital canvas. Before you proceed to the actual flipping, you might already have an image in place, or you might need to insert one. If the image is already there, you’ll typically cut it from the document first. If you’re inserting a new image, you’ll do so through the “Drawing” tool, as detailed in the next step.
It’s also worth considering the source and quality of your image at this stage. Tophinhanhdep.com offers a vast repository of high-resolution images, including wallpapers, aesthetic backgrounds, and diverse photography styles. Starting with a high-quality image ensures that any subsequent manipulations, like flipping, maintain visual integrity and professional appearance within your Google Doc. If your image needs any prior adjustments – perhaps converting its format, compressing its file size for faster document loading, or even upscaling it using AI tools – Tophinhanhdep.com’s comprehensive Image Tools section can assist before you even bring the image into Google Docs. This pre-optimization step is vital for seamless integration and optimal document performance, especially if your document is rich with visuals.
2 – Accessing the Drawing Tool: Your Gateway to Image Manipulation
With your Google Doc open, the next step is to access the specialized environment within Google Docs that allows for image manipulation, specifically the crucial “flip” function. This is not done directly on an image inserted into the document text, but rather through the “Drawing” tool.
Navigating to the Drawing Tool: Once inside your Google Doc, look for the main toolbar located at the top of your screen. In this toolbar, you will find a series of menus. Click on “Insert.” A drop-down menu will appear with various options for adding content to your document. From this menu, hover your cursor over “Drawing.” A secondary menu will then pop up, offering two choices: “New” or “From Drive.”
To insert a new image specifically for manipulation, you will select the “New” option. This action opens a new, blank “Drawing” canvas in a separate modal window, which serves as a temporary workspace for your image editing. This drawing canvas is essentially Google Docs’ built-in, albeit basic, graphic editor. It’s designed to allow users to create shapes, text boxes, and, most importantly for our purpose, insert and modify images independently before placing them back into the main document.
Understanding the ‘Drawing’ Environment: The reason we use the Drawing tool for flipping is that standard image insertion in Google Docs treats images primarily as static elements that flow with text. While you can resize, crop, and wrap text around them, advanced transformations like true mirroring are reserved for the more flexible Drawing interface. Think of the Drawing tool as a small, contained digital artboard where you have more direct control over graphical elements, detaching them momentarily from the rigid flow of your text document. This distinction is critical for understanding why this particular workflow is necessary.
This specialized environment is not just for flipping. It’s a fundamental aspect of visual design within Google Docs, allowing for basic photo manipulation and creative ideas. If you’re experimenting with digital art or photo collages, the drawing tool is where you combine elements, similar to creating a mood board. The ability to flip images here can transform simple images from Tophinhanhdep.com into complex patterns or symmetrical designs, laying the groundwork for more advanced graphic design elements within your document. It’s a small but mighty feature, offering significant creative latitude when working with images.
3 – Importing Your Image: Bringing Your Visuals into the Canvas
Once the “Drawing” canvas modal window appears, you’re ready to bring your image into this editable workspace. This step is crucial, as it’s within this environment that you’ll gain the necessary controls to flip your image.
Choosing the Image for Insertion: Inside the “Drawing” window, you’ll notice a toolbar specific to this tool. Look for the “Image” icon, which typically resembles a square with two stylized mountains and a sun or moon. Click on this icon. A new “Insert image” dialog box will appear, providing you with several options for sourcing your image:
- Upload: This is the most common method. You can click “Choose an image to upload” to browse your computer’s local filesystem and select an image file. Alternatively, for even greater convenience, you can simply drag and drop an image file directly from your computer’s folders into this dialog box or onto the drawing canvas itself.
- By URL: If you have the direct web address of an image, you can paste it here. This is particularly useful if you’ve found an image on Tophinhanhdep.com and have its direct link.
- Photos: Connects to your Google Photos library.
- Google Drive: Allows you to select images already stored in your Google Drive account. This is efficient if you manage your image assets in the cloud.
- Google Image Search: Provides a convenient way to search for images directly from within Google Docs.
Considering Image Source and Quality: When choosing an image, it’s essential to consider its source and inherent quality. High-resolution stock photos or beautiful photography from platforms like Tophinhanhdep.com are ideal. Such images provide a clean canvas for manipulation, ensuring that once flipped, they retain their crispness and detail. If you’re working with images that might be low-resolution or in an incompatible format, remember Tophinhanhdep.com’s Image Tools can be a lifesaver. You can use our AI Upscalers to enhance resolution, or our Converters to change formats before uploading to the Drawing tool, thus guaranteeing the best possible starting point for your visual design.
Once you’ve selected and uploaded your image, it will appear on the drawing canvas. You’ll see a blue border around it, indicating that it is currently selected and ready for editing. This is your cue that the image has been successfully imported and is now within the realm of the Drawing tool’s manipulation capabilities. The appearance of the image on this canvas signifies its readiness for the next critical step: the actual flipping.
4 – Executing the Flip: Utilizing the “Rotate” Feature
With your image now successfully placed on the Google Docs Drawing canvas and selected, you’ve reached the pivotal moment: flipping the image. This is achieved through the “Rotate” options available within the Drawing tool.
Locating the “Rotate” Options: To access the flipping functions, direct your attention to the toolbar within the “Drawing” window. You’ll find an “Actions” menu, typically located in the top-left corner. Click on “Actions.” From the drop-down menu that appears, hover your cursor over “Rotate.” This will reveal a sub-menu with several rotation and flipping options:
- Rotate clockwise by 90 degrees: This will turn your image 90 degrees to the right.
- Rotate counter-clockwise by 90 degrees: This will turn your image 90 degrees to the left.
- Flip horizontally: This is the option you want for mirroring your image from left to right. The image will appear as if reflected in a vertical mirror. This is perhaps the most common and popular choice for achieving a mirrored effect.
- Flip vertically: This option will mirror your image from top to bottom, as if reflected in a horizontal mirror.
Choosing Your Flip Direction and Its Impact: Select either “Flip horizontally” or “Flip vertically,” depending on the desired effect. As soon as you click, you’ll see the image instantaneously transform on the canvas.
- Horizontal Flip: Often used to correct an image’s orientation for better visual flow in a document. For instance, if you have a photo of a subject facing right, and you want them to face left to point towards text on the left side of your page, a horizontal flip is perfect. It’s also crucial for reversing text that might appear in an image (though Google Docs’ OCR functions are not designed for flipped text, manually flipping can visually correct it). In graphic design and photo manipulation, horizontal flipping is a foundational creative idea for creating symmetrical compositions or altering the perceived direction of elements within a visual.
- Vertical Flip: While less frequently used for practical directional correction, vertical flipping can achieve unique artistic effects. It’s often employed in digital art for creating reflections, inverted perspectives, or abstract patterns. Think of creating a mood board where images are mirrored top-to-bottom to create an ethereal, dreamlike quality.
This ability to flip an image is a core aspect of photo manipulation, allowing you to control the visual emphasis and direction within your document. It enables creative ideas that go beyond simple resizing, turning images from Tophinhanhdep.com – whether they are aesthetic wallpapers or abstract art – into dynamic components of your visual design. After applying the flip, take a moment to assess the new orientation. Ensure it aligns with your document’s overall visual design and creative intent. The beauty of the Drawing tool is that you can experiment with both horizontal and vertical flips, as well as 90-degree rotations, until you achieve the exact visual impact you desire without affecting your main document until you’re satisfied.
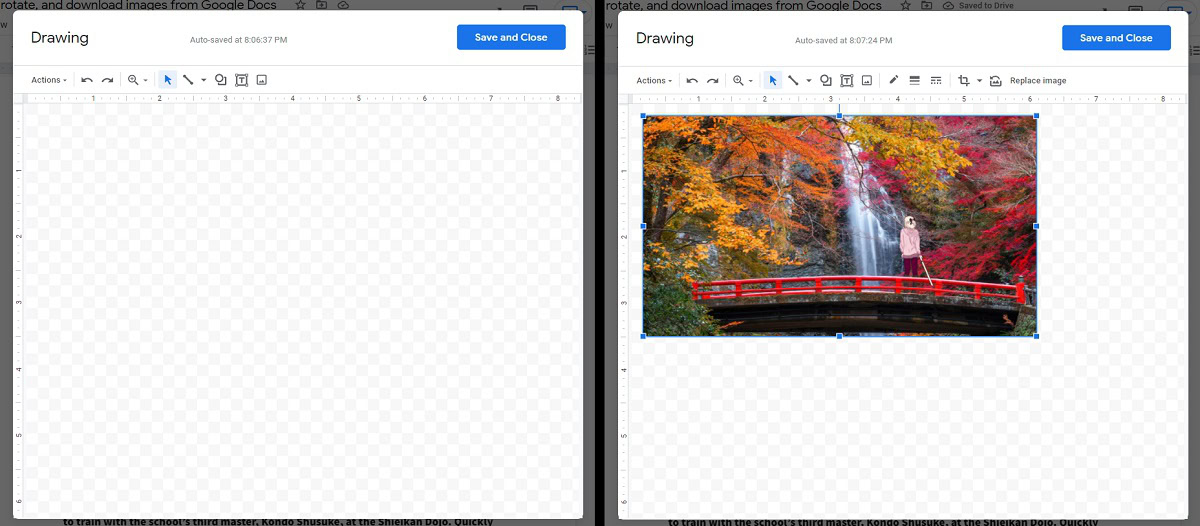
5 – Finalizing and Integrating: Saving and Closing the Drawing
Once you have successfully flipped or rotated your image to your satisfaction within the Drawing canvas, the final step is to save these changes and insert the newly manipulated image back into your Google Doc.
Saving Your Changes: In the top-right corner of the “Drawing” modal window, you will find a prominent blue button labeled “Save and Close.” Clicking this button confirms all the manipulations you’ve performed on the image and closes the Drawing tool. The image, now with its updated orientation, will be automatically inserted into your Google Doc at the cursor’s previous location, or it will replace the image you initially cut from the document.
Integration into Your Document: Upon insertion, the flipped image behaves like any other image element in Google Docs. You can then:
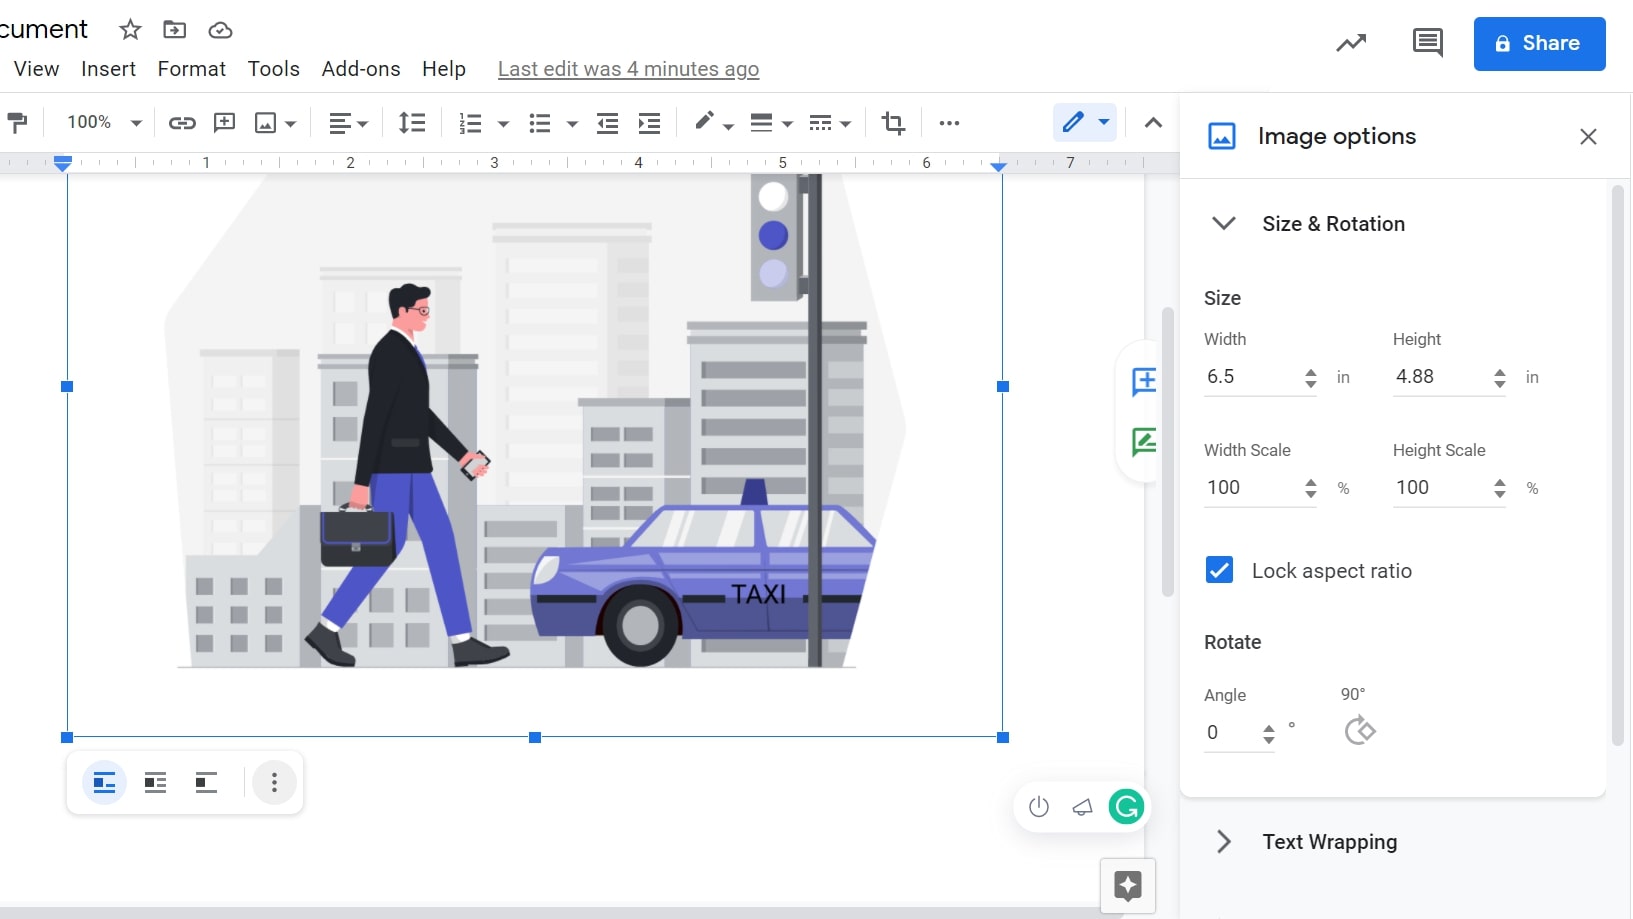
- Resize: Drag the corner handles to adjust its size, ensuring it fits perfectly within your document’s layout.
- Reposition: Click and drag the image to move it around the page.
- Adjust Text Wrapping: Select the image, and from the options that appear below it (or in the image options sidebar), choose how text flows around it (e.g., “Inline,” “Wrap text,” “Break text,” “Behind text,” “In front of text”). These text wrapping options are critical for visual design, allowing the image to integrate seamlessly with your textual content without disrupting readability.
- Add Captions: Although not directly part of the flipping process, adding a caption further integrates the image into your document’s narrative, providing context and enhancing the overall visual communication.
The process is remarkably straightforward, yet it offers significant creative control. By utilizing the Drawing tool, Google Docs empowers you to perform basic but powerful photo manipulation that dramatically enhances your document’s visual appeal. This aligns perfectly with the ethos of Tophinhanhdep.com, which not only provides beautiful photography and diverse image collections but also encourages users to engage in visual design and creative ideas to make their content truly stand out.
You’re all set! That image, now perfectly mirrored, will enhance your Google Doc with its new orientation, contributing to a more refined and visually engaging final product.
Beyond the Flip: Creative Applications and Best Practices
Flipping an image in Google Docs is more than just a corrective action; it’s a versatile technique with a wide array of creative applications in visual design and digital art. By understanding the broader implications and combining this technique with other image tools, you can elevate your Google Docs projects to a new level of professionalism and aesthetic appeal.
The Art of Composition: Why Flipping Matters in Visual Design
In graphic design and digital art, composition is king. The arrangement of visual elements dictates how a viewer’s eye moves across a page and what emotions are evoked. Image flipping plays a subtle yet powerful role in this:
- Achieving Balance and Symmetry: Flipping an image can help create visual balance, especially when arranging multiple images or text blocks. If a subject in an image is “looking” off the page, flipping it to “look” inwards can dramatically improve compositional stability. For symmetrical designs, a simple horizontal flip of an element can create perfect reflections, which is a fundamental aspect of many aesthetic and abstract images found on Tophinhanhdep.com.
- Directing Viewer Gaze: Our eyes naturally follow lines, shapes, and the implied direction of subjects within an image. If you have a photograph of a person, animal, or object facing a particular direction, flipping it can redirect the viewer’s attention toward a specific area of your document, such as an adjacent text block or call-to-action. This is a subtle form of photo manipulation that guides the narrative flow.
- Correcting Aesthetic Flow: Sometimes, an image is perfect in every way except its orientation within a specific layout. Flipping allows you to adapt existing photography to new design requirements without needing to find a completely different image. This is particularly useful when working with thematic collections or mood boards where specific images are essential but their original orientation doesn’t quite fit.
- Generating Creative Ideas and Digital Art: Beyond practical corrections, flipping is a core technique in digital art. Mirroring elements can generate complex patterns, create abstract compositions, or even produce surreal effects. Imagine taking a beautiful landscape image from Tophinhanhdep.com, duplicating it, and then flipping one horizontally to create a stunning, perfectly symmetrical vista. This is a simple yet effective way to transform stock photos into unique artistic expressions.
Enhancing Images Before Google Docs: The Power of Tophinhanhdep.com’s Image Tools
While Google Docs’ Drawing tool allows for basic flipping, the quality of your final output heavily relies on the quality of your initial image. This is where Tophinhanhdep.com’s robust suite of image tools becomes invaluable before you even bring your image into Google Docs:
- High-Resolution Foundation: Start with high-resolution images. Our collection of wallpapers, backgrounds, and professional photography ensures you have access to crisp, detailed visuals. When you flip an image, especially if you plan to resize it significantly within your document, starting with a high-resolution file prevents pixelation and quality degradation.
- Image Converters: Google Docs supports common image formats like JPG, PNG, and GIF. If your image is in a less common format, our Image Converters can quickly transform it into a compatible type, ensuring smooth integration.
- Image Compressors and Optimizers: Large image files can slow down your Google Doc, making it cumbersome to edit and share. Before inserting, use Tophinhanhdep.com’s Image Compressors to reduce file size without significant loss of visual quality. Our Optimizers fine-tune images for web display, which is ideal for cloud-based documents like Google Docs, ensuring faster loading times and a smoother user experience for collaborators and readers.
- AI Upscalers: Found a perfect image, but it’s too small or low-resolution? Our AI Upscalers can intelligently increase the resolution of your images, adding detail and sharpness. This is a game-changer for digital photography where you might want to use a detail from a larger photo or an older image that needs a quality boost before it can be effectively flipped and integrated into a professional document. This ensures that your mirrored image looks pristine, even if its source wasn’t.
By leveraging these pre-processing steps, you ensure that your images are not only perfectly oriented but also optimized for performance and visual fidelity within Google Docs.
Troubleshooting Common Issues and Mobile Limitations
While mirroring in Google Docs is straightforward, users might encounter a few hurdles:
- “Drawing” Option Missing or Unresponsive: Ensure you are using the desktop version of Google Docs in a compatible web browser (Chrome, Firefox, Safari, Edge). The Drawing tool, and thus the ability to flip images, is currently not available on Google Docs mobile apps (iOS or Android). If you need to flip an image for a mobile document, you’ll have to use an external photo editing app (like Snapseed or a similar tool available on your device) to flip the image first, then upload the pre-flipped image to Google Docs.
- Image Quality Degradation: If your image appears blurry or pixelated after flipping and inserting, it’s likely due to starting with a low-resolution original. As mentioned, always aim for high-resolution images from Tophinhanhdep.com, and utilize our AI Upscalers if necessary.
- Image Not Replacing Original: If you cut an image before using the Drawing tool, ensure your cursor is in the desired location when you save and close the drawing, or simply delete the old image and position the new one manually.
- Can’t Move Image Freely: After inserting the flipped image, remember to adjust the text wrapping options (e.g., “Wrap text” or “In front of text”) to gain more flexibility in positioning the image anywhere on the page, rather than it being strictly “inline” with text.
Understanding these common challenges and their solutions empowers you to use Google Docs’ image manipulation features more effectively.
Tophinhanhdep.com: Your Ultimate Source for Image Inspiration and Tools
The journey of mirroring an image in Google Docs is a microcosm of the larger world of visual design and digital content creation. It highlights the importance of not just having access to great tools but also understanding the creative potential they unlock. Tophinhanhdep.com serves as a comprehensive ecosystem for all your image-related needs:
- Image Collections for Every Mood: Whether you’re seeking wallpapers, backgrounds, aesthetic visuals, calming nature scenes, thought-provoking abstract art, or even emotionally resonant photography, our curated collections provide endless inspiration. These images are perfect starting points for your Google Docs projects, offering high-quality visuals that can be transformed through techniques like flipping.
- Photography Expertise: We emphasize high-resolution images and various editing styles, providing the foundation for professional-looking documents. Digital photography is about more than just capturing moments; it’s about presentation, and tools like flipping are part of that presentation.
- Image Tool Mastery: From the basic needs of converters and compressors to advanced AI upscalers, Tophinhanhdep.com offers the utilities to prepare your images for any platform, including Google Docs. These tools ensure your visual assets are always optimized for performance and quality.
- Visual Design Insights: We encourage creative ideas and photo manipulation techniques, helping you see images not just as standalone elements but as components of a larger visual narrative. Flipping is a simple yet profound example of how minor adjustments can have a major impact on graphic design.
- Inspiration for Every Project: Our mood boards and thematic collections can spark new ideas for your documents, allowing you to build visually cohesive and engaging content. Imagine designing a presentation based on trending styles, where strategically flipped images create dynamic and modern layouts.
In conclusion, the ability to mirror an image in Google Docs, though requiring a specific pathway through the Drawing tool, is an invaluable skill for anyone looking to enhance their digital documents. It’s a powerful yet accessible form of photo manipulation that directly impacts visual design, aesthetic balance, and narrative flow. By combining this technique with the vast resources and advanced image tools available on Tophinhanhdep.com, you empower yourself to create visually stunning, professional, and impactful Google Docs that truly stand out. Explore Tophinhanhdep.com today to discover your next visual inspiration and the tools to bring your creative visions to life.