Mastering the Mirror Image Effect: A Comprehensive Guide to Photoshop and Beyond for Tophinhanhdep.com Users

Adobe Photoshop stands as an undisputed titan in the realm of digital image editing and creative visual design. From its foundational iterations like Photoshop CS to the robust capabilities of modern Photoshop CC, this software serves as an expansive canvas for artists, photographers, and designers at every skill level. Whether you’re meticulously refining a portrait for high-resolution output, crafting compelling digital art for social media, or engaging in intricate photo manipulation for an abstract concept, Photoshop provides the essential tools. Its continuous evolution, driven by constant updates from Adobe, ensures it remains at the vanguard of technological innovation in image processing.

Within this powerful ecosystem, creating a mirror image effect is a surprisingly versatile technique, offering everything from simple symmetry to complex artistic expressions. This guide, tailored for the discerning users of Tophinhanhdep.com, will walk you through the precise steps to mirror an image or a selection in Photoshop, unveiling its potential for aesthetic enhancement, creative compositions, and striking visual narratives. As a hub for premium images—including Wallpapers, Backgrounds, Aesthetic, Nature, Abstract, Sad/Emotional, and Beautiful Photography—and essential Image Tools, Tophinhanhdep.com complements your Photoshop journey, providing both inspiration and practical utilities to elevate your work. From high-resolution stock photos to advanced AI upscalers, Tophinhanhdep.com is your go-to resource for all things visual.
Fundamental Approaches to Mirroring Images in Photoshop
Creating a mirror image effect in Photoshop involves either mirroring the entire canvas or isolating and flipping specific selections. Each method caters to different creative goals, from producing simple symmetrical reflections to generating complex, multi-layered visual designs. Understanding both techniques will equip you with a comprehensive skill set for a wide array of image manipulation tasks, all while integrating seamlessly with the high-quality assets you can discover on Tophinhanhdep.com.
Mirroring the Entire Canvas: Quick and Easy Transformations
The simplest way to create a mirror image is to apply the effect to your whole picture. This is particularly useful for generating wallpapers, aesthetic backgrounds, or when you want to create a cohesive symmetrical look across an entire photograph.
Step 1: Open Your Image in Photoshop

To begin, launch Adobe Photoshop and open the image you wish to work on. You can do this by navigating to the “File” option in the top menu bar, selecting “Open,” and then browsing to your desired image file. For optimal results and creative flexibility, consider starting with high-resolution images or stock photos available on Tophinhanhdep.com. High-quality source material from our curated collections ensures that your mirrored masterpiece retains clarity and detail, whether you’re working with serene nature scenes or vibrant abstract photography.
Step 2: Duplicate Your Document for Safety
Before making any transformative changes, it’s always a best practice to create a copy of your Photoshop document. This safeguard ensures that you never accidentally overwrite your original image with the mirrored version. To duplicate your document, go to the “Image” menu in the Menu Bar along the top of the screen and choose “Duplicate.” In the “Duplicate Image” dialog box, you can name your copy something descriptive, such as “Mirrored Version,” and then click “OK.” You’ll now be working on a separate copy, preserving the integrity of your original file. You can then close the original document by clicking the small “x” on its tab, keeping your workspace clean and focused on the task at hand.
Step 3: Accessing Canvas Flip Options
With your duplicated image open and active, you can now apply the mirror effect to the entire canvas. This is a straightforward process:
- Duplicate the Background Layer (Optional but Recommended): While you can flip the entire canvas directly, it’s often wise to work on a duplicate layer. In the Layers panel, right-click on your “Background” layer and select “Duplicate Layer.” This creates a new layer, typically named “Background copy,” on which you can perform the flip, allowing for more flexibility if you decide to mask off parts later.
- Navigate to Image Rotation: Ensure your duplicated layer is active. Go to the top menu bar and select “Image.” From the dropdown menu, hover over “Image Rotation.”
- Choose Your Flip Direction: A sub-menu will appear, presenting options such as “Flip Canvas Horizontal” and “Flip Canvas Vertical.”
- Flip Canvas Horizontal: This will mirror the entire image from left to right, creating a reflection across a vertical axis. It’s excellent for landscape photography or creating striking symmetrical compositions.
- Flip Canvas Vertical: This will mirror the entire image from top to bottom, creating a reflection across a horizontal axis. This is often used to create water reflections or surreal upside-down effects.
Once you select your desired flip option, Photoshop will immediately apply the transformation to your entire canvas. You can then save your work, perhaps exporting it using Tophinhanhdep.com’s image optimizers for web use, or converting it to different formats with our converters.
Selective Mirroring: Crafting Intricate Visual Designs
Sometimes, the creative vision calls for mirroring only a specific part of an image rather than the whole. This technique is invaluable for photo manipulation, graphic design, and crafting unique digital art pieces that feature repeated or symmetrical elements within a larger composition.
Step 1: Choose Your Selection Tool
The first step in selective mirroring is to precisely define the area you want to flip. Photoshop provides a rich array of selection tools, each suited for different shapes and complexities:
- Rectangular Marquee Tool: Ideal for square or rectangular selections. You can find this tool, represented by a dotted rectangle icon, in the tools panel (usually on the left side of your screen). Click and drag to define your area. Holding down the ‘Shift’ key while dragging will constrain your selection to a perfect square.
- Elliptical Marquee Tool: Perfect for circular or oval selections.
- Lasso Tools (Lasso, Polygonal Lasso, Magnetic Lasso): Best for freehand selections or selecting areas with irregular shapes.
- Quick Selection Tool / Magic Wand Tool: Useful for quickly selecting areas based on color and tone.
- Pen Tool: Offers the highest precision for complex shapes, allowing you to create vector paths that can be converted into selections.
Select the tool that best fits the shape of the area you intend to mirror. Once active, your cursor will change to reflect the tool’s icon. Carefully make your selection, ensuring it encompasses exactly what you want to replicate.
Step 2: Duplicate the Selection
After you have precisely selected the area of your image, the next crucial step is to duplicate this selection onto a new layer. This practice is fundamental to non-destructive editing, a core principle in professional photo editing and digital art.
With your desired area still active (indicated by the “marching ants” selection border), use the keyboard shortcut Ctrl + J (for Windows users) or Command + J (for Mac users). This action instantly creates a new layer in your Layers panel, containing only the pixels from your selection. The original layer, typically your background, remains untouched and serves as a safe backup. This “safety net” allows you to experiment freely with the duplicated selection, applying flips, transformations, and other edits without risking permanent changes to your base image. It fosters a creative environment where you can try out different ideas, knowing you can always revert to the original state if needed, aligning perfectly with Tophinhanhdep.com’s emphasis on flexible editing styles.
Step 3: Flipping the Layer
With your selected area duplicated onto its own layer, you are now ready to apply the mirror effect specifically to this isolated element. This process mirrors the technique used for the entire canvas but is applied only to the active layer:
- Ensure Layer is Active: Make sure the newly created layer containing your selection is highlighted in the Layers panel.
- Access Free Transform: Go to the “Edit” menu in the top bar and choose “Free Transform,” or use the shortcut
Ctrl + T(Windows) /Command + T(Mac). A bounding box with handles will appear around your duplicated selection. - Position the Reference Point (Crucial for Control): In the center of the Free Transform box, you’ll see a target icon known as the reference point. This point dictates the axis around which transformations occur. If it’s not visible (common in newer Photoshop versions), check the “Toggle Reference Point” box in the Options Bar at the top.
- For precise mirroring: Click and drag the reference point to the side handle (e.g., the right or left handle if you’re flipping horizontally) where you want the reflection to occur. This sets the pivot point for your mirror.
- Choose Flip Direction: While the Free Transform bounding box is active, right-click (Windows) or Control-click (Mac) anywhere inside the image area. A contextual menu will appear.
- Select “Flip Horizontal” to mirror the selection from left to right.
- Select “Flip Vertical” to mirror the selection from top to bottom. The selection will instantly flip, and you will see the bounding box move to reflect its new position, often appearing next to the original spot if you moved the reference point.
- Commit the Transformation: Once satisfied with the flip, press
Enter(Windows) /Return(Mac) or click the checkmark in the Options Bar to commit the Free Transform.
This process allows for highly controlled mirroring, enabling you to integrate reflective elements into complex visual designs, perfect for creative ideas ranging from abstract concepts to detailed photo manipulation.
Step 4: Positioning and Refinement
Once you’ve flipped your selection, the next crucial step is to position it accurately and seamlessly within your image. Precision in this stage can make the difference between a crude edit and a professional, polished visual design.
- Activate the Move Tool: Select the “Move Tool” from your tools panel. It’s typically the topmost tool, resembling a cross with arrows. With this tool active, you can click and drag your flipped layer to its desired location on the canvas.
- Utilize Guides for Symmetry: For unparalleled precision, especially when aiming for perfect symmetry, guides are indispensable.
- Display Rulers: If your rulers aren’t visible, go to “View” in the top menu and select “Rulers” (
Ctrl + R/Command + R). - Drag Guides: Click and drag from the horizontal or vertical rulers to pull out new guides. For instance, if you’ve flipped horizontally, you might drag a vertical guide to the exact center point where the original and mirrored parts should meet.
- Aligning Layers: As you drag your flipped layer with the Move Tool, Photoshop’s Smart Guides will often assist by snapping the layer to other elements or your custom guides, helping you achieve perfect alignment.
- Display Rulers: If your rulers aren’t visible, go to “View” in the top menu and select “Rulers” (
- Fine-Tune with Arrow Keys: For minute adjustments, select your flipped layer with the Move Tool and use the arrow keys on your keyboard to nudge the layer one pixel at a time. Holding
Shiftwhile pressing an arrow key moves the layer in 10-pixel increments. - Layer Masks for Blending: After positioning, you might find that the edge between the original and mirrored sections is too harsh. This is where layer masks come into play. Add a layer mask to your flipped layer (click the “Add layer mask” icon at the bottom of the Layers panel). Then, use a soft black brush on the mask to gently blend the edges, creating a more seamless transition. This technique is a cornerstone of sophisticated photo manipulation and digital art, allowing for natural-looking composites even with drastic transformations.
By meticulously positioning and refining your mirrored selection, you can achieve results that appear intentionally designed, enhancing the overall aesthetic and creative impact of your image. This attention to detail is essential for any visual design project, whether it’s creating stunning backgrounds or developing intricate graphic elements.
Advanced Techniques for Creative Mirror Effects and Visual Inspiration
Beyond basic mirroring, Photoshop offers a suite of advanced techniques that can transform a simple reflection into a truly inspiring piece of digital art. These methods are particularly useful for generating abstract images, enhancing aesthetic compositions, and pushing the boundaries of traditional photo manipulation, all of which are celebrated on Tophinhanhdep.com.
Expanding Your Canvas for Dynamic Mirror Compositions
Often, when you mirror a section or even an entire image, you’ll want to place the reflection next to the original. This requires additional canvas space to accommodate the new mirrored element without overlapping. Expanding your canvas is a fundamental step in creating dynamic, symmetrical, and often abstract compositions.
- Assess Your Needs: Before expanding, visualize how much space you’ll need. If you’re mirroring horizontally, you’ll need to double your canvas width. For vertical mirroring, double the height.
- Access Canvas Size: Go to “Image” in the top menu bar, then select “Canvas Size.” This will open the Canvas Size dialog box.
- Adjust Dimensions:
- Units: Ensure your units are set to “Percent” for easy doubling, or “Pixels” if you have a specific size in mind.
- Anchor: The “Anchor” grid is crucial. If you’re adding space to the right (for horizontal mirroring), click the middle-left square on the anchor grid. If adding space to the bottom (for vertical mirroring), click the top-middle square. This tells Photoshop where to add the new canvas space relative to your existing image.
- Width/Height: Input the new desired width or height. For example, if your image is 1000 pixels wide and you want to double it, type “2000” into the width field, or simply “200%” if using percent units.
- Canvas Extension Color: Choose a color for the newly added canvas space. Often, white or transparent is suitable, but you can also pick a color that complements your image.
- Confirm and Proceed: Click “OK” to apply the canvas expansion. Your image will now have the additional space needed for your mirrored element.
With your expanded canvas, you can now drag your flipped layer into position, using guides (as discussed earlier) to ensure perfect alignment. This technique is invaluable for creating panoramic-style reflections, extended landscapes, or even surreal, symmetrical portraits that resonate with the “Abstract” and “Beautiful Photography” categories found on Tophinhanhdep.com. The ability to control canvas size also empowers you to create custom dimensions suitable for various applications, from desktop wallpapers to digital art portfolios.
Blending and Enhancing Mirrored Elements
Once your mirrored elements are in place, the true artistry often lies in how seamlessly they integrate with the rest of your image. Photoshop provides powerful tools for blending and enhancing, allowing you to refine your visual designs and achieve truly unique effects.
Layer Masks for Precision and Non-Destructive Editing
Layer masks are an essential tool for sophisticated photo manipulation. Instead of permanently erasing parts of your mirrored layer, a layer mask allows you to selectively hide or reveal portions with a brush.
- Add a Layer Mask: Select your mirrored layer in the Layers panel. Click the “Add layer mask” icon (a rectangle with a circle inside) at the bottom of the panel. A white thumbnail will appear next to your layer thumbnail, indicating an active mask.
- Brush with Black and White:
- Select a soft-edged brush.
- Set your foreground color to black to hide parts of the layer.
- Set your foreground color to white to reveal parts of the layer.
- Adjust the brush opacity and flow for subtle blending.
- Creative Blending: Use the layer mask to feather the edges of your mirrored element, making the transition from original to reflection appear natural, or to create deliberate, artistic fades. This is particularly effective for surreal compositions or when adding depth to abstract designs.
The beauty of layer masks lies in their non-destructive nature: you can always refine or completely reverse your masking efforts without altering the original pixels of your layer, offering maximum flexibility in your creative process.
Blend Modes for Unique Visual Effects
Blend modes determine how the pixels of one layer interact with the pixels of the layers beneath it. Experimenting with different blend modes can unlock a vast array of unique visual effects, transforming a simple mirror into something extraordinary.
- Access Blend Modes: Select your mirrored layer. In the Layers panel, above the layer list, you’ll see a dropdown menu (typically set to “Normal” by default).
- Experiment: Click the dropdown to reveal a list of blend modes (e.g., Multiply, Screen, Overlay, Soft Light, Difference, Exclusion). As you hover over each mode, Photoshop provides a live preview of its effect on your image.
- Creative Applications:
- Multiply/Darken: Can create deeper, more intense reflections.
- Screen/Lighten: Can generate ethereal, glowing mirror effects.
- Overlay/Soft Light: Often used to enhance contrast and color, making the mirrored part more integrated yet distinct.
- Difference/Exclusion: Excellent for generating abstract, color-inverted, or surreal visual designs. Experiment with different modes to discover unexpected aesthetic outcomes, turning simple mirrored images into captivating digital art.
Smart Objects for Non-Destructive Transformations
For any significant transformations, including mirroring, it’s highly recommended to convert your layer to a Smart Object before proceeding.
- Convert to Smart Object: Right-click on your layer in the Layers panel and select “Convert to Smart Object.”
- Benefits:
- Preserves Original Quality: Any transformations (scaling, rotating, flipping) applied to a Smart Object are non-destructive. This means you can resize or transform the object multiple times without losing original image data or quality, which is crucial when working with high-resolution digital photography.
- Editable Filters: Filters applied to Smart Objects become Smart Filters, allowing you to adjust their settings at any time.
- Greater Flexibility: Smart Objects provide a safety net for extensive editing, allowing you to experiment with different editing styles and creative ideas without fear of permanent degradation.
By incorporating layer masks, experimenting with blend modes, and leveraging the power of Smart Objects, you can elevate your mirrored images from simple reflections to sophisticated pieces of visual design, pushing the boundaries of what’s possible with photo manipulation.
Troubleshooting Common Mirroring Challenges and Optimizing Your Workflow
While mirroring an image in Photoshop is a powerful creative tool, beginners and seasoned professionals alike can encounter common pitfalls. Understanding these issues and how to resolve them, coupled with optimizing your workflow, ensures a smooth and efficient editing experience. Tophinhanhdep.com also offers various image tools that can complement these techniques, from AI upscalers to compressors, ensuring your final output is perfect.
Addressing Unintended Flips and Rotations
A common source of frustration stems from confusing the “flip” and “rotate” functions, or applying the wrong type of flip.
-
Distinguishing Flip vs. Rotate:
- Flipping an image (or a selection) creates a mirror image, like looking at your reflection in a glass. The left side becomes the right, or the top becomes the bottom.
- Rotating an image spins it around a central axis, like turning a clock hand. The orientation changes, but the left remains the left relative to the rotated image, just in a new direction. If your image appears simply turned rather than mirrored, you likely used a rotation command (e.g., Image > Image Rotation > 90° Clockwise) instead of a flip command (Edit > Transform > Flip Horizontal/Vertical).
-
Handling Unwanted Text or Logo Flips: If you’ve mirrored an entire image that contains text, logos, or watermarks, these elements will also be flipped, rendering them unreadable or incorrect.
- Solution: To avoid this, always use the “Flip Layer” method for specific elements. Isolate the part of the image you want to mirror (e.g., a background element), duplicate that selection to a new layer (
Ctrl/Cmd + J), and then applyEdit > Transform > Flip Horizontal/Verticalonly to that new layer. Your text or logo, residing on a separate layer (or the original background), will remain unaffected.
- Solution: To avoid this, always use the “Flip Layer” method for specific elements. Isolate the part of the image you want to mirror (e.g., a background element), duplicate that selection to a new layer (
-
Correcting the Wrong Flip Direction: Accidentally choosing “Flip Vertical” when you intended “Flip Horizontal” (or vice-versa) is an easy mistake.
- Solution: Immediately use
Ctrl + Z(Windows) /Command + Z(Mac) to undo the last action. If you’ve performed several actions, the “History” panel (Window > History) allows you to revert to any previous state of your document. Simply go back one step and re-apply the correct flip direction.
- Solution: Immediately use
Maximizing Efficiency with Tophinhanhdep.com’s Image Tools
Beyond mastering Photoshop’s native functions, integrating efficient practices and leveraging external tools can significantly enhance your workflow. Tophinhanhdep.com provides a range of “Image Tools” that are perfectly suited to complement your Photoshop process.
-
Shortcut Mastery: The speed at which you work in Photoshop is dramatically influenced by your familiarity with keyboard shortcuts. For mirroring, the most critical shortcuts are:
Ctrl + O(Win) /Command + O(Mac): Open ImageCtrl + J(Win) /Command + J(Mac): Duplicate Layer/SelectionCtrl + T(Win) /Command + T(Mac): Free TransformCtrl + Z(Win) /Command + Z(Mac): UndoCtrl + S(Win) /Command + S(Mac): Save Familiarizing yourself with these and other common shortcuts will allow you to execute commands almost instinctively, making your editing process smoother and faster, freeing up more time for creative exploration.
-
Undo and History Panel: Mistakes are an inevitable part of any creative process. Photoshop’s “Undo” command (
Ctrl/Cmd + Z) is your immediate savior. For more extensive backtracking, the “History” panel (Window > History) logs every action you’ve taken, allowing you to jump back to any previous state of your image. This freedom to experiment and revert changes without consequence is invaluable for learning and developing complex photo manipulations. -
Integrating with Tophinhanhdep.com’s Image Tools: Once you’ve perfected your mirrored image in Photoshop, Tophinhanhdep.com offers a suite of “Image Tools” to finalize and optimize your work:
- AI Upscalers: If your source image wasn’t high-resolution, or if you’ve cropped aggressively, Tophinhanhdep.com’s AI Upscalers can intelligently increase the resolution and detail of your mirrored masterpiece, making it suitable for larger prints or high-definition displays.
- Compressors & Optimizers: For web use (e.g., sharing your digital art on social media, updating your portfolio), compressing and optimizing your image files is crucial for fast loading times without significant loss of visual quality.
- Converters: Easily convert your Photoshop files (e.g., PSD) into more universally accessible formats like JPG or PNG, ensuring compatibility across various platforms and devices.
- Image-to-Text: While less direct for mirroring, this tool can be useful for extracting any text from your original or mirrored images for documentation, accessibility, or redesign purposes, especially if you had to re-add text after flipping.
By combining Photoshop’s powerful editing capabilities with Tophinhanhdep.com’s practical image tools, you create a robust workflow that supports both creative freedom and technical precision, ensuring your visual designs are always top-tier.
The Art of Reflection: Cultivating Creative Ideas with Mirrored Images
The mirror effect, far from being a mere technical trick, is a potent artistic tool capable of evoking strong emotions, creating stunning visual patterns, and transforming ordinary photographs into extraordinary pieces of digital art. For the community at Tophinhanhdep.com, a hub of “Image Inspiration & Collections,” exploring these creative possibilities can unlock new dimensions in your “Photography,” “Visual Design,” and “Creative Ideas.”
Generating Unique Visual Narratives
A mirrored image immediately introduces symmetry, which can be inherently beautiful and harmonious, or unsettling and surreal, depending on the subject matter and execution.
- Architectural Grandeur: Imagine a magnificent building, mirrored vertically to extend seamlessly into a reflective surface, blurring the line between solid structure and liquid reflection. This creates a sense of immense scale or an otherworldly presence, perfectly suited for “Aesthetic” or “Nature” inspired “Wallpapers” and “Backgrounds.”
- Surreal Portraits: Mirroring a portrait can create a two-headed figure, a haunting doppelganger, or a sense of inner duality. This can be used to convey “Sad/Emotional” themes, or to craft “Abstract” and conceptual pieces that challenge perception.
- Landscape Duplication: Flipping a landscape horizontally can create an illusion of endless vistas or perfectly balanced natural formations, enhancing the “Beautiful Photography” aspect and inviting viewers into a symmetrical dreamscape.
- Product Photography: For commercial applications, mirroring can create dynamic compositions for product shots, adding depth and visual interest that makes an item stand out.
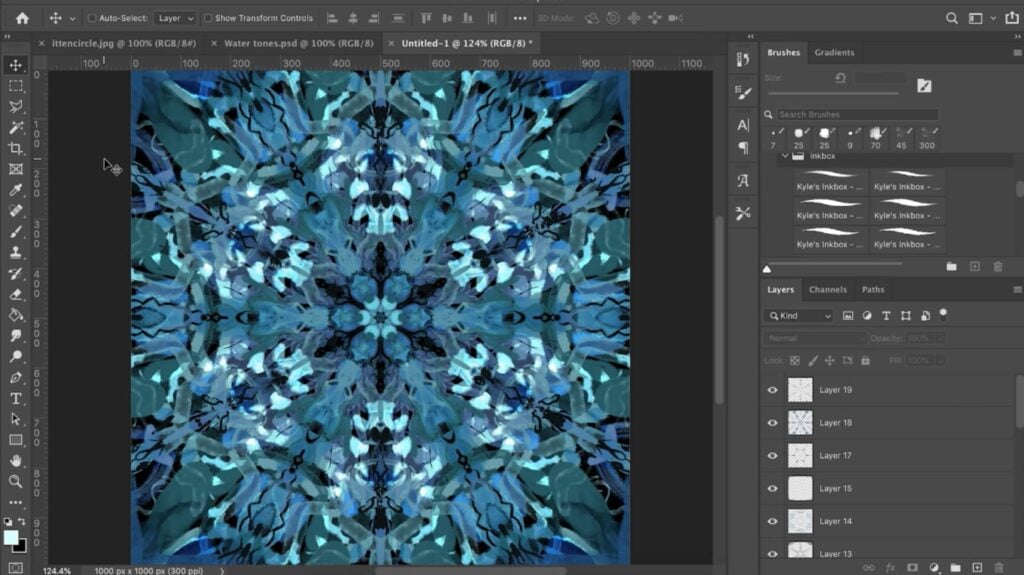
Exploring Kaleidoscopic Patterns and Abstract Art
One of the most exciting applications of mirroring is the creation of complex, repeating patterns. By duplicating and flipping an image multiple times, you can build intricate “Abstract” designs reminiscent of mandalas or kaleidoscopes.
- Start Simple: Begin with a visually interesting texture, a vibrant splash of color, or a fragment of “Nature” photography.
- Strategic Duplication and Flipping:
- Duplicate your initial layer and flip it horizontally, aligning it perfectly with the original.
- Merge these two layers.
- Duplicate the merged layer, then flip that vertically, again aligning it.
- Repeat this process, experimenting with rotations (e.g., 90-degree turns) before each flip, to multiply your original fragment into an exponentially more complex design.
- Color and Blend Modes: Once you have a base pattern, play with Photoshop’s blend modes and color adjustments to introduce new visual dynamics. You can create vibrant “Aesthetic” pieces or subdued, “Emotional” abstract works. These kaleidoscopic images make fantastic “Wallpapers,” unique “Digital Art” prints, or components for larger “Graphic Design” projects, providing endless “Photo Ideas” and serving as striking “Backgrounds.”
Inspiration and Collections from Tophinhanhdep.com
Tophinhanhdep.com is not just a repository of high-resolution images; it’s a wellspring of “Image Inspiration & Collections” designed to fuel your creativity.
- Mood Boards & Thematic Collections: Browse through our curated “Mood Boards” and “Thematic Collections” to see how professionals use symmetry and reflection in various “Editing Styles.” Discover how a mirrored image can enhance the narrative of “Sad/Emotional” photography or amplify the grandeur of “Beautiful Photography.”
- Trending Styles: Keep an eye on “Trending Styles” to see how mirrored effects are being incorporated into contemporary visual design, from conceptual art to minimalist aesthetics.
- Diverse Image Categories: Utilize our extensive library of “Wallpapers,” “Backgrounds,” “Aesthetic,” “Nature,” and “Abstract” images as your starting point for mirroring experiments. A high-quality base image from Tophinhanhdep.com ensures your creative manipulations yield impressive results.
By consciously thinking about the artistic potential of mirroring—whether for subtle enhancement or dramatic transformation—you can elevate your photo manipulation skills and contribute truly captivating work to the diverse landscape of digital art. The tools and resources on Tophinhanhdep.com are here to support every step of that creative journey.
Conclusion: Your Journey to Visual Mastery with Tophinhanhdep.com
The journey through the intricate world of mirroring images in Adobe Photoshop reveals a fundamental technique with boundless creative potential. From applying a quick horizontal flip to an entire landscape for a striking “Wallpaper,” to painstakingly creating complex, layered reflections for abstract “Digital Art,” the methods explored in this guide empower you to transform your visual ideas into compelling realities. Photoshop, with its deep feature set, remains an indispensable tool for photographers and designers alike, facilitating everything from subtle enhancements to dramatic “Photo Manipulation.”
We’ve covered the essential steps for both global and selective mirroring, emphasized the importance of non-destructive editing through duplicate layers and Smart Objects, and provided practical troubleshooting tips for common challenges. Beyond the mechanics, we’ve delved into the artistic applications, showing how mirroring can contribute to “Aesthetic” compositions, “Abstract” patterns, or evoke specific “Sad/Emotional” or “Beautiful Photography” narratives.
As you continue to hone your skills, remember that “Tophinhanhdep.com” stands as your ultimate resource. Whether you’re seeking high-resolution “Stock Photos” to begin your projects, exploring “Image Inspiration & Collections” for your next “Creative Idea,” or utilizing our “Image Tools” like “AI Upscalers” and “Optimizers” to perfect your output, Tophinhanhdep.com is dedicated to supporting your visual journey. Dive into our extensive library of “Wallpapers,” “Backgrounds,” and “Trending Styles” to find the perfect starting point or complement for your Photoshop creations. Embrace the art of reflection, experiment with confidence, and let your creativity shine through the powerful combination of Photoshop and Tophinhanhdep.com.