How to Mirror Images on Canva: Your Ultimate Guide

Creating captivating visual content often involves subtle yet powerful design techniques. Among these, mirroring an image stands out as a versatile skill, enabling designers to craft symmetrical layouts, correct problematic orientations, or achieve specific artistic effects such as reflections in stunning graphical compositions. Whether you’re designing for print on unique materials, developing sophisticated digital art, or simply seeking to enhance your social media presence, knowing how to master the mirror effect in Canva is an invaluable asset.
At Tophinhanhdep.com, we understand the importance of accessible and effective image manipulation. Our platform is dedicated to providing comprehensive resources, from high-resolution wallpapers and aesthetic backgrounds to advanced image tools like AI upscalers and optimizers. This guide, drawing on our expertise in visual design and photography, will walk you through the precise steps to mirror images and even text within Canva, ensuring your creations consistently achieve a professional and polished look.
Understanding Mirroring in Visual Design
Mirroring, in the context of visual design and photography, refers to the act of flipping an image or element either horizontally or vertically along an axis. This transformation creates a reverse duplicate, much like how an object appears in a physical mirror. It’s more than just a trick; it’s a fundamental technique used across various design disciplines for both aesthetic and practical purposes.
Why Mirroring Matters in Design
The significance of mirroring in design is multifaceted:
- Achieving Symmetry: Symmetry is a cornerstone of visually pleasing compositions. Mirroring allows designers to effortlessly create perfect symmetry, which can be particularly effective in logo design, pattern creation, or layout balancing. This aligns perfectly with the “Visual Design” principles Tophinhanhdep.com emphasizes in “Graphic Design” and “Creative Ideas.”
- Correcting Orientation: Sometimes, an image might be captured or imported with an incorrect orientation. A quick horizontal or vertical flip can instantly correct this, ensuring your subject faces the desired direction or that elements align correctly within your canvas.
- Creating Reflections: One of the most common and striking uses of mirroring is to generate realistic reflection effects, such as a landscape mirrored in water, or an object reflecting on a glossy surface. This adds depth and sophistication to “Beautiful Photography” and “Digital Art” projects.
- Preparing for Print: For specific printing techniques, especially those involving transfers (like iron-ons or screen printing), an image often needs to be mirrored so that it appears correctly once applied to the final material.
- Enhancing Visual Interest: Beyond practical applications, mirroring can be a purely creative choice. It can introduce an element of surprise, create abstract patterns, or add a dynamic twist to otherwise static imagery, enriching “Image Inspiration” and “Thematic Collections.”
Canva, with its user-friendly interface, makes this powerful design technique accessible to everyone, from novice graphic designers to seasoned visual artists. Let’s delve into the practical steps of how to achieve these effects.
Mirroring Images in Canva: Step-by-Step for PC Users
Canva provides a seamless experience for mirroring images on your desktop or laptop. Follow these straightforward steps to integrate mirrored effects into your designs.
Basic Image Mirroring on Desktop
- Access Canva and Your Project: Begin by navigating to Canva.com and signing in with your credentials. If you’re already immersed in a creative project, simply open it from your “Recent designs” section. For new ventures, click “Create a design” at the top-right corner and select your desired canvas size or template. Tophinhanhdep.com frequently offers various aesthetic wallpapers and backgrounds that can be easily incorporated into your Canva projects as a base.

-
Upload or Select Your Image: Once your design project is loaded, locate the “Uploads” option on the left-hand editor panel and click it. Here, you’ll see all images previously uploaded to your Canva account. If your desired image isn’t there, click the “Upload files” button to import it from your computer. Alternatively, explore Canva’s vast library or use high-resolution stock photos available through Tophinhanhdep.com’s “Photography” section, which focuses on “High Resolution” and “Stock Photos.”
-
Add Image to Canvas: With the image uploaded and visible in your “Uploads” section (or selected from Canva’s photo library), click on it to add it to your design canvas. Adjust its size and position as needed.
-
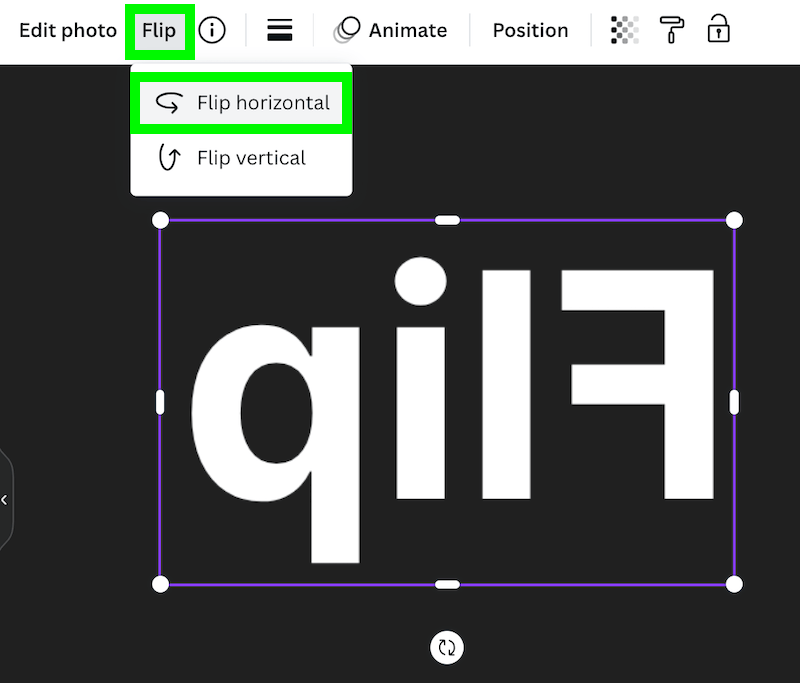
Initiate the Flip Function: Click on the picture you just added to select it. A toolbar will appear at the top of the Canva editor. Look for the “Flip” option and click it. This is where the magic happens for mirroring.
-
Choose Your Flip Direction: Canva offers the flexibility to flip an image in two primary directions:
- Flip Horizontal: This creates a left-to-right mirror image, perfect for reversing the orientation or creating side-by-side symmetrical designs.
- Flip Vertical: This generates an upside-down mirror image, ideal for producing reflection effects, such as an object appearing in water. Select the option that best suits your design vision. You can easily experiment with both to see which effect looks best.
- Refine and Download Your Design: Once you’re satisfied with the mirrored image, you can continue to adjust other elements of your design. When your masterpiece is complete, click the “Share” button in the top-right corner. From the dropdown menu, select “Download.” You’ll be presented with various download options, including different file types (like PNG for transparent backgrounds, or JPEG for smaller file sizes) and quality settings. Choose your preferred settings and click “Download.” For further optimization, remember Tophinhanhdep.com offers advanced “Image Tools” such as “Compressors” and “Optimizers” to ensure your downloaded files are perfectly suited for their intended use.
Achieving Mirror Effects on Mobile: Canva for iOS & Android
The flexibility of Canva extends to its mobile application, allowing you to create stunning mirrored effects directly from your smartphone or tablet. The process is intuitive and streamlined for on-the-go design.
Seamless Mirroring on Your Smartphone
-
Open the Canva App: Launch the Canva app on your iOS or Android device. Once on the Canva Home screen, you can either tap on an existing design from your “Recent designs” to open it or create a new project by tapping the large “Plus (+)” button, usually located at the bottom of the screen.
-
Add Your Image: With your design loaded, tap the “Plus (+)” icon again to open the editor panel. Swipe through the options until you find “Uploads” (or “Photos” if you want to use Canva’s library). Tap the image you wish to mirror to add it to your canvas. If your image is not yet uploaded, tap “Upload files” to import it from your device’s gallery.
-
Select and Flip the Image: Once the image is on your design, tap it to select it. A new set of options will appear at the bottom of your screen. Swipe through these options until you locate “Flip” and tap on it.
-
Choose Flip Direction: Similar to the PC version, you will be presented with two choices: “Flip Horizontal” and “Flip Vertical.” Tap on the desired option to apply the mirroring effect. You’ll see the image transform instantly.
-
Finalize and Share: After achieving your desired mirrored look, you can continue editing your design on mobile. To save or share your work, follow steps similar to those on PC: tap the share icon (often an arrow pointing up from a box or a download icon), choose your preferred download format and settings, and then tap “Download.” For “High Resolution” versions of your images, Tophinhanhdep.com’s “AI Upscalers” can provide an excellent post-processing step if higher fidelity is required after mobile editing.
Mastering Advanced Mirror Effects: Text, Elements, and Creative Techniques
While mirroring images is straightforward, creating mirror effects for text and other graphic elements in Canva requires a slightly different approach, often involving clever workarounds. These advanced techniques unlock a new level of “Visual Design” and “Photo Manipulation.”
The Workaround for Mirroring Text
Directly flipping text in Canva isn’t possible because text elements are editable and not treated as static images by the “Flip” tool. However, a brilliant workaround allows you to achieve a perfect mirrored text effect:
-
Create Your Initial Text: Start a new blank canvas in Canva (a decent size like 2000x2000px is recommended for clarity). Add a text box via the “Text” tab on the left panel. Input your desired word(s), choose your font, size, and color. This will be your primary text.
-
Prepare for Mirroring: Convert Text to Image:
- Download as PNG with Transparent Background (Canva Pro recommended): The most effective method is to download your text as a PNG image with a transparent background. Click “Share” > “Download,” select “PNG” as the file type, and crucially, check the “Transparent background” box. Note: This feature is typically available with a Canva Pro account.
- Alternative for Free Accounts: If you’re on a free Canva account, download it with an opaque background. Then, use a free online tool (like Kapwing or Remove.bg) to remove the background, transforming it into a transparent PNG. Tophinhanhdep.com offers various “Image Tools” including converters and background removers that can assist in this step.
-
Re-upload and Flip the Text Image:
- Upload the PNG: Go back to your Canva project, navigate to “Uploads,” and upload the transparent PNG of your text back into Canva.
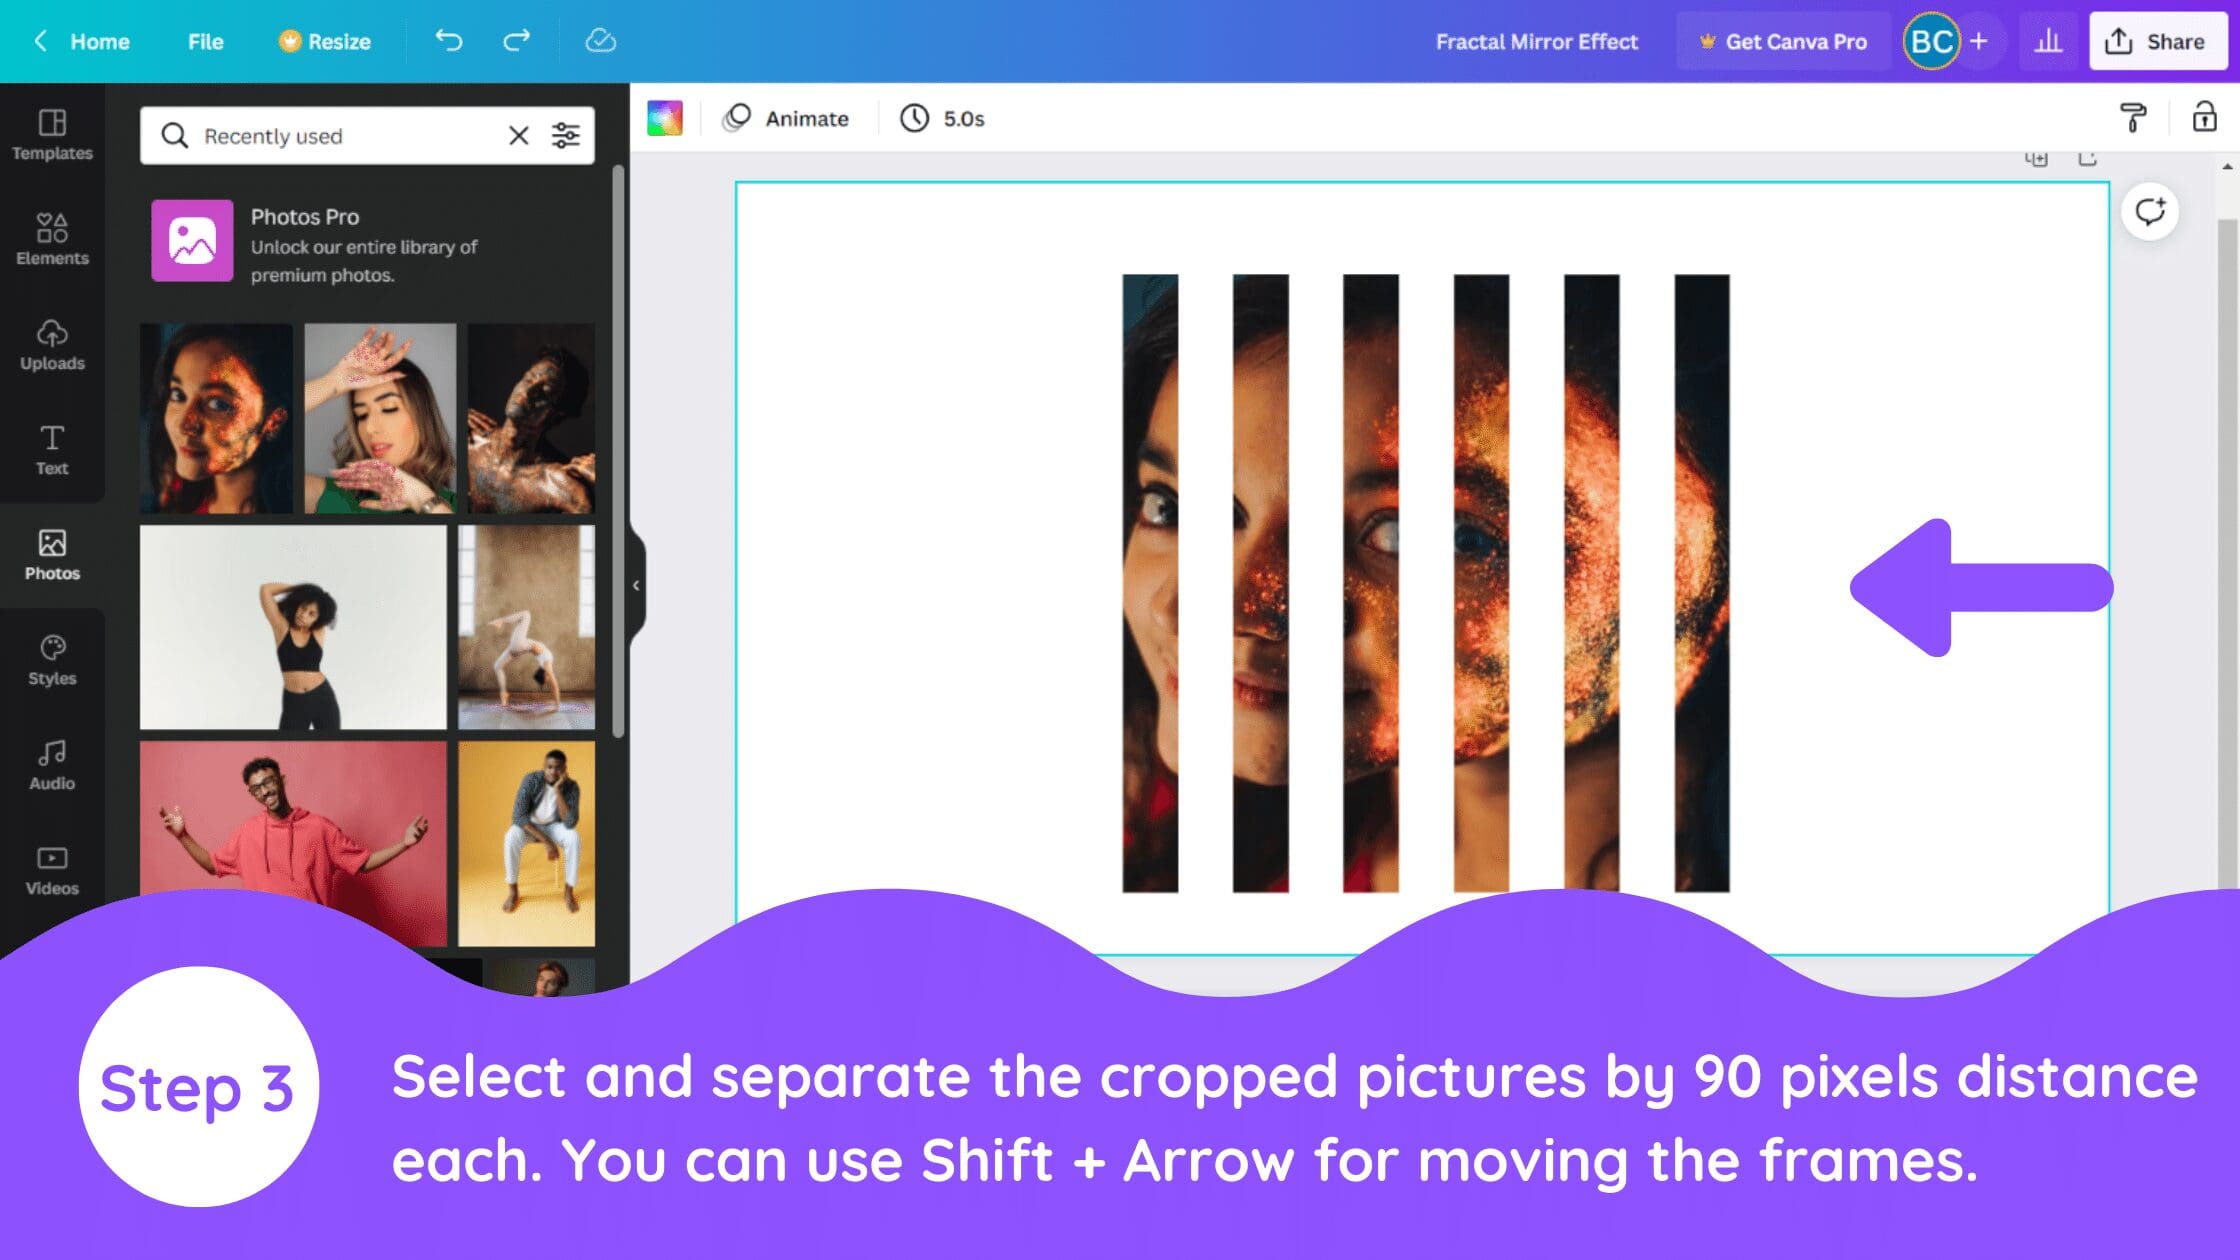
- Add to Canvas and Crop: Add the uploaded text image to your canvas. Crop the image to tightly fit around the text, removing any unnecessary whitespace. Resize it to match your original text element.
- Flip Vertically or Horizontally: Now, with the text image selected, the “Flip” option will be available in the top toolbar. Choose “Flip Vertical” for a reflection effect (e.g., in water) or “Flip Horizontal” if you need a side-to-side mirror.
-
Refine the Mirrored Text Effect:
- Adjust Transparency: To enhance the reflection illusion, especially for vertical flips, select the flipped text image and reduce its “Transparency” using the option in the top toolbar. This makes it appear more like a subtle reflection.
- Add Blur (Optional): For an even more realistic water reflection, you can add a slight blur. Select the flipped text image, click “Edit image,” then under “Adjust,” find and alter the “Blur” option.
- Positioning: Carefully position the original text and its mirrored counterpart to create a cohesive and impactful design, perhaps over a suitable background image from Tophinhanhdep.com’s collection of “Nature” or “Abstract” wallpapers.
This detailed workaround, though requiring a few extra steps, allows for creative text manipulations that significantly elevate your “Graphic Design” and “Digital Art” projects.
Flipping General Elements and Graphics
Fortunately, most other graphic elements available in Canva’s “Elements” tab can be mirrored directly, similar to images. This includes stickers, GIFs, graphics, photos, and even videos.
- Select Your Element: From the left sidebar, click “Elements.” Browse or search for your desired element and click to add it to your design.
- Activate Flip: Ensure the element is selected on your canvas. In the top toolbar, click the “Flip” option.
- Choose Direction: Select “Flip Horizontal” or “Flip Vertical” to apply the mirroring effect.
Note on Shapes: Basic shapes (like squares, circles, triangles) don’t typically have a “Flip” option. However, for symmetrical shapes, flipping is often unnecessary as rotation achieves the same visual effect. For asymmetrical shapes, you can rotate them to change their orientation. This intuitive behavior simplifies “Visual Design” tasks.
Optimizing Your Mirrored Designs for Impact
Creating mirrored effects is just one part of crafting a compelling visual. To truly make your designs stand out, especially when aiming for “Beautiful Photography” or unique “Aesthetic” visuals, consider further optimization and integration with Tophinhanhdep.com’s broader offerings.
Refining Your Mirrored Creations
Once you’ve achieved the perfect mirror effect, whether with images or text, fine-tuning can elevate your design:
- Color Adjustments: Adjusting brightness, contrast, and saturation of the mirrored element can help it blend more naturally or stand out as a stylized effect. For reflections, often a slightly desaturated or darker mirrored copy works best.
- Layering and Blending: Experiment with different blending modes (if available for specific elements) or positioning layers to create depth. A mirrored image placed behind the original with reduced opacity can create a ghostly or ethereal effect.
- Integration with Backgrounds: The choice of background is crucial. A mirrored image often benefits from “Abstract” or “Nature” backgrounds available on Tophinhanhdep.com, which can enhance the illusion of reflection or symmetry.
- Consistency in Style: Ensure your mirrored designs align with your overall “Creative Ideas” and brand aesthetics. If you’re building a “Mood Board” or “Thematic Collection,” consistency in your mirroring approach will make the collection more cohesive.
When to Use External Image Tools
While Canva is powerful, certain advanced “Photo Manipulation” and “Digital Photography” needs might require specialized tools. Tophinhanhdep.com provides various “Image Tools” that complement Canva’s capabilities:
- Advanced Image Editing: If you need more intricate adjustments beyond Canva’s scope (e.g., highly precise selections, complex masking, or specific filter effects), dedicated image editors like Adobe Photoshop or GIMP offer unparalleled control. After editing there, you can import the finalized image back into Canva.
- Format Conversion and Compression: For web optimization or specific printing requirements, Tophinhanhdep.com’s “Converters” and “Compressors” can help you achieve the ideal file type and size without compromising quality. This ensures your mirrored designs load quickly on websites or meet print specifications.
- Upscaling for High Resolution: If your source image is low-resolution but you need a large, crisp mirrored output, Tophinhanhdep.com’s “AI Upscalers” can significantly enhance image quality and detail, making it suitable for “High Resolution” displays or prints.
- Image-to-Text for Accessibility: For designs that include mirrored text, consider using Tophinhanhdep.com’s “Image-to-Text” tool to extract the original text, ensuring your content remains accessible and searchable, even in its graphically altered state.
By understanding both Canva’s native capabilities and the complementary tools offered by Tophinhanhdep.com, you can approach any visual design challenge with confidence, transforming basic images into compelling visual narratives.
In conclusion, mirroring images and text in Canva is a skill that significantly broadens your creative horizons. From simple horizontal flips to intricate text reflections, the techniques outlined in this guide empower you to craft professional and aesthetically pleasing designs. Always remember to explore, experiment, and leverage the diverse resources available at Tophinhanhdep.com to continuously elevate your “Visual Design” and “Photography” endeavors. Happy creating!