How to Mix Images in Photoshop for Stunning Visuals

In the vast and ever-evolving landscape of digital art and photography, the ability to seamlessly combine multiple images into a single, cohesive masterpiece is a skill that opens up boundless creative possibilities. Whether you’re aiming to craft a surreal dreamscape, a compelling narrative, an eye-catching aesthetic background, or a sophisticated piece of digital art, Photoshop offers a powerful suite of tools to blend and merge photographs with precision and artistic flair. This comprehensive guide will walk you through the fundamental and advanced techniques for mixing images in Photoshop, transforming ordinary photos into extraordinary visual compositions that resonate with “Tophinhanhdep.com”’s focus on beautiful photography, visual design, and creative inspiration.

Beyond simply layering one image on top of another, true image mixing involves thoughtful integration, creating an illusion that the combined elements belong together. This process is at the heart of photo manipulation and graphic design, allowing artists and photographers to transcend the limitations of a single shot. From subtle texture overlays to dramatic double exposures, mastering these techniques empowers you to tell more complex stories, evoke deeper emotions, and produce high-resolution, visually stunning images that capture attention, perfect for aesthetic collections, nature wallpapers, or abstract digital art.
To embark on this creative journey, you’ll need a Creative Cloud subscription for Adobe Photoshop and a collection of captivating images. We’ll explore various blending techniques, providing you with the essential knowledge to unlock Photoshop’s full potential for your visual design projects.
Setting Up Your Creative Workspace in Photoshop
Before delving into the intricate blending processes, a well-organized workflow is crucial for efficiency and maintaining creative control. This initial setup ensures that your editing process is non-destructive, allowing for adjustments and experimentation without permanently altering your original photographic assets.
Starting a New Project and Layering Your Images
The first step in any image mixing endeavor is to prepare your canvas and introduce your chosen photographs.
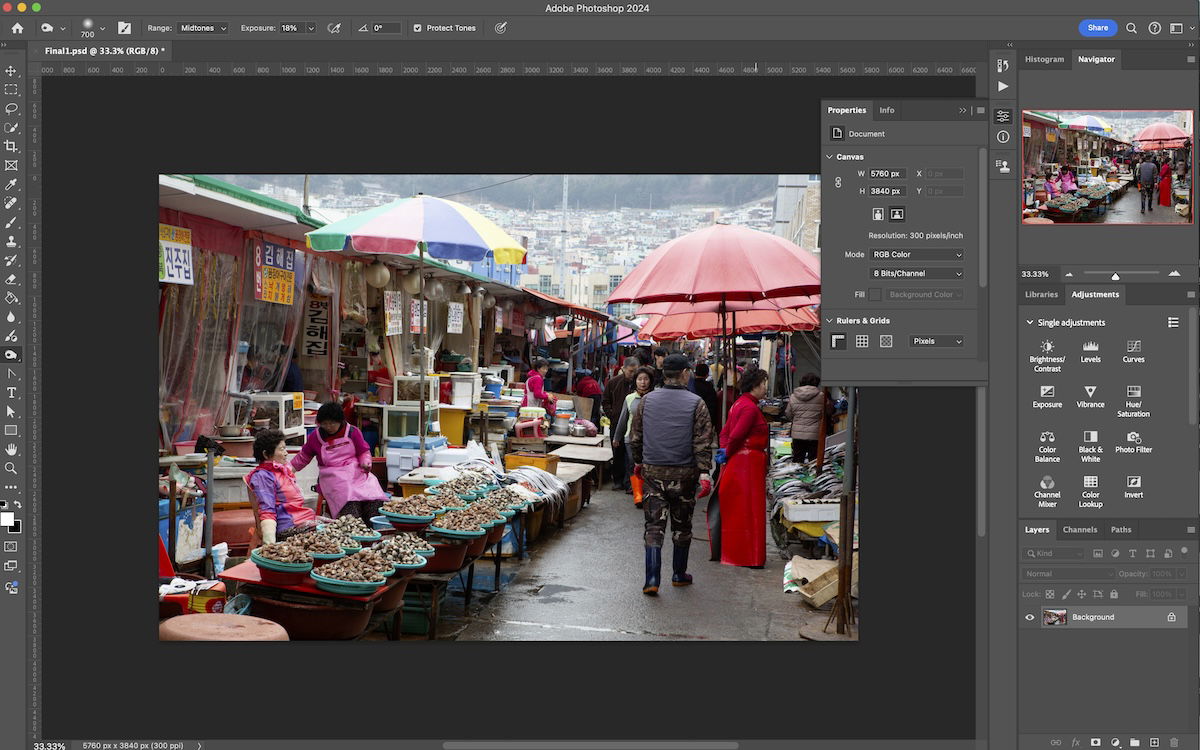
- Initiate a New Project and Place Images: Begin by launching Adobe Photoshop and creating a new document. The dimensions should ideally accommodate both of your selected images, especially if you intend to merge them side-by-side or create a panorama. Once your canvas is ready, navigate to
File > Place Embedded(orPlace Linkedif you prefer smart objects that link to external files) and select your first image. Repeat this process for your second image. Each image will automatically be placed on its own distinct layer within the Layers panel. - Organizing Your Layers: It’s good practice to name your layers clearly (e.g., “Foreground,” “Background,” “Texture,” “Subject”) for easy identification, especially as your compositions grow more complex. Initially, the stacking order of your layers might not seem critical, but as you experiment with blending modes and masks, you’ll discover that altering the layer order significantly impacts the final visual outcome. For instance, placing a city skyline above a portrait can lead to intriguing urban double exposures, while reversing the order creates a different aesthetic.
- Non-Destructive Workflow: Duplicate and Lock: A cornerstone of professional photo manipulation is non-destructive editing. Always make duplicates of your original image layers by selecting a layer and pressing
Ctrl+J(Windows) orCmd+J(Mac). Then, lock the original layers by clicking the padlock icon next to them in the Layers panel. This safeguards your base images, providing a quick fallback if an effect goes awry or you wish to revert to an earlier stage without undoing other desirable adjustments made on different layers. This practice is particularly vital when working with high-resolution digital photography, preserving every detail.
Once your images are positioned and secured, you’re ready to explore the dynamic world of blending.
Mastering Blending Techniques for Artistic Composites
Photoshop offers a spectrum of tools to merge images, ranging from simple transparency adjustments to complex algorithmic interactions between pixels. These techniques are fundamental to creating compelling visual designs, whether for abstract art, aesthetic backgrounds, or refined photo manipulation.
Blending with Layer Opacity: The Foundation of Transparency
The Opacity control is arguably the most straightforward and intuitive method for blending images. It governs the overall transparency of a layer, allowing the underlying layers to show through to varying degrees. This simple slider can produce surprisingly elegant and subtle aesthetic blends, making it an excellent starting point for any creative composition.
Located in the Layers panel, the Opacity slider (typically set to 100% by default, indicating full visibility) becomes active when a layer is selected. To blend images using opacity, you’ll primarily work with the top layer. As you reduce its opacity, its pixels become more transparent, revealing the content of the layer beneath.
Consider these examples for your creative compositions:
- 70% Opacity: A slight reduction in opacity (e.g., to 70%) creates a subtle overlay, allowing elements from both images to coexist without one completely dominating the other. This can be effective for soft textures or introducing a gentle hint of another image.
- 50% Opacity: At 50% opacity, both layers contribute almost equally to the visual blend, resulting in a more pronounced overlap. This level is often chosen for double exposure effects where both subjects need to maintain significant visibility.
- 30% Opacity: A lower opacity (e.g., 30%) makes the top layer much fainter, allowing the background to become the primary focus while the overlay adds an ethereal or ghost-like quality. This can create atmospheric effects or blend faint abstract patterns.
Experimenting with different opacity levels is key to discovering the perfect balance for your specific visual narrative. The simplicity of this tool makes it invaluable for quick adjustments and for understanding the foundational concept of layer interaction.
Exploring Layer Blend Modes for Dynamic Visual Effects
Beyond simple transparency, Photoshop’s Layer Blend Modes offer 27 distinct ways for the pixels of an active layer (the “blend” layer) to interact with the pixels of the layer directly beneath it (the “base” layer). Each blend mode employs a unique mathematical equation to calculate how colors and tones combine, leading to a vast array of editing styles and creative possibilities. These modes are categorized for easier understanding, each group producing a similar overall effect but with nuanced differences perfect for advanced photo manipulation and digital art.
Here’s a breakdown of the main categories and their applications, crucial for elevating your visual design:
- Normal Blend Modes:
- Normal: The default mode; pixels are simply stacked.
- Dissolve: Creates a speckled, dithered effect based on opacity, useful for grunge or vintage aesthetics.
- Darken Blend Modes: These modes analyze the colors of the blend and base layers and selectively darken the resulting composite. They are excellent for merging shadows, textures, or adding depth.
- Examples: Darken, Multiply, Color Burn, Linear Burn, Darker Color.
Multiplyis particularly popular for combining images with light backgrounds, making the darker elements of the top layer merge seamlessly with the base.
- Examples: Darken, Multiply, Color Burn, Linear Burn, Darker Color.
- Lighten Blend Modes: The inverse of darken modes, these modes brighten the composite, ideal for combining highlights, adding glow effects, or integrating elements with dark backgrounds.
- Examples: Lighten, Screen, Color Dodge, Linear Dodge (Add), Lighter Color.
Screenis often used for bright double exposures or adding light effects, as it preserves lighter pixels.
- Examples: Lighten, Screen, Color Dodge, Linear Dodge (Add), Lighter Color.
- Contrast Blend Modes: These modes both darken and lighten, enhancing the contrast between the blend and base layers. They are perfect for enriching colors, adding punch, or creating dramatic effects.
- Examples: Overlay, Soft Light, Hard Light, Vivid Light, Linear Light, Pin Light, Hard Mix.
OverlayandSoft Lightoffer subtle contrast enhancements, whileHard Lightprovides a more intense, dramatic blend, making colors pop for impactful visual art.
- Examples: Overlay, Soft Light, Hard Light, Vivid Light, Linear Light, Pin Light, Hard Mix.
- Inversion Blend Modes: These modes create striking, often abstract, effects by comparing and inverting colors, leading to unique and unexpected results.
- Examples: Difference, Exclusion, Subtract, Divide.
Differencecan be used for artistic glitches or alignment checks, creating vibrant, inverted color shifts.
- Examples: Difference, Exclusion, Subtract, Divide.
- Component Blend Modes: These modes interact with specific color components (hue, saturation, color, luminosity) of the base layer, allowing for precise color grading and tonal adjustments.
- Examples: Hue, Saturation, Color, Luminosity.
Luminosityis excellent for transferring the light and shadow information from one image to another without affecting color, useful for enhancing mood or creating specific photo aesthetics.
- Examples: Hue, Saturation, Color, Luminosity.
Applying Blend Modes for Creative Composites:
- Workflow Setup: As with opacity blending, ensure your two images are on separate layers, with duplicates locked.
- Experimentation: The true power of blend modes lies in experimentation. Select your top layer and cycle through the blend modes in the drop-down menu in the Layers panel. Keyboard shortcuts (
Shift++or-) allow for rapid previewing. - Refine with Opacity and Fill: Remember that almost all blend modes can be further refined using the Opacity slider. Additionally, eight “Special Blend Modes” (Color Burn, Linear Burn, Color Dodge, Linear Dodge (Add), Vivid Light, Linear Light, Hard Mix, Difference) also respond to the Fill slider, which adjusts the transparency of the layer’s pixels while preserving its layer effects, offering even more granular control.
For instance, applying Multiply can elegantly combine a cityscape with a portrait, creating a dark, dramatic urban double exposure, especially when adjusting opacity to 60% and fill to 80% to retain facial clarity. Hard Light might enhance the contrast and vibrancy of both layers, making colors intense but potentially less natural. Conversely, Luminosity can infuse a bright, summery glow into a composition by transferring light information, perfect for creating a warm, inviting mood.
The key is to understand that the “best” blend mode is entirely dependent on the specific images you are combining and your desired artistic outcome. This constant exploration contributes to developing a unique editing style.
Advanced Image Merging with Layer Masks for Precise Control
While opacity and blend modes offer powerful global adjustments, Layer Masks provide an unparalleled level of precision and control over how two images merge. This technique is essential for seamless photo manipulation, allowing you to selectively reveal or conceal parts of a layer, creating intricate composites and creative designs.
Implementing Layer Masks for Seamless Integration
A Layer Mask acts as a non-destructive stencil, dictating which areas of its associated layer are visible or invisible. It’s an extra layer of control that shines when you have a specific vision for your merged image, moving beyond general experimentation to targeted adjustments.
The Black and White Principle: The fundamental concept of a layer mask is simple:
- Black conceals: Painting with black on a layer mask makes the corresponding area of the layer invisible, revealing the layer(s) beneath.
- White reveals: Painting with white makes the corresponding area of the layer visible.
- Grayscale creates transparency: Shades of gray on the mask result in varying levels of transparency for the layer.
Step-by-Step Guide to Using Layer Masks:
- Open Both Images: Start by opening your two desired images in Photoshop and placing them on separate layers in the same canvas, following the initial workflow setup. For best results, consider which image will serve as your foreground and which as your background.
- Add a Layer Mask: Select the top layer in the Layers panel. At the bottom of the Layers panel, click the “Add layer mask” icon (a white rectangle with a black circle inside). A white thumbnail will appear next to your layer thumbnail, indicating an active layer mask. By default, the entire layer is visible (white mask).
- Select the Gradient Tool: Ensure the layer mask thumbnail is selected (a white border will appear around it). Now, select the Gradient tool from the toolbar (keyboard shortcut:
G). In the options bar at the top, choose a “Black to White” gradient (usually the default, or click the gradient preview and select the “Foreground to Background” preset if your foreground color is black and background is white). - Apply the Gradient: With the Gradient tool active and the layer mask selected, click and drag across your image. The direction and length of your drag will determine how the gradient transitions on the mask, creating a smooth blend between the top and bottom layers. For example, dragging from the bottom-right to the top-left will gradually fade the top layer, revealing the background. This is ideal for subtle transitions for wallpapers or backgrounds.
- Refine with Blend Modes (Optional but Recommended): After applying the gradient mask, you can still apply a Blend Mode to the top layer itself (make sure the image thumbnail, not the mask thumbnail, is selected). Combining a gradient mask with a blend mode like
Hard LightorOverlaycan create visually rich effects, adding depth and merging colors in unique ways.
Creative Enhancements with Brush and Gradient Tools
Layer masks truly shine when combined with the Brush tool, allowing for organic and highly detailed integration of elements. This method empowers you to fine-tune your blend, adding creative touches that elevate your photo manipulation.
- Activate the Brush Tool: With the layer mask still selected, choose the Brush tool (keyboard shortcut:
B). Set your foreground color to black to conceal or white to reveal. Adjust the brush size (using[and]) and hardness (right-click on canvas for options) as needed. A soft-edged brush (low hardness) is generally preferred for seamless blending. - Paint on the Mask: Carefully paint over areas of the top layer you wish to hide (with black) or reveal (with white). This allows for precise control, such as masking out parts of an image to reveal a specific element from the layer below, or painting back details that were too faded by a gradient. If you make a mistake, simply press
Xto switch your foreground/background colors and paint over the error to correct it. - Vary Opacity and Flow: For even more subtle blending, adjust the opacity and flow of your brush in the options bar. Painting with a low-opacity brush allows for gradual transitions, building up the masking effect layer by layer. This is invaluable for delicate edges like hair or fur, ensuring a natural blend.
- Combining Techniques: A powerful workflow involves starting with a broad blend using the Gradient tool on a layer mask, then switching to the Brush tool with varying opacities and hardness levels to refine specific areas. This combination maximizes efficiency and precision, allowing you to achieve complex and realistic visual designs.
Layer masks are a versatile “image tool” that, once mastered, will become indispensable for any “visual design” project, enabling you to combine images into sophisticated “digital art” or “beautiful photography” for “thematic collections” and “mood boards.”
Practical Applications and Creative Ideas for Mixed Images
The techniques of blending images in Photoshop extend far beyond simple layering, opening doors to a multitude of creative applications that align perfectly with “Tophinhanhdep.com”’s vision for visual design and image inspiration. From enhancing existing photos to crafting entirely new realities, the possibilities are limited only by your imagination.
Crafting Compelling Visual Narratives
Image mixing is a powerful storytelling device, allowing you to combine elements that wouldn’t naturally coexist to create surreal, abstract, or emotionally resonant compositions.
- Double Exposure Effects: This classic technique involves layering two or more images to create a single, often dreamlike, composition where elements from each image are visible. For example, a portrait combined with a nature scene (a forest, mountains, or starry sky) can evoke feelings of connection to the environment or inner thoughts. Use
Screen,Lighten, orOverlayblend modes, often combined with layer masks to highlight specific features. This style is popular in “aesthetic photography” and “digital art.” - Texture Overlays: Adding textures (concrete, fabric, grunge, paint splatters) to photographs can dramatically alter their mood and visual appeal. A subtle texture overlay can add depth and character, giving a “nature” photo a rugged feel or an “abstract” image more tactile presence. Experiment with
Overlay,Soft Light,Multiply, orScreenblend modes and adjust opacity to control intensity. These are excellent for creating unique “backgrounds” and “wallpapers.” - Surreal Composites: Combine disparate elements to create fantasy worlds or impossible scenarios. Imagine a tiny figure standing on a giant mushroom, or a whale swimming through clouds. These compositions often require meticulous layer masking and color matching to achieve a believable (or deliberately unbelievable) result. This genre strongly resonates with “creative ideas” and “photo manipulation.”
- Emotional Storytelling: Use blending to evoke specific emotions. For instance, combining a melancholic portrait with a stormy sky or a lone figure in a vast landscape can amplify feelings of “sad/emotional” reflection. Conversely, merging a joyful portrait with vibrant floral patterns can convey happiness and beauty.
- Conceptual Art: Digital artists frequently use image mixing to explore complex themes or ideas, presenting them in a visually striking manner. This could involve merging symbols, metaphors, or different visual styles to create a cohesive piece of “digital art.”
Enhancing Backgrounds and Wallpapers
A primary application of image mixing, especially relevant to “Tophinhanhdep.com” visitors, is the creation of custom “wallpapers” and “backgrounds” that are truly unique and aesthetically pleasing.
- Custom Aesthetic Backgrounds: Tired of generic backgrounds? Combine a subtle gradient with an abstract pattern, or blend a minimalist photo with a soft texture to craft a personalized backdrop for your desktop or mobile device. Layer masks can help you seamlessly integrate these elements.
- Nature-Inspired Wallpapers: Take a breathtaking “nature” photograph and enhance it by blending in subtle light leaks, lens flares, or soft atmospheric effects (like mist or fog) from other images. Use
ScreenorLightenmodes for light effects, and layer masks to control where these effects appear. - Thematic Collections: When creating “thematic collections” or “mood boards,” image mixing allows you to unify diverse photos under a single aesthetic. For example, if your theme is “vintage travel,” you can apply a consistent faded texture or sepia tone overlay across all your images to create a cohesive visual narrative.
- Branding and Graphic Design: For graphic designers, blending images is crucial for creating marketing materials, website banners, or social media graphics. A product image might be blended with a contextual background, or a logo integrated into a textured surface to enhance its visual appeal. This directly ties into “graphic design” and “visual design” principles.
- High-Resolution Backgrounds: Ensure that all images used for wallpapers and backgrounds are “high resolution” to maintain clarity and detail, especially on larger screens. After blending, use “Image Tools” like AI upscalers if necessary to boost resolution without sacrificing quality, preparing your image for optimal display.
By understanding these practical applications, you can move beyond simply knowing “how to mix images in Photoshop” to proactively creating impactful and inspiring visual content.
Tips for Success and Avoiding Common Pitfalls
To consistently achieve professional-grade results when mixing images in Photoshop, consider these essential tips and common pitfalls to avoid:
- Image Selection is Key: The success of your composite often begins with your initial image choices.
- Matching Lighting: Images with similar lighting conditions (e.g., both shot in natural daylight, or both with studio lighting) will blend much more realistically. Discrepant lighting can be challenging to correct.
- Consistent Perspective/Focal Length: For realistic composites, images should ideally be shot from a similar perspective and with comparable focal lengths. This helps maintain consistent scale and depth.
- Resolution: Always work with “high resolution” images. Blending a low-resolution image with a high-resolution one will highlight the quality disparity and degrade the overall output.
- Simplicity vs. Complexity: While Photoshop can handle intricate details, starting with simpler images (e.g., clear subjects against relatively uniform backgrounds) will make the learning process easier and yield better initial results.
- Embrace Non-Destructive Editing: As emphasized earlier, always work with duplicate layers and utilize layer masks rather than directly erasing pixels. This allows for endless adjustments and refinements without permanent damage to your original images. Smart Objects are another excellent non-destructive feature, preserving original image data even when scaled or transformed.
- Color Matching and Tonal Harmony: After blending, your images might still look like separate entities. Achieving a unified look often requires color grading and tonal adjustments.
- Adjustment Layers: Use non-destructive Adjustment Layers (e.g., Curves, Levels, Hue/Saturation, Color Balance) to match the color, brightness, and contrast across all merged layers. These can be clipped to individual layers or applied globally to affect the entire composition.
- Match Color Tool: Photoshop’s
Image > Adjustments > Match Colorfeature can be a quick way to harmonize colors between layers, though it often requires further finessing. - Solid Color Overlay with Blend Mode: A subtle
Solid ColorAdjustment Layer set to aBlend ModelikeSoft LightorOverlaywith low opacity can effectively tie together disparate colors, giving the entire image a unified “aesthetic” tone.
- Attention to Edges and Details: The success of a blend often hinges on the seamlessness of edges.
- Refine Edge/Select and Mask: For intricate selections (like hair or fur), the
Select and Maskworkspace provides powerful tools to refine your layer masks, ensuring natural-looking edges. - Dodge and Burn Tools: These tools, used sparingly on separate
50% Gray Overlaylayers, can help you subtly lighten (dodge) or darken (burn) areas to match shadows and highlights, enhancing realism.
- Refine Edge/Select and Mask: For intricate selections (like hair or fur), the
- Practice and Experimentation: Photoshop is a vast program, and mastering image mixing takes time. Don’t be afraid to experiment with different blend modes, layer mask techniques, and tool combinations. The more you practice, the more intuitive the process will become, and the more you’ll develop your unique “editing styles” and “creative ideas.”
- Don’t Be Afraid to Go Overboard (Initially): Sometimes, pushing an effect to its extreme can reveal unexpected creative possibilities. While a dramatic blend might not be suitable for every project (e.g., a website background), it could inspire a striking piece of “digital art” or a poster for a “music festival” (as mentioned in one of the source articles).
- Saving and Exporting: Once you’re satisfied with your masterpiece, save your Photoshop document (
.PSD) with all layers intact for future edits. For web or print use, export your final image usingFile > Export > Save for Web (Legacy)orFile > Export > Export As...to optimize file size and format. Consider using “Image Tools” like compressors or optimizers from “Tophinhanhdep.com” to ensure your final “high resolution” image loads quickly as a wallpaper or background.
Conclusion
The ability to mix images in Photoshop is more than just a technical skill; it’s an art form that transforms individual photographs into cohesive visual narratives, abstract expressions, and stunning pieces of “digital art.” Through the exploration of fundamental tools like Layer Opacity, the dynamic interactions of Layer Blend Modes, and the precise control offered by Layer Masks, you gain the power to reshape reality and unlock unparalleled creative potential.
As a platform dedicated to “beautiful photography,” “visual design,” and “image inspiration,” “Tophinhanhdep.com” encourages you to embrace these techniques. Experiment with different “editing styles,” craft unique “wallpapers” and “backgrounds,” build captivating “mood boards,” and contribute to “thematic collections.” Whether you’re enhancing “nature” shots, creating “abstract” composites, or evoking “sad/emotional” depths, Photoshop provides the canvas for your imagination.
Remember, the journey of mastering image mixing is one of continuous learning and joyful experimentation. The tools covered here are just the beginning; the interplay of colors, textures, and forms in your chosen “high resolution” “stock photos” or “digital photography” will always react uniquely with each blending technique. So, open Photoshop, select your images, and start blending. Your next “creative idea” and “trending style” might just be a few clicks away. And for optimizing your final creations, don’t forget the practical “image tools” like converters, compressors, optimizers, and AI upscalers that can further refine your work for any digital platform.