How to Mount ISO Images: Unlocking Digital Creativity for Tophinhanhdep.com Enthusiasts

In the dynamic world of digital imagery, photography, and visual design, access to the right tools and resources is paramount. Whether you’re a burgeoning photographer seeking high-resolution stock photos, a graphic designer looking to install the latest software, or an artist curating an aesthetic collection, understanding how to manage digital files efficiently is a foundational skill. Among these, the ability to mount an ISO image stands out as a critical yet often overlooked technique. At Tophinhanhdep.com, where we celebrate everything from stunning wallpapers and abstract art to professional digital photography and advanced image tools, empowering our community with such knowledge is a key mission. This comprehensive guide will demystify the process of mounting ISO images, illustrating how this technical procedure directly benefits anyone passionate about images and visual design.
An ISO file, often referred to as an ISO image, is essentially a digital snapshot—an exact, sector-by-sector replica of an optical disc like a CD, DVD, or Blu-ray. It encapsulates all the data and file structures of the original disc into a single, convenient file. Think of it as a meticulously preserved archive, ready to be accessed whenever needed. This format is widely adopted for distributing operating systems, software applications (including those essential for photo manipulation, graphic design, and AI upscaling), game installers, and even large collections of data suchor as thematic image collections or high-resolution photography packs. By learning to mount an ISO, you gain the power to “virtually insert” this digital disc into your computer, allowing you to access its contents without needing a physical drive or burning a real disc. For the Tophinhanhdep.com community, this means seamless access to new creative assets, powerful image tools, and endless inspiration for your next visual project.
Understanding ISO Images: A Digital Canvas of Possibilities
The concept of an ISO image might sound overly technical, but its practical applications for image and design enthusiasts are immense. Imagine downloading a comprehensive digital art tutorial suite, a new font package for graphic design, or a vast library of nature photography backgrounds. These often come packaged as ISO files to preserve the original disc structure and ensure data integrity during distribution. Instead of waiting for a physical disc to arrive or dealing with fragmented downloads, an ISO provides a singular, complete package.
The primary benefit of mounting an ISO is convenience. You avoid the costs and logistical hassles of physical media. No more searching for a blank disc or an external DVD drive. Your computer treats the mounted ISO as if a physical disc were inserted, complete with its own drive letter. This virtual drive allows you to browse files, run installers, or even view collections of wallpapers and backgrounds directly from the ISO. For Tophinhanhdep.com users, this opens up a world of possibilities:

- Accessing Software for Visual Design: Many powerful graphic design, photo editing, and digital art applications are distributed as ISOs. Mounting them allows for quick installation.
- Exploring High-Resolution Image Collections: Curated thematic collections of aesthetic, abstract, or beautiful photography might be archived in an ISO for easy download and distribution. Mounting provides instant access to these high-quality visuals.
- Utilizing Image Tools and Utilities: ISOs can contain installers for various image tools like converters, compressors, optimizers, or even AI upscalers, enhancing your workflow and creative output.
- Preserving Digital Assets: For photographers and designers, creating ISOs of your own work—be it a portfolio of high-resolution images or a backup of crucial design project files—can be an effective archiving strategy.
Modern Windows operating systems (Windows 8, 10, and 11) have integrated native support for ISO images, meaning you no longer need third-party software for basic mounting tasks. This streamlines the process, making it incredibly accessible for everyone, from casual users to professional digital artists who frequent Tophinhanhdep.com for their visual needs.
Native ISO Mounting on Windows 11 and 10: Seamless Access for Visual Creators
Windows 10 and 11 have made accessing the contents of an ISO image incredibly straightforward, requiring no additional software. This native capability is a game-changer for anyone regularly downloading software or digital content, including the high-quality resources often discussed and featured on Tophinhanhdep.com. There are several intuitive ways to mount an ISO using File Explorer, alongside a powerful command-line method for those who prefer scripting.
Mounting ISO Images with File Explorer
File Explorer offers the most user-friendly approach to mounting an ISO. You have a few options, catering to different preferences:
Method 1: Double-Clicking the ISO File
This is often the quickest and most direct method for Tophinhanhdep.com users to access their downloaded digital art resources or software installers.
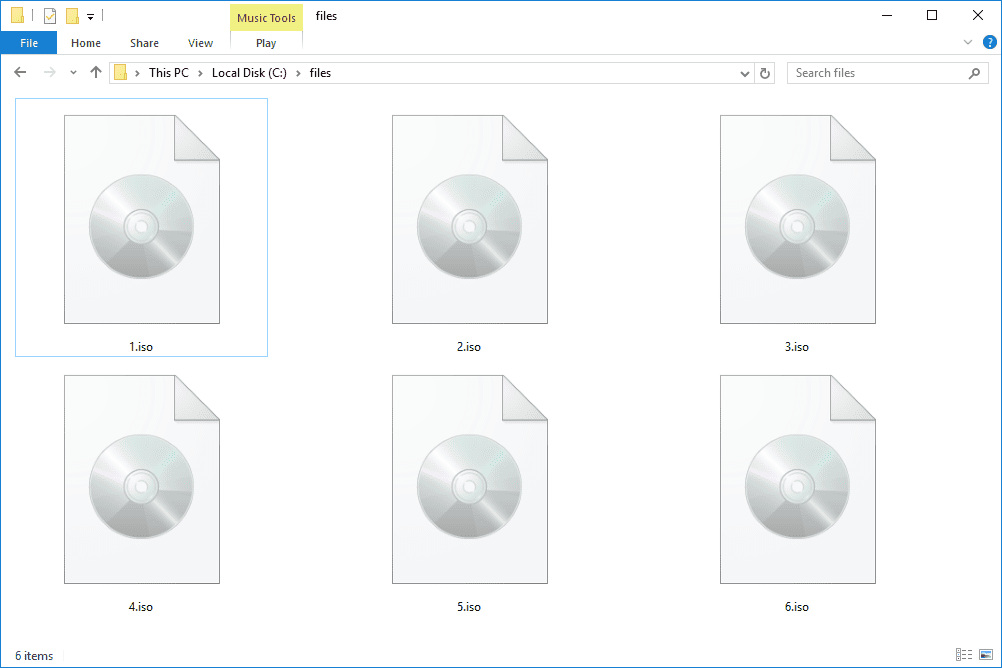
- Locate Your ISO File: Open File Explorer and navigate to the folder where your
.isofile is stored. This could be your “Downloads” folder, a specific project directory for visual design assets, or where you’ve saved a collection of high-resolution backgrounds. - Double-Click to Mount: Simply double-click the
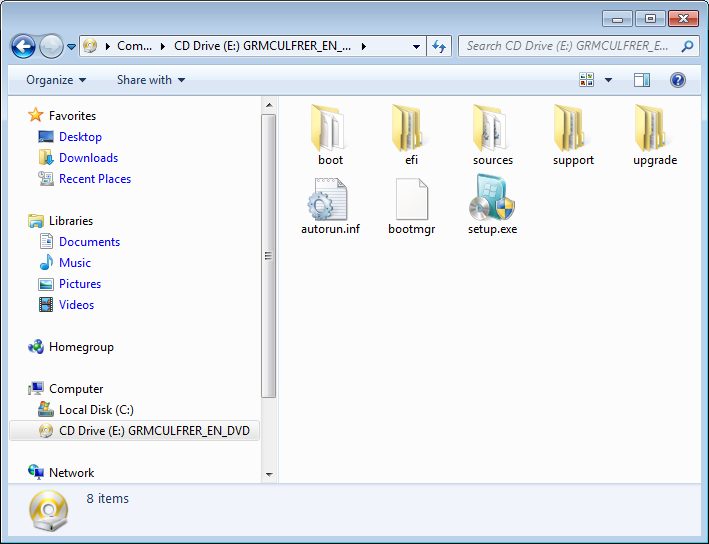
.isofile.- Result: Windows will automatically mount the ISO image as a new virtual drive. This virtual drive will appear under “This PC” in File Explorer, typically assigned the next available drive letter (e.g., D:, E:, F:). The contents of the ISO will then open in a new File Explorer window, allowing you to browse or run executables just as you would with a physical disc.
- Note for Tophinhanhdep.com users: This action assumes that no other application has been set as the default program for handling
.isoextensions. If you’ve previously installed an archiving tool like 7-Zip or WinRAR and associated ISOs with it, you might need to use one of the alternative methods below or temporarily change the default program settings.
Method 2: Using the Context Menu
The right-click context menu provides a reliable way to mount an ISO, especially if the double-click method doesn’t work as expected due to default program associations.
- Find the ISO File: Navigate to the folder containing your
.isofile in File Explorer. - Right-Click and Select “Mount”: Right-click directly on the
.isofile. From the context menu that appears, select the “Mount” option.- Result: Similar to the double-click method, Windows will create a virtual drive for the ISO, and you can then access its contents. The virtual drive will be visible in the left navigation pane under “This PC.”
Method 3: Utilizing the Ribbon Menu
For those who prefer working with the File Explorer ribbon interface, there’s also an option available there.
- Open File Explorer and Select the ISO: Browse to the folder where your
.isofile is located. Click once on the.isofile to select it. - Click “Mount” in the Ribbon: In the File Explorer ribbon at the top of the window, you should see a “Disc Image Tools” tab appear. Click on this tab, and then select the “Mount” button.
- Result: The ISO image will be mounted as a virtual drive, allowing you to interact with its contents. This method is particularly useful if you’re managing multiple digital assets and want a consistent interface.
Unmounting ISO Images: Reclaiming Your Virtual Drive
Once you’ve finished installing software, extracting high-resolution images, or otherwise utilizing the contents of your mounted ISO, it’s good practice to unmount it. This frees up the virtual drive letter and ensures your system resources are optimized, a consideration important for those running demanding image editing or graphic design software.
- Open File Explorer: Launch File Explorer.
- Locate the Virtual Drive: In the left navigation pane, expand “This PC.” You will see the virtual drive that Windows created for your ISO image (e.g., “DVD Drive (E:)”).
- Right-Click and “Eject”: Right-click on the virtual drive. From the context menu, select the “Eject” option.
- Result: The ISO image will be unmounted, and the virtual drive will disappear from “This PC.” Its contents will no longer be accessible until you mount it again.
Mounting and Unmounting ISO Images with PowerShell
For advanced users, system administrators, or those who prefer scripting their workflows—perhaps to automate the deployment of specific image tools or visual design environments—PowerShell offers a robust command-line interface for managing ISO images. This method provides precision and can be integrated into larger scripts for efficiency.
Mounting an ISO Image with PowerShell
- Open PowerShell as Administrator:
- Click the “Start” button.
- Type “PowerShell.”
- Right-click on “Windows PowerShell” (or “PowerShell”) from the search results and select “Run as administrator.” This is crucial as mounting disk images requires elevated permissions.
- Execute the Mount Command: In the PowerShell window, type the following command and press Enter:
Mount-DiskImage -ImagePath "PATH\TO\ISOFILE"- Replace
"PATH\TO\ISOFILE"with the actual, full path to your.isofile. For example:Mount-DiskImage -ImagePath "C:\Users\YourUsername\Downloads\DesignSoftware.iso" - Result: The ISO image will be mounted as a virtual drive. PowerShell will typically show you details about the newly mounted image, including its drive letter and instance ID. You can then access its contents via File Explorer or other command-line tools.
- Replace
Unmounting an ISO Image with PowerShell
- Open PowerShell as Administrator: Follow the same steps as for mounting to open PowerShell with administrative privileges.
- Execute the Unmount Command: Type the following command and press Enter:
Dismount-DiskImage -ImagePath "PATH\TO\ISOFILE"- Again, replace
"PATH\TO\ISOFILE"with the exact path of the.isofile that you previously mounted. It’s important to use the same path to ensure you’re unmounting the correct image. For example:Dismount-DiskImage -ImagePath "C:\Users\YourUsername\Downloads\DesignSoftware.iso" - Result: The virtual drive associated with that ISO image will be removed, and the image’s contents will no longer be accessible.
- Again, replace
Using PowerShell provides a powerful way for Tophinhanhdep.com users who delve into system configuration or software deployment to manage their digital assets with greater control and automation.
Mounting ISOs with Third-Party Tools: Enhancing Your Digital Toolkit
While Windows’ native capabilities cover most basic ISO mounting needs, some Tophinhanhdep.com users might encounter older Windows versions (pre-Windows 8) or require advanced functionalities not available out-of-the-box. This is where third-party ISO tools shine, offering extended features like support for various image formats, the ability to create ISOs, or simultaneous mounting of multiple virtual drives. These tools can become an integral part of a visual designer’s or photographer’s digital toolkit, especially when managing diverse file types and large project archives.
For users exploring the vast resources available for visual design, digital art, and high-resolution photography, these tools offer expanded control over how digital content is accessed and managed. They complement the “Image Tools” category on Tophinhanhdep.com by providing foundational file management capabilities for content that might later be converted, compressed, or upscaled.
When Third-Party Tools Become Essential
- Older Windows Versions: If you’re still operating on Windows 7, Vista, or XP, you’ll absolutely need a third-party application to mount ISOs.
- Support for Diverse Image Formats: Beyond
.iso, there are other disc image formats like.cue,.nrg,.mds/.mdf,.ccd, and.img. Many third-party tools offer broader compatibility. - Creating ISO Images: For photographers archiving their raw image collections or graphic designers packaging their portfolio for distribution, the ability to create an ISO from selected files and folders is invaluable.
- Multiple Virtual Drives: Some advanced tasks might require mounting several ISOs simultaneously. Dedicated tools often support an unlimited or a much higher number of virtual drives than typically needed.
Popular Third-Party ISO Tools for Tophinhanhdep.com Users
Several reliable third-party applications are available, many with free or trial versions, which can significantly enhance your ability to manage digital media.
1. PowerISO
PowerISO is a robust solution that goes beyond simple mounting. It’s a comprehensive tool for opening, burning, editing, compressing, encrypting, extracting, and converting virtually all CD/DVD/BD image files. For Tophinhanhdep.com users, its features are particularly appealing:
- Virtual Drive Emulation: PowerISO can emulate multiple virtual drives, allowing you to mount various ISOs simultaneously. This is great for installing multiple pieces of design software or accessing different image libraries at once.
- ISO Creation: You can create ISO files from your own files and folders. Imagine compiling your best abstract art or nature photography into a single, easily shareable ISO archive.
- Format Support: It supports a wide array of formats beyond ISO, including BIN, NRG, CDI, DAA, UIF, and more.
- Integration with Windows Explorer: Similar to native mounting, PowerISO often integrates a shell context menu, allowing for simple right-click mounting.
- How to Mount with PowerISO (General Steps):
- After installing PowerISO, navigate to your ISO file in File Explorer.
- Right-click on the ISO file.
- From the context menu, select “PowerISO” > “Mount image to drive…” (e.g., “Mount image to drive E:”).
- The ISO will be mounted, and its contents accessible via the assigned virtual drive letter.
- Note for Tophinhanhdep.com users: While the full version of PowerISO is paid, its free version might have limitations (e.g., file size for creation/editing), but often still allows basic mounting.
- How to Mount with PowerISO (General Steps):
2. WinCDEmu
WinCDEmu is a popular open-source CD/DVD/BD emulator, celebrated for its simplicity and lightweight design. It’s an excellent choice for Tophinhanhdep.com users who need a straightforward, free solution primarily for mounting.
- One-Click Mounting: WinCDEmu prides itself on “one-click mounting” from Windows Explorer, making it incredibly user-friendly.
- Unlimited Virtual Drives: It supports mounting an unlimited number of virtual drives simultaneously. This is beneficial if you’re comparing different versions of software installers or accessing various visual asset packs.
- Broad Compatibility: It runs on a wide range of Windows versions, from XP to Windows 10/11, making it suitable for older systems.
- ISO Creation: Beyond mounting, it also allows creating ISO images through a context menu, useful for archiving.
- Open Source and Free: Being open-source and free for any use makes it an attractive option for budget-conscious creators.
- How to Mount with WinCDEmu (General Steps):
- Download and install WinCDEmu. It does not typically require a reboot.
- Locate your ISO file in Windows Explorer.
- Double-click the ISO file, or right-click and select “Mount image” (the exact menu option may vary slightly based on version).
- The image will be mounted to a virtual drive, and its contents become accessible.
- How to Mount with WinCDEmu (General Steps):
3. Virtual CloneDrive
Virtual CloneDrive by Elaborate Bytes is another free and straightforward tool that creates virtual drives to access ISO files. It’s known for its ease of use and ability to handle various formats.
- Multiple Virtual Drives: Supports creating up to 15 virtual drives.
- Automatic Mounting: Can automatically mount the last used ISO, a handy feature for ongoing projects.
- Format Support: Supports ISO, BIN, CCD, IMG, DVD, and UDF formats.
- Integration: Integrates well with the Windows shell, allowing mounting via a simple right-click.
These tools, while technical in nature, empower the Tophinhanhdep.com community by expanding their capabilities to manage and access digital assets more effectively. Whether it’s installing a new photo manipulation suite, diving into a massive collection of aesthetic wallpapers, or simply ensuring quick access to essential image tools, understanding and utilizing these third-party solutions can significantly streamline your creative workflow.
The Practical Applications of ISO Mounting for Image & Design Professionals
For anyone deeply involved in the world of images, photography, and visual design—the core audience of Tophinhanhdep.com—mastering ISO mounting is not just a technical skill; it’s a gateway to expanded creative possibilities and streamlined workflows. The ability to efficiently handle ISO images directly impacts how you acquire, utilize, and manage the digital resources that fuel your artistic endeavors.
Expanding Your Digital Library and Toolset
- Software Acquisition: Many professional graphic design suites (e.g., Adobe Creative Suite components, Affinity Designer/Photo installers, Blender releases), CAD software, and specialized photography tools are often distributed as ISO files. Mounting these allows for a clean, direct installation without needing physical media or complex extraction procedures. This means quicker access to new features for photo manipulation, digital art, and visual design.
- High-Resolution Content Access: Imagine downloading a meticulously curated collection of high-resolution stock photos, an exclusive set of texture packs for 3D rendering, or a vast library of aesthetic backgrounds and wallpapers. These often come packaged as ISOs to ensure integrity and manageability. Mounting them provides instant, organized access to these valuable assets, ready to be incorporated into your next project. For Tophinhanhdep.com users, this means always having a fresh supply of visual inspiration and beautiful photography at your fingertips.
- Learning Resources: Comprehensive video tutorials on digital photography techniques, advanced editing styles, or intricate graphic design principles can also be bundled into ISOs. Mounting these provides a structured way to access and navigate extensive educational content, enhancing your skills directly relevant to Tophinhanhdep.com’s mission.
Streamlining Workflow and Asset Management
- Virtual Environments and Testing: For visual designers or developers who also dabble in creating interactive visual experiences, ISOs are fundamental for installing operating systems into virtual machines. This allows for testing software, creating isolated design environments, or even developing specific visual applications without affecting your main system.
- Backup and Archiving Personal Projects: Photographers can create ISOs of their finished high-resolution image portfolios, categorizing different styles (nature, abstract, emotional). Graphic designers can archive entire project directories, including source files, fonts, and assets, into a single ISO. This method provides a stable, immutable snapshot, perfect for long-term storage and ensuring the integrity of your visual design history. This aligns with the “Image Inspiration & Collections” focus, allowing you to curate and preserve your own evolving body of work.
- Distributing Creative Works: If you’re creating a digital product—perhaps a custom brush pack for digital art, a template library for graphic designers, or an exclusive collection of your high-resolution images—packaging it as an ISO offers a professional and organized distribution method. Your audience can then easily mount and access your creations.
- Efficient Deployment of Image Tools: Companies or studios that rely on a specific set of image converters, compressors, optimizers, or AI upscalers might bundle these tools into a custom ISO. This ensures consistent and rapid deployment across multiple workstations, standardizing the digital toolkit for every team member.
Bridging Technical Skill with Creative Output
The act of mounting an ISO, while technical, directly contributes to the creative output of a Tophinhanhdep.com user. It’s about overcoming a minor technological hurdle to unlock a world of visual content and powerful tools. Whether you’re enhancing an image with an AI upscaler, designing a new aesthetic background, or preparing a photography collection for display, the ability to quickly access the necessary software and assets from an ISO image empowers you to focus more on the art itself and less on the logistics.
In essence, ISO mounting is a foundational digital literacy skill that allows you to fully leverage the digital ecosystem of visual creativity. It ensures that the high-resolution images, advanced photography techniques, cutting-edge image tools, and inspiring visual designs showcased and discussed on Tophinhanhdep.com are not just concepts, but accessible realities for every member of our community.
Troubleshooting and Best Practices for a Smooth ISO Experience
While mounting ISO images is generally a straightforward process, occasionally you might encounter issues. Adhering to best practices can also prevent problems and ensure a smooth, efficient workflow for your image, photography, and visual design projects. For Tophinhanhdep.com users, a stable and reliable system is crucial for creative work, so understanding these tips is invaluable.
Common Troubleshooting Scenarios
-
ISO File Doesn’t Mount (or Opens with Another Program):
- Symptom: You double-click the ISO, and it opens as an archive (like a .zip file) in an extraction program (e.g., 7-Zip, WinRAR) instead of mounting as a virtual drive.
- Solution: This typically means another program has taken over the default association for
.isofiles.- Right-Click “Mount”: The easiest fix is to right-click the ISO file and select “Mount” from the context menu. This bypasses the default program association and forces Windows to mount it.
- Change Default Program: If you want to permanently revert this, right-click the ISO file, select “Open with” > “Choose another app.” Select “Windows Explorer” (or “File Explorer”) from the list, check the box “Always use this app to open .iso files,” and click “OK.”
- Check Third-Party Tools: If you have multiple ISO tools installed (e.g., PowerISO, WinCDEmu), they might conflict or offer their own mounting options in the context menu. Experiment with the different “Mount” options provided.
-
“Disc Image Tools” Tab is Missing or Mount Option is Greyed Out:
- Symptom: When selecting an ISO in File Explorer, the “Disc Image Tools” tab doesn’t appear, or the “Mount” button is inactive.
- Solution: Ensure the file extension is indeed
.iso. Sometimes files are misnamed. Also, verify that the file isn’t corrupted or incomplete. If it’s a recent download, try downloading it again. If you’re on an older Windows version (pre-Windows 8), remember that native mounting isn’t supported, and you’ll need a third-party tool.
-
Error Message: “The disc image file is corrupted”:
- Symptom: Windows reports that the ISO file is damaged and cannot be mounted.
- Solution: This is straightforward: the file is indeed corrupted. This often happens during incomplete downloads or if the file was transferred improperly. Redownload the ISO from a reliable source. If it’s a large file, consider using a download manager that can resume interrupted downloads. For Tophinhanhdep.com users downloading large collections of high-resolution images or design software, file integrity is crucial.
-
ISO Mounts, But Contents Aren’t Accessible:
- Symptom: The virtual drive appears, but when you try to open it, you get an error, or the drive appears empty.
- Solution: The ISO itself might be poorly created or severely corrupted beyond a simple “corrupted file” error. Try mounting it with a different third-party tool (like PowerISO or WinCDEmu) to see if they can handle it better. If not, obtaining a new copy of the ISO is usually the only recourse.
-
Not Enough Available Drive Letters:
- Symptom: While rare for most users, if you have an excessive number of physical or virtual drives, Windows might run out of available drive letters.
- Solution: Unmount any unnecessary ISOs or other virtual drives. If using a third-party tool, check its settings for assigning specific drive letters or options to manage virtual drive slots.
Best Practices for Tophinhanhdep.com Users
- Download from Reputable Sources: Always obtain ISO files from official websites or trusted platforms. This minimizes the risk of downloading malicious or corrupted files. This is especially important for graphic design software, image tools, or operating systems.
- Verify File Integrity (Checksums): When downloading critical ISOs (like operating systems or large software suites), the source often provides a “checksum” (e.g., MD5, SHA1, SHA256 hash). After downloading, use a checksum utility to verify that your downloaded file matches the provided hash. This confirms the file wasn’t altered or corrupted during download.
- Manage Your ISO Collection: For users who frequently download design resources or high-resolution image packs, create an organized folder structure for your ISOs. Label them clearly (e.g., “Graphic Design Software,” “Photography Tutorials,” “Aesthetic Wallpapers ISOs”). This makes finding and mounting specific ISOs much easier.
- Unmount When Done: Always unmount ISO images when you’re finished using them. This frees up system resources and drive letters, keeping your system tidy and efficient, which is beneficial for performance-intensive tasks like photo manipulation or digital art.
- Consider Third-Party Tools for Advanced Needs: While native Windows mounting is good for basics, if you regularly deal with diverse disc image formats, need to create your own ISOs (e.g., for archiving your beautiful photography collections), or require multiple virtual drives, invest in or utilize free reputable third-party tools like PowerISO or WinCDEmu. They offer enhanced flexibility and control.
- Keep Your System Updated: Ensure your Windows operating system is always up-to-date. Microsoft frequently releases updates that improve system stability and compatibility, including how it handles file systems and virtual drives.
By understanding how to troubleshoot common issues and adopting these best practices, Tophinhanhdep.com users can ensure their journey through digital creativity remains smooth and uninterrupted. Accessing powerful image tools, diverse photography collections, and essential visual design software from ISO images will become a seamless part of your artistic workflow.
Conclusion: Empowering Your Creative Journey with Tophinhanhdep.com
In the vibrant ecosystem of digital images, photography, and visual design, proficiency in handling digital assets is as crucial as artistic vision. The ability to mount an ISO image, while seemingly a technical detail, is a fundamental skill that significantly enhances your access to software, resources, and creative possibilities. At Tophinhanhdep.com, our mission is to provide you with inspiration, tools, and knowledge to elevate your creative output, whether you’re admiring stunning wallpapers, capturing beautiful photography, or mastering complex photo manipulation techniques.
This guide has walked you through the simple yet powerful process of mounting ISO files natively on Windows 10 and 11 using File Explorer and PowerShell, and has introduced you to the benefits of third-party tools for advanced needs or older systems. We’ve highlighted how this skill directly supports various aspects of your creative journey: from seamlessly installing high-resolution image editors and graphic design software to accessing vast collections of aesthetic backgrounds, nature photography, or abstract art for your mood boards and thematic collections.
By understanding how to mount an ISO, you unlock digital archives containing essential image tools like converters, compressors, optimizers, and AI upscalers, ensuring your digital toolkit is always equipped for the task at hand. Moreover, it empowers you to manage your own digital art and photography collections more effectively, preserving your creative works for future inspiration and sharing.
As you continue to explore the realms of visual design and digital art, remember that the technical skills you acquire are merely extensions of your creative will. Mounting an ISO is not just about opening a file; it’s about opening a world of new possibilities, enabling you to bring your creative ideas to life with greater efficiency and fewer technological hurdles. Embrace this essential skill, and let Tophinhanhdep.com continue to be your trusted resource for all things visual, inspiring your next masterpiece in high resolution.