Mastering Image Movement in Photoshop: A Comprehensive Guide for Tophinhanhdep.com Users

Adobe Photoshop stands as the undisputed champion in the realm of image blending, compositing, and manipulation. For anyone delving into digital photography, visual design, or even just curating stunning images for a personal collection, understanding how to move elements within and between Photoshop documents is absolutely fundamental. Whether you’re assembling a complex digital art piece, arranging high-resolution stock photos for a graphic design project, or simply finessing a beautiful landscape shot, the ability to precisely relocate images and layers is a cornerstone skill. This guide from Tophinhanhdep.com will explore five distinct methods for moving images and layers between Photoshop documents, alongside detailed insights into Photoshop’s versatile Move Tool and its intelligent Content-Aware counterpart, ensuring you can bring your creative ideas to life with unparalleled control.
Photoshop’s power lies in its flexibility. It doesn’t limit your creativity; rather, it provides an array of tools and techniques that allow your imagination to flourish. However, before you can embark on advanced photo manipulation or design intricate visual compositions, you first need to grasp the basics of getting your images where you want them. By default, Photoshop opens each image in its own separate document, which can seem daunting when your goal is to blend multiple photos together to create an aesthetic background or a thematic collection.
In this comprehensive tutorial, we’ll break down the essential techniques for moving images and layers, from the straightforward copy and paste method to advanced drag-and-drop strategies, and the seemingly magical Content-Aware Move Tool. We’ll cover how these methods apply to various document arrangements—tabbed, multi-document layouts, and floating windows—and provide invaluable tips and shortcuts that will streamline your workflow. By the end of this guide, you’ll be equipped with the knowledge to efficiently manage and move your visual assets, setting a solid foundation for all your creative endeavors with Tophinhanhdep.com.
The Versatile Photoshop Move Tool: Beyond Simple Dragging
At the heart of all image relocation in Photoshop lies the Move Tool, often represented by a black arrow icon in the Toolbar or activated by the keyboard shortcut “V”. While its primary function might appear deceptively simple—clicking and dragging objects—its utility extends far beyond, making it an indispensable asset for graphic design, digital art, and precise photo manipulation. Understanding its full capabilities is crucial for anyone engaging in digital photography and creative editing styles.
Activating and Using the Move Tool
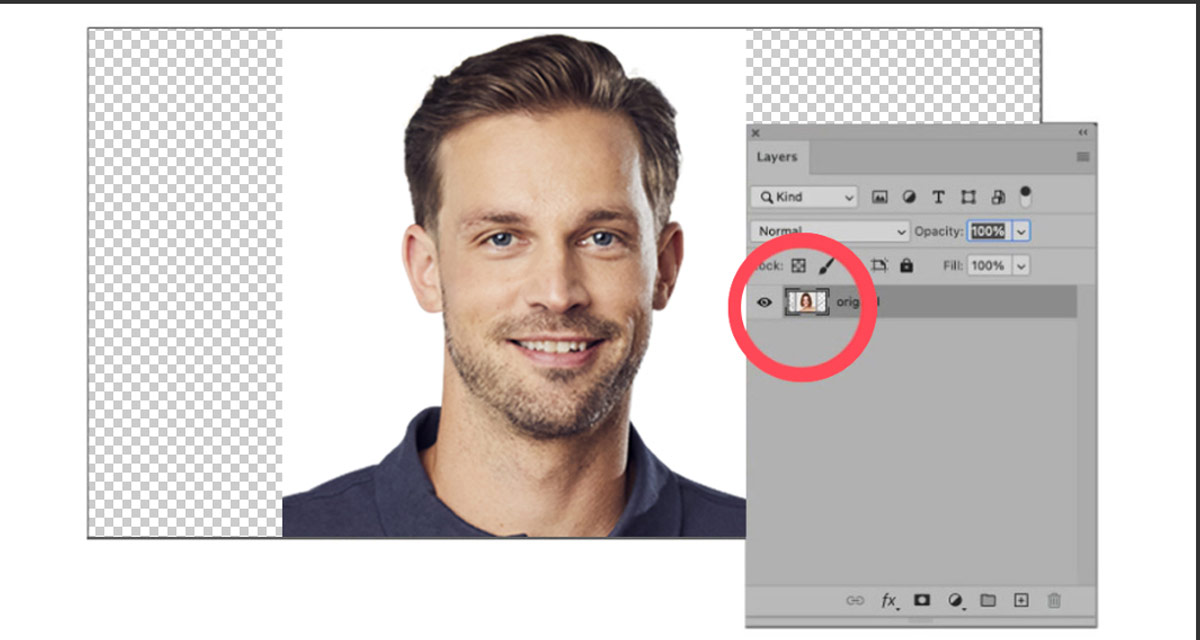
To begin, ensure you have the Move Tool selected in your Toolbar (or press ‘V’). When you open a photo, it typically resides on a “Background” layer, which is locked by default. Trying to move this layer without unlocking it will result in an error message. To unlock it, simply click the lock icon in the Layers panel. Once unlocked, or if working with any other layer, you can click and drag the image on the canvas to move it freely.
For enhanced efficiency, Photoshop offers an “Auto-Select” option in the Options Bar when the Move Tool is active. Enabling this feature allows you to click directly on any element in your canvas, and Photoshop will automatically select its corresponding layer, making it instantly movable. This bypasses the need to manually locate and select layers in the Layers Panel, significantly speeding up your workflow for complex visual designs.
Another invaluable shortcut for selecting layers on the fly is the right-click method. With the Move Tool active, right-clicking on an object in your canvas will bring up a context menu listing all layers present at that cursor position. You can then choose the specific layer you wish to move or adjust, providing a quick way to target elements without navigating through a potentially crowded Layers panel.
Resizing Layers with Transform Controls
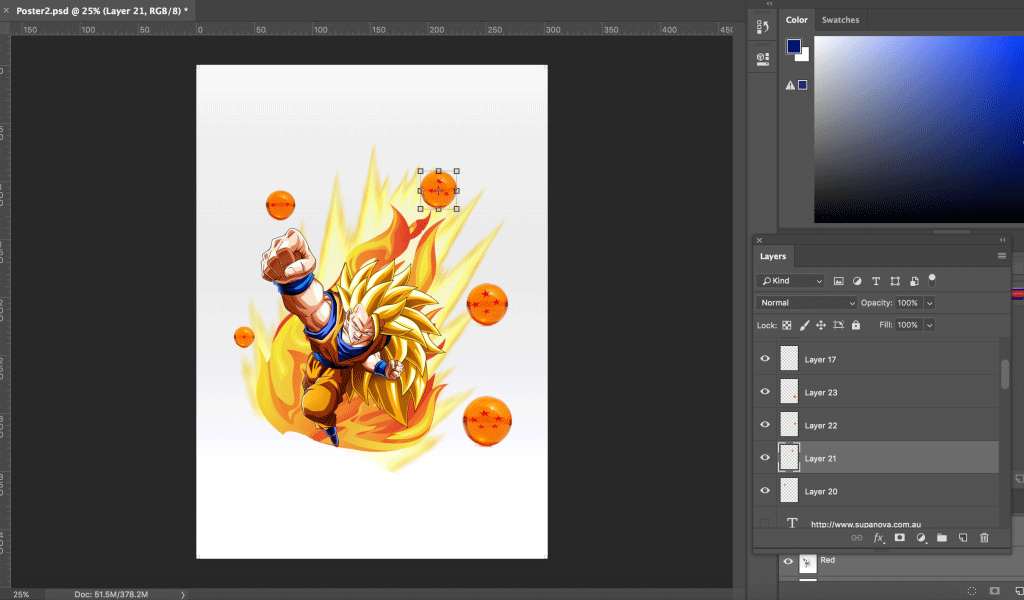
Beyond simple repositioning, the Move Tool also facilitates easy resizing and transformation of layers. This is achieved through the “Show Transform Controls” option, also found in the Options Bar when the Move Tool is active. When this option is enabled, selecting a layer will display a bounding box with eight anchor points around it.
Clicking and dragging any of these anchor points allows you to scale the layer. For proportional scaling—which is crucial for maintaining the integrity of high-resolution images and preventing distortion in beautiful photography—press and hold the Shift key while dragging. Modern Photoshop versions often default to proportional scaling, so sometimes you hold Shift to disable it, but it’s always good practice to know. After resizing, click the checkmark in the Options Bar or press Enter to commit the changes. This control over size is vital for compositing, allowing you to seamlessly integrate elements from different source images into a cohesive digital art piece.
Precise Alignment and Nudging Layers
Achieving perfect alignment is paramount in visual design, ensuring a polished and professional look for your wallpapers, backgrounds, or graphic elements. The Move Tool, in conjunction with its alignment options, makes this straightforward.
In the Options Bar, you’ll find alignment icons (often initially greyed out). To activate them, you must either have multiple layers selected (to align them relative to each other) or change the “Align To” option to “Canvas.” When “Align To: Canvas” is selected, you can center a layer horizontally, vertically, or snap it to any edge of your document with a single click. This is incredibly useful for positioning a main subject in a portrait photo or centrally placing a logo in a graphic design layout.
Alternatively, if you create a selection using any of Photoshop’s selection tools, you can then choose “Align To: Selection.” This allows you to align your chosen layer precisely to the boundaries of your active selection, offering unparalleled control for intricate photo manipulation tasks.
For those subtle, pixel-perfect adjustments that are often necessary to refine a composition, the Move Tool also works in tandem with your keyboard’s arrow keys. With a layer selected by the Move Tool, each tap of an arrow key will “nudge” the layer one pixel in that direction. Holding down the Shift key while nudging will move the layer by 10 pixels, offering both fine and broader control over positioning. This precision is invaluable for digital photography, ensuring every element is exactly where it needs to be for the most aesthetic result.
Mastering Cross-Document Image Transfers
One of Photoshop’s most powerful features for digital artists and photographers on Tophinhanhdep.com is the ability to combine elements from multiple images into a single cohesive document. Whether you’re creating an abstract background, compositing elements for a nature scene, or layering textures to achieve a unique editing style, moving images between documents is a fundamental skill. Photoshop offers several intuitive methods, each suited for different workflows.
Method 1: Copy and Paste - The Classic Approach
The most basic and universally understood method is “Copy and Paste.” This technique is straightforward and reliable, making it an excellent starting point for beginners.
How to Use:
- Select the Source Document: Open both images you wish to work with. Navigate to the document containing the image or layer you want to move by clicking on its tab.
- Select the Image/Layer: Go to
Select > Allfrom the Menu Bar (or pressCtrl+A/Cmd+A) to select the entire canvas content. If you only want to move a specific layer, ensure that layer is active in the Layers panel. - Copy the Selection: Go to
Edit > Copy(or pressCtrl+C/Cmd+C). This places the selected content onto Photoshop’s clipboard. - Switch to the Destination Document: Click on the tab of the document where you want to paste the image.
- Paste the Image: Go to
Edit > Paste(or pressCtrl+V/Cmd+V). The copied image will appear on a new layer, usually centered in the destination document, often entirely covering the existing content if it’s the same size. The Layers panel will confirm the addition of this new layer, signifying that both images are now in the same document, ready for compositing or further photo manipulation.
This method is universal and works across various applications, but it creates a new layer with each paste, which might require renaming for organization in larger visual design projects.
Method 2: Duplicating Layers for Seamless Integration
The “Duplicate Layer” command offers a more direct way to move a specific layer from one document to another, providing an immediate destination selection. This method is particularly efficient when you already know exactly which layer you want to transfer.
How to Use:
- Select the Source Document and Layer: Activate the document containing the layer you wish to move, and ensure that specific layer is selected in the Layers panel.
- Access Duplicate Layer: Go to
Layer > Duplicate Layerfrom the Menu Bar. - Configure Duplication: A “Duplicate Layer” dialog box will appear.
- Name: You can rename the duplicated layer here for clarity (e.g., “Texture Overlay” for an aesthetic background).
- Destination: In the “Destination” section, use the dropdown menu to select the other open Photoshop document as the target.
- Confirm: Click “OK.” Photoshop will instantly create a duplicate of your chosen layer in the specified destination document.
This approach is excellent for maintaining a clean workflow, as it directly places the layer in its new home without an intermediate clipboard step. It’s ideal for adding stock photos or specific graphic design elements to an existing high-resolution image.
Method 3: Drag and Drop - Efficient Transfers Between Documents
Drag and drop is often the fastest and most intuitive method, especially once you become comfortable with Photoshop’s interface. It offers three variations depending on how your documents are arranged on your screen.
Moving Between Tabbed Documents
When working with Photoshop’s default tabbed document view, you can still use drag and drop:
- Select Move Tool: Ensure the Move Tool (V) is active.
- Initiate Drag: In your source document, click and hold on the image or layer you want to move.
- Drag to Destination Tab: While still holding the mouse button, drag your cursor upwards over the tab of the destination document. Photoshop will automatically switch to that document.
- Drop into Document: Continue dragging the image downwards from the tab into the center of the newly active document window.
- Release: Crucially, press and hold the Shift key before releasing your mouse button. This will automatically center the dragged image within the new document, a handy trick for precise visual design layouts and quick compositing of images for a mood board. If you don’t hold Shift, the image will drop wherever your cursor is.
Utilizing Multi-Document Layouts
For tasks requiring constant referencing between images, arranging your documents side-by-side using multi-document layouts is highly effective.
- Arrange Documents: Go to
Window > Arrangeand choose a layout like “2-up Vertical” to display your two images simultaneously. - Select Move Tool: Activate the Move Tool (V).
- Direct Drag: Click on the image you want to move in its source window and simply drag it directly into the destination document’s window.
- Release: Again, holding the Shift key before releasing the mouse button will center the image.
- Revert View (Optional): Once done, you can return to the tabbed view by going to
Window > Arrange > Consolidate All to Tabs. This method is particularly useful for comparing elements from different high-resolution photos or merging sections for photo manipulation.
Floating Windows for Flexible Drag and Drop
Floating windows offer the ultimate flexibility in terms of arrangement, allowing you to position documents anywhere on your screen.
- Float Documents: Go to
Window > Arrange > Float All in Windows. This will convert your tabbed documents into individual floating windows. Rearrange them as needed for optimal visibility. - Select Move Tool: Activate the Move Tool (V).
- Drag Between Windows: Click and drag the image from its source floating window directly into the destination floating window.
- Release: Hold the Shift key to center the image upon release, or release without it to drop it at the cursor’s position.
- Revert View (Optional): To return to the tabbed view, go to
Window > Arrange > Consolidate All to Tabs. This method is favored by many digital artists for its intuitive nature and ease of use in complex visual design projects.
Blending Images Together After Movement
Once images are successfully moved into the same Photoshop document, the next step in compositing or creating aesthetic backgrounds is often blending them. Initially, a newly pasted or dragged image might completely obscure the layers beneath it, especially if it’s the same size or larger. This is because its layer blend mode is typically set to “Normal” by default.
To blend images, simply select the top layer in the Layers panel and change its Blend Mode (found in the upper-left of the Layers panel, usually displaying “Normal”). Experimenting with different blend modes like “Multiply,” “Screen,” “Overlay,” or “Soft Light” can instantly create captivating effects, turning two disparate images into a harmonious composition suitable for wallpapers or artistic photography. Tophinhanhdep.com encourages exploring these editing styles to achieve unique visual outcomes.
Advanced Techniques: Content-Aware Movement and Precision
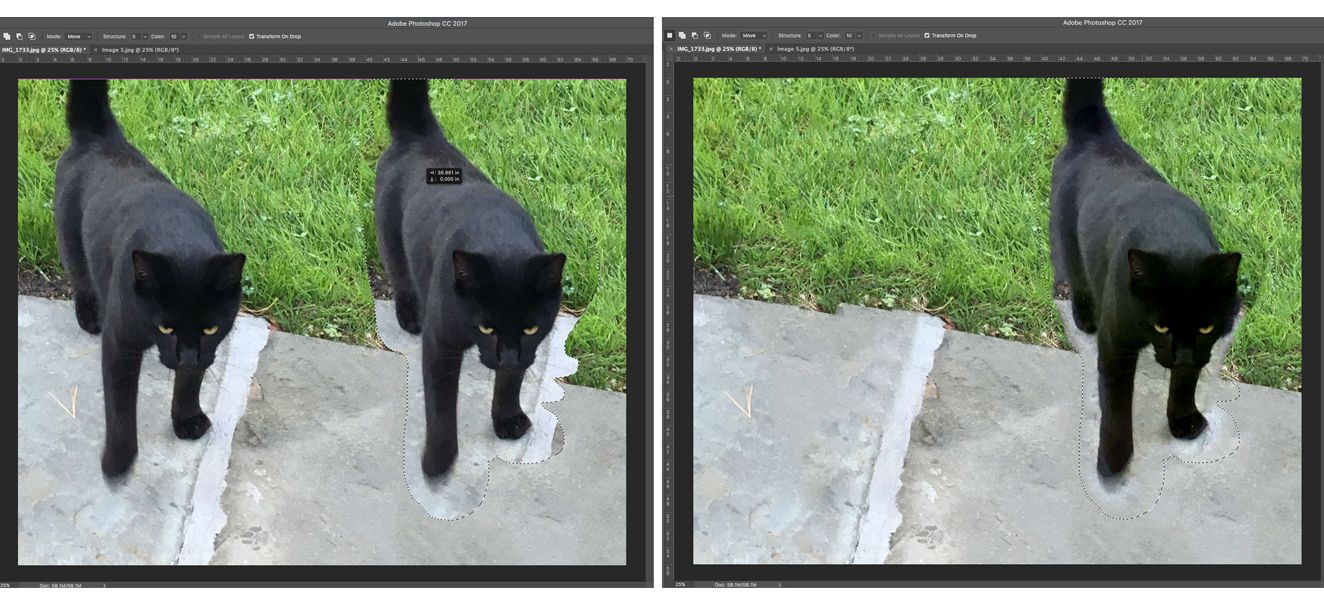
Beyond the standard Move Tool, Photoshop offers sophisticated functionalities for moving objects while intelligently adapting the surrounding image. The Content-Aware Move Tool is a prime example of Photoshop’s AI-powered capabilities, providing a seamless way to adjust composition or remove distracting elements in digital photography and graphic design.
The Magic of the Content-Aware Move Tool
The Content-Aware Move Tool (often nested under the Healing Brush or Patch Tool in the Toolbar) is a marvel of photo manipulation. It allows you to select an object, move it to a new location, and Photoshop will automatically and intelligently fill in the original space left behind, blending it with the background. This tool is invaluable for improving compositional balance in high-resolution photography or subtle adjustments in digital art.
How to Use:
- Prepare Your Layer: It’s always a good practice to duplicate your background layer (
Ctrl+J/Cmd+J) before using destructive tools like Content-Aware Move, to preserve your original image. - Select the Tool: Choose the Content-Aware Move Tool from the Toolbar.
- Adjust Tool Functions (Options Bar):
- Mode: Ensure “Move” is selected (as opposed to “Extend”).
- Structure: This setting (1-7) dictates how closely Photoshop adheres to existing image patterns when filling the gap. Higher values lead to more faithful pattern replication.
- Color: This setting (0-10) controls the algorithmic color blending. Higher values result in smoother color transitions.
- Sample All Layers: If your document has multiple layers, enable this to instruct Photoshop to use information from all visible layers for background reconstruction.
- Transform On Drop: Check this option if you want to be able to immediately resize or rotate the moved object after placing it.
- Select the Object: Use the Content-Aware Move Tool itself to draw a selection around the object you wish to move. This tool acts like a lasso, allowing you to trace the outline of your subject.
- Drag to New Position: Once the selection is active, click and drag the selected object to its desired new location. As you drag, you’ll see a ghost image of the object, and upon release, Photoshop will begin its calculation to fill the old spot and blend the moved object into its new surroundings.
- Commit Changes: Press Enter (or click the checkmark in the Options Bar) to finalize the move and allow Photoshop to complete the background reconstruction.
The Content-Aware Move Tool can effortlessly relocate a person in a nature scene, shift an element in an abstract composition, or remove an unwanted detail from a beautiful photograph, leaving behind a convincingly reconstructed background. This capability is a game-changer for digital photography editing styles, offering unparalleled flexibility in composition.
Shortcuts and Workflow Enhancements
Efficiency is key in any creative pursuit. Tophinhanhdep.com emphasizes optimizing your workflow, and Photoshop’s movement tools come with several shortcuts designed to save you time:
- Quick Toggle: While using almost any other tool, you can temporarily activate the Move Tool by holding down
Ctrl(Windows) orCommand(Mac). Releasing the key reverts to your previous tool. This is perfect for quick adjustments without switching tools. - Duplicate and Move: To create an instant copy of a layer and move it simultaneously, hold down
Alt(Windows) orOption(Mac) while clicking and dragging with the Move Tool. This leaves the original layer untouched and is incredibly useful for repeating graphic design elements or quickly cloning parts of an image. - History Panel for Undo/Redo: Remember the importance of the History panel (
Window > History). If you make a mistake while moving or blending images, you can step back through your actions to revert to a previous state. This is more powerful than justCtrl+Z(Undo) which typically only undoes the last action.
Elevating Your Visual Design & Photography with Tophinhanhdep.com
Mastering how to move images and layers in Photoshop is more than just learning technical steps; it’s about unlocking a vast array of creative possibilities that directly align with the core offerings of Tophinhanhdep.com. These fundamental skills empower you to transform raw images into captivating visual experiences, whether for personal enjoyment or professional projects.
Enriching Your Image Collections and Visual Designs
For users passionate about Images—be it Wallpapers, Backgrounds, Aesthetic, Nature, Abstract, Sad/Emotional, or Beautiful Photography—the ability to precisely move and layer elements is paramount. Imagine taking two high-resolution nature photos: one of a serene forest and another of a majestic deer. By effectively moving the deer from its original background and compositing it into the forest scene, you create a new, breathtaking wallpaper or a unique piece of digital art. Similarly, transforming ordinary photos into an aesthetic collection involves carefully arranging and blending elements to achieve a specific mood or style. For abstract compositions, the freedom to endlessly rearrange shapes, textures, and colors through movement allows for iterative experimentation and the birth of truly unique creative ideas.
In the realm of Photography, including High Resolution, Stock Photos, Digital Photography, and Editing Styles, these movement techniques are indispensable. When working with stock photos, you often need to extract subjects or combine backgrounds from different sources. Mastering the Move Tool and drag-and-drop methods ensures that these high-resolution assets are seamlessly integrated. Furthermore, developing distinct editing styles often involves complex compositing, where elements are introduced, resized, and blended using the very techniques discussed. Whether you’re aiming for a moody, emotional feel or a vibrant, beautiful photographic outcome, precise image placement is non-negotiable.
Foundational Image Tools for Creative Expression
While Tophinhanhdep.com offers advanced Image Tools such as Converters, Compressors, Optimizers, AI Upscalers, and Image-to-Text capabilities, understanding image movement in Photoshop is a foundational prerequisite. Before you can optimize or convert a final composite, you must first create it. Imagine you’ve used an AI Upscaler to enhance a texture; you then need to move that upscaled texture into your main document to apply it as an overlay for an aesthetic background. These movement tools are the hands-on interface that allows you to manipulate the visual data that Tophinhanhdep.com’s other utilities then refine and prepare. They are the initial creative steps that precede the technical processing, forming a comprehensive toolkit for digital image mastery.
Driving Visual Design Innovation and Inspiration
For those deeply involved in Visual Design, encompassing Graphic Design, Digital Art, and Photo Manipulation, along with cultivating Creative Ideas, the Move Tool and its associated techniques are daily companions. Graphic designers routinely move text boxes, logos, and images to create balanced and impactful layouts. Digital artists rely on precise layer placement to build intricate scenes and characters. Photo manipulators utilize every trick, from simple dragging to Content-Aware movements, to blend fantastical elements into realistic scenes.
Moreover, these skills are crucial for Image Inspiration & Collections, including crafting Photo Ideas, Mood Boards, Thematic Collections, and Trending Styles. Building a mood board for a new project often involves rapidly dragging and dropping various images into a single document to visualize a concept. Creating thematic collections, such as a series of sad/emotional images or a curated set of beautiful nature shots, requires the ability to arrange and refine each composition. Staying abreast of trending styles in digital art and photography frequently means deconstructing and reconstructing elements from multiple sources to adapt and innovate, all facilitated by a strong command of image movement.
Conclusion
The ability to effectively move images and layers in Photoshop is far from a trivial skill; it is a fundamental pillar of digital creativity. From the basic copy-and-paste to the intelligent Content-Aware Move Tool, and the various drag-and-drop methodologies, these techniques empower you to seamlessly integrate elements, refine compositions, and bring complex visual ideas to fruition.
Whether you are just starting your journey into digital photography and graphic design, or you are an experienced artist looking to refine your workflow, the insights shared in this guide from Tophinhanhdep.com provide a robust foundation. Mastering these methods will not only enhance your efficiency but also expand your creative horizons, allowing you to craft stunning wallpapers, build captivating aesthetic backgrounds, develop unique editing styles for high-resolution images, and explore new dimensions in photo manipulation and digital art.
At Tophinhanhdep.com, we are dedicated to providing you with the knowledge and tools to excel in your visual pursuits. Embrace these essential Photoshop techniques, and unlock the full potential of your images. Continue to explore our comprehensive resources for more tutorials, image inspiration, and cutting-edge image tools to further elevate your creative journey.