How to Outline an Image in Canva: Elevate Your Visuals with Tophinhanhdep.com

In today’s visually-driven digital landscape, making your images stand out is not just an advantage; it’s a necessity. From captivating Instagram feeds and engaging YouTube thumbnails to professional presentations and striking blog graphics, the demand for distinctive visual content has never been higher. One particularly popular and effective technique that has taken social media by storm is adding a crisp, eye-catching outline to images. This simple yet powerful effect instantly makes subjects pop, adding depth, dimension, and a touch of modern flair to any design.
For many years, achieving this level of visual sophistication often meant grappling with complex software like Photoshop, requiring specialized skills and a significant time investment. However, thanks to the remarkable advancements in user-friendly design platforms, applying a professional-grade outline to your images is now accessible to everyone. Canva, a beloved online graphic design tool, has revolutionized how creators approach visual content, offering intuitive features that make complex edits surprisingly straightforward. And when paired with the rich resources and inspiration found on platforms like Tophinhanhdep.com, your design potential becomes limitless.
Whether you’re a seasoned graphic designer, a busy small business owner, a social media manager, or simply someone looking to enhance their personal photos, this comprehensive guide will walk you through the seamless process of adding stunning outlines to your images in Canva. We’ll delve into the essential steps, reveal expert tips, and explore how to leverage Canva’s capabilities, particularly its Pro features, to unlock a world of creative possibilities. We’ll also touch upon how Tophinhanhdep.com, with its vast array of images, photography insights, and image tools, can serve as your ultimate companion in crafting truly exceptional visual narratives. Get ready to elevate your Canva design skills and transform your ordinary photos into extraordinary visual assets.
The Power of Outlines in Visual Design: Making Your Images Pop
The seemingly simple act of adding an outline to an image can have a profound impact on its overall visual appeal and effectiveness. In the realm of visual design, where every pixel contributes to the message, an outline acts as a strategic boundary, guiding the viewer’s eye and enhancing the prominence of your subject. This section explores why outlines are such a valuable tool, linking their aesthetic benefits to core principles of graphic design and the diverse content categories found on Tophinhanhdep.com.
Enhancing Aesthetic Appeal and Professionalism
Outlines serve as a powerful design element, capable of transforming a flat, ordinary image into a dynamic, professional-looking graphic. They create a clear separation between the main subject and its background, preventing it from blending in and ensuring it captures immediate attention. This is particularly crucial for images destined for crowded platforms like Instagram or competitive spaces like YouTube thumbnails, where every fraction of a second counts in grabbing a viewer’s interest.

A well-executed outline adds a sense of polish and intentionality to your design, contributing to a more cohesive and professional aesthetic. It can make a subject appear “cut out” from its surroundings, giving it a sticker-like quality that is both trendy and visually appealing. This technique is often seen in “aesthetic” images, where crisp lines and defined subjects contribute to a clean, modern, and curated look. When you’re browsing Tophinhanhdep.com for “Aesthetic” or “Beautiful Photography” inspirations, you’ll often notice how subtle design choices, like a well-placed outline, can dramatically elevate the perceived quality of the visual.
Furthermore, outlines can be customized in terms of color, thickness, and even blur, allowing for creative expression that aligns with specific branding or thematic collections. A stark white outline can convey modernity and simplicity, while a colored outline can inject vibrancy and personality, tying into a broader color scheme or mood board. This level of control over visual elements is a cornerstone of effective Graphic Design and Digital Art, enabling creators to manipulate photos and achieve specific creative ideas without needing advanced software.
Strategic Use in Different Visual Contexts
The versatility of image outlines makes them suitable for a wide array of visual content and applications, echoing the diverse categories covered by Tophinhanhdep.com, from Wallpapers and Backgrounds to Thematic Collections.
- Social Media Posts: On platforms like Instagram, outlines make profile pictures, product images, and personal branding photos stand out in a scroll-heavy feed. Imagine a nature scene from Tophinhanhdep.com’s “Nature” category, with a prominent white outline around a central element like a mountain peak or a serene tree – it instantly becomes more captivating.
- YouTube Thumbnails: In the competitive world of YouTube, thumbnails are your first impression. An outline around a person, object, or key text in your thumbnail can significantly boost its click-through rate by making the subject clearer and more engaging. This directly relates to the importance of High Resolution Photography and smart editing styles in generating successful digital content.
- Presentations and Reports: For corporate or educational presentations, outlining key images or graphs can draw attention to critical information, enhancing clarity and impact. Instead of generic stock photos, using unique, outlined elements derived from Tophinhanhdep.com’s “Stock Photos” or “Digital Photography” sections can make your slides memorable.
- Product Showcases: E-commerce businesses can use outlines to highlight products against busy backgrounds or within lifestyle shots, making them appear more distinct and desirable. This visual separation is critical for showcasing intricate details of products.
- Digital Art and Photo Manipulation: Beyond practical applications, outlines are a fantastic tool for artistic expression. They can give images a cartoonish or illustrative feel, integrate seamlessly into digital collages, or contribute to unique photo manipulation effects, inspiring new creative ideas. Tophinhanhdep.com’s “Abstract” and “Sad/Emotional” image categories could be transformed with thoughtful outlining to evoke even deeper sentiments or artistic interpretations.
- Infographics and Educational Material: Outlines help delineate different sections or elements within an infographic, making complex information easier to digest and visually separating various components.
By understanding the “why” behind using outlines, creators can move beyond merely applying an effect and begin to strategically integrate them into their visual content strategy. This thoughtful approach ensures that every design element, including a simple outline, contributes meaningfully to the overall message and aesthetic, guiding viewers and amplifying impact.
Mastering Image Outlines in Canva: A Step-by-Step Guide
Canva has democratized graphic design, making it possible for anyone to achieve professional-looking results without extensive training. Adding an outline to an image is a prime example of this, transforming a once-complex task into a few simple clicks. This section provides a detailed, step-by-step guide to mastering image outlines in Canva, ensuring you can create that trendy, impactful effect with ease. We’ll integrate insights related to Photography, Image Tools, and Visual Design, reinforcing the comprehensive value proposition of platforms like Tophinhanhdep.com.
1. Starting Your Design and Choosing Your Image
The journey to an outlined image begins within Canva itself.
- Log In or Sign Up for Canva: If you’re new to Canva, sign up for a free account. While the free version offers incredible utility, many of the advanced features discussed here, including the essential background remover, are exclusive to Canva Pro. Consider taking advantage of a free trial to explore its full potential. Tophinhanhdep.com, recognizing the importance of powerful design tools, highly recommends Canva Pro for those serious about their visual content creation.
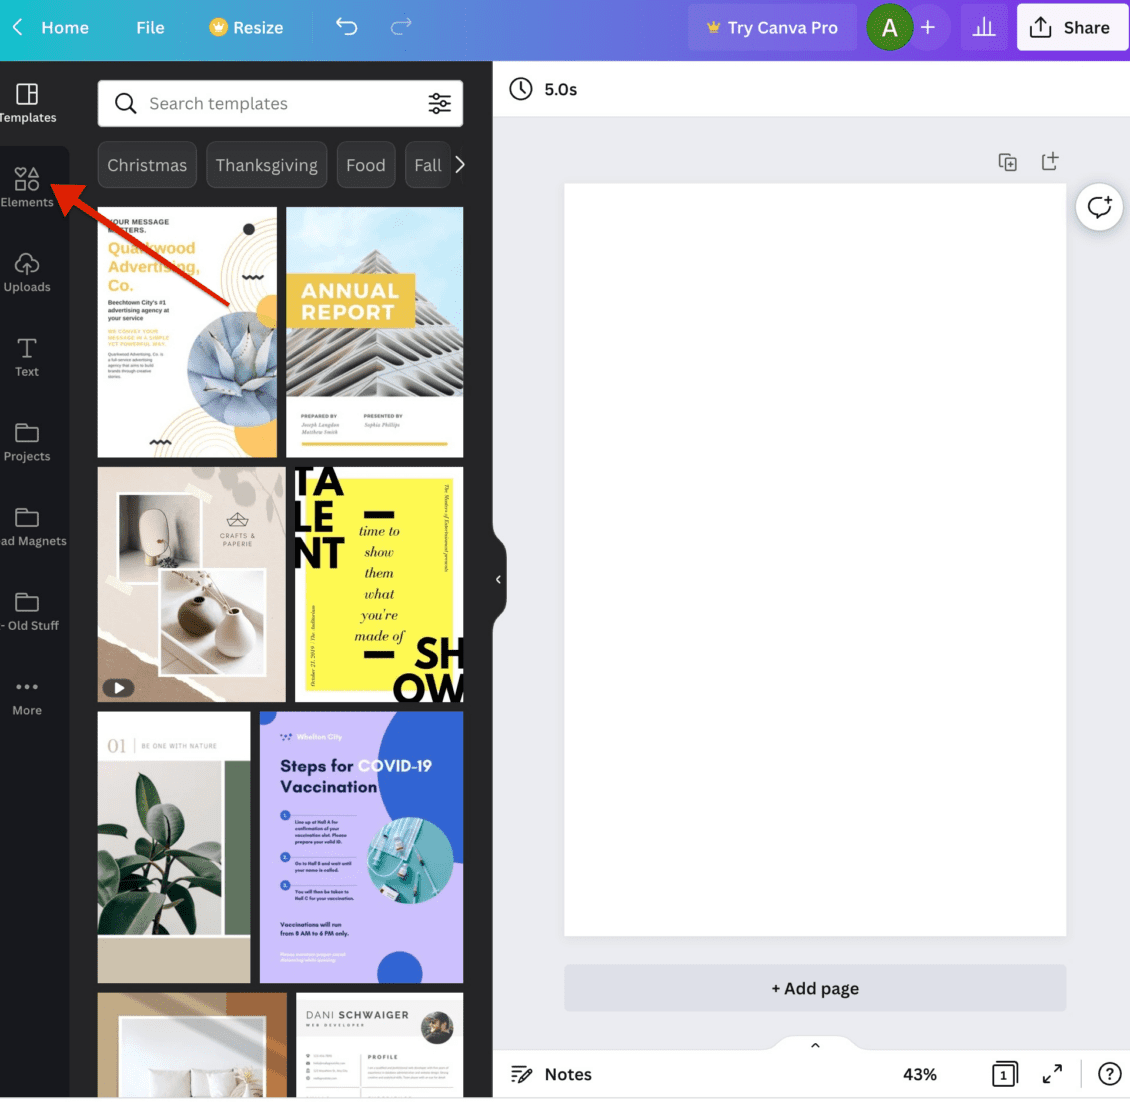
- Create or Open a Design: From your Canva homepage, click “Create a design” or select an existing project. The dimensions of your canvas don’t restrict this feature, so choose a format that suits your output (e.g., Instagram Post, YouTube Thumbnail, Custom Size).
- Upload or Select Your Image:
- Your Own Images: For unique, personalized designs, upload your own photos. Drag and drop the image onto your design page, and it will automatically be added to your “Uploads” section for future use. For the best results, always aim for High Resolution images. Images sourced from your own Digital Photography efforts are ideal for this.
- Canva’s Stock Photos: Canva offers an extensive library of premium stock photos. While convenient, remember that using your unique images often results in more distinctive content, a point emphasized by Tophinhanhdep.com in its “Stock Photos” and “Photography” sections.
- Images from Tophinhanhdep.com: Explore Tophinhanhdep.com’s vast collections of Wallpapers, Backgrounds, Aesthetic, Nature, Abstract, Sad/Emotional, and Beautiful Photography. Download your preferred images (ensuring you adhere to any licensing requirements) and then upload them to Canva. This provides a constant stream of fresh, inspiring visuals.
2. Preparing Your Image: The Essential Background Removal
For a clean, subject-specific outline, removing the image background is usually the first and most critical step. Without it, the outline will apply to the entire rectangular image, not just your desired subject.
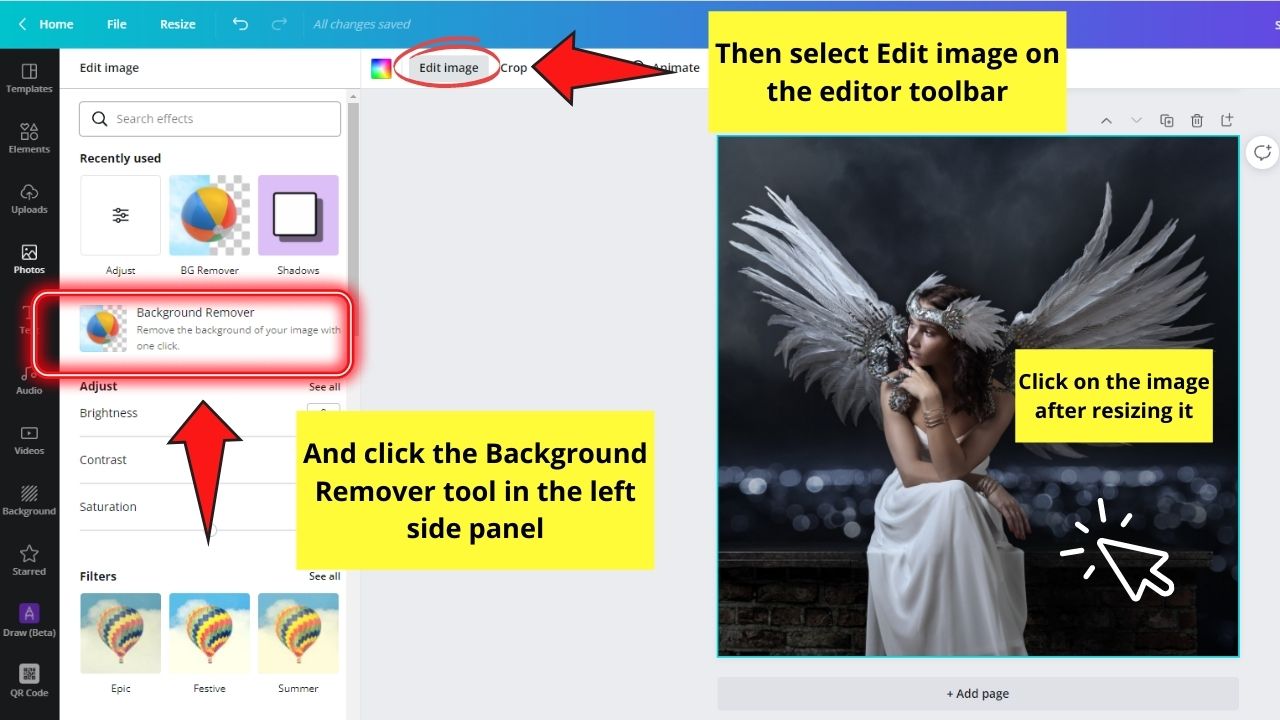
- Using Canva Pro’s Background Remover (Recommended):
- Select the image you’ve placed on your design.
- Click “Edit Photo” in the top toolbar.
- Under the “Tools” section, select “BG Remover” (Background Remover).
- Canva’s AI will automatically detect and remove the background in a single click.
- Refining Background Removal: Sometimes, the automatic removal might not be perfect. Canva allows for precise adjustments:
- After applying “BG Remover,” click the “BG Remover” icon again.
- You’ll see “Erase” and “Restore” brushes. Use these to manually clean up edges, remove unwanted elements, or bring back parts that were mistakenly removed.
- Adjust the brush size for fine-tuning, even down to 1 pixel for intricate details. You can often toggle “Show original image” as a guide.
- Alternative for Free Canva Users: If you don’t have Canva Pro, don’t fret! Tophinhanhdep.com recommends external tools like its own “Background Remover” (or similar services that were previously referenced as
remove.bg) to achieve this. Upload your image toTophinhanhdep.com's Background Remover, download the transparent PNG, and then upload it to your Canva design. - Tip for Better Results: The quality of your original image significantly impacts the effectiveness of background removal. High-resolution images with good contrast between the subject and background yield the cleanest cutouts. Investing in quality Digital Photography or selecting premium High Resolution images from Tophinhanhdep.com will always lead to superior outcomes.
3. Applying the Glow Shadow Effect for Perfect Outlines
With your background removed, you’re ready to add the outline itself. Canva’s “Glow” effect is the secret weapon here.
-
Accessing the Shadow Effects:
- Select your now background-removed image on the canvas.
- Click “Edit Photo” in the top toolbar.
- Scroll down to the “FX Effects” (or simply “Effects”) section.
- Under “Shadows,” you will see various shadow presets: “Glow,” “Drop,” and “Outline.” While “Outline” might sound like the obvious choice, “Glow” often provides more control for a solid, uniform outline. Select “Glow.”
-
Adjusting Glow Settings for a Solid Outline: After clicking “Glow,” a settings icon (usually a small cogwheel or three sliders) will appear. Click this to open the adjustment panel. Here’s how to configure it for a crisp, solid outline:
- Size: This controls the thickness of your outline. Experiment with values from 8 to 35, or even higher, based on your preference and the desired visual impact. A range of 8-14 is often recommended for a subtle white outline, while 16-35 works well for a more prominent border.
- Transparency: Set this to 100. This makes the outline fully opaque, preventing any blurriness or fading within the outline itself.
- Blur: Set this to 0. This is crucial for achieving a sharp, hard-edged outline. Any blur will soften the edge and create a halo effect rather than a distinct border. While a tiny bit of blur (e.g., 1-2) can sometimes look less “amateur” and more natural depending on the style, a zero blur is ideal for the classic crisp outline.
- Color: Change this to White. While white is the most popular choice for that trendy look, you can experiment with any color to match your brand, mood, or design aesthetic. Picking a color from your image using the eyedropper tool can create a harmonious look, aligning with “Creative Ideas” in Visual Design.
- Angle, Distance, and Intensity (if using Outline/Drop presets): If you initially chose “Outline” or “Drop” presets, you might see “Angle” and “Distance” settings. For a uniform outline, set both to 0. “Intensity” (sometimes called fade) should be between 50-100 for a solid appearance. For “Glow,” these are usually not relevant as the effect emanates uniformly.
-
Applying the Effect: Once you’ve adjusted the settings, click “Apply.”
4. Customizing Your Outline for Unique Visuals
The beauty of Canva’s tools lies in their flexibility. Don’t be afraid to experiment to find what works best for your specific image and desired style.
- Color Variations: While white outlines are popular, try matching the outline color to elements within your image or your brand palette. A vibrant blue outline around a serene “Nature” image from Tophinhanhdep.com, for instance, could create a striking effect.
- Thickness (Size): A thin outline offers a subtle enhancement, while a thicker one creates a bolder, more graphic-novel style.
- Subtle Blur: As mentioned, a “Blur” setting of 0 creates a hard edge. However, a slight blur (e.g., 1-5) can sometimes soften the effect and integrate the outline more organically, giving it a gentle halo rather than a stark border. This is a nuanced aspect of Photo Manipulation and Digital Art that can dramatically change the feel.
- Combining with Other Effects: After outlining, you can still apply other effects to your image or the overall design, such as filters, adjustments, or additional shadows to create even more complex Visual Design outcomes.
By diligently following these steps, you’ll be able to consistently produce high-quality outlined images in Canva, ready to enhance any project and make your visuals truly stand out.
Advanced Outline Techniques and Canva Synergies
While the basic white outline is incredibly popular, Canva’s capabilities extend far beyond that. For creators looking to push their Visual Design skills, exploring advanced outlining techniques and understanding how Canva integrates with broader image tools offers a significant advantage. This section delves into outlining text and elements, and how these techniques complement the range of Image Tools and Photography insights offered by Tophinhanhdep.com.
Outlining Text and Elements for Comprehensive Designs
A cohesive design often requires more than just outlined images. The ability to outline text and other graphic elements ensures a uniform and professional aesthetic across your entire visual creation.
Outlining Text in Canva
Adding an outline to text in Canva is just as straightforward as outlining an image, using the platform’s robust text effects. This is a powerful feature for creating engaging headings, call-to-action buttons, or emphasized quotes.
- Add or Select Text: In your Canva design, click on the “Text” tab on the left sidebar, or simply press ‘T’ on your keyboard to add a new text box. Type your desired text.
- Access Text Effects: Select your text box, then click “Effects” in the top toolbar. This opens the text effects panel.
- Choose an Outline Effect: Canva offers several effects that can create an outline:
- “Outline” Effect: This is the most direct option. Select “Outline,” and you can then adjust the “Thickness” and “Color” of the outline.
- “Hollow” Effect: This creates text that is purely an outline, with a transparent fill. You can then change the outline color. This is excellent for overlaying text on complex backgrounds while maintaining readability.
- “Splice” Effect: This offers a slightly more stylized, double-outline look. You can adjust the “Thickness,” “Offset,” “Direction,” and “Color” of both the main text and its splice.
- “Neon” Effect: While primarily designed for a glow, you can manipulate its settings (high intensity, low blur) to create a soft, neon-like outline or border effect, especially effective with contrasting colors.
- Customizing Colors: With any of these effects, you can independently control the color of the text fill and the outline. Simply click on the respective color swatches within the effects panel or the main text color tool in the top toolbar. Harmonizing these colors, perhaps by picking hues from your main image using the eyedropper, contributes to sophisticated Visual Design and strong branding.
Outlining Elements (Shapes, Icons, Illustrations) in Canva
Elements, such as shapes, icons, and illustrations from Canva’s library, can also benefit from outlines, enhancing their visibility and integrating them seamlessly into your design. The process varies slightly depending on the type of element.
- Styled Borders for Shapes/Frames: For simple shapes and frames (like rectangles, circles, or image frames), you can use the “Border Style” option in the top toolbar when the element is selected. This allows you to:
- Choose border thickness (weight).
- Select border color.
- Change the border style (solid, dashed, dotted).
- Round corners. This method is quick and effective for adding a basic outline without needing to cut out the element. It removes the need for outdated “white rectangle behind” hacks.
- Outlining Complex Elements (Sticker Effect): For more intricate illustrations or “sticker-type” elements that you want to outline with the “Glow” effect, the process is a bit different:
- Export as Transparent PNG: Place the element on a blank Canva page. Click “Share” > “Download.” Choose “PNG” as the file type and select “Transparent background” (a Canva Pro feature). Download the element.
- Re-upload as Image: Upload this newly downloaded transparent PNG of your element back into Canva.
- Apply Image Outline: Now, treat this re-uploaded element as an image. Select it, go to “Edit Photo,” then “Shadows,” and apply the “Glow” effect, adjusting the settings (Transparency 100, Blur 0, desired Color, desired Size) just as you would for a photo. This technique is a fantastic way to create custom stickers and unique Graphic Design assets.
Integrating Outlines with Tophinhanhdep.com’s Image Tools
Creating compelling outlined images is just one part of a comprehensive visual strategy. Tophinhanhdep.com offers a suite of Image Tools that can seamlessly integrate with your Canva workflow, enhancing the quality, performance, and accessibility of your outlined visuals.
- Image Converters: After creating an outlined image in Canva, you might need it in a specific format (e.g., JPG for smaller file size, WebP for web optimization). Tophinhanhdep.com’s Image Converters allow you to transform your PNG outputs into any required format, ensuring compatibility and efficiency.
- Image Compressors & Optimizers: Outlined images, especially transparent PNGs, can sometimes be large files, slowing down website loading times. Tophinhanhdep.com’s Compressors and Optimizers can reduce file size without significant loss of visual quality. This is crucial for web performance, SEO, and user experience, making your beautiful, outlined images load quickly across all devices.
- AI Upscalers: If you start with a lower-resolution image from your personal collection or an older project, outlining it might reveal pixelation. Before applying the outline in Canva, use Tophinhanhdep.com’s AI Upscalers to enhance the image quality, increasing its resolution and detail. A high-quality base image will always yield a superior outlined result. This tool is invaluable when working with older Digital Photography or when you need to repurpose smaller visuals for larger formats.
- Image-to-Text: While not directly related to outlining, if your outlined image contains text (e.g., an outlined quote graphic), Tophinhanhdep.com’s Image-to-Text tool can extract that text for content repurposing, accessibility, or indexing. This demonstrates a holistic approach to image utility, extending beyond visual appeal.
By combining Canva’s intuitive design capabilities for outlining with Tophinhanhdep.com’s powerful image manipulation tools, you can establish an incredibly efficient and effective workflow for all your visual content needs. This synergy empowers you to create stunning, optimized, and versatile images that truly stand out.
Beyond Outlines: Elevating Your Visual Content Strategy with Tophinhanhdep.com
While mastering image outlining in Canva is a fantastic step, it’s just one piece of the larger puzzle of visual content creation. A truly effective digital presence relies on a holistic approach that encompasses everything from finding inspiration and curating high-quality visuals to optimizing and deploying them strategically. This section expands the discussion to a broader visual content strategy, demonstrating how the comprehensive offerings of Tophinhanhdep.com—across its categories of Images, Photography, Image Tools, Visual Design, and Image Inspiration & Collections—can serve as your ultimate resource.
Curating and Inspiring Visuals: The Starting Point
Every great design begins with inspiration. Tophinhanhdep.com is designed to be a wellspring of visual ideas, helping you define your aesthetic and find the perfect imagery.
- Diverse Image Categories: Explore “Images” such as “Wallpapers,” “Backgrounds,” “Aesthetic,” “Nature,” “Abstract,” “Sad/Emotional,” and “Beautiful Photography.” These categories are not just for casual browsing; they are curated collections that can spark creative ideas for your outlined images. For instance, finding a powerful “Nature” shot on Tophinhanhdep.com and then outlining a central element in Canva can transform it into a unique piece for social media.
- Image Inspiration & Collections: Delve into “Photo Ideas,” “Mood Boards,” and “Thematic Collections.” These sections provide insights into trending styles and conceptual frameworks. Before outlining an image, consider the overall “Mood Board” you’re aiming for. Is it bright and vibrant, requiring a bold outline? Or is it melancholic, suggesting a more subdued, perhaps even subtly blurred, outline?
- Trending Styles: Stay abreast of current design trends. Outlining is a trend, but understanding how it fits into broader visual narratives (e.g., retro, minimalist, maximalist) found on Tophinhanhdep.com helps you apply it effectively and stay relevant.
By regularly consulting Tophinhanhdep.com for inspiration, you ensure that your outlined images are not just technically proficient but also artistically relevant and impactful, feeding into your broader Visual Design goals.
Optimizing Your Workflow with Canva and Tophinhanhdep.com
Efficiency is key in content creation. Integrating Canva’s design prowess with Tophinhanhdep.com’s practical tools streamlines your workflow, saving time and ensuring consistent quality.
- High-Quality Photography as a Foundation: As highlighted in Tophinhanhdep.com’s “Photography” section, starting with “High Resolution” and well-composed “Stock Photos” or your own “Digital Photography” is paramount. A crisp outline demands a clear subject. Leveraging Tophinhanhdep.com’s resources for premium image acquisition means your Canva projects start from a strong base, reducing the need for extensive corrections and yielding superior outlined results.
- Canva Pro for Expedited Design: Canva Pro, as emphasized, is a game-changer. Beyond the background remover, it offers:
- Unlimited Elements & Premium Stock: Access to a vast library of elements and “Stock Photos” directly within Canva, complementing Tophinhanhdep.com’s image offerings.
- Custom Fonts: Maintain consistent branding by uploading your custom fonts, which can then be outlined with Canva’s text effects.
- Brand Kit: Store your brand colors, logos, and fonts, making it effortless to ensure your outlined images align perfectly with your brand identity.
- Magic Resize: Adapt your outlined image designs instantly for different platforms (e.g., from an Instagram post to a YouTube thumbnail), ensuring consistency across your content ecosystem.
- Transparent Background Downloads: Essential for exporting outlined images or elements for repurposing elsewhere, and perfectly complementing Tophinhanhdep.com’s Image Tools for further optimization.
- Leveraging Image Tools for Post-Production: After creating your outlined image in Canva, don’t forget the “Image Tools” on Tophinhanhdep.com.
- Converters and Compressors: Optimize your final outlined images for web use or specific platforms. Faster loading times improve user experience and SEO.
- AI Upscalers: If you decide to print your outlined graphic or use it in a much larger format, Tophinhanhdep.com’s AI Upscaler can increase its resolution post-Canva, ensuring it remains sharp and detailed.
- Image-to-Text: If your outlined images include important textual information, use this tool to make the content searchable and accessible.
By consciously weaving together Canva’s design interface with Tophinhanhdep.com’s diverse resources and tools, you’re not just outlining an image; you’re executing a sophisticated Visual Design strategy that saves time, enhances quality, and maximizes impact. This integrated approach elevates your content from merely presentable to truly outstanding, ensuring your visual communication is always at its peak.
Conclusion: Mastering Outlines for Unforgettable Visuals
In the fast-paced world of digital content, visual appeal is paramount. The ability to create eye-catching, professional-grade images can significantly impact your brand, engagement, and overall message. Adding an outline to your images is a simple yet incredibly effective technique that elevates your visuals, making subjects pop, grabbing attention, and conveying a polished aesthetic. What once required complex and costly software, like Photoshop, is now effortlessly achievable thanks to user-friendly platforms like Canva.
This guide has walked you through the step-by-step process of outlining an image in Canva, from the essential background removal (a crucial first step often facilitated by Canva Pro’s one-click solution or Tophinhanhdep.com’s dedicated tools) to the nuanced adjustments of the “Glow” shadow effect. We’ve explored how to fine-tune settings like size, transparency, blur, and color to achieve the perfect crisp, hard outline that defines so many trending visuals today.
Beyond just images, we’ve extended these techniques to outlining text and even complex graphic elements, ensuring that your entire design maintains a cohesive and professional look. We’ve also highlighted how these outlining skills fit into a broader visual content strategy, emphasizing the importance of quality “Photography,” understanding “Visual Design” principles, and drawing inspiration from “Image Inspiration & Collections.”
Crucially, throughout this journey, we’ve underscored the invaluable role of Tophinhanhdep.com as your comprehensive resource. From providing a vast library of “Images” like “Wallpapers,” “Backgrounds,” and “Aesthetic” visuals to offering essential “Image Tools” such as Converters, Compressors, Optimizers, and AI Upscalers, Tophinhanhdep.com empowers you to find inspiration, prepare your assets, and refine your final creations. By combining Canva’s intuitive design platform with the rich resources and practical utilities of Tophinhanhdep.com, you’re equipped with a powerful arsenal for crafting visuals that truly stand out.
So, whether you’re designing social media posts, creating engaging YouTube thumbnails, or developing professional presentations, embrace the power of the outline. Experiment with different colors, thicknesses, and even subtle blurs to find your unique style. With Canva and Tophinhanhdep.com by your side, the possibilities for creating unforgettable visual content are endless. Start outlining today and watch your designs come to life!