How to Post an Image to Facebook: A Comprehensive Guide to Sharing Your Visual Stories

In today’s visually-driven digital landscape, sharing images has become a cornerstone of online interaction. Facebook, with its vast global audience, stands as a premier platform for broadcasting your visual narratives, whether they are breathtaking wallpapers, intricate digital art, stunning nature photography, or simply cherished personal moments. At Tophinhanhdep.com, we understand the power of a well-presented image. Our mission is to provide you with the tools, inspiration, and knowledge to create and share visuals that truly resonate. This comprehensive guide will walk you through the process of posting images to Facebook from both mobile devices and computers, while also exploring how Tophinhanhdep.com’s resources can elevate your sharing experience, ensuring your photos – be they high-resolution stock photos or carefully manipulated graphic designs – always look their best.
Sharing an image on Facebook is more than just a technical upload; it’s an act of visual storytelling. It’s an opportunity to present your aesthetic vision, convey emotions through poignant photography, or showcase your latest creative ideas. From ensuring your images are perfectly optimized with our online tools to finding inspiration in our thematic collections, Tophinhanhdep.com is your partner in digital visual excellence. Let’s delve into the simple yet impactful methods for bringing your images to the Facebook feed.
Seamlessly Uploading Your Visual Story: Mobile & Desktop Approaches
Whether you’re capturing a spontaneous moment with your phone or meticulously curating a portfolio on your desktop, Facebook offers intuitive ways to share your images. Understanding these primary methods is the first step to effectively broadcasting your visual content to your friends, family, or a wider audience interested in your photography and digital art.
Mobile App: Sharing Moments On-the-Go

The convenience of smartphones has made mobile photography and on-the-spot sharing an integral part of our daily lives. The Facebook mobile app is designed to make this process as smooth as possible, allowing you to instantly share anything from a beautiful nature shot taken during a hike to an aesthetic background you captured for inspiration.
-
Accessing the Facebook App: Begin by opening the Facebook app on your Android or iOS device. Look for the familiar dark blue icon with a white ‘f’. Once launched, if you’re already logged in, you’ll land directly on your News Feed. If not, a quick entry of your email (or phone number) and password will grant you access. This News Feed acts as your central hub, where you not only consume content but also initiate your own posts.
-
Navigating to Your Desired Posting Location: Facebook gives you the flexibility to post images in various places. Most commonly, users will share photos directly to their own timeline via the News Feed. However, you might want to share an image on a friend’s page, within a specific group, or on a page you manage.
- For your own timeline: Simply remain on the News Feed page.
- For a friend’s page: Utilize the search bar at the top of the app. Type in your friend’s name, select their profile from the search results, and then navigate to their timeline.
- For a group or page you manage: Find the specific group or page through search or your shortcuts and proceed to its posting interface.
-
Initiating the Photo Upload: On your News Feed (or chosen posting location), you’ll see a section labeled “What’s on your mind?”. To the right of this box, you’ll find an “Image” icon, often represented by a green landscape with a sun. This is your gateway to uploading visuals. If, for any reason, this icon isn’t immediately visible, tapping directly inside the “What’s on your mind?” field will typically reveal an option like “Photo/Video,” which serves the same purpose.
-
Selecting Your Images: Tapping the image icon will open your device’s photo gallery. Here, you can browse through your collection of images, from recent high-resolution photographs to carefully curated aesthetic wallpapers downloaded from Tophinhanhdep.com.
- Single Image: Tap on the one image you wish to upload.
- Multiple Images: Tap on each photo you’d like to include in your post. As you select them, you’ll usually see a numerical indicator on each thumbnail, showing the order in which they will appear. This is perfect for creating thematic collections or mini-mood boards directly in your post.
-
Confirming Your Selection: After choosing your images, tap “Done” (on iPhones/iPads) or “Next” (on Android devices). This action transitions you to the post composition screen, where your selected images are now attached, forming the visual foundation of your upcoming Facebook post.
-
Refining Your Post Content: This stage is where you add context and creativity to your visual story.
- Textual Narratives: Type your thoughts, descriptions, or observations into the “Say something about this…” or “Say something about these photos…” box. This is where you can articulate the inspiration behind a sad/emotional photo, the details of a beautiful photography piece, or the concept of your abstract digital art.
- Adding More Photos: Realized you missed an image? You can usually tap an “Add more” option or the green landscape icon again to return to your gallery and select additional pictures.
- Enhancing with Facebook’s Tools: Facebook often provides basic editing tools right within the app. You might find options to crop, rotate, add filters, stickers, or even draw on your photos. While these are convenient for quick adjustments, remember that for more advanced photo manipulation or precise aesthetic tuning, Tophinhanhdep.com offers a suite of image tools and detailed guides on editing styles.
- Location Tagging and Moods: Just like the content studio, you can tag your location by tapping the “Check in” option, letting your friends know where your nature photography was captured or where your creative ideas came to life. You can also express your current feeling or activity by tapping “Feeling/Activity,” adding another layer of emotional context to your post.
- Tagging Friends: If the images involve other people who are also on Facebook, you can tag them by selecting “Tag Friends.” This helps increase visibility and relevance, especially if you’re sharing moments with a group. However, be mindful of privacy settings; some users may restrict tagging.
-
Setting Your Audience and Publishing: Before hitting “Post,” take a moment to review your privacy settings.
- Audience Selection: Facebook offers options like “Public” (visible to anyone), “Friends” (visible only to your Facebook friends), “Friends of Friends,” or custom lists. For personal memories, “Friends” is common. For showcasing your graphic design work or promoting a thematic collection of images from Tophinhanhdep.com, “Public” might be more appropriate to maximize reach and gather image inspiration.
- Finalizing the Post: Once you’re satisfied with your images, caption, tags, and privacy settings, tap “Post” in the top-right corner. Your visual story, be it a high-resolution masterpiece or a quick aesthetic snap, will now be uploaded and shared on Facebook.
Desktop Interface: Uploading High-Resolution Masterpieces
For those who prefer a larger screen, a keyboard, or who work with professional-grade photography and digital art, using a computer to upload images to Facebook offers a more expansive and often more precise experience. This method is ideal for showcasing high-resolution images, detailed graphic design projects, or curated mood boards that demand fidelity.
-
Accessing Facebook via Browser: Open your preferred web browser (Chrome, Firefox, Safari, Edge, etc.) and navigate to
https://www.facebook.com. Similar to the mobile app, if you’re logged in, you’ll be greeted by your News Feed. If not, enter your credentials. -
Choosing Your Publishing Destination: Just as with the mobile app, you have control over where your image post appears.
- Your Personal News Feed/Timeline: Stay on the main News Feed page.
- Friend’s Profile: Use the search bar to find and click on a friend’s name, then navigate to their profile.
- Managed Page or Group: Search for or select the relevant page or group from your left-hand menu. The process for initiating a post will be consistent across these locations.
-
Initiating the Photo/Video Upload: On your News Feed (or chosen page), locate the “What’s on your mind?” text box at the top. Directly below this box, you’ll find the “Photo/Video” option. Click this to open a pop-up window, which is your primary interface for selecting and preparing your images.
-
Selecting Images from Your Computer: This pop-up window presents you with options to add your images.
- Drag and Drop: A highly convenient feature for desktop users. Simply open your file manager (File Explorer on Windows, Finder on Mac) or have your desired images on your desktop, then click and drag them directly into the Facebook upload window. This is particularly useful when dealing with a collection of wallpapers or backgrounds you’ve been curating.
- Browse Files: Alternatively, click the “Add Photos/Videos” text within the pop-up. This will open your computer’s native file browser. Navigate to the folder containing your images.
- Single Image: Click on the image you wish to upload.
- Multiple Images: To select several images at once, hold down the
Ctrlkey (Windows) or⌘ Commandkey (Mac) while clicking on each desired photo. This is perfect for uploading an entire high-resolution photography series or a digital art collection. - Once selected, click “Open” or “Choose” to import them into the Facebook post draft.
-
Composing and Enhancing Your Post: With your images loaded, you’ll now be on the post composition screen, ready to add details and context.
- Add More Photos/Videos: If you want to include more visuals, click the “Add Photos/Videos” option at the top of the post window.
- Crafting Your Caption: Use the “Say something about this photo” (or “these photos”) box to write your caption. This is your chance to describe your nature photography, explain the abstract concepts behind your art, share the story of a beautiful photography piece, or credit the image inspiration.
- Editing Options: Facebook on desktop also offers basic editing functionalities like cropping, rotating, and applying filters. For images that require more advanced photo manipulation, precise color correction, or specific editing styles, consider processing them with Tophinhanhdep.com’s image tools before uploading.
- Tagging and Location: You can tag friends, products, or even add your location to the post, enriching its context and increasing its discoverability.
- Creating Albums: For a larger thematic collection, such as a series of wallpapers or a comprehensive visual design portfolio, consider creating a dedicated photo album directly from this interface. This organizes your images beautifully and provides a more immersive viewing experience.
-
Finalizing Privacy and Posting: Before sharing your visual story with the world, confirm your audience.
- Audience Settings: Near the bottom or top of the post window, you’ll see a button indicating your current privacy setting (e.g., “Friends,” “Public”). Click this to select your desired audience. For professional digital photography or graphic design work meant for broad exposure, “Public” is often the best choice. For highly personal sad/emotional images, “Only Me” can function as a private storage solution.
- Publishing Your Content: Once everything is set to your satisfaction, click the “Post” button, usually located at the bottom right of the post window. Your high-resolution images, aesthetic compositions, or creative ideas will now be live on Facebook.
Beyond the Basics: Enhancing Your Facebook Images with Tophinhanhdep.com Tools
Posting an image is one thing; posting an image that stands out, loads quickly, and maintains its quality is another. This is where Tophinhanhdep.com’s specialized tools and insights become invaluable. We empower you to prepare your visuals to perfection, ensuring your audience sees your work exactly as you intended.
Preparing Your Images: Compression, Optimization, and Upscaling
The quality and file size of your images directly impact their performance and presentation on Facebook. Large, unoptimized files can lead to slow uploads, pixelation, or automatic compression by Facebook that degrades quality. Small, low-resolution files might appear blurry or unprofessional. Tophinhanhdep.com offers solutions to strike the perfect balance.
-
Image Compressors: Before uploading your high-resolution photography or detailed digital art, consider using Tophinhanhdep.com’s image compressors. These tools intelligently reduce file size without a noticeable loss in visual quality. This means faster upload times, less data consumption for mobile viewers, and a smoother viewing experience across all devices. For instance, a stunning landscape from your nature photography collection, while beautiful at its original 20MB, can be compressed to 2-3MB, making it Facebook-friendly while retaining its breathtaking detail.
-
Image Optimizers: Beyond raw compression, optimization involves fine-tuning image settings for web display. Our optimizers can adjust resolution, format (e.g., converting to JPEG or WebP for better web performance), and metadata, ensuring your images are lean and mean for online sharing. This is particularly crucial for images destined to be aesthetic backgrounds or wallpapers, where every pixel counts for a crisp display.
-
AI Upscalers: Have an older, lower-resolution photograph that holds sentimental value, or perhaps a beautiful photography piece that wasn’t originally captured in high resolution? Tophinhanhdep.com’s AI upscalers can breathe new life into these images. Utilizing advanced artificial intelligence, these tools can intelligently increase the resolution of your photos, adding detail and sharpness, making them suitable for sharing on Facebook without appearing pixelated or fuzzy. This is a game-changer for preserving and sharing historical photos or early digital art pieces.
-
Image Converters: Sometimes, your image might be in a format not ideally suited for web sharing or Facebook’s display. Our image converters can help you change formats (e.g., from TIFF to JPEG, or PNG to WebP), ensuring compatibility and optimal performance.
-
Image-to-Text Tools: For creative captions, accessibility, or simply extracting information from a visual element, our image-to-text tools can be surprisingly useful. Imagine you have a graphic design piece with important text; this tool can help you quickly extract that text for your caption or for an alt-text description, enhancing SEO and accessibility.
Leveraging Visual Design for Impact
Facebook is a visual canvas, and your posts are your artwork. Whether you’re a graphic designer showcasing your portfolio, a digital artist sharing your latest creation, or simply someone who appreciates aesthetic images, thoughtful visual design is paramount.
-
Graphic Design Portfolios: For professionals, Facebook can serve as an informal portfolio. Uploading your graphic design projects, complete with explanatory captions (perhaps even derived from image-to-text descriptions of your work), allows colleagues and potential clients to see your creative ideas in action. Remember to use Tophinhanhdep.com’s tools to ensure these high-resolution images load quickly and retain their sharp lines and vibrant colors.
-
Digital Art Showcase: Digital artists can use Facebook to share their unique styles, from abstract compositions to intricate photo manipulations. Engaging with comments and questions about your creative process can foster a strong community around your art. Using our optimizers will ensure your digital art looks crisp and detailed, showcasing the nuances of your work.
-
Photo Manipulation: The results of sophisticated photo manipulation can be truly captivating. Sharing these on Facebook, perhaps with a “before and after” comparison or a breakdown of your editing styles, can attract significant attention and discussions.
-
Creative Ideas and Thematic Collections: Beyond individual pieces, consider presenting your images as part of a larger narrative or thematic collection. A series of nature photography showcasing different seasons, a mood board of aesthetic images for a project, or a collection of sad/emotional photos exploring a particular theme can engage your audience on a deeper level. Tophinhanhdep.com’s inspiration sections can provide countless photo ideas to fuel such collections.
Mastering the Art of Engagement: Crafting Captivating Photo Posts
Once your images are perfectly prepared and uploaded, the next step is to maximize their impact and foster engagement. A compelling image combined with a well-crafted post can transform a simple upload into a meaningful interaction.
Privacy and Audience Selection: Tailoring Your Reach
One of Facebook’s most powerful features is its granular control over who sees your content. Understanding and utilizing these privacy settings is essential, especially when sharing diverse image types.
-
“Only Me” for Private Storage or Testing: If you’re uploading an image primarily for backup, as a private reference, or to test how it looks on Facebook before sharing, the “Only Me” setting is invaluable. This acts as a personal gallery of your wallpapers, backgrounds, or even sensitive sad/emotional photos that you don’t intend to share publicly. It’s also great for drafting posts with high-resolution images that you might want to perfect later.
-
“Friends” for Personal Connections: The most common setting for personal photographs, especially those documenting daily life, family moments, or casual aesthetic snaps. This ensures your content reaches your immediate social circle without being exposed to strangers.
-
“Friends Except…” or Custom Lists for Niche Sharing: For more nuanced sharing, Facebook allows you to exclude specific friends or create custom lists. This is useful if you’re sharing content that might be relevant to only a subset of your friends, or if there are certain individuals you prefer not to see a particular post (e.g., a specific photo manipulation project not meant for a client’s eyes yet).
-
“Public” for Maximum Exposure: When you want your work to be seen by the widest possible audience, “Public” is the way to go. This is ideal for showcasing your high-resolution photography, promoting your digital art, sharing your graphic design portfolio, or presenting trending styles that you want others to discover. For instance, if you’re a photographer specializing in nature photography, setting these posts to public can help you gain new followers and recognition.
-
Understanding Shared Privacy: When posting on a friend’s wall, their friends will also be able to see the post. This is an important consideration for collaborative creative ideas or shared beautiful photography. Both you and your friend can often edit the post to adjust its audience visibility.
Captions, Tags, and Calls to Action
A picture may be worth a thousand words, but a well-written caption can add context, emotion, and drive interaction.
-
Crafting Engaging Captions:
- Storytelling: For your nature photography or beautiful photography, tell the story behind the shot. Where was it taken? What emotion does it evoke?
- Behind-the-Scenes: For digital art or photo manipulation, offer a glimpse into your creative process. What inspired this abstract piece? What techniques did you use?
- Questions: Pose questions to encourage comments. “What does this aesthetic background remind you of?” or “Which of these wallpapers would you choose?”
- Keywords: Incorporate keywords relevant to Tophinhanhdep.com’s categories, such as “high resolution,” “aesthetic,” “nature,” “abstract,” “digital art,” “creative ideas,” to make your posts searchable and relevant.
-
Strategic Tagging:
- People: Tag friends who are in the photo or relevant to the post.
- Locations: Tag the location where the photo was taken, especially for travel photography or nature shots.
- Pages/Brands: Tag relevant pages if your image relates to a product, event, or collaboration. For example, if you used a particular editing style inspired by a brand, you might tag them.
-
Hashtags for Discoverability: Hashtags are powerful tools for increasing visibility beyond your immediate network. Research trending styles and popular hashtags related to your image content. For example:
#NaturePhotography#DigitalArt#Aesthetic#HighResolution#Wallpaper#AbstractArt#CreativeIdeas#PhotoManipulation#Tophinhanhdep(if referencing our site’s content or tools) Employ a mix of broad and niche hashtags to reach a diverse audience interested in image inspiration and collections.
-
Calls to Action (CTAs): Encourage specific actions.
- “What do you think of this aesthetic?”
- “Download this wallpaper from Tophinhanhdep.com!”
- “Click the link in bio for the full high-resolution image.”
- “Share your favorite nature photography in the comments!”
Troubleshooting Common Image Upload Issues and Ensuring Optimal Presentation
Even with the best intentions and carefully prepared images, you might encounter occasional hiccups. Knowing how to address common issues can save you time and ensure your beautiful photography and digital art are presented flawlessly.
Addressing Cropping and Quality Concerns
One of the most frequent complaints revolves around images appearing cropped or losing quality after being uploaded to Facebook.
-
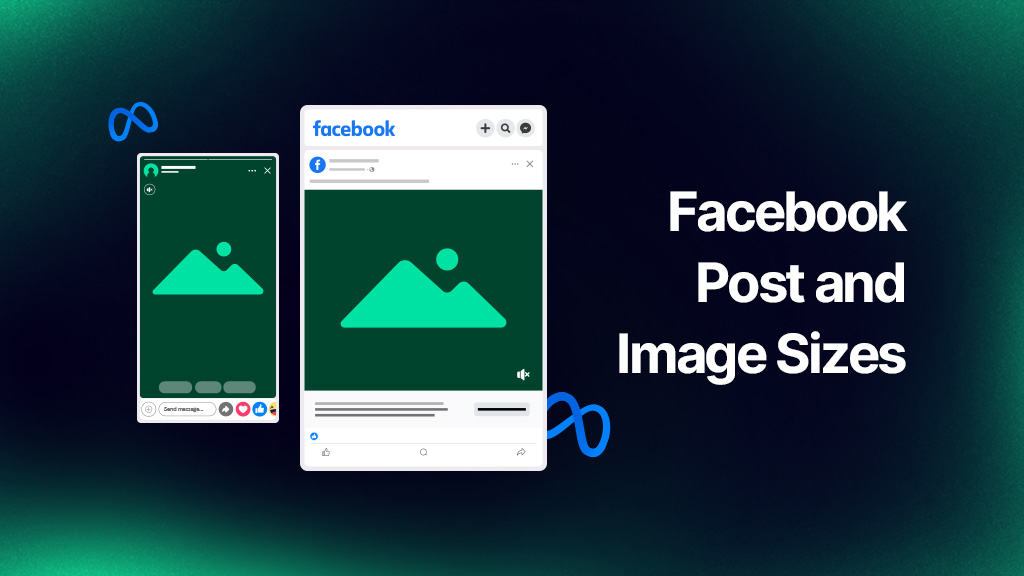
Understanding Facebook’s Aspect Ratios: Facebook often crops images to fit certain display formats, especially in the News Feed.
- Square (1:1): Often ideal for profile pictures and some post previews.
- Landscape (e.g., 1.91:1): Common for shared links and horizontal images.
- Portrait (e.g., 4:5): Best for taller images, often used in Stories or Reels, but can be cropped in the main feed.
- Resolution: Facebook recommends specific resolutions for optimal display (e.g., 1200x630 pixels for shared images, 2048px on the longest edge for full-size photos).
- Pre-cropping with Tophinhanhdep.com Tools: To avoid unexpected cropping, it’s best to pre-crop your high-resolution images to common Facebook aspect ratios before uploading. Tophinhanhdep.com provides image tools that can help you precisely crop and resize your photos, allowing you to control the composition rather than leaving it to Facebook’s algorithms.
-
Image Compression by Facebook: Facebook compresses images to optimize loading times for its massive user base. While necessary, this can sometimes lead to a noticeable drop in quality, especially for images with fine details or vibrant gradients, like complex digital art or high-resolution stock photos.
- Upload High-Resolution Originals: Always start with the highest quality original image you have. The better the source material, the more gracefully it will withstand Facebook’s compression.
- Optimal File Size: Use Tophinhanhdep.com’s image compressors to reduce file size while maintaining visual fidelity. Aim for a file size that’s manageable (e.g., under 1-2 MB for typical photos) without excessive quality loss. This provides Facebook with a pre-optimized image, reducing its need for aggressive re-compression.
- Save as Progressive JPEG: When saving images (especially photography), use the “Progressive JPEG” option if available in your editing software. This allows images to load gradually, appearing quickly in lower quality and sharpening as the download completes, enhancing user experience.
-
The “Smaller Preview” Phenomenon: As highlighted in the expert Q&A, you might see a cropped or smaller preview of your image during the drafting stage. Rest assured, unless you explicitly crop it using Facebook’s tools, the entire picture will typically be posted in its intended dimensions (though scaled and compressed by Facebook). The preview is merely an indicator, not the final rendered output.
Advanced Sharing: Albums and Carousels
For deeper storytelling and showcasing multiple related images, Facebook offers structured posting options.
-
Creating Photo Albums: If you have a series of images—perhaps a collection of nature photography from a trip, a portfolio of graphic design mock-ups, or a mood board of aesthetic images for a new project—creating a dedicated album is highly recommended.
- Organization: Albums keep related images together, making it easier for viewers to browse a cohesive thematic collection.
- Narrative Flow: Each image in an album can have its own caption, allowing for detailed storytelling. The album itself can have an overarching description, providing context for the entire collection.
- High-Resolution Presentation: Albums generally display images well, and users can often view them in a larger format.
- How to Create: From the desktop interface, after clicking “Photo/Video,” you’ll usually find an option to “Create Album.” On mobile, you might select multiple photos and then be prompted to “Create Album” or find the option within the post editor.
-
Carousel Posts (for Pages and Ads): While primarily used for advertising, businesses and content creators can leverage carousel posts for organic content on their pages. Carousels allow you to display multiple images (or videos) in a single post that users can swipe through horizontally. Each image can have its own link and caption, making it perfect for:
- Showcasing Different Angles: Of a digital art piece or a new graphic design.
- Step-by-Step Guides: Using images from your creative ideas section.
- Product Catalogs: Highlighting various stock photos.
- Visual Storytelling: A sequential narrative using beautiful photography.
Converting Facebook Ads into Organic Page Posts
An often-overlooked strategy for maximizing content reach is converting successful Facebook Ads into organic page posts. As seen in the external content, Facebook doesn’t provide a direct “convert to post” button, but a workaround exists via the Ads Manager.
-
Why Convert Ads?
- Preserve Engagement: Ads that garnered significant likes, comments, and shares can bring that social proof directly to your page. This immediately signals to organic visitors that your content is engaging and valuable.
- Repurpose High-Performing Content: If an ad featuring your high-resolution photography or compelling graphic design resonated well, turning it into an organic post extends its lifespan and visibility without additional ad spend.
- Maintain Ad Behavior: Surprisingly, if the ad was a lead generation form, converting it to a post often retains that functionality, allowing organic users to interact with it similarly to the ad.
-
The Process (via Facebook Ads Manager):
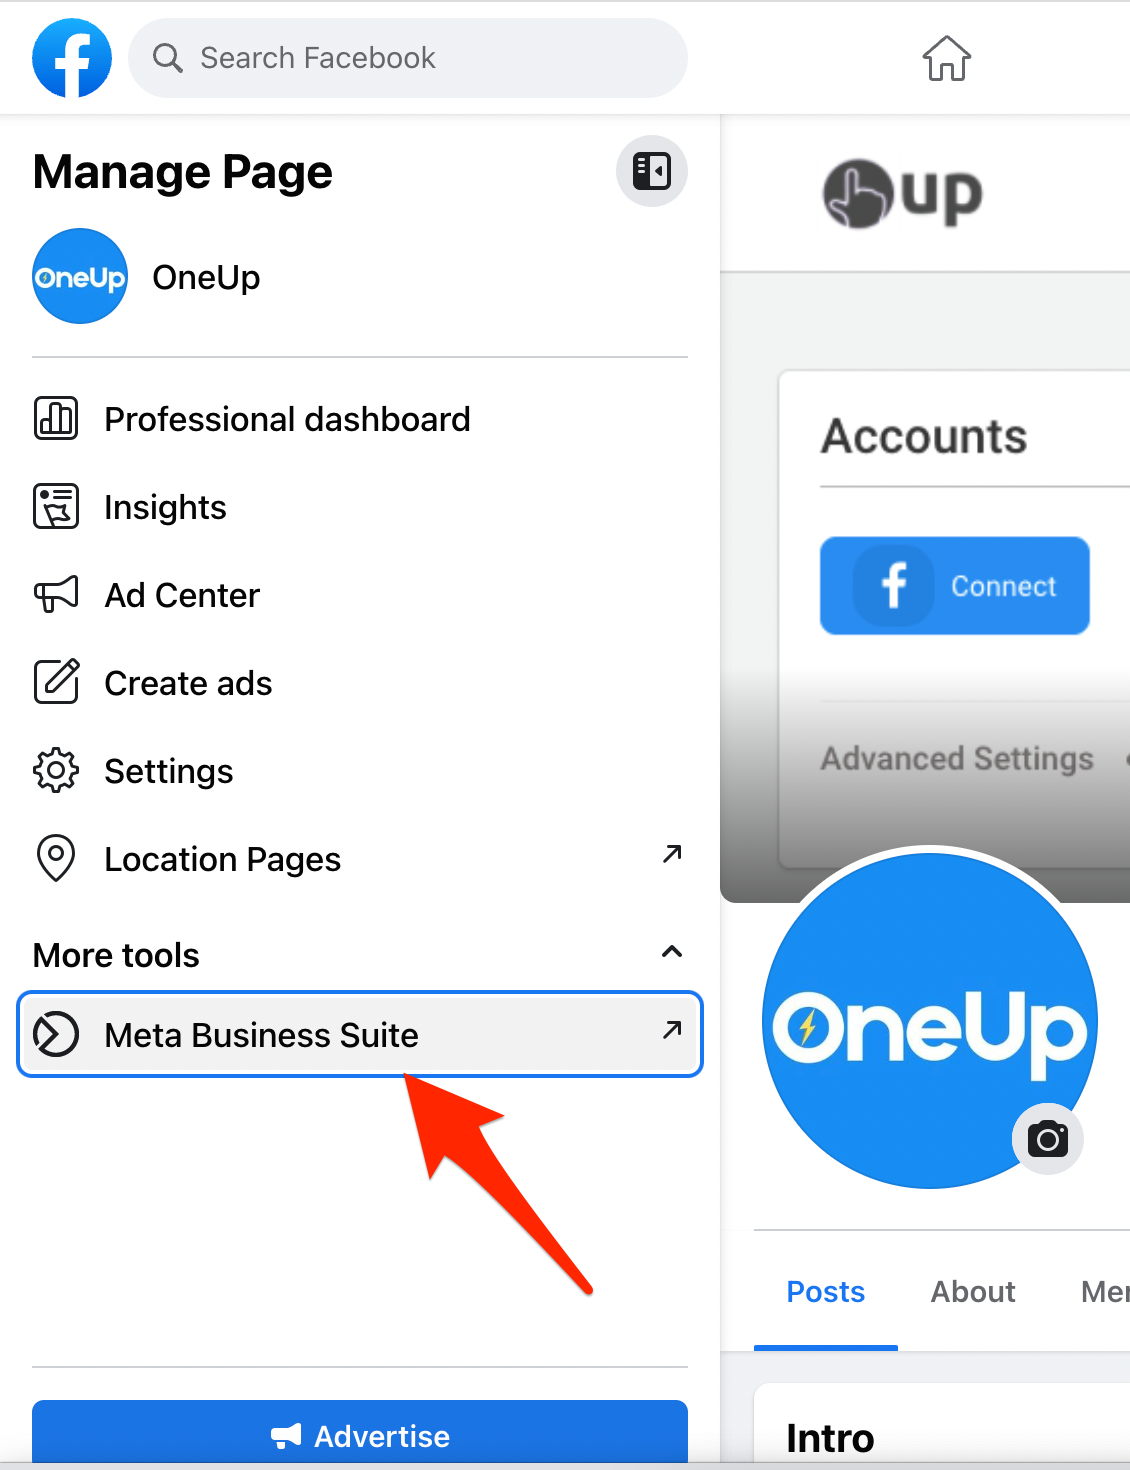
- Log into Facebook Business Manager: Access your Business Manager account, then navigate to your Facebook Ads Manager.
- Go to Page Posts: In the left panel, look for the “hamburger menu” (three horizontal lines). Under the “Engage Customers” section, select “Page posts.”
- Filter for Ad Posts: Within the “Page posts” section, you’ll see a filter option on the left. Choose “Ad posts” to view all your past advertisements.
- Select and Publish: Find the ad you wish to convert, tick the checkbox next to it. This will typically open a preview. From this preview window, you should see a “Publish” option. Click it, and your successful ad, complete with its engagement metrics, will appear as a normal post on your page. This method allows your well-performing visual content, whether a product shot from your stock photos or an emotionally impactful image, to continue generating value organically.
Embracing the Visual Journey: Your Canvas, Your Story
Posting images to Facebook is a dynamic process that combines technical execution with creative expression. By mastering the fundamental steps of uploading from mobile and desktop, and by strategically utilizing the advanced tools and insights from Tophinhanhdep.com, you can transform how your visual stories are perceived.
Remember that every image you share—be it a high-resolution wallpaper, a piece of abstract digital art, a tender sad/emotional photograph, or a stunning example of nature photography—contributes to your unique online persona. Tophinhanhdep.com is dedicated to helping you harness the full potential of your images, providing everything from image tools for optimization and upscaling to endless image inspiration for your next project. We encourage you to explore our vast collections of aesthetic backgrounds, discover new editing styles, and constantly refine your visual design skills.
Facebook is more than just a social network; it’s a global gallery where your creative ideas can find an audience, where your beautiful photography can inspire, and where your digital art can spark conversations. Take these steps, experiment with our tools, and make your mark in the visual world, one captivating image at a time. The journey of visual storytelling begins with a single click, and with Tophinhanhdep.com, you’re always equipped to tell it beautifully.