How to Print an Image: Your Ultimate Guide to Bringing Digital to Life with Tophinhanhdep.com

In an increasingly digital world, where screens dominate our visual experience, there remains an undeniable charm and tangibility in holding a physical print. From stunning wallpapers and aesthetic backgrounds to cherished memories captured in high-resolution photography, digital images enrich our lives. But what happens when you want to transform that vibrant digital file from Tophinhanhdep.com into something you can touch, frame, or share? This comprehensive guide will walk you through the essential steps to print an image, ensuring you achieve the best possible quality and bring your visual inspirations to life.
Tophinhanhdep.com, a premier destination for captivating visuals, offers an expansive collection of images spanning nature, abstract art, sad/emotional scenes, and breathtaking beautiful photography. Beyond just providing high-quality visuals, we understand the desire to materialize these digital assets. Whether you’re a photographer looking to showcase your digital art, a designer needing physical mock-ups, or simply someone wanting to decorate your space with a unique aesthetic, mastering the art of printing is invaluable. We’ll delve into everything from optimizing your images and connecting your printer to navigating print settings across various operating systems and exploring creative applications for your printed masterpieces.
Preparing Your Image for Print: Optimizing Quality and Visual Impact
Before you even think about hitting the “Print” button, the quality of your digital image plays the most crucial role in the outcome of your physical print. Sourcing your images from Tophinhanhdep.com already gives you a significant advantage, as the platform is dedicated to providing high-resolution images and exceptional photography. However, a few preparatory steps can further ensure your print truly shines, reflecting the visual design and artistic intent you desire.
Choosing the Right Image: Resolution and Aesthetic Considerations
The journey to a perfect print begins with selecting the right image, and understanding its technical specifications is paramount. The term “high resolution” is key here. For printing, an image’s resolution is measured in DPI (dots per inch) or PPI (pixels per inch). Generally, for a sharp, high-quality print, you’ll want an image that is at least 300 DPI at the desired print size. A stunning nature shot or a piece of abstract digital art from Tophinhanhdep.com, downloaded in its highest available resolution, is already well-suited for printing. Attempting to print a low-resolution image, perhaps one saved from social media or optimized for web display, will likely result in a pixelated or blurry output, regardless of your printer’s capabilities.
Consider the intended use and aesthetic of the print. Are you creating a large wall-sized wallpaper print, or a small, intimate photograph for a mood board? The size will dictate the minimum required resolution. Tophinhanhdep.com offers various categories like “Aesthetic,” “Wallpapers,” and “Backgrounds,” which are curated for visual impact. When selecting an image, visualize how its colors, composition, and overall mood (e.g., sad/emotional, beautiful photography) will translate onto paper and integrate into your physical space or project. A high-resolution stock photo or a piece of digital photography intended for print will have rich detail and vibrant colors that hold up well when translated from screen to paper.
Pre-Print Enhancements: Editing and Optimization
Even with a high-resolution image from Tophinhanhdep.com, minor adjustments can elevate its print quality. This is where basic image editing and optimization come into play, linking closely with “Editing Styles” and “Photo Manipulation” under visual design principles. While professional graphic design software offers extensive capabilities, even simple tools can make a difference.
Before printing, consider these enhancements:
- Cropping: Frame your subject perfectly and remove distracting elements. This can dramatically improve the composition, aligning with creative ideas for presentation.
- Color Correction: Digital screens are backlit and often display colors differently than they appear in print. Adjusting brightness, contrast, and color balance can compensate for this, ensuring colors appear true to life. If your image is a vibrant abstract piece, ensuring color fidelity is critical.
- Sharpening: A subtle amount of sharpening can enhance detail and make the image look crisper in print. Be careful not to over-sharpen, as this can introduce artifacts.
- Noise Reduction: If your image has digital noise, especially noticeable in darker areas, a light application of noise reduction can clean it up for a smoother print.
- Image Optimization and Upscaling: For images that aren’t quite at the ideal resolution for your desired print size, Tophinhanhdep.com’s affiliated “Image Tools” might include “Optimizers” or “AI Upscalers.” These tools can intelligently increase an image’s resolution without significant loss of quality, making smaller files suitable for larger prints. While not a magic bullet for very low-res images, AI upscalers can be incredibly effective for moderate enhancements.
- Color Profiles: For advanced users, understanding color profiles (like sRGB vs. Adobe RGB) can be crucial. Most consumer printers and online printing services expect sRGB, while professional photographers might work in Adobe RGB. Matching the profile helps ensure color accuracy.
By taking these steps, you’re not just printing an image; you’re actively engaging in “Visual Design” and “Photo Manipulation” to create a superior physical product from the excellent “Digital Photography” you found on Tophinhanhdep.com.
Connecting Your Devices: The Foundation of Image Printing
A beautiful, optimized image is only half the battle. To bring it into the physical world, your computer needs to communicate seamlessly with a printer. This fundamental connection is the bridge between your digital canvas and the tangible print, regardless of whether you’re working with a stunning wallpaper or a critical document.
Setting Up Your Printer: Wired and Wireless Connections
The first and most critical step is ensuring your printer is properly set up and connected to your computer. Modern printers offer various connection methods, each with its own setup nuances:
- Wired Connection (USB): This is the most straightforward method. Connect one end of the USB cable to your printer and the other to an available USB port on your computer. Your operating system (Windows or macOS) should typically detect the new hardware and attempt to install the necessary drivers automatically. If not, you might need to insert an installation CD that came with your printer or download the drivers directly from the printer manufacturer’s website. Keeping your printer drivers updated is essential for optimal performance and access to all printing features.
- Wireless Connection (Wi-Fi): Wireless printing offers greater flexibility, allowing you to place your printer almost anywhere within your network’s range. For wireless setup, you generally need to connect your printer to your home or office Wi-Fi network. This process often involves using the printer’s control panel to select your Wi-Fi network and enter the password. Crucially, your computer must be connected to the same Wi-Fi network as your printer for them to communicate. If you encounter issues, consulting your printer’s manual or the manufacturer’s support website is always a good idea. Many manufacturers also provide dedicated setup software that simplifies the process.
Once connected, ensure your printer is turned on and has sufficient ink/toner and paper. A quick test print (often available in your printer’s utility software) can confirm everything is in working order.
From Smartphone to Print: Mobile Printing Solutions
The desire to print images isn’t confined to desktop computers. Many of us capture and store our most valuable “Digital Photography” on our smartphones, making mobile printing a highly convenient option, especially for quick prints of “Aesthetic” or “Nature” photos.
Most modern smartphones and printers support various mobile printing technologies:
- AirPrint (for iPhone/iPad): If you have an Apple device and an AirPrint-compatible printer, printing is incredibly simple. Just open the image in the Photos app (or any app that supports printing), tap the Share icon, and select “Print.” Your iPhone will automatically discover nearby AirPrint printers on the same Wi-Fi network. You can then select your printer, choose the number of copies, and hit “Print.”
- Android Printing (Print Services): Android devices typically use “Print Services” or printer-specific apps. Many printer manufacturers offer their own Android apps (e.g., HP Smart, Epson iPrint, Canon PRINT Inkjet/SELPHY) that allow you to manage and print photos directly from your phone. These apps often provide more control over settings like paper type and quality. Alternatively, Android’s built-in print services allow you to add printers through “Settings” > “Connected devices” > “Connection preferences” > “Printing.” Once configured, you can print from gallery apps or other applications by tapping the menu icon (usually three dots) and selecting “Print.”
- Cloud Printing Services: Services like Google Cloud Print (though being phased out) or manufacturer-specific cloud solutions allowed printing from anywhere with an internet connection, without needing to be on the same local network. While native app support is more common now, these options can still be relevant for some setups.
These mobile options mean you can easily print that stunning “Beautiful Photography” you just captured or downloaded from Tophinhanhdep.com, right from the palm of your hand, turning it into a tangible memory or a quick visual reference for “Creative Ideas.”
Navigating the Print Process: Step-by-Step Guide for Digital Images
With your image optimized and your printer connected, you’re ready for the core printing process. While the exact steps and available options may vary slightly depending on your operating system and the application you use, the fundamental workflow remains consistent. Here, we’ll cover how to print images effectively from both Windows and macOS, keeping in mind the goal of achieving a high-quality print of your chosen image from Tophinhanhdep.com.
Printing from Windows (File Explorer & Photos App)
Windows 10 and 11 offer user-friendly built-in tools for printing images without the need for additional software. You can typically print directly from File Explorer or use the more feature-rich Photos app.
Method 1: Printing from File Explorer
This is often the quickest way to print one or more images:
- Locate Your Image: Open File Explorer (you can do this by double-clicking “This PC” or searching for it). Navigate to the folder containing the image(s) you wish to print. All the “High Resolution” images you downloaded from Tophinhanhdep.com will be here.
- Select and Print: Right-click on the image you want to print. From the context menu, select “Print.” If you want to print multiple images, select them all (Ctrl + Click or Shift + Click) before right-clicking and choosing “Print.”
- The Print Pictures Dialogue Box: A “Print Pictures” dialogue box will appear. Here, you can:
- Choose Your Printer: From the “Printer” dropdown menu, select your connected printer.
- Select Paper Size: Use the “Paper size” menu to choose the size of the paper loaded in your printer (e.g., Letter, A4, 4x6 photo paper).
- Choose Layout: The left pane offers various layout options, allowing you to print full-page images, multiple smaller images on one page, or even contact sheets. This is where your “Creative Ideas” for display can begin.
- Adjust Quality: The “Quality” menu is crucial for image printing. Options usually include:
- Draft: Uses less ink and prints quickly, but quality is lower. Good for quick proofs.
- Normal: A balanced option for everyday prints with text and images.
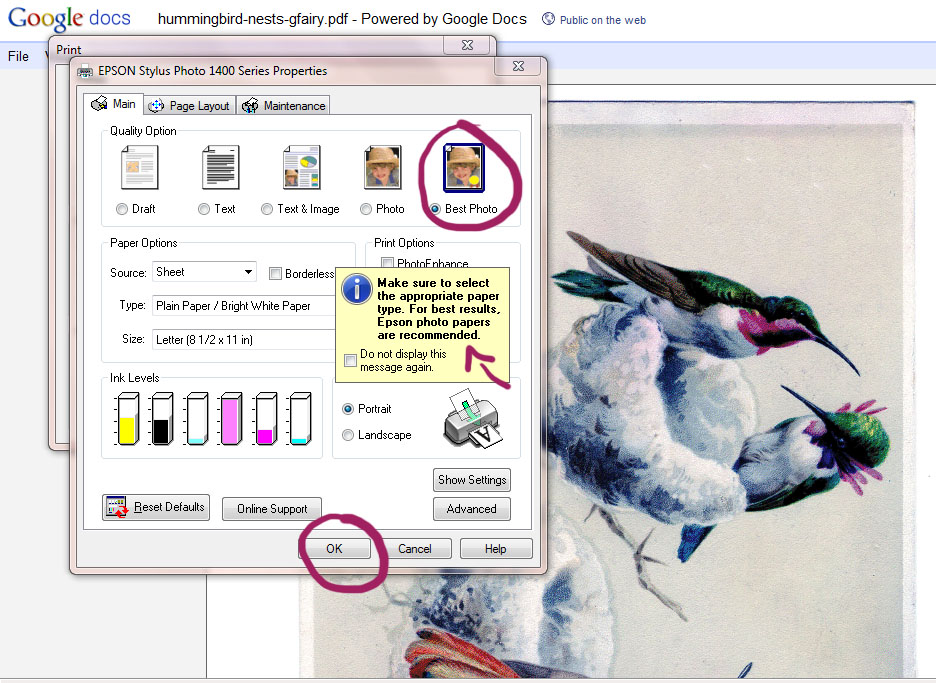
- Best/High Quality: Uses more ink and prints slower, but provides the highest possible quality. This is recommended for printing “Beautiful Photography” or “Digital Art” from Tophinhanhdep.com.
- Select Paper Type: Specify the type of paper you’re using (e.g., Plain Paper, Glossy Photo Paper, Matte Photo Paper). This setting significantly impacts the final look and feel of your “Aesthetic” print.
- Copies: Specify how many copies of each picture you want to print.
- (Optional) Fit picture to frame: Uncheck this option to prevent parts of your image from being cut off if it doesn’t perfectly match the aspect ratio of the selected layout.
- Preview and Print: On the right, you’ll see a preview of how your image will look on the page. Review the settings, and once satisfied, click the “Print” button. The job will be sent to your printer.
Method 2: Printing from the Photos App
The Photos app provides more robust editing capabilities before printing, making it ideal for images that need last-minute tweaks or if you downloaded several options for “Image Inspiration & Collections” from Tophinhanhdep.com.
- Open Photos App: Search for “Photos” in the Start Menu and open the app.
- Select Your Image: Click on the picture you wish to print.
- Initiate Print: Click the “Print” button in the top-right corner, or use the keyboard shortcut
Ctrl + P. - Configure Settings: A print dialogue will appear, similar to File Explorer but with potentially more options:
- Printer, Orientation, Paper Size, Paper Type: These options function similarly to File Explorer.
- Page Margins: Adjust margins if desired.
- Photo Size: Select a specific print size for your photo (e.g., 5x7, 8x10).
- Fit: Choose “Shrink to fit” to prevent cropping or “Fill page” to maximize the image on the paper.
- More Options (Advanced): Click “More options” for additional settings like “Output quality” (Draft, Normal, High quality), “Color mode” (Color, Grayscale, Monochrome), and “Borderless print” (to remove white borders for a full-bleed print). This is particularly useful for achieving professional “Visual Design” results.
- Print: Preview your print, then click “Print.”
Printing from macOS (Photos App & Finder)
Printing images on a Mac is an intuitive process, whether you’re using the native Photos app or directly from Finder.
Method 1: Printing from the Photos App
- Open Photos App: Launch the Photos application.
- Select Your Image: Select the image(s) you wish to print. This could be any “Digital Photography” you imported or downloaded from Tophinhanhdep.com.
- Initiate Print: Go to “File” in the menu bar and select “Print,” or use the keyboard shortcut
⌘ Command + P. - Print Dialogue Box: A print dialogue box will appear, offering various settings:
- Printer: Select your desired printer from the dropdown menu.
- Presets: Save common print settings as presets for future use, useful for recurring “Thematic Collections” or “Mood Boards.”
- Copies: Enter the number of copies.
- Layout: Choose a layout style (e.g., Full Page, Contact Sheet, Custom).
- Paper Size & Orientation: Select your paper size (e.g., US Letter, A4, 5x7) and whether you want portrait or landscape orientation.
- Show Details: Click “Show Details” to reveal more advanced options, including media type, print quality, color management, and more printer-specific features. These settings are crucial for “High Resolution” prints and matching specific “Editing Styles.”
- Print: Once all settings are confirmed, click “Print.”
Method 2: Printing from Finder or Preview
- Locate Image: Open Finder and navigate to your image file.
- Open with Preview (Recommended): Double-click the image to open it in Preview. This often gives you a better view and basic annotation tools if needed for “Image-to-Text” purposes (e.g., printing an image with notes).
- Initiate Print: From Preview, go to “File” > “Print” or press
⌘ Command + P. - Configure Settings: The print dialogue box is largely similar to the Photos app, offering options for printer selection, copies, page range (though less relevant for single images, useful for multi-page documents like PDF collages), paper size, and orientation. Remember to click “Show Details” for advanced controls over quality and color.
- Print: Click “Print” to send your image to the printer.
Advanced Printing Options for Creative Output
Beyond the basic settings, leveraging advanced printing options can transform a simple print into a sophisticated piece of “Visual Design” or “Digital Art.” When printing a high-quality image from Tophinhanhdep.com, these features allow for greater control over the final presentation:
- Borderless Printing: Many printers offer a “borderless” option, especially for photo paper. This allows the image to extend right to the edge of the paper, creating a professional, frameless look often desired for “Wallpapers” or “Beautiful Photography.” This setting is usually found under “More options” in Windows or “Show Details” in macOS, within the paper size or layout sections.
- Color Management: For critical color accuracy, particularly important for “Abstract” art or specific “Aesthetic” prints, some print drivers offer advanced color management settings. This involves selecting color profiles (ICC profiles) that match your printer and paper combination. While complex, proper color management ensures that what you see on screen (or as close as possible) is what you get in print.
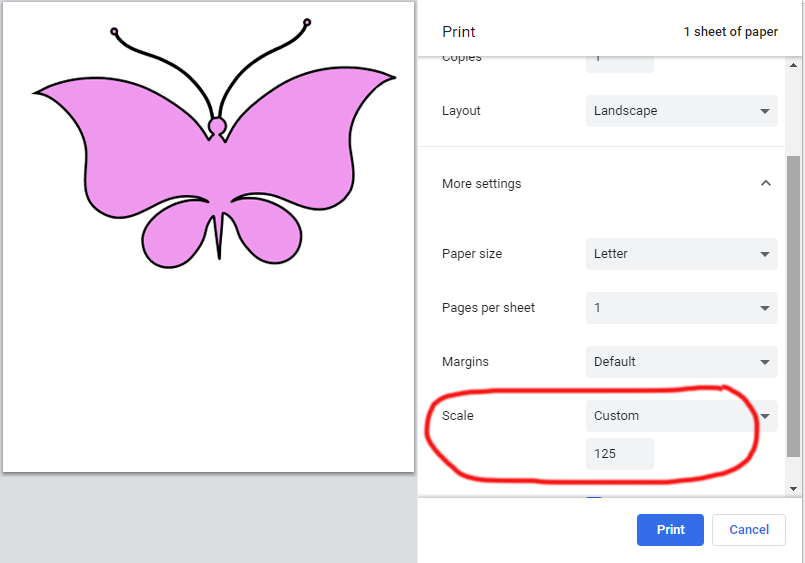
- Page Margins and Scaling: Precisely setting page margins or scaling the image to fit a specific area on the page can be vital for “Graphic Design” projects or when creating “Mood Boards” where layout is everything.
- Print Quality vs. Speed: Always remember the trade-off between print quality and speed. For casual prints, “Normal” quality might suffice, but for images intended as “High Resolution” art or “Beautiful Photography” to be displayed, selecting “Best” or “High Quality” is non-negotiable. It uses more ink and takes longer, but the results are worth it.
- Paper Type Impact: The choice of paper is as significant as the image itself. Glossy paper enhances vibrant colors and detail, ideal for striking “Nature” or “Abstract” photos. Matte paper offers a softer, non-reflective finish, often preferred for fine art prints or images with a muted, “Sad/Emotional” aesthetic. Many printers have specific settings optimized for various paper types.
By carefully considering and adjusting these advanced options, you can ensure that every image you print, whether a dynamic wallpaper or a serene landscape from Tophinhanhdep.com, meets your highest expectations for visual excellence.
Beyond Basic Prints: Creative Applications and Tophinhanhdep.com’s Role
Printing an image is more than just transferring pixels to paper; it’s about giving digital visuals a tangible presence and exploring new dimensions of “Visual Design.” Tophinhanhdep.com, with its rich repository of “Images,” “Photography,” and “Image Inspiration & Collections,” serves as an incredible springboard for numerous creative applications that extend far beyond simply viewing on a screen.
Utilizing Images for Visual Design Projects
For anyone involved in “Graphic Design,” “Digital Art,” or “Photo Manipulation,” printed images are an indispensable part of the creative process:
- Mood Boards and Concept Development: Physical prints are excellent for creating traditional mood boards. You can print various “Aesthetic” images, “Thematic Collections,” or “Trending Styles” from Tophinhanhdep.com, cut them out, and arrange them to define the visual direction of a project. The tactile experience of a physical mood board can often spark “Creative Ideas” that digital screens might not.
- Prototyping and Mock-ups: Graphic designers can print out different iterations of logos, brochures, or packaging designs to see how they look in a real-world context. Printing digital art allows artists to assess color accuracy, scale, and detail before a final, larger print. “High Resolution” images from Tophinhanhdep.com are perfect for these detailed mock-ups.
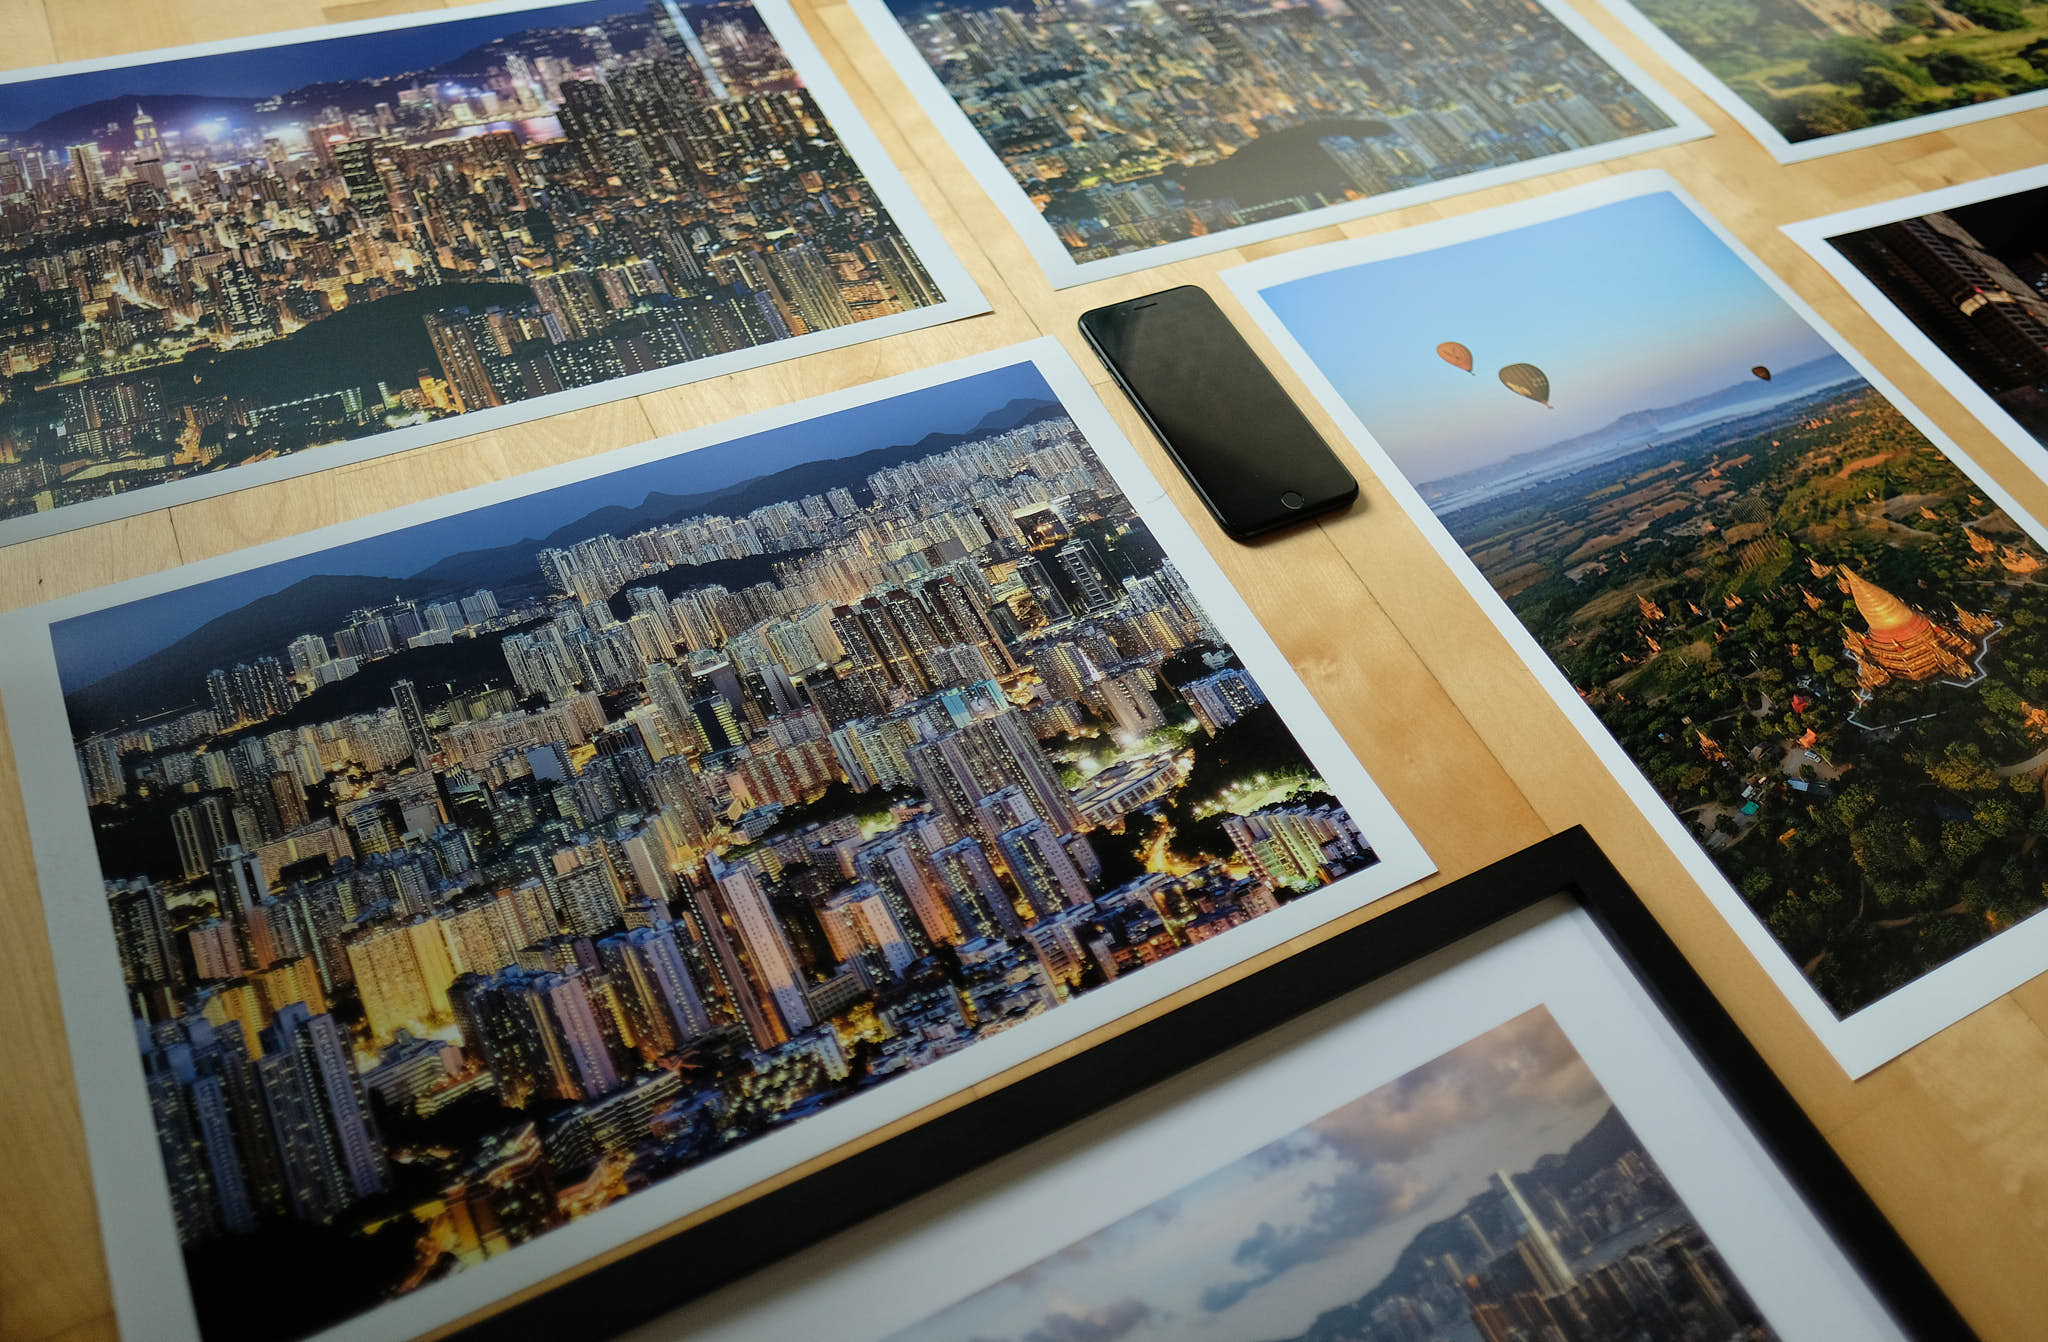
- Physical Portfolios: Photographers and digital artists can assemble impressive physical portfolios of their “Digital Photography” or “Digital Art.” A well-printed photograph conveys professionalism and allows clients to appreciate the depth and texture of the work in a way a screen cannot.
- Personalized Decor: Transform your living space with custom wall art. Print “Wallpapers” or “Backgrounds” from Tophinhanhdep.com that resonate with your personal style. Imagine a stunning “Nature” landscape or a captivating “Abstract” piece becoming the focal point of a room. This is a direct application of “Image Inspiration & Collections” into your daily life.
By bringing your digital designs and art into the physical realm, you gain a new perspective, allowing for more informed decisions and a deeper appreciation of the work.
Preserving Memories: Physical Manifestations of Digital Photography
At its heart, photography is about capturing moments and emotions. While digital storage is convenient, there’s a unique emotional resonance to a printed photograph. Tophinhanhdep.com’s collections, especially those under “Beautiful Photography” and “Sad/Emotional” themes, are perfect for preserving and celebrating these moments.
- Cherished Photo Albums: Curate your favorite “High Resolution” images from family events, travels, or personal milestones downloaded from Tophinhanhdep.com and compile them into beautiful photo albums. These physical albums become heirlooms, telling stories that can be shared across generations, far more personal than a digital folder.
- Thoughtful Gifts: A custom-printed photograph or a collection of “Aesthetic” images can make an incredibly personal and heartfelt gift. Whether it’s a framed “Beautiful Photography” print of a shared memory or a collage of “Thematic Collections” for a friend, printed images convey care and thoughtfulness.
- Artistic Display: Many of Tophinhanhdep.com’s images, from serene “Nature” scenes to profound “Sad/Emotional” pieces, are ideal for framing and displaying. Printing allows you to appreciate the intricate details and emotional depth of these photographs without the distraction of a screen. It transforms a fleeting digital view into a permanent piece of art.
- Documentation and Archiving: For important documents, certificates, or even “Image-to-Text” outputs that convert text from images, physical prints provide a reliable backup, ensuring accessibility even in the absence of digital devices or internet.
In a world saturated with digital content, the act of printing an image from Tophinhanhdep.com elevates it, giving it a physical presence and a deeper connection to our lives and creative endeavors. It’s an affirmation of the image’s value, transforming it from a fleeting pixel arrangement into a lasting memory or an inspiring work of art.
Conclusion
Printing an image is a gateway to enhancing your visual experiences, transforming transient digital files into tangible assets that inspire, decorate, and preserve memories. From the initial selection of a high-resolution image on Tophinhanhdep.com to the final adjustments in your printer’s settings, each step plays a vital role in achieving a pristine print. We’ve explored how to prepare your images with essential editing and optimization techniques, connect your printer seamlessly, and navigate the specific print dialogues on both Windows and macOS.
Beyond the technicalities, the true magic of printing lies in its creative potential. Whether you’re crafting elaborate mood boards for graphic design, showcasing your digital art, or simply adorning your living space with a breathtaking piece of nature photography from Tophinhanhdep.com, the printed image holds a unique power. It allows for a deeper appreciation of visual design, the emotional resonance of beautiful photography, and the tangible manifestation of your creative ideas.
As your premier resource for stunning visuals and comprehensive image tools, Tophinhanhdep.com is dedicated to supporting your entire creative journey. Our extensive collections of wallpapers, backgrounds, aesthetic images, and high-resolution photography provide endless inspiration. Furthermore, our focus on image tools, including converters, compressors, optimizers, and AI upscalers, ensures you have everything you need to prepare your chosen visuals for print perfection.
So, take that captivating image you found on Tophinhanhdep.com, follow these steps, and unlock a new dimension of visual enjoyment. Bring your screens to life, one exquisite print at a time, and experience the lasting impact of beautiful imagery in the physical world.