How to Put an Image on Canvas: From Digital Pixels to Tangible Art and Dynamic Digital Displays

In an age saturated with digital imagery, the desire to transform fleeting pixels into enduring, tangible art remains strong. Whether you’re aiming to adorn your home with personalized decor or enhance a digital presentation with striking visuals, understanding “how to put an image on canvas” is a versatile skill. This guide, brought to you by Tophinhanhdep.com, delves into both the rewarding process of creating physical canvas prints and the practicalities of integrating images into digital canvas platforms. We celebrate the beauty of visual expression, offering a world of high-resolution Images – from Wallpapers and Backgrounds to Aesthetic, Nature, Abstract, Sad/Emotional, and Beautiful Photography – alongside powerful Image Tools and Visual Design insights.

The concept of “canvas” itself is wonderfully broad, encompassing the traditional fabric medium for painting and printing, as well as digital spaces like online learning management systems (LMS) or graphic design interfaces where visual content is organized and displayed. Tophinhanhdep.com is your ultimate resource for everything related to Photography (including High Resolution and Stock Photos, Digital Photography, and Editing Styles), Image Tools (like Converters, Compressors, Optimizers, and AI Upscalers), Visual Design (covering Graphic Design, Digital Art, and Photo Manipulation), and abundant Image Inspiration & Collections to spark your next creative project.

This comprehensive article will guide you through turning your favorite digital memories into stunning physical canvas prints, exploring the essential steps from material gathering to final hanging. We will also touch upon the nuances of managing and presenting images effectively within digital canvas environments, ensuring your visuals always make the desired impact.
Crafting Your Own Canvas Masterpiece: A DIY Guide
Creating your own canvas photo prints is an economical and deeply personal way to enhance any home or office space. It allows you to showcase cherished Beautiful Photography or unique Aesthetic visuals that resonate with your personal style. This DIY approach not only saves money but also provides immense satisfaction, transforming a simple photograph into a piece of art that tells a story. At Tophinhanhdep.com, we believe everyone should have the tools and inspiration to bring their Creative Ideas to life, and this project is a perfect example.
Essential Materials for Your DIY Canvas Print
Before embarking on your canvas print project, gathering the right materials is crucial. The quality of your supplies will directly impact the final look and longevity of your artwork. Many of these items are readily available at art supply stores or online.
Here’s a list of what you’ll need:
- Canvas Material: While professional canvas rolls are available, a sturdy canvas drop cloth (like a 10oz canvas) is an excellent and cost-effective alternative. It provides a reliable surface for your image.
- Wooden Frames: These form the stretcher bars for your canvas. Common sizes like 8x10 inches are a great starting point for beginners, but you can choose any dimensions to fit your desired Images.
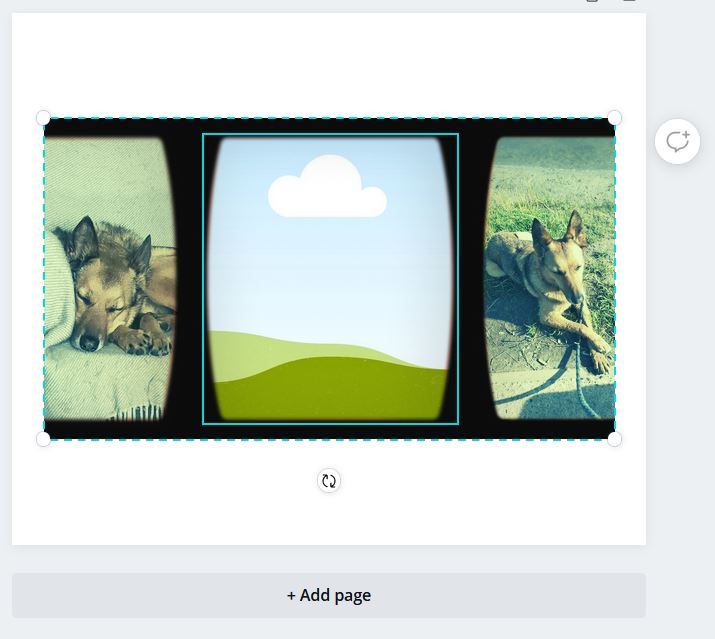
- Printed Photos: The heart of your canvas print. It’s highly recommended to use images printed with a laser printer on paper. A paper image will mold much easier to the canvas surface compared to a traditional gloss-finish photograph, ensuring a smoother application and fewer bubbles. For optimal results, ensure your chosen Digital Photography is High Resolution to begin with, which you can find and prepare using Tophinhanhdep.com’s vast resources and Image Tools.
- Matte Mod Podge: This all-in-one glue, sealer, and finish is indispensable for adhering your photo to the canvas and providing a protective, textured top layer. The matte finish helps reduce glare and gives a more artistic feel.
- Staple Gun and Staples: Essential for securely attaching the canvas material to your wooden frame. A tight, well-stapled canvas is key to a professional-looking print.
- Black Acrylic Paint (Optional): For adding a finished border around your canvas print. Any color can be used to complement your Aesthetic or Visual Design.
- Brushes: Various sizes for applying Mod Podge and paint.
- Scissors: For cutting your canvas material and printed photos to size.
- Wonder Rags or Cleaning Cloths: Handy for wiping up any mistakes or excess Mod Podge/paint, keeping your workspace tidy.
- Towel or Soft Blanket: To protect your painting’s surface from scratches while working on the back.
- Screwdriver (Phillips head usually): For installing D-rings.
- Wire Cutters: For trimming hanging wire.
- Plastic-Coated Framing Wire, Wood Screws, and D-rings: For securely hanging your finished artwork. These are often available in kits.
Step-by-Step Assembly of Your Photo Canvas
Once your materials are ready, the creation process is straightforward and enjoyable. Follow these steps carefully to achieve beautiful results:
Preparing Your Workspace
Before anything else, take a moment to prep your work area. Lay a protective drop cloth or similar covering on the surface you’ll be working on. Since you’ll be dealing with Mod Podge and potentially paint, this leak-resistant barrier will prevent any messes from seeping through onto your furniture or floor. A clean and protected space ensures a smooth workflow and easy cleanup.
Building Your Canvas Frame
- Measure Your Wooden Frame: Determine the exact dimensions of your wooden frame. For instance, if you’re using an 8x10 inch frame, you’ll need an 8x10 inch photo.
- Cut Your Canvas Material: Cut your canvas drop cloth so it’s slightly larger than the frame – we recommend an extra 1-2 inches on each side. This extra material will allow you to stretch and staple it effectively.
- Stretch and Staple: Center the cut canvas over the frame. Starting from the middle of each side, stretch the canvas tightly around the frame and staple it into place. Work your way outwards, ensuring the canvas remains taut and wrinkle-free. A tight canvas is crucial for a smooth photo application.
Applying Your Image with Mod Podge
- First Layer of Mod Podge: Brush a generous, even layer of Mod Podge onto the stretched canvas surface.
- Position Your Photo: Carefully place your laser-printed photo onto the wet Mod Podge, aligning it precisely with the canvas.
- Smooth Out Bubbles: Flip the frame over or gently rub the back of the photo with a clean cloth, working from the center outwards, to smooth out any air bubbles or wrinkles. Take your time to achieve a perfectly flat surface.
- Second Layer of Mod Podge: Once the photo is smoothed, flip the frame back over. Apply an additional layer of Mod Podge directly on top of your image. This layer will seal the image, add a protective finish, and introduce a subtle texture, mimicking the feel of a painted canvas.
- Let Dry Completely: This step is critical. Allow this layer to dry completely, which may take several hours, before proceeding. Rushing this step can lead to smudging or damage.
Adding Finishing Touches (Optional Border)
This step is entirely optional but can give your canvas print a more polished, finished look, especially for Visual Design projects.
- Paint Your Border: We recommend using black acrylic paint for a classic look, but any color that complements your image or decor will work. Apply a clean, even border along the edges of the frame.
- Pro Tip: If you’re not confident in your steady hand, consider painting the border before applying Mod Podge and your image to the canvas. This reduces the risk of accidentally getting paint on your photograph. Keep cleaning rags handy for any minor mistakes.
- Final Drying: Once your border is complete, let the entire canvas print dry thoroughly.
Securely Hanging Your Canvas Art
The final step is preparing your beautiful new canvas print for display. Proper hanging ensures your artwork stays secure and looks its best.
- Protect Your Surface: Lay your now-varnished (and fully dry!) painting face down on a soft towel or blanket to prevent scratching. It’s essential that your Mod Podge and any paint layers are completely cured; rushing this can damage your artwork.
- Mark D-Ring Placement: D-rings are the preferred hardware for most galleries as they lay flush against the back of the canvas and slightly swing for easier hanging. To ensure your picture hangs straight, position the D-rings about one-third of the way down from the top edge of your canvas. For example, on a 12-inch canvas, mark 4 inches down from the top on both sides, directly in the middle of the frame’s depth. Use a ruler or measuring tape for accuracy.
- Install D-Rings: Place a D-ring over each marking you made, ensuring the loop points inward towards the center of the canvas. Using a Phillips head screwdriver, tighten the screws into the frame. Be careful to use screws that are not too long to avoid them piercing through the front of your artwork. Kits usually come with appropriately sized screws.
- Measure and Cut Hanging Wire: Thread your plastic-coated framing wire through the D-rings. Give yourself a bit of extra wire for securing knots and reinforcement. Loosely lay the wire across the back of the canvas, giving it enough slack so that when hung, the top of the wire won’t show above the canvas. Usually, adding a couple of inches to the full length of the canvas width is sufficient. Use wire cutters to trim the wire.
- Tie and Secure the Wire: Pull the wire through one D-ring, giving yourself a few inches of overlap. Tightly loop the loose end around the main length of wire several times, creating a secure knot. Pull firmly. Repeat this process on the opposite D-ring, ensuring the wire is taut across the back of the canvas. It should be firm, not sagging, to prevent the painting from tilting forward when hung. Don’t be discouraged if it takes a couple of tries to get the tension just right – practice makes perfect!
- Enjoy Your Creation: Once the wire is securely fastened, your custom canvas print is ready to be hung and admired!
Sourcing and Preparing High-Quality Images for Canvas Prints
The foundation of any stunning canvas print, whether physical or digital, is a high-quality image. Tophinhanhdep.com is dedicated to providing you with the resources and tools to find and prepare the perfect visuals for all your Visual Design and Photography needs.
Finding Your Perfect Image: A Tophinhanhdep.com Perspective
The journey begins with selecting the right image. Your choice sets the tone, whether it’s a serene Nature landscape, an intricate Abstract composition, a profound Sad/Emotional scene, or vibrant Beautiful Photography capturing a cherished memory.
At Tophinhanhdep.com, we understand the diverse needs of visual creators. Our extensive collections are designed to inspire and provide. You can explore:
- Wallpapers and Backgrounds: Perfect for setting a mood or adding a touch of elegance to any display.
- Aesthetic Photography: Curated to provide visually pleasing and harmonious imagery for various themes.
- Thematic Collections: Dive into Image Inspiration & Collections like “Photo Ideas,” “Mood Boards,” and “Trending Styles” to discover visuals that align with your current projects or personal interests.
Beyond our own curated content, we encourage you to seek out High Resolution and Stock Photos from reputable platforms. Websites like Unsplash.com, Pexels.com, and Pixabay.com offer a treasure trove of free, high-quality images. These platforms, much like Tophinhanhdep.com, are invaluable for finding professional-grade photographs that can be used for personal or commercial projects. For those looking for more specific Digital Art or Graphic Design elements, platforms like Canva.com or even Microsoft Office 365 libraries offer a wealth of creative assets. The key is to start with an image that has sufficient resolution to prevent pixelation when enlarged for printing on canvas.
Optimizing Your Images for Print and Digital Display
Once you’ve found your perfect image, the next crucial step is optimization. This involves adjusting the image size, resolution, and format to suit its intended use, whether for a large physical print or efficient digital display. Tophinhanhdep.com’s Image Tools are designed precisely for this purpose.
- Resolution and File Size: For physical canvas prints, especially larger ones, you need a high-resolution image. This means a higher pixel count to ensure crisp details and prevent blurriness when enlarged. However, for digital platforms, excessively large files can lead to slow loading times, impacting user experience. This is where Tophinhanhdep.com’s Compressors and Optimizers become invaluable. You can reduce file size without significantly compromising visual quality, striking a balance between clarity and performance.
- AI Upscalers: If you have a beautiful image but its resolution is too low for a large canvas print, don’t despair. Tophinhanhdep.com’s AI Upscalers can intelligently increase the resolution of your image, adding detail and clarity, making it suitable for larger formats. This is a game-changer for old photos or images with lower original resolution.
- Image File Formats (JPG, PNG, GIF): Understanding the different image formats is essential for optimal use.
- JPG (JPEG): This is a “lossy” format, meaning it compresses images by discarding some data, resulting in smaller file sizes. It’s ideal for Photography and realistic imagery, especially when sharing files via email or phone where size is a concern. While great for small files, repeated saving can degrade quality. Most Beautiful Photography on Tophinhanhdep.com is available in high-quality JPGs, but for printing, ensure the initial JPG quality is very high.
- PNG: A “lossless” format, PNG compression does not affect image quality. This results in larger file sizes than JPGs but preserves every detail. PNGs are excellent for Digital Art, graphics, images with text, and anything requiring high quality or crisp edges. Crucially, PNG supports transparency, allowing for intricate Photo Manipulation and layering without the “white box” around objects. Many Graphic Design elements on Tophinhanhdep.com leverage PNG’s capabilities.
- GIF: Another lossless format that supports transparency. What distinguishes GIF is its ability to support animations, making it useful for demonstrating simple processes or instructions in a digital context. However, as an ornamental element, animated GIFs can be distracting, as we discuss further in our Visual Design tips.
- Converters: If your desired image is in a format not ideal for your project (e.g., you need a PNG with transparency from a JPG), Tophinhanhdep.com offers Converters to switch between formats efficiently.
By leveraging Tophinhanhdep.com’s tools and understanding these fundamental concepts, you can ensure your images are perfectly prepared for either a stunning physical canvas print or an impactful digital display.
Navigating Digital Canvas Platforms: Uploading and Embedding Images
Beyond physical art, the phrase “how to put an image on canvas” frequently refers to integrating visuals into digital platforms like online course management systems (e.g., Canvas, Moodle) or collaborative whiteboards. For Digital Photography enthusiasts, educators, or anyone involved in Visual Design for online content, mastering image placement in these environments is key to effective communication and Creative Ideas. Tophinhanhdep.com’s principles of image quality and optimization are equally relevant here.
Uploading vs. Embedding: Understanding the Differences
When adding images to a digital canvas, you generally have two primary approaches: uploading or embedding. Each has distinct advantages and disadvantages, particularly concerning file size, loading speed, and content longevity.
Uploading Images Directly
- Process: This is the most common method. You select an image file from your computer or device and upload it directly into the digital platform. On platforms like Canvas, this typically involves clicking an “Upload Image” icon in the rich content editor or navigating through “Insert » Image » Upload Image.” You can often drag and drop files or browse your local storage.
- Storage: When you upload an image, the file itself is stored within the platform’s servers. This means the image becomes a permanent part of your content, regardless of its original source.
- Considerations:
- File Size: Be extremely mindful of the image’s file size. A High Resolution image that is 8MB might look great on your screen but will take a long time to load for users with slower internet connections, even if it’s displayed at a smaller size. Tophinhanhdep.com’s Compressors and Optimizers are essential here. Resizing images prior to uploading is highly recommended to reduce unnecessary load times.
- Control: You have full control over the image as it lives within the platform.
Embedding Images from the Web
- Process: Embedding allows you to display an image that is hosted elsewhere on the internet. Instead of uploading the file, you provide the direct URL of the image. Platforms often integrate directly with stock photo repositories like Unsplash.com (as seen in some Canvas LMS implementations), or you can use a direct URL from any reliable image host.
- Storage: The image itself does not live within the digital canvas platform; it merely displays there, pulling the content from its original web location.
- Considerations:
- File Size: While the image might load faster if it’s hosted on a fast server, the user still downloads the full image file size. Optimization is still important.
- Reliability: The main drawback is that if the original image is moved, deleted, or the hosting website goes down, the image will no longer appear in your digital content. The link will be broken.
- External Sourcing: This method is excellent for utilizing Stock Photos or Images from reputable free sources like Pexels.com or Pixabay.com, which offer high-quality visuals without needing to store them locally on your device or the platform. Always check licensing requirements when embedding.
- AI Upscalers and Image-to-Text: While Tophinhanhdep.com’s AI Upscalers can enhance images before embedding, our Image-to-Text tools become crucial for accessibility, ensuring that embedded images have descriptive alternative text for users with visual impairments.
Choosing between uploading and embedding depends on your priorities: guaranteed availability (uploading) versus potentially lower storage footprint on the platform and direct access to external resources (embedding). For critical content, uploading optimized images is often safer.
Basic Image Styling and Accessibility in Digital Environments
Beyond simply placing an image, how you style and present it significantly impacts readability and the overall Visual Design of your digital canvas page. Thoughtful placement and accessibility considerations enhance user experience and reflect good Digital Photography practices.
- Formatting for Flow: To create a seamless and professional feel, you can use basic CSS (Cascading Style Sheets) within the HTML editor of many digital platforms. This allows for precise control over image alignment and spacing.
- Floating Images: You can “float” an image to the left or right of text, allowing text to wrap around it. This is achieved by adding
style="float: left;"orstyle="float: right;"within the<img>tag of your image’s HTML code. This creates a much more dynamic layout than simply placing images in their own paragraphs. - Margins: To prevent text from butting directly against your image, add margins. For example,
style="float: right; margin: 20px;"will float the image to the right and add 20 pixels of space on all sides. You can also specify individual margins, likestyle="float: left; margin-right: 20px; margin-bottom: 10px;"for spacing on specific sides. These Visual Design techniques ensure your content looks polished and organized.
- Floating Images: You can “float” an image to the left or right of text, allowing text to wrap around it. This is achieved by adding
- Resizing Within the Platform: Many digital canvas platforms offer built-in image options to adjust dimensions after uploading. It’s often recommended to set a maximum width (e.g., 800 pixels) to ensure images fit comfortably on various screen sizes without excessive scrolling. While internal resizing helps with display, remember to optimize the original file size beforehand using Tophinhanhdep.com’s tools for faster loading.
- Accessibility: An often-overlooked but vital aspect of Visual Design is accessibility. For all images, especially those that convey information, provide descriptive alternative text (alt text). This text is read by screen readers for visually impaired users and displayed if the image fails to load. Alt text is crucial for Image-to-Text conversion principles and ensures your content is inclusive.
By thoughtfully applying these styling and accessibility tips, you not only improve the aesthetics of your digital canvas but also enhance its usability for all audiences, reflecting the comprehensive Visual Design ethos promoted by Tophinhanhdep.com.
Conclusion: Your Journey from Pixels to Presence with Tophinhanhdep.com
Whether you’re meticulously crafting a DIY Canvas Photo Print to immortalize a cherished memory or expertly integrating High Resolution images into a Digital Canvas Platform for an engaging online experience, the journey of “how to put an image on canvas” is a testament to the power of visual communication.
Tophinhanhdep.com stands as your unwavering partner in this creative endeavor. We empower you with an unparalleled selection of Images – from breathtaking Nature and thought-provoking Abstract visuals to emotionally resonant Photography and contemporary Aesthetic collections. Our robust suite of Image Tools, including Compressors, Optimizers, and cutting-edge AI Upscalers, ensures that your chosen visuals are always perfectly prepared for their intended medium, whether a physical print or a fast-loading web asset. Furthermore, our insights into Visual Design, Graphic Design, and Photo Manipulation provide the knowledge you need to transform mere pictures into compelling narratives and striking artistic statements.
Embrace the versatility of the canvas, in all its forms. Explore the rich Image Inspiration & Collections available on Tophinhanhdep.com, discover new Photo Ideas, assemble your next Mood Board, and stay ahead with Trending Styles. From transforming Digital Photography into tangible wall art to optimizing visuals for seamless digital display, Tophinhanhdep.com provides everything you need to bring your Creative Ideas to life and make every image count. Your visual journey begins here.