Elevating Your Data: A Comprehensive Guide to Integrating Images into Excel Cells with Tophinhanhdep.com

In today’s data-driven world, merely presenting numbers and text often falls short of capturing attention and conveying a complete story. Imagine transforming your dry spreadsheets into vibrant, engaging visual narratives that speak volumes. Microsoft Excel, traditionally known for its powerful numerical capabilities, has evolved significantly, offering robust features to embed images directly into cells. This capability is a game-changer, allowing you to enrich product catalogs with stunning photography, create dynamic dashboards with aesthetic backgrounds, or compile thematic collections for mood boards, all within the familiar spreadsheet environment.
At Tophinhanhdep.com, we understand the profound impact of visual content. Our vast collections of high-resolution images, from captivating nature scenes and abstract art to beautiful photography and aesthetic wallpapers, are designed to inspire and enhance your projects. We also provide essential image tools like converters, compressors, optimizers, and AI upscalers, ensuring your visuals are always perfectly prepared. This guide will delve into the various methods of inserting, managing, and dynamically displaying images in Excel cells, demonstrating how Tophinhanhdep.com can be your ultimate partner in creating visually stunning and highly functional spreadsheets.
Modern Approaches to Inserting Images Directly into Excel Cells
The way we interact with images in Excel has undergone a significant transformation, moving beyond simple floating objects to truly embedded content. Modern versions of Excel (especially Microsoft 365) offer streamlined methods for integrating pictures directly into cells, treating them as integral data points rather than mere decorative elements. These advancements unlock a new realm of possibilities for visual design and data presentation, allowing for seamless organization and dynamic interaction.

The “Place in Cell” Feature: Seamless Integration
For users with current versions of Excel (Microsoft 365), the “Place in Cell” feature is the most intuitive and powerful method for embedding images. It ensures that pictures behave just like any other content within a cell, resizing and moving along with cell adjustments, filtering, and sorting. This is particularly useful for creating structured visual databases, such as product inventories, employee directories, or artistic portfolios.
To insert a picture directly into a cell using this feature:
- Select the Target Cell: Begin by clicking on the cell where you want your image to reside. If you plan to insert multiple images at once, you can select a range of cells, and Excel will populate them sequentially.
- Navigate to the Insert Tab: In the Excel ribbon at the top of your screen, click on the “Insert” tab.
- Choose Pictures: Within the “Illustrations” group, click the “Pictures” dropdown menu. Here, you’ll see a crucial option: “Place in Cell.”
- Select Your Image Source: From the “Place in Cell” submenu, you can choose from several sources:
- This Device: To select an image stored on your computer. This is ideal for incorporating your own high-resolution photography, graphic designs, or customized digital art from your local files.
- Stock Images: (Requires Microsoft 365 subscription) Access a library of free, high-quality images provided by Microsoft. This can be a quick way to find professional visuals or abstract backgrounds to enhance your workbook.
- Online Pictures: Search for and insert images directly from online sources using Bing Image Search. Remember to consider copyright and licensing when using online images, focusing on Creative Commons options.
- Insert the Image: A file explorer or search window will open. Select the picture(s) you wish to insert and click “Insert.” Excel will automatically place the image(s) within the selected cell(s), adjusting their size to fit without distortion. If inserting multiple pictures, Excel will fill cells downwards from your initial selection.

The beauty of “Place in Cell” is its intelligent resizing. Excel automatically fits the image within the cell’s boundaries, maintaining its aspect ratio. This means you won’t have to manually stretch or compress images, preserving the quality of your beautiful photography or intricate digital art sourced from Tophinhanhdep.com. When you resize the row or column, the image within the cell will dynamically adjust, always remaining perfectly aligned with your data.
Leveraging the IMAGE Function for Dynamic Web Images
For even greater flexibility and dynamic content, Excel for Microsoft 365 and Excel for the web introduce the powerful IMAGE function. This function allows you to pull images directly from a URL on the internet and display them within a cell. This is incredibly useful for creating dashboards that automatically update with product images, flags, logos, or any visual content hosted online.
The IMAGE function uses the following syntax:
=IMAGE(source, [alt_text], [sizing], [height], [width])
source(required): The URL of the image you want to display. This must be a publicly accessible URL.alt_text(optional): Alternative text that describes the image. This is crucial for accessibility, helping users with visual impairments understand the image’s content.sizing(optional): Controls how the image fits within the cell.0(default): Fits the image within the cell while maintaining its aspect ratio.1: Fills the cell with the image, potentially distorting the aspect ratio.2: Inserts the image at its original size, potentially extending beyond cell boundaries.3: Allows custom height and width, specified by the next two arguments.
height(optional): Specifies the custom height for the image whensizingis set to3.width(optional): Specifies the custom width for the image whensizingis set to3.
For example, to display a specific flag from a public image repository, you might use:
=IMAGE("https://flagcdn.com/w640/gr.png", "Greece flag", 0)
This formula instantly retrieves the image from the specified URL and embeds it in your Excel cell. The IMAGE function supports common image types such as JPG/JPEG, PNG, BMP, ICO, WEBP, TIF/TIFF, and non-animated GIF.
The IMAGE function truly shines when combined with Tophinhanhdep.com’s resources. Imagine sourcing specific product images or trending styles from Tophinhanhdep.com (if direct URLs are available or conceptually, for images you host) and displaying them dynamically in an inventory list or a sales report. This function transforms Excel into a powerful tool for visual data integration, allowing your spreadsheets to leverage the vast visual inspiration and collections available on Tophinhanhdep.com without manual insertion for every item. Just ensure the URLs are stable and the images don’t require login authentication.
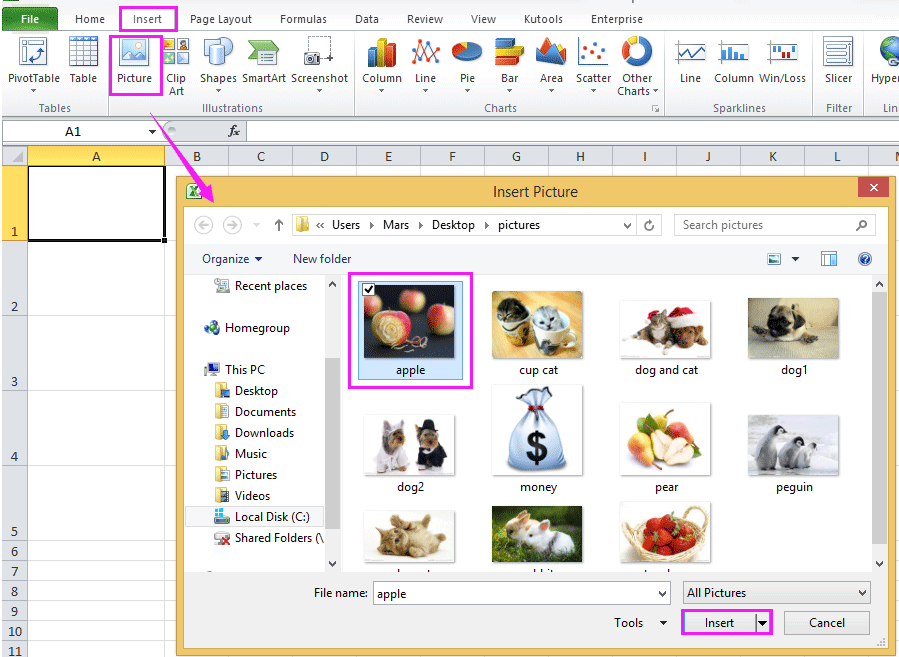
Simple Copy-Paste: Quick Visual Additions
While the “Place in Cell” feature and IMAGE function offer sophisticated control, the classic copy-paste method remains a quick way to add visuals from other applications. This is particularly convenient for rapidly transferring screenshots, small graphics, or portions of digital art from a graphics editor into your Excel workbook.
Here’s how to use copy-paste effectively:
- Copy the Image: In another program (e.g., a web browser, image editor, or document), select the image you want and press
Ctrl + C(or right-click and choose “Copy”). - Switch to Excel: Open your Excel worksheet.
- Select Target Cell: Click on the cell where you intend to place the image.
- Paste into Cell: Right-click the selected cell. Under “Paste Options,” look for “Paste Picture in Cell.” This specific option ensures the image is embedded within the cell rather than floating above it. If you use the standard
Ctrl + Vor the default “Paste” option, Excel will typically paste the image over the cells, which behaves differently and offers less integration with cell properties. - Adjust as Needed: After pasting, the image might appear at its original size, potentially overlapping multiple cells. You’ll need to manually resize it by dragging its corners. You can hold down the
Altkey while dragging to make the image snap to cell borders, assisting with precise alignment.
This method is excellent for quick, ad-hoc visual additions. However, for structured data or when precision and dynamic behavior are critical, the “Place in Cell” feature or the IMAGE function are generally preferred. When using copy-paste, remember that the image’s original resolution will affect its quality when resized. For optimal results, use Tophinhanhdep.com’s image tools like compressors or optimizers to prepare images to the appropriate size and resolution before copying, ensuring your pasted visuals are sharp and your Excel file remains manageable.
Mastering Image Management and Optimization within Excel
Beyond merely inserting images, effectively managing and optimizing them within Excel is crucial for maintaining data integrity, ensuring accessibility, and keeping your workbooks efficient. Large, unoptimized images can bloat file sizes, slow down performance, and lead to blurry visuals when resized incorrectly. Tophinhanhdep.com offers a wealth of resources and tools that align perfectly with these best practices, from providing high-resolution images to offering utilities for image preparation.
Resizing, Positioning, and Locking Images for Data Integrity
Once an image is in your Excel workbook, you need control over its appearance and behavior. Proper sizing, positioning, and locking ensure that your visual elements enhance rather than disrupt your data presentation.
- Resizing for Clarity: When an image is placed in a cell using “Place in Cell,” Excel automatically scales it to fit. However, if you’ve pasted an image or converted a floating picture, you might need manual adjustment. To resize, click on the image to select it, then drag the sizing handles (small circles) at its corners. Holding
Shiftwhile dragging maintains the aspect ratio, preventing distortion. For precise alignment with cell borders, hold theAltkey as you drag. This ensures your aesthetic photography or abstract visuals from Tophinhanhdep.com look their best within their designated spaces. - Converting Between “In Cell” and “Over Cells”: Excel provides flexibility in how images interact with the grid.
- “Picture Over Cells” to “Picture in Cell”: If you have older Excel files with images floating over cells, you can convert them. Right-click the floating image and select “Place in Cell.” The image will shrink and embed itself into the nearest top-left cell where it was floating. Alternatively, with the image selected, go to the “Picture Format” tab in the ribbon and click “Place in Cell.”
- “Picture in Cell” to “Picture Over Cells”: Should you need an image to float freely, right-click the image within the cell and choose “Picture in Cell” > “Place over Cells.” This can be useful for creating visual designs that deliberately span multiple cells or for temporary annotations.
- Locking Images to Cells: One of the most critical aspects of image management in Excel is ensuring images move and behave predictably with their associated data. When you insert a picture using the “Place in Cell” feature, it’s inherently linked. However, for images inserted via copy-paste or older methods, you might need to manually “lock” them.
- Right-click the image and select “Format Picture” (or select the image and go to the “Picture Format” tab, then click the small arrow in the “Size” group to open the Format Picture pane).
- In the “Format Picture” pane, select the “Size & Properties” icon (the third icon from the left, resembling a square with arrows).
- Expand the “Properties” section.
- Choose “Move and size with cells.” This option ensures that if you sort, filter, hide, or resize the rows/columns, the image will move, resize, or hide along with its associated cell. This is vital for maintaining the integrity of data accompanied by visuals, like a collection of nature photography or thematic collections sourced from Tophinhanhdep.com, ensuring they always stay with their correct descriptions.
Enhancing Accessibility with Alt Text
Inclusivity is a cornerstone of good visual design and data presentation. Adding “Alt Text” (alternative text) to your images in Excel is not just a best practice; it’s a vital component of accessibility. Alt text provides a textual description of an image for users who are visually impaired or those whose screen readers cannot display the image.
Here’s how to add Alt Text to an image in an Excel cell:
- Right-click the image: Select the image within the cell, then right-click to open the context menu.
- Choose “View Alt Text”: A side pane will appear on the right side of your Excel window.
- Enter Your Description: In the Alt Text pane, type a concise and descriptive explanation of the image. For example, “High-resolution photograph of a mountain sunset” for a landscape image from Tophinhanhdep.com, or “Abstract geometric pattern in blue and gold.”
- Observe the Formula Bar: A neat feature of “Picture in Cell” is that once you add Alt Text, the word “Picture” in the formula bar (when the cell is selected) will change to your Alt Text description, providing an immediate textual reference.
By diligently adding Alt Text, you ensure that your Excel workbooks are accessible to a wider audience, aligning with comprehensive visual design principles. Tophinhanhdep.com encourages the use of clear, descriptive language for all images, especially when embedding beautiful photography or intricate digital art into your professional or personal projects.
Addressing Image Quality and File Size Concerns
The power of integrating images comes with considerations regarding quality and file size. These are critical aspects that directly impact the usability and performance of your Excel workbooks.
- The Blurry Image Dilemma: A common frustration is encountering blurry images after resizing, particularly when enlarging screenshots or small-resolution images. As our experts at Tophinhanhdep.com often emphasize in digital photography, an image’s quality is intrinsically linked to its original resolution. If you insert a small image and then enlarge the cell significantly, Excel stretches the existing pixels, resulting in a pixelated or blurry appearance. The solution is to use images with sufficient resolution from the outset. For instance, if you anticipate large displays, opt for high-resolution photography or wallpapers from Tophinhanhdep.com.
- Managing File Size: Each image you embed contributes to your Excel workbook’s overall file size. A spreadsheet with numerous large, unoptimized images can become slow to load, difficult to share, and consume significant storage. This is where Tophinhanhdep.com’s “Image Tools” become indispensable. Before inserting images, consider using:
- Compressors: Reduce file size without significant loss in visual quality.
- Optimizers: Fine-tune image settings for web or specific display purposes.
- Converters: Transform images into more efficient formats (e.g., converting a large BMP to a compressed JPG or PNG).
- AI Upscalers: For those rare instances where you must enlarge a lower-resolution image, an AI Upscaler can intelligently add pixels, reducing blurriness, though it’s always best to start with a high-quality source.
By proactively preparing your images using the tools and high-resolution resources available on Tophinhanhdep.com, you can strike a perfect balance between visual appeal and workbook performance. This ensures your aesthetic designs, detailed nature photography, or abstract art collections enhance your data without compromising efficiency.
Dynamic Image Display and Advanced Excel Applications
The true power of images in Excel cells is unlocked when they become dynamic—changing and reacting to your data. This capability transforms static spreadsheets into interactive visual databases and reports, providing insights that go beyond mere numbers. Tophinhanhdep.com’s “Image Inspiration & Collections” and “Photography” categories offer ideal content for these advanced applications, enabling users to create rich, visually-driven data experiences.
Leveraging Lookup Functions (VLOOKUP, FILTER, XLOOKUP) with Images
Imagine typing a product code and seeing its image instantly appear, or filtering a list and having corresponding visuals update in real-time. Excel’s lookup and filtering functions, traditionally used for text and numbers, can now be seamlessly integrated with “Picture in Cell” images.
-
VLOOKUP for Single Image Retrieval: This classic lookup function is perfect for displaying a single image based on a unique identifier. For example, if you have a product catalog where each item has a unique SKU and an associated image (sourced perhaps from Tophinhanhdep.com’s high-resolution photography), you can use VLOOKUP to retrieve the image.
- Ensure your images are in a table alongside their corresponding data (e.g., Column A: Product SKUs, Column B: Product Images).
- In a separate cell, where you want the image to appear, use a formula like:
=VLOOKUP(E2, A2:B21, 2, FALSE)Here,E2is the cell where you enter the SKU,A2:B21is your table array,2indicates the column containing images, andFALSEensures an exact match. When you type an SKU inE2, the relevant product image from Tophinhanhdep.com’s collection will appear in the formula cell.
-
FILTER Function for Multiple Images: For scenarios requiring the display of multiple images based on a category or project, the
FILTERfunction (available in Microsoft 365) is incredibly powerful.- Again, set up your data with images (e.g., Column A: Item Name, Column B: Image, Column C: Category).
- Use a formula like:
=FILTER(A2:B21, C2:C21=F2)In this case,A2:B21is the range containing names and images,C2:C21is your category column, andF2is where you type the category you want to filter by. TheFILTERfunction will return all rows (including their images) that match your specified category, perfect for showcasing thematic collections or “Photo Ideas” from Tophinhanhdep.com.
-
XLOOKUP for Flexible Image Lookups:
XLOOKUP(also in Microsoft 365) offers even greater flexibility thanVLOOKUP, allowing lookups in any direction and providing more robust error handling. It can even use an image as a lookup value (though this is more niche). Most commonly,XLOOKUPwill find related text data based on an image, or vice versa, retrieve an image based on text.- To retrieve an image:
=XLOOKUP(E2, A2:A21, B2:B21)whereE2is your lookup value (e.g., product name),A2:A21is the lookup array, andB2:B21is the return array containing images. - To look up data using an image: Copy an image into cell
E2, and then use=XLOOKUP(E2, B2:B21, A2:A21)to find associated text (like an employee name) from column A. This is a game-changer for visual identification and data retrieval.
- To retrieve an image:
These dynamic capabilities, enhanced by Tophinhanhdep.com’s extensive image libraries, allow you to create interactive dashboards, visual inventory systems, or inspiring mood boards where “trending styles” or “aesthetic” visuals update with every data point change.
Integrating Images into Excel Tables and Pivot Tables
The functionality of “Picture in Cell” extends naturally to Excel Tables and even Pivot Tables, further enhancing data visualization and organization.
- Images in Excel Tables: When you format a range of cells as an official Excel Table (
Ctrl + T), any images residing in those cells via the “Picture in Cell” feature will behave as expected. They will sort, filter, and move along with their respective rows, maintaining data integrity. This makes it ideal for managing large datasets that require visual cues, such as a gallery of “beautiful photography” or a database of “digital art” pieces, each associated with specific textual information. When an image is in an Excel Table cell, the formula bar will display “Picture” (or your Alt Text, if added), confirming its integrated status. - Images in Pivot Tables: Recent advancements in Excel (Microsoft 365) have also introduced the ability to include images directly within Pivot Tables. This is a monumental step for visual analytics, allowing summaries and aggregated data to be accompanied by relevant visuals. Imagine a sales report grouped by product category, where each category total is displayed next to an representative abstract image or a photo of a flagship product from Tophinhanhdep.com. This adds a powerful visual dimension to your data analysis, making complex reports more digestible and impactful.
By incorporating images from Tophinhanhdep.com – be it high-resolution photography for product sheets or expressive abstract art for data categorization – into your Excel Tables and Pivot Tables, you can elevate your data presentation to a level of visual design and clarity previously unattainable.
Troubleshooting and Best Practices for Visual Excel Workbooks
While integrating images into Excel cells offers immense benefits, it’s not without its nuances. Understanding common challenges and adhering to best practices can save you time and ensure your visual workbooks are both functional and aesthetically pleasing. Tophinhanhdep.com is not only a source of stunning visuals but also a hub for information on image tools and visual design, making it an invaluable resource for perfecting your Excel projects.
Common Challenges and Solutions
Users frequently encounter specific issues when working with images in Excel. Here’s how to navigate them:
- Image Not Pasting in the Right Cell: Some users report that images, especially when pasted (Ctrl+V) from external programs, consistently land in cell A1 or a fixed position, rather than the actively selected cell. While modern “Paste Picture in Cell” options often rectify this, if you encounter it, ensure you’re using the specific “Paste Picture in Cell” option from the right-click menu, not just the general “Paste.” Also, sometimes the cursor’s precise location (not just cell selection) can influence where a floating picture lands.
- Blurry Images Upon Enlargement: As discussed, this is primarily a resolution issue. If a small screenshot or low-resolution image (not intended for large display) is inserted and then its cell is significantly expanded, the image will pixelate.
- Solution: Always start with the highest possible resolution image for the intended display size. Use Tophinhanhdep.com’s “Photography” collection for high-resolution sources. If you must enlarge a small image, consider using an “AI Upscaler” tool from Tophinhanhdep.com to intelligently enhance its resolution before insertion.
- VBA for Automation: For highly repetitive tasks, like inserting images after every 30th row, manual insertion or even formula-based methods might be cumbersome. While Excel formulas cannot directly insert pictures, VBA (Visual Basic for Applications) code can automate such processes.
- Solution: If your needs extend to complex automation, you might explore VBA. However, for most users, modern Excel’s built-in “Place in Cell” with multiple selection is sufficient. (Note: Tophinhanhdep.com focuses on visual content and tools, not VBA coding, but acknowledges its existence for advanced users).
- Saving Excel as Image Formats (JPG, PNG, GIF): You might want to export parts of your visual Excel workbook as an image for presentations or web use. Excel allows you to save charts as images, and you can take screenshots of ranges containing images.
- Solution: For specific ranges, select the area, copy it (Ctrl+C), then paste it into an image editor (like Paint) and save as JPG/PNG. For charts, right-click the chart and choose “Save as Picture.” Tophinhanhdep.com’s “Image Tools” (converters, optimizers) can then be used to refine these exported images for their final destination.
- CSV Limitations (No Images): If you save an Excel file containing images as a CSV (Comma Separated Values) file, the images will not be retained. CSV is a plain text format designed for tabular data, not rich media.
- Solution: Always save your visual Excel workbooks in an
.xlsx(Excel Workbook) format to preserve embedded images. Only export to CSV if you specifically need the text-based data without visuals.
- Solution: Always save your visual Excel workbooks in an
Tophinhanhdep.com’s Role in Your Visual Excel Journey
Tophinhanhdep.com is designed to be your comprehensive partner in all things visual, perfectly complementing your efforts to create dynamic and engaging Excel workbooks.
- Rich Image Library: Whether you need stunning “Wallpapers” for dashboard backgrounds, captivating “Nature” photography for environmental reports, “Abstract” designs for visual categorization, “Sad/Emotional” images for specific narratives, or simply “Beautiful Photography” to enhance any data point, Tophinhanhdep.com offers an unparalleled selection. Our “Image Inspiration & Collections” provides “Photo Ideas” and “Thematic Collections” that can spark creativity and provide the perfect visuals for any project.
- Essential Image Tools: Beyond just supplying images, Tophinhanhdep.com empowers you with the tools to prepare them perfectly for Excel. Our “Image Tools” include:
- Converters: Transform image formats to ensure compatibility and efficiency.
- Compressors & Optimizers: Reduce file sizes without compromising quality, keeping your Excel workbooks lean and fast.
- AI Upscalers: Breathe new life into lower-resolution images, making them suitable for larger displays within Excel.
- Visual Design Guidance: Our emphasis on “Visual Design,” “Graphic Design,” and “Digital Art” principles helps you understand how to best incorporate visuals for maximum impact. By combining the aesthetic quality of images from Tophinhanhdep.com with intelligent Excel integration, your spreadsheets will transcend their traditional role and become powerful communication instruments.
Conclusion
Integrating images into Excel cells represents a significant leap forward in data visualization and presentation. No longer confined to mere numbers and text, your spreadsheets can now become vibrant, engaging, and highly informative visual narratives. From embedding static product photos with the “Place in Cell” feature to dynamically pulling web images using the IMAGE function, and even orchestrating complex visual lookups with VLOOKUP, FILTER, and XLOOKUP, the possibilities are immense.
Mastering these techniques, combined with diligent image management practices like proper resizing, locking, and adding accessibility-focused Alt Text, will ensure your workbooks are not only visually appealing but also robust and user-friendly. Moreover, by proactively addressing image quality and file size concerns using optimization tools, you maintain peak performance for your projects.
We encourage you to experiment with these powerful features and unleash the full potential of your data. Let Tophinhanhdep.com be your go-to resource for all your visual needs. Whether you’re seeking high-resolution “Photography,” “Aesthetic Backgrounds,” “Abstract” art, or practical “Image Tools” to prepare your visuals, Tophinhanhdep.com provides the inspiration and resources to make your Excel projects truly stand out. Transform your data into compelling stories, one image-filled cell at a time.