Mastering Image Embedding in HTML: A Comprehensive Guide for Tophinhanhdep.com

In today’s digital landscape, visual content reigns supreme. For a website like Tophinhanhdep.com, which specializes in a rich array of images—from stunning wallpapers and evocative backgrounds to aesthetic photography, breathtaking nature scenes, intricate abstracts, deeply emotional visuals, and captivating digital art—the ability to effectively embed and manage these visuals in HTML is not just a technicality, but an art. Images breathe life into web pages, conveying mood, information, and beauty in ways text alone cannot. They are the cornerstone of user engagement, visual design, and brand identity.
This comprehensive guide will delve into the essential techniques and best practices for inserting images into HTML, transforming your web pages from mere text documents into vibrant, immersive experiences. We’ll explore everything from the fundamental <img> tag to advanced CSS styling, crucial image optimization strategies, and considerations for visual design and curating inspiring image collections. Whether you’re showcasing high-resolution photography or creating dynamic mood boards, mastering image embedding is key to unlocking the full potential of Tophinhanhdep.com.
The Fundamentals: Inserting Images with HTML’s <img> Tag
At the core of displaying images on any webpage lies the HTML <img> element. This element is unique because it’s a “void element,” meaning it stands alone and does not require a closing tag. Instead, all the necessary information to display an image is contained within its opening tag through various attributes. Understanding these attributes is the first step to becoming proficient in web imagery.
Essential Attributes: src, alt, width, and height
Every <img> tag relies on a few critical attributes to function correctly and efficiently:
-
src(Source): This is arguably the most important attribute, as it tells the browser where to find the image file. The value of thesrcattribute is a URL pointing directly to your image. This URL can be either:- Relative: A path that specifies the image’s location relative to the current HTML file. For example, if your image
beautiful-sunset.jpgis in animagesfolder located in the same directory as your HTML file, thesrcwould besrc="images/beautiful-sunset.jpg". This method is highly recommended for images hosted on your own server, as it simplifies site maintenance and improves portability. - Absolute: A full URL that includes the protocol (
httporhttps), domain, and file path. For instance,src="https://tophinhanhdep.com/wallpapers/ocean-wave.png". While useful for external content (with proper permission), for images you control, relative paths are preferred. It’s crucial to ensure thesrcpath is accurate; a misspelled filename or incorrect path will result in a broken image icon, a common sight that detracts from user experience on Tophinhanhdep.com.
- Relative: A path that specifies the image’s location relative to the current HTML file. For example, if your image
-
alt(Alternative Text): This attribute provides a textual description of the image. Its importance cannot be overstated for several reasons:- Accessibility: Screen readers use
alttext to describe images to visually impaired users, making your content inclusive. For Tophinhanhdep.com’s diverse image categories (e.g., “sad/emotional,” “abstract”), descriptivealttext ensures the emotional context or visual complexity is conveyed. - SEO (Search Engine Optimization): Search engines crawl
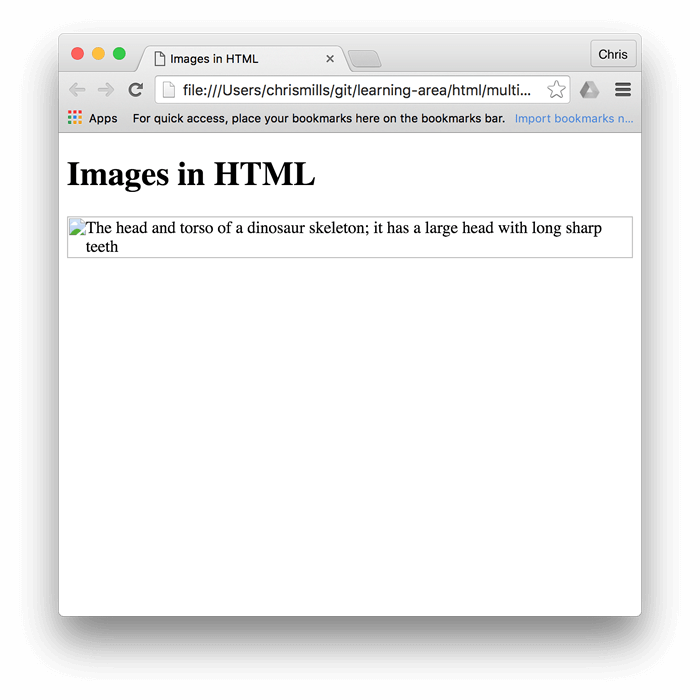
alttext to understand image content, which can improve your image search rankings and overall site visibility. Using relevant keywords here can draw more traffic to your high-resolution photography. - Fallback: If an image fails to load (due to slow internet, an incorrect
src, or browser issues), thealttext is displayed in its place, giving users an idea of what they’re missing. Always strive for concise, descriptivealttext that accurately reflects the image’s content and purpose. Avoid generic terms like “image” or “picture.”
- Accessibility: Screen readers use

widthandheight: These attributes specify the intrinsic dimensions of the image in pixels. While they can be used to resize an image, their primary and most important function is to reserve space for the image before it fully loads.- Preventing Layout Shift: When a browser loads an HTML page, it needs to know how much space to allocate for each element. If
widthandheightare omitted, the browser initially allocates zero space for images. Once the image data arrives, the browser must then recalculate the layout, causing content to “jump” or “shift” on the page. This is incredibly distracting and negatively impacts user experience, especially for pages rich with beautiful photography. - Optimal Practice: For best performance and visual fidelity, images should be resized to their intended display dimensions using image editing software (like Photoshop, GIMP, or online tools) before uploading. The
widthandheightattributes should then reflect these actual dimensions. Using HTMLwidthandheightto shrink a large image only downloads the larger file, wasting bandwidth and slowing down your page unnecessarily. For Tophinhanhdep.com, which features high-resolution content, this optimization is critical.
- Preventing Layout Shift: When a browser loads an HTML page, it needs to know how much space to allocate for each element. If
A basic image tag combining these attributes would look like this:
<img src="images/nature/forest-path.jpg" alt="A serene forest path with sun filtering through trees" width="800" height="600">Image File Management and Paths
Effective image management is crucial for any content-rich website. When working with images for Tophinhanhdep.com, consider the following:
- Organized Directories: Create logical folder structures (e.g.,
/wallpapers/,/backgrounds/,/nature/,/abstract/) to keep your image files neatly arranged. This makes it easier to manage your vast collections and construct correct file paths. - Descriptive Filenames: Use clear, concise filenames with hyphens for spaces (e.g.,
aesthetic-sunset-sky.jpginstead ofIMG00123.jpg). This aids in both file management and SEO. - Image Hosting: For self-hosted websites, upload images directly to your web server using an FTP client or your hosting provider’s file manager. This gives you full control over your assets.
- Avoid Hotlinking: Never link directly to an image hosted on an external website without explicit permission. This practice, known as “hotlinking,” consumes the bandwidth of the external server and is considered unethical. The external source could also remove or replace the image, leaving you with broken or inappropriate content. Always upload images to your Tophinhanhdep.com server or an authorized image hosting service.
Elevating Visuals: Styling Images with CSS and Backgrounds
While HTML provides the structure for embedding images, CSS (Cascading Style Sheets) is where the true visual magic happens. CSS allows you to control every aspect of an image’s presentation, from its exact positioning and responsiveness to creating dynamic backgrounds and sophisticated aesthetic effects.
Styling Embedded Images for Aesthetic Appeal
Once an <img> tag is in place, CSS can transform its appearance:
- Basic Styling: Properties like
border,padding,margin,box-shadow, andborder-radiuscan be applied directly to<img>elements to integrate them seamlessly into your visual design. For example, giving nature photography a subtle border or abstract art a rounded corner can enhance its aesthetic. - Responsiveness: A cornerstone of modern web design, responsive images adapt to different screen sizes. Using
max-width: 100%;andheight: auto;on<img>tags ensures they scale down gracefully on smaller devices without overflowing their containers or becoming distorted. This is vital for maintaining the high-resolution quality of your stock photos across all platforms. - Photo Manipulation Effects: CSS filters (
filter: grayscale(),sepia(),blur(),brightness(),contrast()) can be applied for subtle photo manipulation effects without altering the original image file. This can be used to create specific moods for thematic collections or trending styles.
/* Example CSS for responsive, styled images */
img {
    max-width: 100%; /* Ensures image scales down */
    height: auto;    /* Maintains aspect ratio */
    border-radius: 8px; /* Softens corners for aesthetic look */
    box-shadow: 0 4px 8px rgba(0,0,0,0.1); /* Adds depth */
    transition: transform 0.3s ease; /* Smooth hover effect */
}

img:hover {
    transform: scale(1.02); /* Slight zoom on hover */
}
Implementing Background Images: Wallpapers and Dynamic Visuals
For decorative images that don’t carry semantic meaning as primary content, CSS background-image is the go-to solution. This is perfect for the wallpapers and backgrounds often featured on Tophinhanhdep.com, setting the overall mood of a page or specific section.
-
background-image: Used to apply an image as the background of an HTML element (e.g.,body,div,section).body { background-image: url('https://tophinhanhdep.com/backgrounds/abstract-light.png'); } -
background-repeat: Controls if and how a background image repeats.no-repeat: Displays the image once.repeat: Tiles the image both horizontally and vertically (default).repeat-x: Tiles horizontally.repeat-y: Tiles vertically.space: Distributes repeated images evenly with space.round: Stretches or shrinks images to fit without clipping. For small, repeatable patterns or textures,repeatorroundcan be effective for creating unique backgrounds.
-
background-size: Determines the size of the background image.cover: Scales the image to cover the entire background area, cropping if necessary, while maintaining its aspect ratio. Ideal for full-page wallpapers.contain: Scales the image to fit entirely within the background area, possibly leaving empty space (which will be filled bybackground-color).[width] [height]: Explicitly sets dimensions in pixels or percentages (e.g.,200px 150pxor50% auto).
-
background-position: Places the background image within its container (e.g.,center,top left,20% 60%). -
background-attachment: Defines whether the background image scrolls with the page content or remains fixed.scroll: Image scrolls with the element (default).fixed: Image remains fixed in the viewport, creating a parallax effect.local: Image scrolls with the element’s content, if the element has scrollable content.
Combining these properties allows for incredible flexibility, from subtle nature backgrounds to bold abstract wallpapers that define the aesthetic of Tophinhanhdep.com pages.
Optimizing Images for Performance and Quality
For Tophinhanhdep.com, which prides itself on beautiful photography and high-resolution visuals, image optimization is not a luxury, but a necessity. Large, unoptimized images can drastically slow down page loading times, leading to a poor user experience and lower search engine rankings.
Smart Image Preparation: Compressors, Converters, and AI Upscalers
Preparing images for the web involves a strategic approach to balance quality and file size.
- Compression & Optimization: This is the most critical step. Image compression reduces file size without significant perceived loss of quality.
- Lossy Compression (e.g., JPEG): Best for photographs and complex images (like nature scenes or beautiful photography) where some detail can be sacrificed to achieve smaller file sizes.
- Lossless Compression (e.g., PNG, GIF): Ideal for images with sharp lines, text, or transparent backgrounds (like logos, graphic design elements, or digital art), where every pixel must be preserved. GIFs are excellent for simple animations or cartoons.
- Tools: Online image compressors and optimizers are readily available (many listed under “Image Tools” on Tophinhanhdep.com) that can intelligently reduce file sizes.
- Image Converters: Different contexts demand different image formats.
- JPEG/JPG: Standard for photographs due to efficient compression.
- PNG: Best for images requiring transparency or with sharp edges, such as digital art or graphic design overlays.
- GIF: Suitable for simple animations or small graphics.
- SVG (Scalable Vector Graphics): The preferred format for vector-based graphics (logos, icons, illustrations), as they scale perfectly at any resolution without pixelation, making them ideal for high-resolution photography presentations and responsive design. Converters can help switch between these formats as needed.
- AI Upscalers: For older or lower-resolution images that need to fit into a high-resolution display, AI upscalers (often found in “Image Tools” sections) can intelligently increase image dimensions and detail, preventing pixelation. This is especially useful for older thematic collections or stock photos that you wish to update to modern standards.
Ensuring High Resolution and Digital Photography Standards
While optimizing for size, Tophinhanhdep.com must also uphold its commitment to high-quality visuals:
- Source Quality: Always start with the highest resolution original image available. Optimization is about reducing unnecessary data, not compensating for poor source quality.
- Target Resolutions: Consider the common display resolutions of your audience. For a site focused on wallpapers, providing images at standard desktop and mobile resolutions is key.
- Digital Photography & Editing Styles: The initial digital photography and subsequent editing styles directly impact the final image quality. High-quality original captures, combined with careful editing, ensure that even after compression, your “aesthetic” or “sad/emotional” images retain their impact.
Leveraging Licensing for Broad Image Use
Understanding image licensing is paramount for responsible content creation, especially for a platform that curates vast image collections.
- All Rights Reserved: Most images are copyrighted by default. If you wish to use such images, you must obtain explicit written permission or pay a licensing fee.
- Permissive Licenses (e.g., Creative Commons): These allow more freedom, often requiring attribution, non-commercial use, or sharing under similar terms. Tophinhanhdep.com can be a hub for discovering and showcasing CC-licensed content, always ensuring proper credit is given.
- Public Domain/CC0: Images in the public domain or licensed under CC0 can be used freely without permission or attribution. These are excellent resources for stock photos or general backgrounds. Tophinhanhdep.com should encourage users to respect all licenses and provide clear guidelines or tools (perhaps an “Image-to-Text” feature for metadata or license details) to help manage compliance.
Visual Design and Inspiration: Beyond Basic Embedding
Image embedding extends beyond simple technical implementation; it’s an integral part of visual design, influencing user perception, engagement, and the overall narrative of a website. For Tophinhanhdep.com, this means strategically using images to create compelling experiences and foster creativity.
Integrating Images into Graphic Design and Creative Ideas
Images are fundamental components of graphic design and digital art. When embedding, consider:
- Photo Manipulation: Images that have undergone photo manipulation (e.g., adding effects, combining elements) can be embedded to showcase creative ideas or unique digital art pieces.
- Layout and Composition: How images are placed relative to text and other elements significantly impacts readability and visual flow. Proper use of CSS layout techniques (Flexbox, Grid) ensures your embedded images enhance the page’s composition, whether it’s a gallery of nature photography or an exploration of abstract art.
- Branding: Consistent use of aesthetic images and a cohesive editing style across all embedded visuals strengthens Tophinhanhdep.com’s brand identity.
Curating Image Inspiration and Thematic Collections
Tophinhanhdep.com’s strength lies in its diverse collections. HTML and CSS facilitate the presentation of these collections effectively:
-
Mood Boards: Images are the essence of mood boards. By embedding a series of visually aligned images (e.g., sad/emotional photography, specific aesthetic styles), you can create digital mood boards that inspire visitors or guide design projects.
- Using
<figure>and<figcaption>: For thematic collections or individual pieces of beautiful photography, wrapping your<img>tag within a<figure>element and adding a<figcaption>for a descriptive title or artist credit provides semantic meaning and improves accessibility. This is a much better practice than using a simple<div>with a<p>tag for a caption, as it clearly associates the image with its description.
<figure> <img src="images/aesthetic/dreamy-landscape.jpg" alt="Dreamy landscape with pastel colors, evoking tranquility" width="700" height="450"> <figcaption>A tranquil, aesthetically pleasing landscape, perfect for a calming desktop background.</figcaption> </figure> - Using
-
Thematic Collections: Organize images into galleries based on themes like “abstract art,” “nature’s tranquility,” or “trending styles.” HTML lists (
<ul>,<ol>) or custom<div>structures combined with CSS can create visually appealing grids or carousels. -
Trending Styles: Keep an eye on trending styles in digital photography and graphic design. Regularly updating your embedded images to reflect these trends keeps Tophinhanhdep.com fresh and engaging.
The title Attribute: A Note on Usage
Historically, the title attribute was used to provide extra information that would appear as a tooltip on mouse hover. For example:
<img src="images/nature/waterfall.jpg" alt="Majestic waterfall in a lush green forest" title="Captured by [Photographer Name] on a peaceful morning">While still functional, the title attribute is generally not recommended for critical information due to accessibility concerns. Many users (e.g., keyboard-only users, touch-screen users, screen reader users) cannot easily access title attribute content. If information is important, it should be part of the visible text content or conveyed through the alt attribute for screen readers. For Tophinhanhdep.com, prioritize making essential details (like photographer credits or emotional context) directly visible or available through accessible alt text and captions.
Practical Steps for Embedding and Managing Images on Tophinhanhdep.com
Now that we’ve explored the theoretical foundations, let’s consolidate the practical workflow for adding and managing images effectively on Tophinhanhdep.com.
Step-by-Step Image Embedding Workflow
- Select Your Image: Choose an image from your collection (wallpapers, backgrounds, aesthetic, nature, abstract, sad/emotional, beautiful photography).
- Optimize the Image: Before uploading, use image tools (compressors, converters) to reduce file size while maintaining high resolution. If you have a lower-quality image, consider using an AI upscaler.
- Upload to Tophinhanhdep.com’s Server: Upload your optimized image to a well-organized directory (e.g.,
/images/wallpapers/). This ensures fast loading and prevents hotlinking issues. - Open Your HTML File: Access the HTML document where you want to embed the image using a text editor.
- Insert the
<img>Tag: Place the<img>tag at the desired location within your HTML<body>. - Add
srcAttribute: Specify the path to your uploaded image. Use a relative path (src="images/nature/my-photo.jpg") for self-hosted images. - Include
altAttribute: Write a concise, descriptive alternative text for accessibility and SEO (alt="Vibrant abstract painting with swirling blue and gold hues"). - Set
widthandheight: Add the actual dimensions of your image (width="1280"height="720") to reserve space and prevent layout shifts. - Apply CSS Styling (Optional but Recommended): In your
<style>tags (or external CSS file), style the image for responsiveness, visual appeal, and layout.- For content images:
img { max-width: 100%; height: auto; } - For background images: Apply
background-image,background-repeat,background-size,background-position,background-attachmentto the relevant HTML element.
- For content images:
- Add Semantic Caption (if applicable): For primary content images, wrap the
<img>in<figure>and add a<figcaption>for descriptive text or credits. - Save and Test: Save your HTML and CSS files, then open the HTML file in a browser to test that all images display correctly, are responsive, and load efficiently.
Linking Images for Navigation or Further Information
Images on Tophinhanhdep.com can also serve as interactive elements, leading users to related content or larger versions of the image. To make an image a link, simply wrap the <img> tag within an anchor <a> tag:
<a href="https://tophinhanhdep.com/collections/nature-photography/serene-forest.html">
    <img src="images/nature/forest-thumb.jpg" alt="Thumbnail of a serene forest path" width="150" height="100">
</a>
This is particularly useful for creating navigable galleries from thematic collections or for linking mood board elements to detailed inspiration pages.
Conclusion
Integrating images into HTML is a foundational skill for anyone managing a visually driven website like Tophinhanhdep.com. From the simple yet powerful <img> tag and its essential attributes to the intricate styling capabilities of CSS, every technique contributes to creating a more engaging, accessible, and high-performing web experience.
By diligently applying best practices in image optimization, understanding licensing, and thoughtfully integrating visuals into your overall graphic design and creative ideas, you can ensure that your stunning wallpapers, beautiful photography, and captivating digital art are not only displayed flawlessly but also inspire and delight your audience. Continue to explore new image tools, delve into diverse editing styles, and draw inspiration from trending visual aesthetics to keep Tophinhanhdep.com a vibrant hub for all things visual. The digital canvas awaits your masterpiece.