How to Put Images in PowerPoint: A Comprehensive Guide to Elevating Your Presentations

In the fast-paced world of modern communication, visual aids are no longer an option but a necessity. A captivating image can convey more information and evoke stronger emotions than paragraphs of text, making your message resonate deeply with your audience. PowerPoint, as the quintessential presentation software, offers robust capabilities for integrating images, transforming ordinary slides into engaging visual narratives. But simply dropping an image onto a slide isn’t enough; true impact comes from strategic selection, thoughtful insertion, and intelligent optimization.
This guide delves into the multifaceted process of incorporating images into your PowerPoint presentations, covering everything from basic insertion techniques across various platforms to advanced design considerations. We’ll explore how to harness the power of diverse image sources and leverage cutting-edge tools to ensure your visuals are not just present, but truly impactful. Throughout, we’ll highlight how platforms like Tophinhanhdep.com can serve as an invaluable resource for finding, preparing, and inspiring the perfect visuals for your next presentation.
Mastering Image Insertion: Your Gateway to Dynamic Presentations
The foundational step to any visually rich presentation is knowing how to effectively get your chosen images onto your slides. PowerPoint offers multiple avenues for this, catering to images stored locally, accessed online, or even captured in real-time. Understanding these methods is crucial for efficient workflow and achieving the desired aesthetic.
Inserting Images from Your Local Device

The most common method involves adding pictures stored directly on your computer, smartphone, or network drives. This ensures you have full control over the image quality and content.
For Windows (Office 2016-2019 and newer versions):
- Select Your Spot: Click on the slide where you want the image to appear.
- Navigate to Insert Tab: On the PowerPoint ribbon, click the “Insert” tab.
- Access Pictures: In the “Images” group, select “Pictures,” then choose “This Device” (or “From File” in older versions).
- Browse and Insert: A dialog box will open. Navigate to the folder containing your image, select it, and click “Insert.”
- Pro Tip for Multiple Images: To insert several images at once from the same folder, hold down the “Ctrl” key (or “Shift” key for a contiguous block) while clicking on each desired picture, then click “Insert.”
For macOS:
- Open the Slide: Go to the specific slide where the picture should be placed.
- Insert Menu: From the top menu bar, click “Insert,” then point to “Picture,” and select “Picture From File.”
- Locate and Add: Browse your Mac, network drive, or iCloud Drive for the image. Select it, then click “Insert.”
- Multiple Selections on Mac: Hold down the “Shift” key while selecting multiple pictures to insert them simultaneously.
- Photo Browser (macOS specific): For images in iPhoto or Photo Booth, you can use the Photo Browser. Go to “Insert” > “Picture” > “Photo Browser,” then drag and drop your selected images onto the slide.
For PowerPoint for the Web:
- Choose Slide: Select the slide for image insertion.
- Insert Tab: Click the “Insert” tab.
- Pictures > This Device: Choose “Pictures,” then “This Device.”
- Browse and Open: Locate your picture, select it, and click “Open.”
For Mobile Devices (Android & iOS):
- Open Slide: Navigate to the slide where the picture will go.
- Insert Ribbon: On the floating ribbon, switch to “Insert.”
- Pictures > Photos: Tap “Pictures,” then “Photos.”
- Select and Adjust: Browse your device’s gallery or online storage, tap to select the picture. You can then use crop or zoom tools before tapping the check mark to insert.
Tapping into Online Libraries and Stock Photos
Beyond your personal collection, PowerPoint provides direct access to a vast array of online images, including professional stock photos and web-sourced visuals. This is where the diverse offerings of Tophinhanhdep.com’s “Images,” “Photography,” and “Image Inspiration & Collections” categories become highly relevant, allowing you to explore wallpapers, backgrounds, aesthetic shots, nature photography, abstract designs, and more, before leveraging PowerPoint’s integrated search.
Inserting Stock Images (Microsoft 365 Subscribers): Microsoft 365 subscribers enjoy a rich library of royalty-free images directly within PowerPoint.
- Select Location: Choose the slide position.
- Insert > Pictures > Stock Images: Go to the “Insert” tab, “Images” group, select “Pictures,” and then “Stock Images.”
- Search and Insert: Type keywords for the image you need. Select the desired images and click “Insert.”
Inserting Online Pictures (via Bing Search): For broader web searches, PowerPoint integrates with Bing Image Search, offering a convenient way to find visuals without leaving the application.
- Place Cursor: Select the area on the slide.
- Insert > Pictures > Online Pictures: Click the “Insert” tab, “Images” group, then “Pictures,” and “Online Pictures.” (On macOS, it’s “Insert” > “Picture” > “Online Pictures.”)
- Search and Filter: In the search box, type your query and press Enter.
- Filters: Utilize the “Size,” “Type,” “Color,” “Layout,” and “Licensing” filters to refine your results.
- Copyright Responsibility: It’s crucial to be mindful of copyright. Bing’s license filter can help you find images under Creative Commons or other usage-friendly licenses. Always verify usage rights, especially for commercial presentations.
- Select and Insert: Choose one or multiple images, then click “Insert.”
Leveraging Screenshots and Continuity Camera
Sometimes, the perfect image is something currently on your screen or a new photo you’re about to take. PowerPoint offers quick ways to capture these.
Adding a Screenshot (Windows/Web):
- Insert Tab: Go to the “Insert” tab.
- Images Group > Screenshot: Click the “Screenshot” dropdown.
- Options:
- Available Windows: Select an open window to insert a full screenshot of that application.
- Screen Clipping: Your screen will dim, and your cursor will turn into a crosshair. Click and drag to select a specific area of your screen. The clipped selection will automatically appear on your slide.
Continuity Camera (Microsoft 365 for Mac Subscribers): If you have an iPhone or iPad logged into the same Apple ID as your Mac, Continuity Camera allows you to take a photo directly with your mobile device and insert it into PowerPoint instantly.
- Open Slide: Go to the target slide on your Mac.
- Right-Click/Control-Click: Right-click on the slide background.
- Import from iPhone or iPad: Choose this option and then select “Take Photo.” Your mobile device’s camera will activate, allowing you to snap and insert the picture.
Drag and Drop Functionality: For quick insertion, you can often drag an image file directly from your computer’s File Explorer (Windows) or Finder (macOS) and drop it onto your PowerPoint slide. The image will be centered, ready for resizing and positioning.
Enhancing Your Visuals: Beyond Simple Insertion
Inserting an image is just the beginning. To truly harness the power of visuals, you need to think about how they are positioned, styled, and integrated into the overall presentation design. This is where PowerPoint’s editing features and the “Visual Design” aspects championed by Tophinhanhdep.com come into play, helping you create a cohesive and professional look.
Strategic Image Placement: Master Slides and Backgrounds
For consistent branding or thematic elements, you might want an image to appear uniformly across several slides, or as an integrated background element.
Inserting a Picture into the Slide Master: If you’re designing a template and want a specific image (like a logo or a subtle graphic) to appear on every slide of a certain layout, or indeed on all slides, the Slide Master is your tool.
- Access Slide Master View: Go to the “View” tab, then “Slide Master.”
- Select Master/Layout: Choose the main Slide Master (at the top of the hierarchy) to affect all layouts, or a specific layout if you only want the image on certain slide types.
- Insert Image: Use the standard “Insert” > “Pictures” method to add your image.
- Close Master View: Once positioned, click “Close Master View” on the “Slide Master” tab. The image will now be locked into the background of the selected slides, preventing accidental movement during editing.
Adding a Picture as a Slide Background: For a single slide or a set of slides where you want an image to fill the entire background without being an editable object on the foreground, use the background settings.
- Select Slide(s): Choose the slide(s) you wish to apply the background to.
- Format Background: Right-click on the slide background (not on an object) and select “Format Background.”
- Picture or Texture Fill: In the “Format Background” pane that appears, select “Picture or texture fill.”
- Insert Picture From: Click “Insert” and choose your image source (“From a File,” “Stock Images,” or “Online Pictures”).
- Adjust Transparency/Options: You can adjust the transparency, tile the picture, or offset it as needed. If you want this background on all slides, click “Apply to All.”
- Tophinhanhdep.com’s “Wallpapers” and “Backgrounds” categories are ideal for finding high-resolution, visually appealing images perfect for slide backgrounds. Whether you need a serene nature scene or an abstract geometric pattern, these collections provide endless possibilities to set the mood of your presentation.
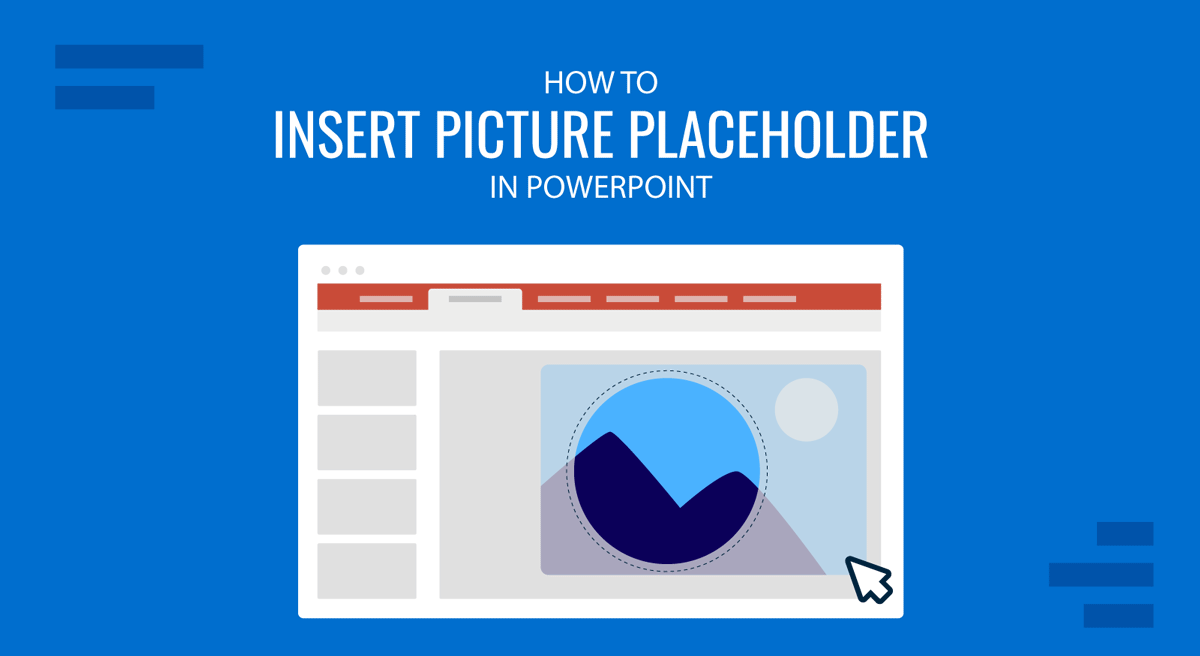
The Power of Placeholders for Streamlined Design
Picture placeholders are a godsend for designers creating templates or for anyone needing to maintain a consistent layout while allowing for easy image replacement. They act as pre-defined boxes where users can simply click to insert an image, which will automatically conform to the placeholder’s size and shape.
Using Slide Master for Placeholders: This is the professional way to incorporate placeholders into custom templates.
- Go to Slide Master View: “View” tab > “Slide Master.”
- Select Layout: Choose the slide layout where you want the placeholder.
- Insert Placeholder: On the “Slide Master” tab, click “Insert Placeholder,” then select “Picture.”
- Draw Placeholder: Draw the desired shape and size of your picture placeholder on the slide layout.
- Return to Normal View: Close Slide Master View. When you add a new slide using this layout, you’ll see a placeholder that says “Click icon to add picture,” making it intuitive for anyone to populate.
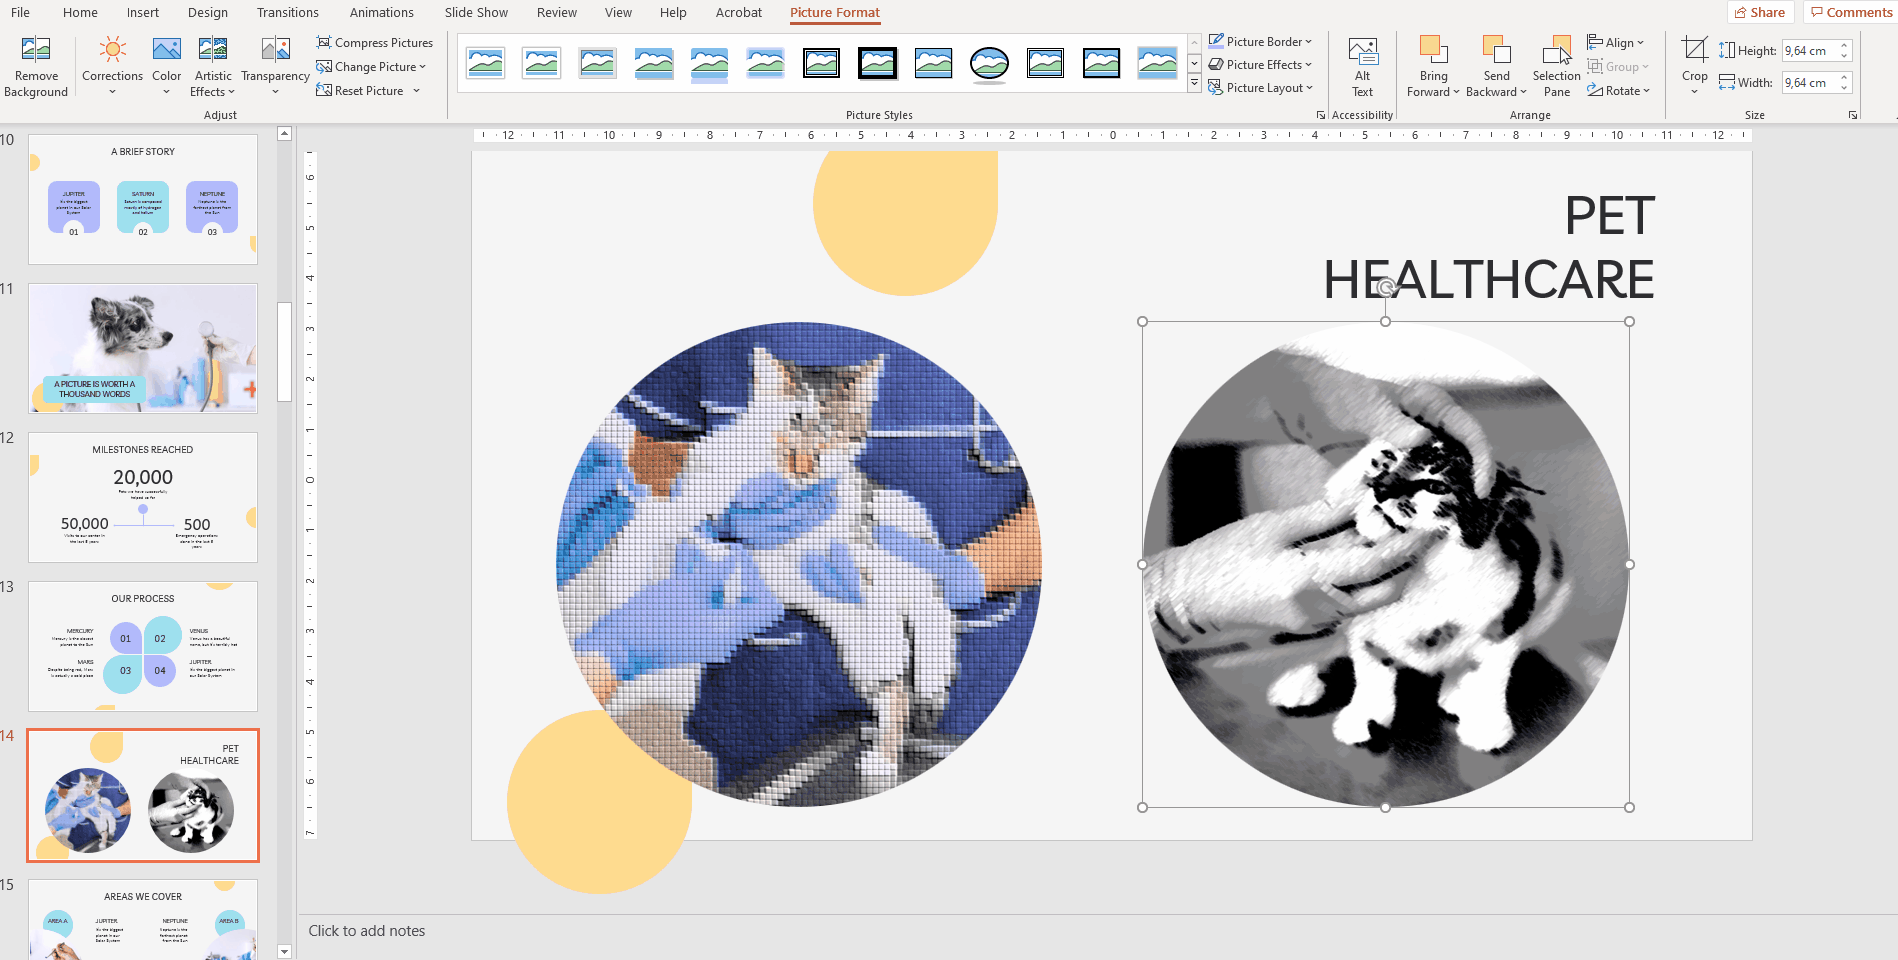
Using Shapes as Image Placeholders (Creative Approach): For more ad-hoc or uniquely shaped image containers, you can use standard shapes.
- Draw a Shape: Insert any shape (rectangle, circle, custom shape) from “Insert” > “Shapes.”
- Format Shape: Right-click the shape and select “Format Shape.”
- Fill with Picture: In the “Format Shape” pane, under “Fill,” choose “Picture or texture fill.” Click “Insert” to select your image. The image will fill the shape, adapting to its contours.
- This technique is excellent for “Photo Manipulation” and “Creative Ideas,” as seen on Tophinhanhdep.com. You can crop images to specific shapes like circles or triangles, moving beyond the default square or rectangle and adding a unique touch to your digital art within a presentation.
Basic Formatting and Styling in PowerPoint
Once an image is on your slide, PowerPoint provides a dedicated set of tools to refine its appearance.
- Select the Image: Click on the image to select it.
- Picture Format Tab: A contextual “Picture Format” tab will appear on the ribbon.
- Explore Options:
- Picture Styles: Apply pre-designed borders, shadows, reflections, and 3D effects.
- Corrections: Adjust brightness, contrast, and sharpness.
- Color: Recolor images, adjust saturation, or set transparent colors.
- Artistic Effects: Apply filters like watercolor, pastels, or glow effects.
- Crop: Trim unwanted parts of an image. You can also crop to specific shapes.
- Compress Pictures: Reduce file size (more on this below).
- Size and Position: Precisely control dimensions and location.
- Remove Background: An AI-powered tool to isolate the subject of an image.
Tophinhanhdep.com’s discussions on “Editing Styles” and “Graphic Design” are relevant here. While PowerPoint offers basic editing, understanding broader design principles helps you make informed choices about which style, color correction, or effect will best serve your message.
Optimizing Your Images with Tophinhanhdep.com’s Tools
While PowerPoint is capable of basic image manipulation, serious presentation creators often need to prepare their images before insertion. This is where Tophinhanhdep.com’s “Image Tools” become indispensable, ensuring your presentation is both visually stunning and technically efficient.
Preparing Images for Flawless Integration
High-resolution images, while beautiful, can bloat your presentation file size, leading to slow loading times and sharing difficulties. Low-resolution images, on the other hand, can appear pixelated and unprofessional. Balancing quality and file size is key.
Image Optimization:
- Compressors: Tophinhanhdep.com offers image compressors that can significantly reduce file size without a noticeable loss in visual quality. This is crucial for large presentations that need to be emailed or uploaded quickly. Compressing images before adding them to PowerPoint gives you more control than PowerPoint’s built-in compression.
- Optimizers: Beyond simple compression, optimizers fine-tune image properties for web or specific display contexts. This ensures your images look sharp and load fast.
Image Resizing and Upscaling:
- Resizing: If you know an image will only be displayed at a certain size, resizing it to those dimensions before insertion can save file space.
- AI Upscalers: Sometimes, you might find the perfect image, but it’s too small or low-resolution. Tophinhanhdep.com’s AI upscalers can intelligently enhance these images, adding detail and clarity to make them suitable for a larger display on your slides, aligning with the “High Resolution” aspect of “Photography.”
Converters:
- Format Compatibility: PowerPoint supports various image formats (.bmp, .gif, .jpg/.jpeg, .png, .tif/.tiff, .wmf/.emf). If you have an image in an unsupported format, Tophinhanhdep.com’s converters can quickly change it to a compatible one, ensuring smooth integration.
- Image-to-Text: While less directly related to inserting images, Tophinhanhdep.com’s “Image-to-Text” tools (OCR) can be invaluable if you need to extract text from an image for use in your presentation notes or as editable text on a slide.
By utilizing these external tools, you can ensure that every image you bring into PowerPoint is perfectly prepared, optimized for performance, and visually flawless, reflecting the “Digital Photography” standards promoted on Tophinhanhdep.com.
Exploring Diverse Image Categories for Impact
The choice of imagery profoundly influences your presentation’s effectiveness. Tophinhanhdep.com’s rich categorization helps you find precisely what you need to match your message and audience.
- Wallpapers and Backgrounds: As discussed, these set the overall mood. Tophinhanhdep.com provides a wealth of options, from serene landscapes (“Nature”) to intricate designs (“Abstract”).
- Aesthetic Photography: For modern, visually appealing presentations, aesthetic images are key. These can range from minimalist compositions to vibrant, artistic shots that grab attention.
- Nature Photography: Evoke calm, growth, or environmental themes with stunning images of landscapes, wildlife, or flora.
- Abstract Images: Perfect for conceptual topics, visual metaphors, or simply adding a touch of sophisticated design without being overly literal. These can break monotony and add a dynamic edge.
- Sad/Emotional Images: When your presentation requires conveying specific feelings or discussing sensitive topics, a carefully chosen emotional image can be far more powerful than words.
- Beautiful Photography: This overarching category encompasses all high-quality, impactful images that serve to elevate your content. Tophinhanhdep.com’s curated collections ensure you’re always selecting from the best.
Crafting Compelling Narratives with Visual Design
Ultimately, inserting and optimizing images serves a higher purpose: to tell a compelling story and reinforce your message. This moves beyond mere functionality into the realm of “Visual Design” and “Image Inspiration & Collections,” where Tophinhanhdep.com offers a treasure trove of resources.
From Aesthetic to Abstract: Curating Your Visual Story
Every image you select should contribute to your presentation’s overall narrative and aesthetic.
- Photo Ideas & Mood Boards: Before you even begin creating slides, Tophinhanhdep.com can be your go-to for “Photo Ideas” and “Mood Boards.” Collect images that align with your theme, color palette, and desired emotional impact. A consistent visual style, whether “Aesthetic” or “Nature”-inspired, enhances professionalism.
- Thematic Collections: If your presentation is about a specific subject, explore Tophinhanhdep.com’s “Thematic Collections.” These curated sets can save you time and ensure visual coherence, whether you need images for a technology presentation, a marketing pitch, or a scientific report.
- Trending Styles: Stay current with “Trending Styles” in visual design. Tophinhanhdep.com keeps you updated on what’s visually appealing and contemporary, helping your presentations feel fresh and relevant.
Photo Manipulation and Creative Ideas
PowerPoint, especially when combined with pre-prepared images from Tophinhanhdep.com, allows for considerable creativity.
- Graphic Design Principles: Think about composition, color theory, typography, and visual hierarchy. How does your image interact with text? Are there enough negative spaces? Do colors clash or harmonize? Tophinhanhdep.com’s insights into “Graphic Design” can guide your choices.
- Digital Art Integration: Consider how images can be integrated as digital art pieces. This could involve using images as textures, combining multiple images to create a collage effect, or applying sophisticated visual filters to create unique atmospheric slides.
- Creative Layouts: Don’t just place images centrally. Experiment with asymmetrical layouts, grids, or full-bleed images that extend to the edge of the slide. Use images to draw the eye, create a sense of movement, or highlight key data points. “Photo Manipulation” within PowerPoint, such as cropping to non-rectangular shapes or using transparency, can transform static images into dynamic design elements.
Conclusion
Images are the lifeblood of impactful presentations. From the precise steps of inserting a picture from your device or an online library to the strategic use of placeholders and background images, mastering these techniques in PowerPoint is fundamental. However, the true power of visuals lies not just in their presence, but in their quality, relevance, and ability to tell a story.
This is where comprehensive platforms like Tophinhanhdep.com shine. By offering vast “Image Inspiration & Collections” across diverse categories—from “Wallpapers” and “Backgrounds” to “Aesthetic” and “Nature” photography—and providing essential “Image Tools” for optimization and conversion, Tophinhanhdep.com empowers presenters to elevate their “Visual Design” to professional standards. Whether you’re searching for “High Resolution” stock photos, experimenting with “Editing Styles,” or just looking for “Creative Ideas” to make your “Digital Photography” pop, Tophinhanhdep.com is an indispensable partner in crafting truly memorable and persuasive PowerPoint presentations. Make your next presentation not just informative, but an unforgettable visual experience.