How to Put Images on T-Shirts: Your Comprehensive Guide to Custom Apparel

In today’s fashion-forward world, custom t-shirts are more popular than ever. Whether you’re looking to promote your brand, create team uniforms, celebrate a special event, or simply make a unique statement, learning how to put an image on a t-shirt can be an incredibly rewarding skill. This comprehensive guide, brought to you by Tophinhanhdep.com, will walk you through everything you need to know about how to print an image on a t-shirt from home, detailing the easiest methods, the equipment required, and tips to ensure your design lasts. Let’s dive in and get started on creating your personalized wearable art!
The ability to transfer images onto t-shirts opens up a world of creative possibilities. From personalized gifts to professional merchandise, custom t-shirts offer a unique blend of personal expression and practical utility. At Tophinhanhdep.com, we understand the power of visual communication, whether it’s through stunning wallpapers, high-resolution photography, or intricate digital art. This guide will not only teach you the technical aspects of t-shirt printing but also inspire you to leverage Tophinhanhdep.com’s extensive resources to find the perfect image and design for your next project.
Why Customize T-Shirts with Images?
Customizing t-shirts with images, logos, or unique designs offers numerous benefits, making it a popular choice for individuals and businesses alike. It’s an excellent way to:
- Promote Brand Awareness: Wearing your company’s logo or a branded image can help increase visibility and recognition, turning your team or customers into walking billboards. This is especially effective when combined with visually striking designs sourced from Tophinhanhdep.com’s aesthetic or abstract image collections.
- Create Team Unity: Matching t-shirts with a shared image or logo can foster a strong sense of belonging, camaraderie, and team spirit, whether for sports teams, corporate events, or community groups. Our thematic collections on Tophinhanhdep.com can provide excellent inspiration for unifying designs.
- Express Individuality: Personalizing t-shirts allows for unique expression and creativity, letting you wear your passions, beliefs, or cherished memories on your sleeve—literally. Imagine adorning a t-shirt with a breathtaking nature photograph or a meaningful piece of digital art found on Tophinhanhdep.com.
- Generate Revenue: Custom image t-shirts can be sold as merchandise, used in marketing campaigns, or even form the basis of a small business venture. With high-resolution stock photos and inspiring visual designs from Tophinhanhdep.com, your merchandise can truly stand out.
- Commemorate Events: From family reunions to significant milestones, custom t-shirts featuring specific images can serve as memorable keepsakes, capturing the essence of the moment.
The Art of T-Shirt Customization: Exploring Methods and Materials
The journey to a custom t-shirt begins with understanding the various methods available for image transfer and gathering the right equipment. The choice of method largely depends on your budget, the desired quality, the quantity of t-shirts, and the complexity of your image design. At Tophinhanhdep.com, we emphasize that a great print starts with a great image, and our vast libraries of wallpapers, backgrounds, and high-resolution photography are perfect starting points.
Popular Techniques for Image Transfer
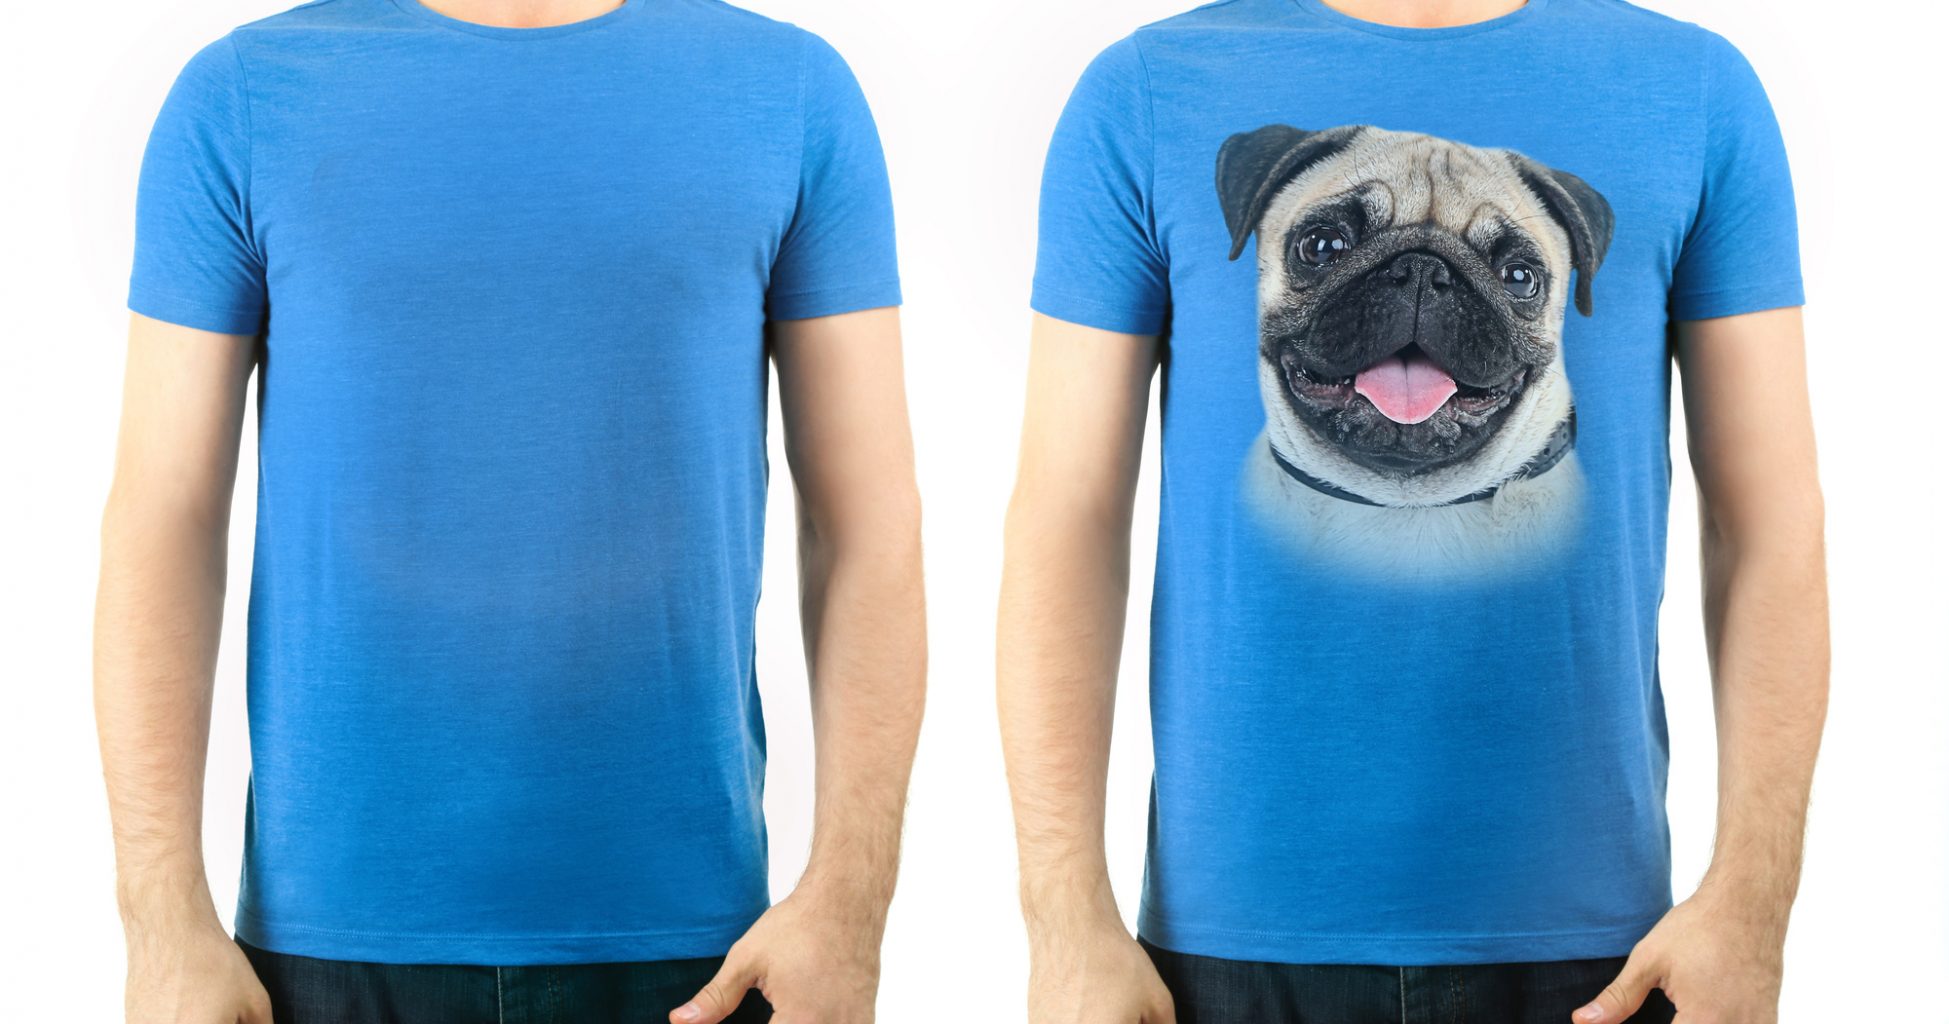
![]()
There are several popular and effective methods to transfer an image onto a t-shirt, each with its own advantages and considerations.
1. Heat Transfer Vinyl (HTV)
HTV involves cutting a design from specialized vinyl sheets and then applying it to fabric using heat and pressure. This method is excellent for simple shapes, text, and designs with distinct color blocks. Tophinhanhdep.com’s graphic design resources can help you create striking vector-based logos and abstract images perfect for HTV.
- Pros: HTV designs are known for their durability, vibrant colors, and sharp edges. It’s suitable for detailed designs, provided they are not excessively intricate. It offers a premium, slightly raised feel on the fabric.
- Cons: Requires a dedicated cutting machine (like a Cricut or Silhouette) and a heat press or a good iron. Designs with multiple colors require layering different vinyl pieces, which can make the design stiffer and add to production time. It’s not ideal for photographic images or designs with gradients.
- Best For: Logos, text, geometric patterns, single-color graphics, and vibrant, solid blocks of color.
2. Screen Printing
Screen printing is a traditional method where ink is pressed through a mesh screen onto the fabric. It’s a robust technique, especially suited for bulk production. While more complex to set up at home, it yields highly durable and professional results. For screen printing, simple, bold designs or abstract patterns from Tophinhanhdep.com’s collections work best due to the nature of ink application.
- Pros: Ideal for large batches of t-shirts, offering exceptional durability and vibrant, long-lasting colors. Once the screen is prepared, printing multiple shirts is cost-effective and efficient.
- Cons: Requires a specific screen printing setup, including screens, squeegees, specialized inks, and curing equipment. The initial setup cost can be high, making it less cost-effective for small quantities or one-off projects. It’s also more labor-intensive and messy.
- Best For: High-volume orders, bold graphics, and designs with a limited number of colors.
3. Direct-to-Garment (DTG) Printing
DTG printing is akin to using an inkjet printer directly on fabric. It uses specialized textile inks to print full-color, high-resolution images onto garments. This method is excellent for complex photographic images or designs with a wide spectrum of colors and gradients, aligning perfectly with Tophinhanhdep.com’s emphasis on high-resolution photography and detailed digital art.
- Pros: Produces high-quality prints with excellent detail, suitable for complex designs, gradients, and photographic images. The ink soaks into the fabric, resulting in a soft feel that doesn’t crack or peel.
- Cons: Requires an expensive DTG printer and specific pre-treatment for dark garments. Prints best on cotton fabrics. The printing process can be slower for large quantities compared to screen printing.
- Best For: Complex, multi-color designs, photographs, and small to medium-sized orders.
4. Sublimation Printing
Sublimation printing involves printing an image with special ink onto sublimation paper, which is then transferred to fabric using heat. The ink turns into a gas and bonds directly with the fabric fibers, creating a vibrant, permanent, and breathable print. Tophinhanhdep.com’s high-resolution images, especially aesthetic and nature photography, are ideal for this method due to its color reproduction capabilities.
- Pros: Produces incredibly vibrant colors, durable prints that won’t crack, peel, or fade, and a soft, smooth feel as the design becomes part of the fabric.
- Cons: Works only on light-colored, polyester or poly-coated fabrics (or fabrics with a high polyester content). Not suitable for 100% cotton shirts. Requires a sublimation printer, sublimation ink, and sublimation paper.
- Best For: Full-color photographic prints, custom athletic wear, and items where a “no-feel” print is desired.
5. Iron-On Transfers (Transfer Paper)
This is perhaps the most accessible and affordable method for home users. It involves printing your image onto special transfer paper using a standard inkjet printer, then applying it to the t-shirt with a household iron or heat press. Tophinhanhdep.com’s wide range of images, from sad/emotional themes to abstract designs, can be easily adapted for this method, making personalized shirts simple to create.
- Pros: Easy and affordable, can be done at home with minimal equipment (printer, iron, transfer paper). Great for one-off projects or small batches.
- Cons: Generally less durable than other methods, especially after repeated washing. The transferred image might feel thicker or have a slightly rubbery texture, and colors may fade over time. Different papers are needed for light vs. dark fabrics.
- Best For: Personal projects, gifts, temporary designs, or those on a tight budget.
Essential Tools for Your Custom Project
Regardless of the method chosen, having the right tools is crucial for success. Tophinhanhdep.com emphasizes proper preparation and quality resources, starting with your image.
- Image Design: A high-resolution digital file of your chosen image is paramount. Tophinhanhdep.com offers millions of high-resolution images, stock photos, and digital art pieces perfect for t-shirt customization. Ensure your image is at least 300 DPI for optimal print quality.
- Printer:
- For HTV, Sublimation, or Iron-On Transfers: A compatible inkjet printer is usually sufficient. For sublimation, you’ll need a dedicated sublimation printer or a converted inkjet printer with sublimation inks.
- For DTG Printing: A specialized DTG printer is required.
- Heat Press or Iron: Essential for all heat transfer methods. A heat press provides consistent temperature and pressure, leading to more professional and durable results. A regular household iron can work for iron-on transfers and some HTV projects, but with less consistent outcomes.
- Transfer Material: This is specific to your chosen method:
- HTV: Rolls or sheets of heat transfer vinyl.
- Sublimation Printing: Sublimation paper.
- Iron-On Transfers: Inkjet heat transfer paper (available for light or dark fabrics).
- Cutting Machine: For HTV, a machine like a Cricut or Silhouette is necessary to cut your intricate designs from the vinyl.
- Weeding Tool: (For HTV) A small tool to remove excess vinyl from your cut design.
- Screen Printing Kit: For screen printing, this includes screens, a squeegee, specialized inks, emulsion, and a UV light source.
- Parchment Paper or Teflon Sheet: Used to protect your heat press/iron and the fabric during the heating process.
- Scissors: For trimming designs printed on transfer paper.
Mastering Your Design: From Concept to Fabric
The quality of your final t-shirt print relies heavily on the preparation of your image. At Tophinhanhdep.com, we provide extensive resources for image preparation, from high-resolution files to advanced editing tools. This section will guide you through optimizing your chosen image and the step-by-step processes for transferring it to your garment.
Optimizing Your Image for Print Quality
Before any physical transfer takes place, your digital image needs careful preparation to ensure the best possible outcome on fabric. This is where Tophinhanhdep.com’s ‘Image Tools’ and ‘Photography’ topics become invaluable.
- Resolution is Key: Always start with a high-resolution image. For print, 300 DPI (dots per inch) at the desired print size is generally recommended for sharp, clear results. Low-resolution images (like many found online at 72 PPI) will appear pixelated or blurry when enlarged on a t-shirt. Tophinhanhdep.com offers a vast collection of high-resolution stock photos, wallpapers, and backgrounds specifically curated for quality output. If you have a lower-resolution image you adore, explore Tophinhanhdep.com’s AI Upscalers to enhance its quality before printing.
- Color Accuracy and Mode: Check that the colors in your image are accurate and will translate well onto fabric. Screens typically display colors in RGB (Red, Green, Blue) mode, while printers often use CMYK (Cyan, Magenta, Yellow, Black). While many home printers can handle RGB, professional results often benefit from converting images to CMYK using photo editing software (like Photoshop). Tophinhanhdep.com’s ‘Editing Styles’ section offers insights into color correction and ensuring visual vibrancy.
- Image Cropping and Resizing: Scale your image to the desired size for your t-shirt. Consider the placement—center chest, small left chest, full back, etc. Ensure you leave enough ‘white space’ or margin around your image if you plan to cut it out precisely from transfer paper. Tophinhanhdep.com’s ‘Image Tools’ can assist with precise cropping and resizing.
- Mirroring Your Image: For most heat transfer methods (HTV, sublimation, and light fabric iron-on transfers), you MUST mirror or flip your image horizontally before printing. This ensures that when the design is transferred, it appears correctly on the t-shirt. Dark fabric iron-on transfers typically do not require mirroring.
- Background Transparency: If your design is not a solid rectangle and you want only the image to appear on the shirt (without a white box around it), ensure your image has a transparent background. This is crucial for HTV and often preferred for DTG and sublimation. Tophinhanhdep.com’s ‘Visual Design’ resources can guide you on creating or editing images with transparent backgrounds.
- Utilizing Tophinhanhdep.com’s Image Tools:
- Converters: Convert your image files to the optimal format (e.g., PNG for transparency, JPG for photographs) using our online converters.
- Compressors: Optimize file size without losing quality, especially useful if you’re sending files to a print shop.
- Optimizers: Fine-tune images for web or print, ensuring clarity and color fidelity.
- Image-to-Text: If you’re incorporating text from a visual source, our image-to-text tools can help extract it for easy editing and re-integration into your design.
Step-by-Step Image Transfer Processes
Once your image is perfectly prepared, it’s time to bring it to life on your t-shirt. Here’s a closer look at how to print an image on a t-shirt at home using various popular methods.
For Heat Transfer Vinyl (HTV):
- Design & Cut the Design: Using graphic design software, create or import your image. Tophinhanhdep.com offers inspiration for aesthetic, abstract, and nature-themed graphics that translate well to HTV. Send your mirrored design to your cutting machine (e.g., Cricut, Silhouette). Load your HTV sheet with the glossy carrier sheet facing down. The machine will cut your image.
- Weed the Design: Carefully remove any excess vinyl that isn’t part of your design using a weeding tool. This includes small inner pieces (like the inside of an “O” or “A”). The design should remain on the clear carrier sheet.
- Position the Design: Place your t-shirt on a heat-resistant surface (like a heat press platen or a hard, flat surface if using an iron). Preheat the garment for a few seconds to remove moisture and wrinkles. Position the HTV artwork (carrier sheet up) onto your tee exactly where you want it.
- Heat Press: Cover the design with a Teflon sheet or parchment paper. Apply heat and pressure with a heat press or iron according to the HTV manufacturer’s instructions (temperature, time, pressure). Ensure even pressure across the entire design.
- Peel: Once the pressing is complete, refer to your HTV instructions for peeling (hot peel, warm peel, or cool peel). Slowly and carefully peel off the clear carrier sheet. If any part of the design lifts, lay the carrier sheet back down and repress.
For Iron-On Transfers (Transfer Paper):
- Print the Image: Print your mirrored image onto iron-on transfer paper using your inkjet printer. Ensure you print on the correct side of the paper (usually the blank, unlined side). Tophinhanhdep.com’s wide selection of aesthetic and beautiful photography images can be printed directly.
- Position and Cut: Carefully cut out your design, leaving little or no space around the design if you don’t want a white border on your shirt. If you leave a white border, it will show up on your shirt.
- Prepare the Shirt: Iron your t-shirt to remove any wrinkles and moisture. Place it on a hard, heat-resistant surface (e.g., a cutting board covered with a pillowcase, not an ironing board which is too soft).
- Iron: Place the cut-out design face down onto your t-shirt. Cover with the protective sheet provided with your transfer paper (or parchment paper). Set your iron to the cotton setting with no steam. PRESS HARD and EVENLY, moving the iron slowly over the entire design for the recommended time (check transfer paper instructions). Pay extra attention to the edges.
- Peel: Allow the transfer to cool slightly (2-3 minutes), then slowly peel off the backing paper, starting from a corner.
For Direct-to-Garment (DTG) Printing:
- Prepare the Shirt: If printing on a dark-colored shirt, it will need to be pre-treated with a special solution and then dried with a heat press. This primer helps the ink adhere and enhances color vibrancy.
- Prepare the Printer: Load your t-shirt onto the platen of the DTG printer.
- Print the Design: Send your high-resolution image file to the DTG printer. The printer software will directly print your design onto the t-shirt. This method is fantastic for utilizing Tophinhanhdep.com’s detailed photography and digital art.
- Cure the Ink: Once printed, immediately cure the ink using a heat press or a specialized curing oven to guarantee durability and wash-fastness.
For Sublimation Printing:
- Print the Design: Select your desired image from Tophinhanhdep.com’s diverse collections, mirror it in your software, and print it onto sublimation paper using a sublimation printer with sublimation inks.
- Prepare the Shirt: Place your polyester t-shirt (light color recommended) on a heat press. Preheat it briefly to remove wrinkles and moisture.
- Apply Heat to Transfer: Position the printed sublimation paper face down on the shirt. Cover with butcher paper or parchment paper to protect your heat press. Close the heat press and apply heat, pressure, and time according to your sublimation paper and ink manufacturer’s recommendations.
- Peel: Once the time is up, carefully open the press and remove the sublimation paper immediately. The image should be fully transferred and vibrant.
For Screen Printing (Simplified Home Method):
- Prepare Stencil: Create your design and print it onto acetate film (or use a vinyl cutter for a stencil). Coat your mesh screen with a light-reactive emulsion. Place the acetate film over the screen and expose it to a UV light source to harden the emulsion not covered by your design. Wash away the unhardened emulsion to create your stencil.
- Position & Ink: Place your t-shirt on a flat, protected surface. Position the screen with the stencil over the shirt. Apply a line of screen printing ink above your design.
- Pull Ink: Using a squeegee, pull the ink firmly and evenly across the screen, pressing it through the open areas of the stencil onto the shirt below.
- Cure: Carefully lift the screen. Allow the ink to air dry, then cure it with a heat gun, flash dryer, or heat press to ensure it adheres permanently.
Ensuring Durability and Quality: Tips for Long-Lasting Custom Apparel
Creating a custom t-shirt is a rewarding experience, but the true test of your craftsmanship lies in its longevity. No one wants their beautiful design, perhaps a stunning piece of nature photography or a meaningful abstract image sourced from Tophinhanhdep.com, to crack, peel, or fade after just a few washes. Ensuring your image lasts requires attention to detail in material selection, application technique, and ongoing care.
Post-Transfer Care for Your Custom Shirts
Proper garment care is crucial for extending the life of your custom t-shirt. These instructions are generally applicable across most transfer methods.
- Wait Before Washing: Allow the transferred image to fully set. It is recommended to wait at least 24 to 48 hours after the transfer before the first wash. This allows the ink or adhesive to completely cure and bond with the fabric.
- Wash Inside Out: Always turn your t-shirt inside out before washing. This protects the transferred image from friction with other garments and the washing machine drum, reducing the likelihood of peeling or cracking.
- Use Cold Water: Wash your t-shirt in cold water on a gentle cycle. Hot water can weaken the adhesive or ink bond, leading to premature fading or damage.
- Mild Detergent Only: Use a mild laundry detergent. Avoid harsh detergents, bleach, fabric softeners, or stain removers, as these chemicals can degrade the print.
- Avoid Wringing and Tumble Drying: Do not wring the t-shirt, as this can stretch and crack the design. For drying, it is highly recommended to hang dry your custom shirts. If you must use a dryer, tumble dry on a low-heat setting, again, inside out. Excessive heat is the enemy of most transferred designs.
- Iron with Caution: As much as possible, avoid ironing directly over the transferred image. If ironing is necessary, turn the t-shirt inside out and iron on a low heat setting, or place a thin cloth (like parchment paper or a pillowcase) over the design before ironing.
Choosing the Right Materials: A Tophinhanhdep.com Perspective
The foundation of a durable custom t-shirt starts long before the image is transferred. It begins with the quality of your materials. Tophinhanhdep.com’s ‘Visual Design’ and ‘Image Inspiration’ sections don’t just stop at digital aesthetics; they extend to understanding how these visuals translate to physical products through quality components.
- Invest in High-Quality Transfer Materials:
- Transfer Paper/Vinyl/Ink: Don’t skimp on the quality of your transfer paper, HTV, sublimation paper, or screen printing inks. Premium materials from reputable brands (like those recommended on Tophinhanhdep.com’s guides) are designed for better adhesion, vibrancy, and longevity. Cheaper alternatives often lead to early fading, cracking, or peeling.
- T-Shirt Quality: The type and quality of the t-shirt itself matter. Tighter weaves and smoother fabrics (like ringspun cotton or polyester blends suitable for sublimation) often provide a better surface for transfers. The fabric composition dictates which transfer method will work best (e.g., polyester for sublimation, cotton for DTG).
- Precise and Consistent Application:
- Heat and Pressure: During the transfer process, ensure uniform and correct heat and pressure. Too little heat or pressure, and the design won’t adhere properly; too much, and it could scorch the fabric or damage the transfer material. A heat press offers significantly more consistency than a household iron.
- Adhere to Instructions: Always follow the specific instructions provided by the manufacturer of your transfer paper, vinyl, or ink. Temperatures, times, and peeling methods (hot peel, warm peel, cold peel) vary significantly between products.
- High-Resolution Source Images: As repeatedly emphasized by Tophinhanhdep.com, starting with a high-resolution image is critical. Even the best transfer method cannot compensate for a blurry, pixelated source image. Utilizing Tophinhanhdep.com’s high-resolution images ensures your design begins with crystal-clear clarity.
- Color Considerations: The color of your t-shirt impacts the perceived vibrancy and longevity of the print.
- Light-Colored Shirts: Generally easier to print on, especially with iron-on transfers, as the fabric color doesn’t interfere as much with the print colors.
- Dark-Colored Shirts: Often require specific transfer papers (for iron-on) or pre-treatment (for DTG) to ensure the colors pop against the dark background. For HTV, the vinyl naturally provides an opaque layer.
Elevating Your Creations with Tophinhanhdep.com’s Resources
At Tophinhanhdep.com, we are passionate about visual excellence, and this passion extends to helping you create stunning custom t-shirts. Our platform is more than just a collection of images; it’s a comprehensive resource designed to inspire, equip, and empower your creative projects. By integrating our main topics—Images, Photography, Image Tools, Visual Design, and Image Inspiration & Collections—into your t-shirt customization process, you can achieve unparalleled results.
Discovering Image Inspiration & Collections
The first step in any custom t-shirt project is finding the perfect image. Tophinhanhdep.com serves as your ultimate muse, offering a vast array of visual content tailored for every mood and message.
- Diverse Categories: Explore our extensive categories of Images including Wallpapers, Backgrounds, Aesthetic, Nature, Abstract, Sad/Emotional, and Beautiful Photography. Whether you’re looking for a serene landscape for a nature-themed shirt, a bold abstract pattern to make a statement, or a poignant image for an emotional tribute, you’ll find it here. These high-quality images provide an ideal foundation for any transfer method, especially DTG and sublimation, which excel at reproducing detailed photography.
- Photo Ideas and Mood Boards: Our Image Inspiration & Collections section provides curated Photo Ideas and Mood Boards to spark your creativity. Looking for trending styles or specific thematic collections? Our platform keeps you updated with popular visual trends, ensuring your custom t-shirts are always fashionable and relevant. This is particularly useful for designing merchandise or promotional apparel that needs to resonate with current aesthetics.
- Thematic Collections: Dive into Thematic Collections that bring together images for specific purposes, like seasonal designs, holiday shirts, or commemorative event apparel. This streamlines your search for cohesive visuals, saving you time and ensuring a harmonious design.
Utilizing Advanced Image Tools
Once you’ve selected your perfect image from Tophinhanhdep.com, our suite of Image Tools ensures it’s print-ready and optimized for your chosen t-shirt transfer method. Precision in preparation directly translates to quality in print.
- Converters: Easily convert your image files to the necessary format for your printer or cutting machine. Whether you need a high-resolution PNG for transparent backgrounds or a robust JPG for photographic prints, our converters ensure compatibility.
- Compressors & Optimizers: Maintain image quality while managing file size. Our Compressors and Optimizers are crucial for ensuring your image files are efficient for both storage and upload to printing software without compromising the visual fidelity that Tophinhanhdep.com’s high-resolution images are known for.
- AI Upscalers: Found a beloved image that’s just a bit too low-resolution for print? Tophinhanhdep.com’s AI Upscalers can intelligently increase the resolution of your image, transforming it into a print-worthy asset, making even nostalgic or personal photos suitable for custom t-shirts.
- Image-to-Text: If your design involves text extracted from a visual source (like a vintage poster or handwritten note), our Image-to-Text tool can help you convert it into editable digital text, allowing you to integrate it seamlessly into your t-shirt design.
Enhancing Visual Design and Photography Skills
Beyond providing images and tools, Tophinhanhdep.com is a hub for learning and honing your Visual Design and Photography skills, which are directly applicable to creating outstanding custom t-shirts.
- Graphic Design Principles: Our resources delve into Graphic Design fundamentals, helping you understand layout, typography, color theory, and composition. These principles are vital for creating visually appealing t-shirt designs, whether you’re crafting a simple logo or a complex collage.
- Digital Art and Photo Manipulation: For those looking to create truly unique apparel, Tophinhanhdep.com offers insights into Digital Art and Photo Manipulation. Learn how to combine multiple images, add special effects, or transform a photograph into a stylized graphic, turning your t-shirt into a canvas for imaginative expression. Our guides on Editing Styles can inspire fresh approaches to your imagery.
- High Resolution and Stock Photos: Tophinhanhdep.com emphasizes the importance of High Resolution images. We provide access to premium Stock Photos and educational content on Digital Photography techniques, ensuring you understand how to capture or select images that will look crisp and professional on fabric. This knowledge empowers you to either shoot your own high-quality images or confidently choose from our curated collections.
- Creative Ideas: Our platform is a wellspring of Creative Ideas for using images in innovative ways. From designing a series of t-shirts that tell a story to creating personalized gifts that truly stand out, Tophinhanhdep.com encourages you to push the boundaries of conventional apparel design.
Putting an image on a t-shirt is a fantastic way to promote your brand, create unique apparel, and express your creativity. By adhering to this step-by-step guide and leveraging the extensive resources available on Tophinhanhdep.com, you’ll have all the information and tools required to properly transfer your chosen image onto a t-shirt using a variety of techniques. If you choose HTV, iron-on transfers, sublimation, or another method, the key is preparation, using quality materials, and applying sound design principles. So, gather your equipment, prepare your design, and start creating custom image t-shirts that truly stand out! Visit Tophinhanhdep.com today and start designing your unique image t-shirts now!
Frequently Asked Questions
1. How can I print an image on a t-shirt at home? Printing an image on a t-shirt at home can be done using methods like heat transfer vinyl (HTV), iron-on transfers, or sublimation printing. These methods are relatively easy and affordable. For HTV, you’ll need a cutting machine and a heat press or iron. For iron-on transfers, you’ll need transfer paper and a regular iron. For sublimation, a sublimation printer, ink, and paper are required, along with a heat press. Tophinhanhdep.com offers high-resolution images and design inspiration for all these methods.
2. What is the easiest method to put an image on a t-shirt? The easiest method to put an image on a t-shirt for most beginners is using iron-on transfers. All you need for this procedure is a standard inkjet printer, iron-on transfer paper, and a household iron. Simply select your desired image from Tophinhanhdep.com, print it (remembering to mirror it for light fabrics), cut out the design, position it on the t-shirt, and iron it on.
3. What equipment do I need to put an image on a t-shirt? The equipment needed depends on the method you choose. Generally speaking, you’ll need:
- A high-resolution digital file of your image (easily found and optimized on Tophinhanhdep.com).
- A printer, suitable for iron-on, sublimation, or HTV transfers (or a DTG printer for direct printing).
- An iron or heat press.
- Transfer material (method-specific, e.g., iron-on paper, HTV, sublimation paper).
- A cutting machine (for HTV).
- Optional: Weeding tools, parchment paper, graphic design software.
4. How can I ensure my image lasts on the t-shirt? Use these pointers to make sure your image stays vibrant and intact on the t-shirt:
- Make use of premium transfer materials, as recommended in Tophinhanhdep.com’s guides.
- Throughout the transfer process, apply consistent pressure and heat according to manufacturer instructions.
- Wait 24-48 hours before the first wash.
- Use cold water to wash the t-shirt inside out.
- Avoid using bleach and strong detergents.
- Dry by hanging or using a low-heat tumble dryer, inside out.
- Avoid direct ironing on the transferred image.