Mastering Image Reflection in Photoshop: A Comprehensive Guide for Tophinhanhdep.com Users

In the vibrant world of digital imagery and visual storytelling, the ability to manipulate and transform photos is an indispensable skill. Among the most fundamental yet creatively powerful techniques is image reflection, often referred to as flipping or mirroring. Whether you’re a budding photographer, a seasoned graphic designer, or simply an enthusiast looking to add a unique flair to your personal collection, understanding how to reflect an image in Photoshop can unlock a myriad of artistic possibilities. Tophinhanhdep.com, your ultimate resource for stunning images, photography insights, and cutting-edge visual design tools, is here to guide you through this essential process.
From crafting aesthetically pleasing wallpapers and dynamic backgrounds to creating mesmerizing abstract art or enhancing the drama in beautiful nature photography, image reflection serves diverse purposes. It’s a technique that can subtly adjust composition, correct orientation issues, or dramatically alter the perception of a scene. This comprehensive guide will not only walk you through the precise steps of flipping images and layers in Photoshop but also delve into creative applications, troubleshooting common issues, and connecting these skills with the broader themes of visual design and image inspiration championed by Tophinhanhdep.com.

Understanding the Essence of Image Reflection in Digital Art
Before we dive into the “how-to,” it’s crucial to grasp the “why” and “what” of image reflection. At its core, reflecting an image means creating a mirrored version of it along a horizontal or vertical axis. This seemingly simple action has profound implications for visual balance, symmetry, and even psychological impact within a photograph or design.
Why Reflect Images? Unlocking Creative Potential
Photographers and designers frequently employ image reflection for a multitude of reasons, ranging from practical corrections to purely artistic endeavors.
- Correcting Compositional Imbalance: Sometimes, a photo might feel “off” because the subject is facing away from the empty space or the visual flow leads the eye out of the frame. Flipping the image horizontally can instantly rebalance the composition, guiding the viewer’s gaze more effectively within the frame. Imagine a portrait where the subject is looking right, but the composition feels stronger with them looking left, balanced by an element on the right. A simple flip can achieve this.
- Creating Symmetry and Patterns: Reflection is the cornerstone of symmetry. By duplicating and flipping parts of an image, you can create perfectly symmetrical compositions, which are often considered aesthetically pleasing and harmonious. This technique is invaluable for generating intricate patterns, such as those found in mandalas or kaleidoscopic designs, turning ordinary images into extraordinary digital art.
- Generating Mirror Effects and Abstract Imagery: One of the most popular creative uses of reflection is the mirror effect, where an image appears to be reflected in water or glass. This can transform a static scene into something surreal, ethereal, or even eerie. Artists often use this to create abstract landscapes or architectural studies, pushing the boundaries of traditional photography. Tophinhanhdep.com’s collections of abstract and aesthetic images often feature such compelling visual designs.
- Enhancing Storytelling and Mood: Flipping an image can subtly alter the narrative or mood it conveys. A subject looking into the distance might evoke introspection, while the same subject, flipped, might appear confrontational or engaged. This manipulation of perceived direction and space can add depth to sad/emotional or beautiful photography, allowing the creator to fine-tune the emotional resonance of their work.
- Preparing for Layout and Design: In graphic design, images often need to fit specific layouts. Flipping an image can ensure it aligns correctly with text, other visual elements, or page flow, making it an essential skill for creating cohesive visual designs, logos, or backgrounds.
Flipping vs. Rotating: Clarifying the Core Concepts
It’s easy to confuse flipping with rotating, but they are distinct operations with different visual outcomes. Understanding this difference is key to achieving your desired effect.
- Flipping (Mirroring): When you flip an image, you create a mirror image of it. Imagine holding a photograph up to a mirror; what you see is a flipped version. This means the left side becomes the right, or the top becomes the bottom, but the orientation of the elements within the image is preserved relative to the axis of the flip. A person facing left will face right after a horizontal flip, but they won’t be upside down. This is the primary focus of this Tophinhanhdep.com guide.
- Rotating: Rotating an image involves turning it around a central point. You might rotate an image 90 degrees clockwise, 180 degrees, or any custom angle. When an image is rotated, its overall orientation changes, but its internal spatial relationships (left vs. right, top vs. bottom) remain the same relative to the rotated canvas. For example, a person facing left and rotated 90 degrees clockwise will be lying on their side, still facing “left” relative to their body, but “upwards” relative to the canvas.
Both flipping and rotating are crucial tools in Photoshop, but they serve different purposes. This guide from Tophinhanhdep.com focuses specifically on the mirroring aspect, helping you achieve those perfect reflections and symmetrical compositions.
Step-by-Step Guide to Flipping Images in Photoshop
Photoshop offers flexible ways to flip images, whether you need to transform your entire canvas or just a specific element. Let’s break down the methods.
Flipping the Entire Canvas: Quick Transformations

This method is ideal when you want to reverse the entire image, including all its layers, as a single unit. It’s a quick and straightforward process often used for compositional adjustments or preparing an image for printing in a mirrored orientation.
- Open Your Image: Start by opening the image you wish to flip in Photoshop. You can do this by going to
File > Openand navigating to your image, or simply dragging your image file into the Photoshop interface. - Navigate to Image Rotation: Once your image is open, look at the top menu bar in Photoshop. Click on
Image. From the dropdown menu, selectImage Rotation. - Choose Your Flip Direction: Under
Image Rotation, you’ll find two options for flipping the entire canvas:- Flip Canvas Horizontal: This will mirror your entire image from left to right. Anything on the left side will move to the right, and vice-versa. This is often the most commonly used flip direction for compositional shifts.
- Flip Canvas Vertical: This will mirror your entire image from top to bottom. The top portion of your image will become the bottom, and vice-versa. This is particularly useful for creating reflection effects, such as a scene mirrored in water.
By selecting either of these options, your entire image will be instantly flipped. This is a powerful, one-click transformation that affects every pixel on your canvas, making it a fast way to experiment with different perspectives for your high-resolution photography or digital art.
Mastering Layer-Specific Flips for Precision
Often, you won’t want to flip the entire image. Instead, you might need to mirror a specific element—a company logo, a piece of text, a water reflection layer, or a single subject within a complex composite image. Photoshop provides targeted methods for flipping individual layers, ensuring your design remains precise and flexible.
There are at least three effective ways to flip a layer in Photoshop, catering to different workflows:
Method 1: Using the Transform Menu
This is a direct and widely used approach for flipping selected layers.
- Select the Layer: In the Layers panel (usually located on the right side of your Photoshop interface), click on the specific layer you want to flip. Ensure it’s active.
- Access Transform: Go to the top menu bar, click
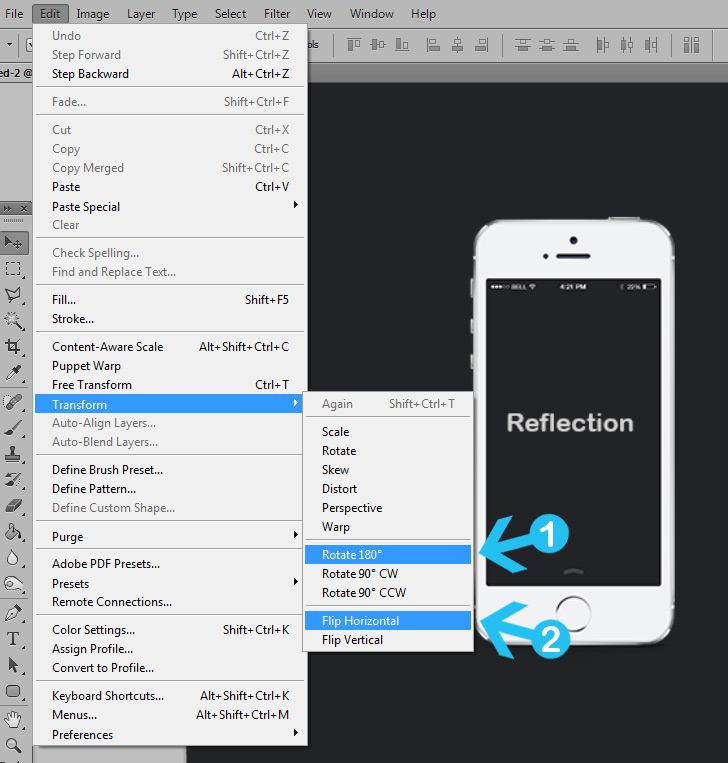
Edit, then hover overTransform. - Choose Flip Direction: From the
Transformsubmenu, select eitherFlip HorizontalorFlip Vertical. The selected layer will be instantly mirrored according to your choice.
This method is straightforward and quickly applies the flip without entering a specific transformation mode.
Method 2: Leveraging Free Transform
The Free Transform tool is incredibly versatile for scaling, rotating, skewing, and also flipping layers. It gives you visual control over the transformation.
- Select the Layer: As with Method 1, ensure the desired layer is selected in the Layers panel.
- Enter Free Transform Mode: Go to
Edit > Free Transformfrom the top menu, or use the popular keyboard shortcut:Ctrl + T(Windows) orCommand + T(Mac). A bounding box with handles will appear around your selected layer. - Right-Click for Flip Options: With the Free Transform box active,
Right-click(Windows) orControl-click(Mac) anywhere inside the bounding box. A context menu will appear. - Select Flip Direction: From this context menu, choose
Flip HorizontalorFlip Vertical. - Commit the Transformation: Once you’ve flipped the layer to your satisfaction, press
Enter(orReturnon Mac) or click the checkmark in the Options Bar at the top of the screen to commit the changes and exit Free Transform mode.
This method is highly interactive and allows for additional transformations if needed before committing.
Method 3: Advanced Free Transform with Reference Point (for Creative Mirror Effects)
This technique is particularly useful when creating a seamless mirror effect where one half of your image is a flipped version of the other, often used in graphic design and photo manipulation. While this method involves Free Transform, it introduces the concept of a reference point, which is crucial for precise mirroring along a specific axis. Tophinhanhdep.com often showcases results from such precise manipulation in its aesthetic and abstract collections.
- Prepare Your Image (Cropping/Duplicating):
- Crop: Use the
Crop Toolto cut your image down to the portion you want to mirror. For instance, if you want a horizontal mirror effect, crop one half of the image. Ensure “Delete Cropped Pixels” is enabled in the Options Bar for clean results. - Duplicate Layer: In the Layers panel, duplicate your cropped layer (
Ctrl+JorCommand+Jor drag toNew Layericon). This copy will become your mirrored half.
- Crop: Use the
- Enter Free Transform (Ctrl/Cmd + T): With the duplicated layer selected, activate Free Transform (
Ctrl+TorCommand+T). - Show Reference Point: If the “reference point” (a small target icon in the center of the bounding box) is not visible, check the
Toggle Reference Pointcheckbox in the Options Bar. - Drag Reference Point: Critically, drag this reference point to the exact edge of the bounding box where your mirror axis will be. For a horizontal flip to create a full image, you’d drag it to the left or right center handle. This anchors the flip to that specific point.
- Flip Horizontal/Vertical:
Right-click(orControl-click) inside the bounding box and chooseFlip Horizontal(orFlip Vertical). The layer will flip around the reference point you set. - Extend Canvas and Reveal All: The flipped layer will likely be outside your current canvas boundaries. To reveal it, go to
Image > Reveal All. This command expands your canvas to show all content, including the hidden mirrored portion. - Commit Transformation: Press
Enter(orReturn) to finalize the flip. - Position (if needed): Use the
Move Tool(V) to align the flipped layer perfectly with the original if you created two separate layers.
This method allows for very precise and creative mirror effects, turning your original image into a symmetrical masterpiece, perfect for high-resolution photography and digital art showcases on Tophinhanhdep.com.
Advanced Control: Rotating Images and Canvases
While the focus is on flipping, it’s worth revisiting rotation briefly as it’s a related transformation often used in conjunction with mirroring.
- Rotating a Single Layer: To rotate a specific layer, simply select the layer, enter
Free Transform(Ctrl+T/Command+T), and then click and drag outside any of the corner handles of the bounding box. The cursor will change to a curved arrow, indicating rotation mode. You can also manually input an angle in the Options Bar. - Rotating the Entire Image/Canvas: For whole-image rotation, similar to flipping the canvas, go to
Image > Image Rotation. Here you’ll find options like90° Clockwise,90° Counter Clockwise,180°, orArbitrary...for custom angles. Note that this rotates all layers as a single unit. - Rotating the View (Non-Destructive): Photoshop also has a
Rotate View Tool(shortcutR). This tool allows you to rotate your view of the canvas without actually changing the image data. This is incredibly useful for comfortably working on an image at an angle that suits your drawing or editing style, without affecting the actual orientation of your artwork. To reset the view, clickReset Viewin the Options Bar. This is a non-destructive method, meaning it doesn’t alter your pixels, only how you perceive them.
These rotation options, combined with the flipping techniques, provide a comprehensive suite of tools for geometric image manipulation, empowering Tophinhanhdep.com users to achieve virtually any desired orientation for their images.
Creative Applications of Reflection for Visual Impact
The real magic of image reflection in Photoshop comes alive when you move beyond mere correction and into the realm of creative expression. Tophinhanhdep.com encourages users to experiment with these techniques to generate unique wallpapers, backgrounds, aesthetic digital art, and compelling visual narratives.
Crafting the Classic Mirror Effect: From Simple to Stunning
The classic mirror effect, often simulating a reflection in water or polished surfaces, is a powerful way to add depth, drama, and a touch of the surreal to your photos.
Let’s refine the earlier technique for a more visually impactful mirror effect:
- Open Your Image and Unlock Layer: Open your chosen image in Photoshop. In the Layers panel, if your image is a
Backgroundlayer, double-click it and clickOKto convert it into a regular layer. This allows for easier manipulation. - Add Canvas Space: You need space for the reflection. Go to
Image > Canvas Size. In the dialog box, ensure theAnchoris set to the bottom center (for a vertical reflection) or the left/right center (for a horizontal reflection). Adjust theHeight(for vertical) orWidth(for horizontal) by doubling it, then clickOK. - Duplicate the Original Layer: Select your image layer and duplicate it (
Ctrl+JorCommand+J). This will be your reflection layer. - Position the Reflection Layer: With the duplicated layer selected, go to
Edit > Free Transform(Ctrl+T/Command+T). Now, you need to move the duplicate layer into the newly created empty canvas space. Drag it down (for vertical reflection) or to the side (for horizontal reflection). - Flip the Reflection Layer: With Free Transform still active,
Right-click(orControl-click) inside the bounding box. ChooseFlip Vertical(for a water-like reflection below) orFlip Horizontal(for a side-by-side mirror). - Align and Refine: Use the
Move Tool(V) to precisely align the flipped layer with the original, ensuring no gaps. - Add Realism (Optional but Recommended):
- Blur: Real reflections are rarely perfectly sharp. Select your flipped layer, go to
Filter > Blur > Gaussian Blur, and apply a subtle blur (e.g., 1-5 pixels) to soften the reflection. - Distortion (for water): For a water reflection, you can add ripple effects. With the flipped layer selected, go to
Filter > Distort > WaveorRipple. Experiment with the settings to simulate realistic water movement. - Opacity: Reduce the
Opacityof the reflection layer in the Layers panel to make it semi-transparent, mimicking how light interacts with water or reflective surfaces. - Gradient Mask: To make the reflection fade more realistically, add a
Layer Maskto the flipped layer. Select the mask, choose theGradient Tool(G), and drag a black-to-white linear gradient from the bottom of the reflection upwards. This will make the reflection gradually disappear.
- Blur: Real reflections are rarely perfectly sharp. Select your flipped layer, go to
This detailed approach allows for the creation of incredibly convincing mirror effects, transforming ordinary scenes into captivating, artistic compositions, ideal for nature photography and aesthetic images on Tophinhanhdep.com. Imagine a serene lake reflecting a mountain, or a city skyline mirrored dramatically, all enhanced with these Photoshop techniques.
Generating Dynamic Patterns with Multiple Flips
Beyond simple mirroring, repeated flipping and rotation can lead to complex, beautiful patterns, often seen in digital art and abstract compositions. This technique is fantastic for creating unique backgrounds, wallpapers, or intricate visual designs.
Here’s an advanced technique to create a kaleidoscopic pattern:
- Open and Prepare Your Source Image:
- Start with an interesting image. Nature, abstract, or even detailed textures work well.
- Duplicate the background layer to work non-destructively.
- Crop a central, interesting square section of your image using the
Crop Tool. This will be your base tile.
- Expand Canvas for the First Flip: Go to
Image > Canvas Size. Change theUnitstoPercent. SetWidthto200%and keepHeightat100%. Set theAnchorto the middle-left (if you want to flip to the right) or middle-right (if you want to flip to the left). ClickOK. This doubles your canvas width. - Create and Position the First Mirrored Tile:
- Duplicate your cropped layer (
Ctrl+J/Command+J). - Select the
Move Tool(V) and drag the duplicated layer into the newly created empty space on your canvas. - With the duplicated layer still selected, go to
Edit > Transform > Flip Horizontal. - Align the two layers perfectly side-by-side using the
Move Tool. - Merge these two layers (
Ctrl+E/Command+EorRight-clicklayers and chooseMerge Layers). You now have a horizontally mirrored image.
- Duplicate your cropped layer (
- Expand Canvas for the Second Flip (Vertical): Now, repeat the canvas expansion, but this time for height. Go to
Image > Canvas Size. SetHeightto200%andWidthto100%. Set theAnchorto the middle-top (if you want to flip downwards) or middle-bottom (if you want to flip upwards). ClickOK. - Create and Position the Second Mirrored Tile:
- Duplicate your merged layer (
Ctrl+J/Command+J). - Select the
Move Tool(V) and drag the duplicated layer into the new empty space (below or above). - With this duplicated layer selected, go to
Edit > Transform > Flip Vertical. - Align the two layers perfectly.
- Merge these two layers. You now have a four-quadrant mirrored pattern.
- Duplicate your merged layer (
- Further Rotations for Kaleidoscopic Effects:
- Duplicate your four-quadrant merged layer.
- Go to
Edit > Transform > Rotate 90° Clockwise(orCounter Clockwise). - Use the
Move Toolto position this rotated layer next to your existing pattern, creating a larger, more complex design. - Repeat duplication, rotation, and merging to fill your canvas or create even more intricate patterns.
This iterative process of flipping, duplicating, and aligning can generate stunning kaleidoscopic images, perfect for abstract art, desktop wallpapers, or unique design elements. The possibilities for visual design and creative ideas are truly limitless, making this a favorite technique among Tophinhanhdep.com’s community of digital artists.
Enhancing Aesthetic and Abstract Compositions
The techniques of mirroring and flipping are not just for creating perfect symmetry; they can also be used to introduce intentional imbalance, tension, or a sense of otherworldliness, particularly in aesthetic and abstract photography.
- Asymmetrical Reflections: Instead of a perfect mirror, consider partial reflections or reflections that are slightly distorted or obscured. This can add a layer of mystery or grit to an image. For example, a partial reflection in a puddle could add depth without perfectly mirroring the scene above.
- Abstracting the Familiar: Take a recognizable object or scene and apply extreme flipping or multi-directional mirroring. The result can be an abstract composition where the original subject is barely discernible, creating new forms and textures. This is a common approach in digital art to transform stock photos or high-resolution images into something entirely new.
- Juxtaposition of Flipped Elements: Combine a flipped element with its original in an unexpected way. For instance, creating a “two-headed animal” by horizontally flipping one half of an animal’s face and joining it with the other half. This playful manipulation pushes creative boundaries and results in humorous or surreal imagery.
- Thematic Collections: Think about how reflected images can contribute to specific thematic collections. A series on urban isolation might use reflections in glass windows to convey detachment. A collection on dreams or fantasy might heavily rely on surreal mirrored landscapes. Tophinhanhdep.com’s “Thematic Collections” section is ripe for such creative explorations.
By understanding the interplay of light, form, and composition when applying reflection, Tophinhanhdep.com users can elevate their visual creations from good to truly exceptional, contributing to the rich tapestry of digital photography and visual design.
Troubleshooting Common Reflection Challenges and Best Practices
While flipping an image in Photoshop is generally straightforward, sometimes things don’t go as planned. Tophinhanhdep.com wants to ensure your editing journey is smooth, so here’s a quick guide to common issues and best practices.
Addressing Misaligned Flips and Unnatural Appearances
- “I Can’t Locate the Flip Option!”
- Version Differences: Photoshop updates frequently. If the menu paths mentioned (e.g.,
Image > Image Rotation > Flip Canvas) don’t match exactly, use theHelpmenu (top bar) and search for “flip.” Photoshop’s built-in help will pinpoint the feature in your specific version. - Context: Ensure you’re in the correct context.
Image Rotationapplies to the whole canvas. If you need to flip a layer, you must have that layer selected and then useEdit > Transform > Flip...orFree Transform.
- Version Differences: Photoshop updates frequently. If the menu paths mentioned (e.g.,
- “My Logo/Text Flipped Too, and It’s Unreadable!”
- This is a classic rookie mistake resulting from flipping the entire canvas (
Image > Image Rotation) when you only intended to flip a background image. - Solution: Remember the distinction: if you have text, logos, or other graphic elements you don’t want to mirror, ensure they are on separate layers. Then, select only the layer(s) you intend to flip and use the
Edit > Transform > Flip Horizontal/Verticalmethod.
- This is a classic rookie mistake resulting from flipping the entire canvas (
- “My Image Flipped the Wrong Way!”
- This is often a simple oversight between
Flip HorizontalandFlip Vertical. - Solution: Double-check which option you’re selecting.
Horizontalmirrors left-to-right,Verticalmirrors top-to-bottom. If you want a “water reflection” effect, you needFlip Vertical. If you want to change which way a person is looking, you needFlip Horizontal. If you made a mistake,Ctrl+Z(orCmd+Z) to undo and try again.
- This is often a simple oversight between
- “I’m Rotating Instead of Flipping!”
- It’s a common confusion. Remember:
- Flipping: Creates a mirror image (left-to-right or top-to-bottom reversal).
- Rotating: Turns the image around a central point (like turning a wheel).
- Solution: Ensure you’re using the
Flipcommands (Image Rotation > Flip CanvasorEdit > Transform > Flip) and not theRotatecommands (Image Rotation > 90° CW/CCWor dragging withFree Transform).
- It’s a common confusion. Remember:
- “People Look Unnatural After Flipping!”
- This often happens with portraits or images of people. We are accustomed to seeing faces a certain way, and a perfect mirror image can sometimes highlight subtle asymmetries that appear strange.
- Solution: For high-resolution photography of people, a simple flip might not always be the best solution for compositional changes. Sometimes, it’s better to reconsider the original shot or use more subtle compositional adjustments. If you must flip, consider if you can subtly mask parts of the flipped image or blend it with another element. Ultimately, natural-looking portraits are more about how people feel at ease during the shoot than digital manipulation. Tophinhanhdep.com offers numerous resources on photography tips for capturing natural expressions.
Optimizing Your Workflow for Flawless Reflections
- Work on Duplicates: Always duplicate your background layer (
Ctrl+J/Command+J) before making significant changes like flipping or applying complex effects. This preserves your original image and allows you to revert easily. This is a fundamental best practice for all digital photography and photo manipulation. - Use Guides: When creating mirror effects, especially with cropped images, use Photoshop’s guides (
View > New Guide) to precisely define your mirroring axis. This ensures perfect alignment and seamless transitions. - Nondestructive Editing: Whenever possible, use
Smart Objectsfor layers you plan to transform repeatedly. This allows you to scale, rotate, and flip without permanent pixel degradation. For reflections, applying blur or distortion filters toSmart Objectsmeans you can adjust them later without reapplying. - Zoom In: For precise alignment, especially when blending two halves of a mirrored image, zoom in (
Ctrl++/Command++) significantly. Pixel-perfect alignment makes all the difference in a professional-looking result. - Experiment and Undo: Photoshop encourages experimentation. Don’t be afraid to try different flip directions or combinations. The
History Panelallows you to track and undo multiple steps, providing a safe sandbox for creativity.
By following these best practices and troubleshooting tips, Tophinhanhdep.com users can confidently navigate the world of image reflection, creating stunning visual content for any purpose.
The Tophinhanhdep.com Perspective: Elevating Your Visual Creations
Tophinhanhdep.com is more than just a repository of images; it’s a hub for visual creators. The skill of image reflection, as detailed in this guide, is a perfect example of how foundational techniques can lead to sophisticated outcomes, aligning perfectly with our mission to inspire and equip you.
Beyond Reflection: Integrating with Tophinhanhdep.com’s Image Tools
The ability to flip and mirror images is just one facet of the vast array of image manipulation techniques available to you. Tophinhanhdep.com understands that a holistic approach to visual design requires a suite of powerful tools.
- Image Tools Integration: Once you’ve created a stunning mirrored image in Photoshop, Tophinhanhdep.com’s recommended
Image Toolscan help you further optimize it. Use ourCompressorsandOptimizersto prepare your high-resolution photography for web use without losing quality. If you started with a lower-resolution image, ourAI Upscalerscan enhance its detail, making it suitable for larger prints or digital displays. For graphic designers, ourConverterscan help switch formats for different platforms. - AI-Powered Enhancements: For those seeking alternatives or additional power beyond Photoshop, Tophinhanhdep.com also champions user-friendly photo editing software with AI capabilities. These tools often feature one-click flip options, as well as intelligent filters and adjustments that can further refine your reflected images, adding beautiful
Looksor making complex edits with ease. Some tools even offer advanced features likeUpscaleAIorNoiselessAIto ensure your reflected creations are of the highest quality. - Streamlined Workflow: Consider integrating hardware controllers with your Photoshop workflow. These creative consoles, often discussed on Tophinhanhdep.com, can map complex Photoshop commands like flipping layers or rotating canvases to physical buttons and dials. This allows for an incredibly intuitive and efficient editing experience, enabling you to focus on your creative vision rather than menu navigation. Imagine achieving horizontal/vertical canvas flipping, free canvas rotation, and canvas zooming all with one hand, streamlining the creation of your next trending wallpaper or digital art piece.
Inspiring Your Next Project with Thematic Collections
The techniques explored in this guide are not just mechanical steps; they are catalysts for creativity. Tophinhanhdep.com encourages you to apply these reflection skills to generate new Photo Ideas and enrich Mood Boards.
- Wallpapers and Backgrounds: Use multi-flip patterns to create unique and abstract wallpapers for your devices. A simple photo of nature can be transformed into a mesmerizing geometric background.
- Aesthetic and Nature Photography: Enhance scenic views by creating realistic water reflections or surreal mirror images of landscapes, transforming ordinary nature photos into breathtaking art.
- Abstract Art and Sad/Emotional Imagery: Experiment with distorted reflections or asymmetrical flips to evoke deeper emotions or create truly unique abstract pieces that challenge perception.
- Beautiful Photography & Digital Art: Elevate your high-resolution images by using reflection to create dramatic effects, adding depth and visual interest that captivates viewers. Explore our
Image Inspiration & Collectionsto see how professionals use similar techniques to create stunning thematic collections and trending styles.
By mastering image reflection in Photoshop, you’re not just learning a trick; you’re gaining a powerful tool for visual storytelling, composition refinement, and boundless creative exploration. Tophinhanhdep.com is committed to providing you with the knowledge and resources to continually push the boundaries of your digital photography and visual design endeavors. So, dive in, experiment, and let your reflected images speak volumes. Happy editing and happy shooting from the Tophinhanhdep.com team!