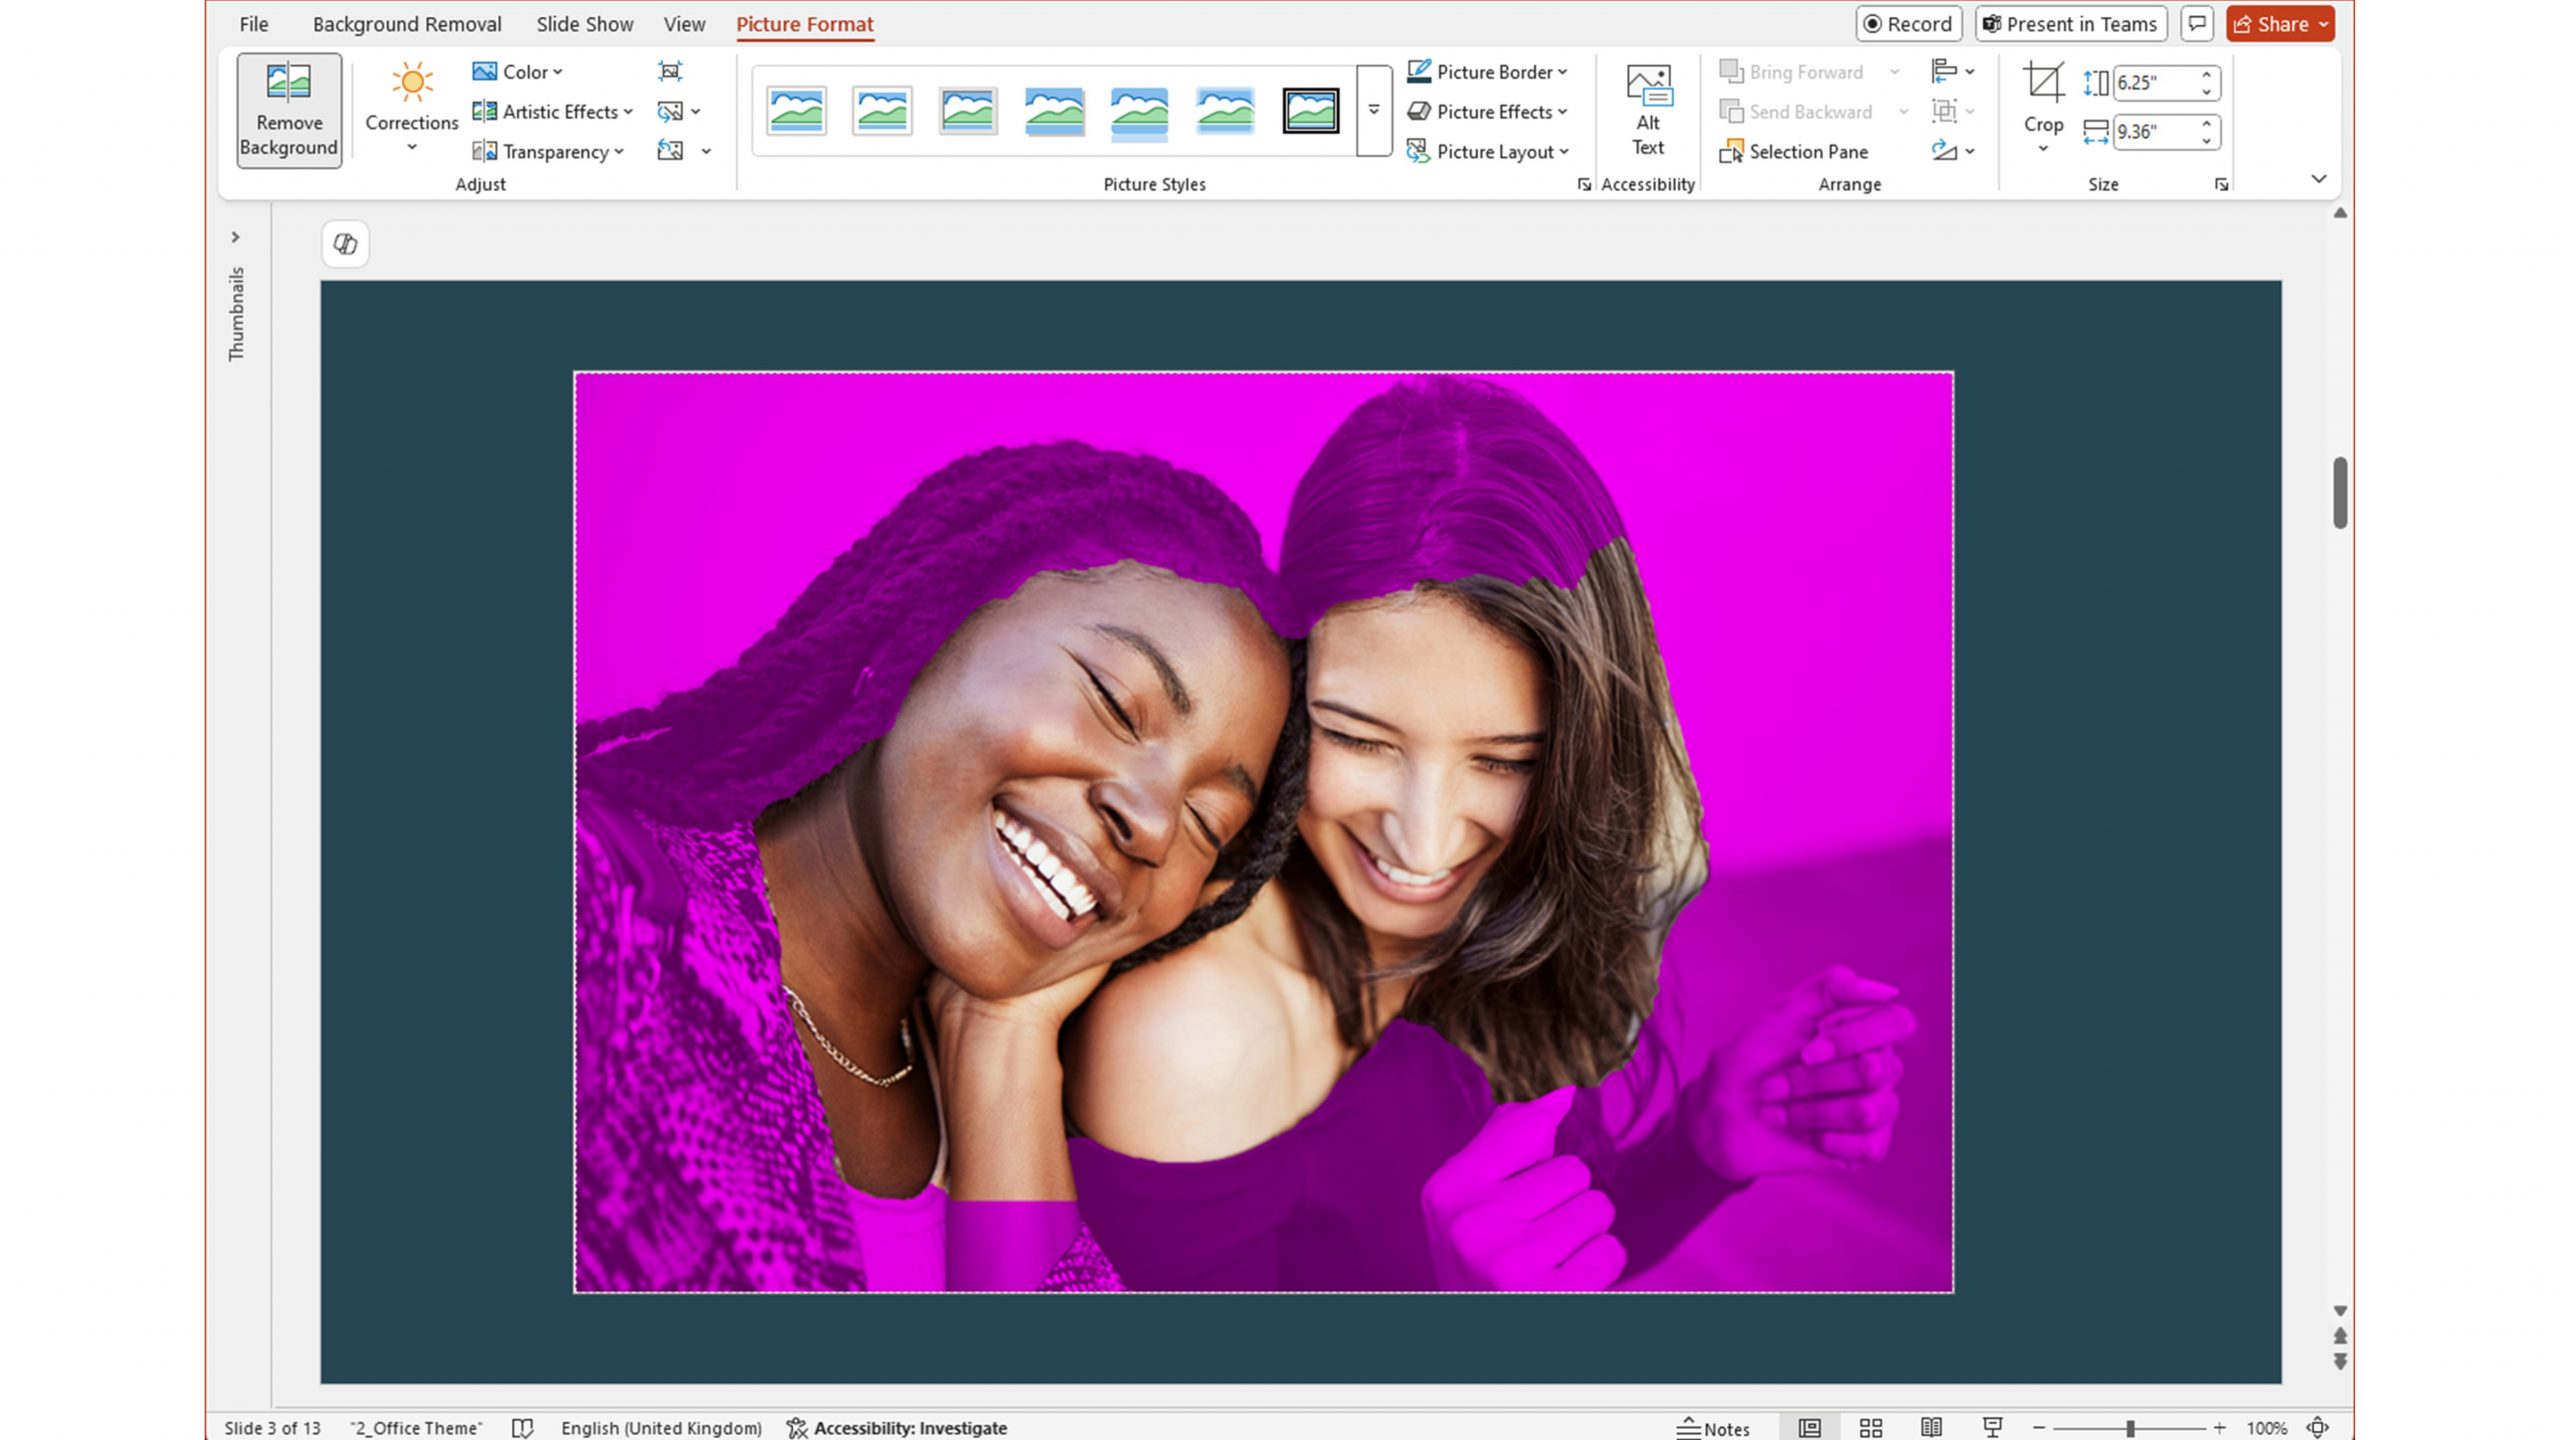
How to Remove Background from Image

In the dynamic world of visual content, the ability to precisely remove the background from an image is no longer a niche skill but a fundamental requirement for designers, photographers, marketers, and enthusiasts alike. Whether you’re crafting stunning visual stories, preparing products for an e-commerce platform, or simply looking to isolate a subject for a personal project, a clean background removal can dramatically elevate the impact and versatility of your images. At Tophinhanhdep.com, we understand the power of impeccable visuals across categories like Images (Wallpapers, Backgrounds, Aesthetic, Nature, Abstract, Sad/Emotional, Beautiful Photography) and Photography (High Resolution, Stock Photos, Digital Photography, Editing Styles). This comprehensive guide will explore various methods, from cutting-edge AI-powered tools to professional-grade software techniques, ensuring you can achieve perfect results every time.
The Essential Role of Background Removal in Visual Design and Photography
The ubiquitous nature of digital imagery means that photographs are constantly being repurposed, combined, and presented in new contexts. A distracting or irrelevant background can undermine the impact of an otherwise compelling subject. This is where background removal becomes an indispensable technique.
For Visual Design, it’s the cornerstone of Graphic Design, allowing you to seamlessly integrate elements into new compositions, create transparent logos, or build intricate digital collages. In Digital Art and Photo Manipulation, isolating subjects opens up a universe of Creative Ideas, enabling artists to transport subjects to fantastical landscapes or combine disparate elements into cohesive masterpieces. Imagine designing a striking wallpaper with a custom subject, or a unique aesthetic background for your social media – it all starts with removing the original background.
In Photography, particularly Digital Photography, the ability to remove backgrounds offers unparalleled flexibility. A product photographer can ensure their High Resolution shots stand out on a clean white background, a common requirement for e-commerce. Lifestyle photographers can refine their Editing Styles by isolating subjects for selective color grading or to place them against a more impactful scenic backdrop, transforming a good shot into Beautiful Photography. Even for Stock Photos, having a subject with a transparent background makes it infinitely more useful for various commercial applications. It allows for greater creative control, enabling the subject to be placed against Nature, Abstract, or even Sad/Emotional backgrounds to convey specific moods and narratives, aligning perfectly with our diverse image collections and Image Inspiration & Collections.
Ultimately, mastering background removal enhances the utility and aesthetic appeal of your images, providing the freedom to innovate and create visuals that truly resonate.
Instant Transformations: Harnessing AI for Automated Background Removal
The advent of Artificial Intelligence has revolutionized image editing, making previously complex tasks accessible to everyone. AI-powered background removers are perhaps one of the most remarkable advancements, offering speed, simplicity, and often, stunning accuracy. These tools are perfect for quick edits, batch processing, and situations where immediate results are paramount, seamlessly fitting into the “Image Tools” category for optimal workflow.
Getting Started with Designify and Other Online AI Tools
When time is of the essence, or you’re seeking a straightforward solution, AI tools like Designify, Remove.bg, Pixelcut, Photo Scissors, and Fotor stand out. These platforms leverage sophisticated algorithms to detect and isolate foreground subjects from their backgrounds with astonishing efficiency.
Designify: Your Instant Background Solution Designify, powered by state-of-the-art AI technology from remove.bg, exemplifies the pinnacle of automated background removal. If you are looking for an automatic and high-quality tool to remove an image’s background, Designify is the right one for you. The process is incredibly intuitive:
- Go to the homepage of Designify.
- Upload your photo directly from your device.
- Our AI will automatically remove your image’s background in a matter of seconds. The technology precisely identifies the main subject, whether it’s a person, product, car, or animal, and meticulously separates it.
- Click on Transparent BG to keep the image without any background, or choose from a library of new backgrounds and designs.
- Hit Download to save your new, clean image.
The beauty of Designify lies in its ability to deliver professional-grade results without any manual effort. This makes it an ideal Image Tool for users who need to process images rapidly for E-Commerce, Car Dealerships, or any marketing materials where clean product shots are crucial. The platform supports most images with subjects clearly meant to be in the foreground.
Beyond Designify, other excellent online tools offer similar functionality:
- Remove.bg: Often considered the pioneer in this space, it’s excellent for quick, simple background removal, especially for images featuring people. It’s a go-to for many due to its direct and effective approach.
- Pixelcut.ai: Praised for its ease of use and professional-looking results, Pixelcut is a favorite among small businesses creating marketing materials. It makes achieving a polished look incredibly simple.
- Photo Scissors: This tool provides a bit more control than purely automatic removers, allowing users to highlight areas to keep (green) and remove (red), with AI doing the rest. It’s a great intermediate step for trickier images.
- Clipping Magic: Offering even more granular control, Clipping Magic includes dedicated tools to refine edges, adjust colors, and add shadows/reflections, making it suitable for users who need more refined results without the full complexity of professional software.
- Fotor: An all-in-one photo editing and design tool, Fotor also includes a robust background remover, along with features for collages, filters, and other adjustments.
These tools exemplify how AI has transformed Digital Photography workflows, offering powerful solutions that are both accessible and efficient, and contribute to various Editing Styles for diverse visual needs.
Beyond Basic Removal: Leveraging AI for Enhanced Visuals
The capabilities of AI-driven platforms extend far beyond mere background extraction. They often integrate a suite of Image Tools designed to enhance the overall quality and creative potential of your visuals, aligning perfectly with aspects of Visual Design and Photography.
After removing a background with a tool like Designify, you’re not just left with a transparent image; you unlock a world of creative possibilities. Designify offers several integrated features that cater to the comprehensive needs of modern image creators:
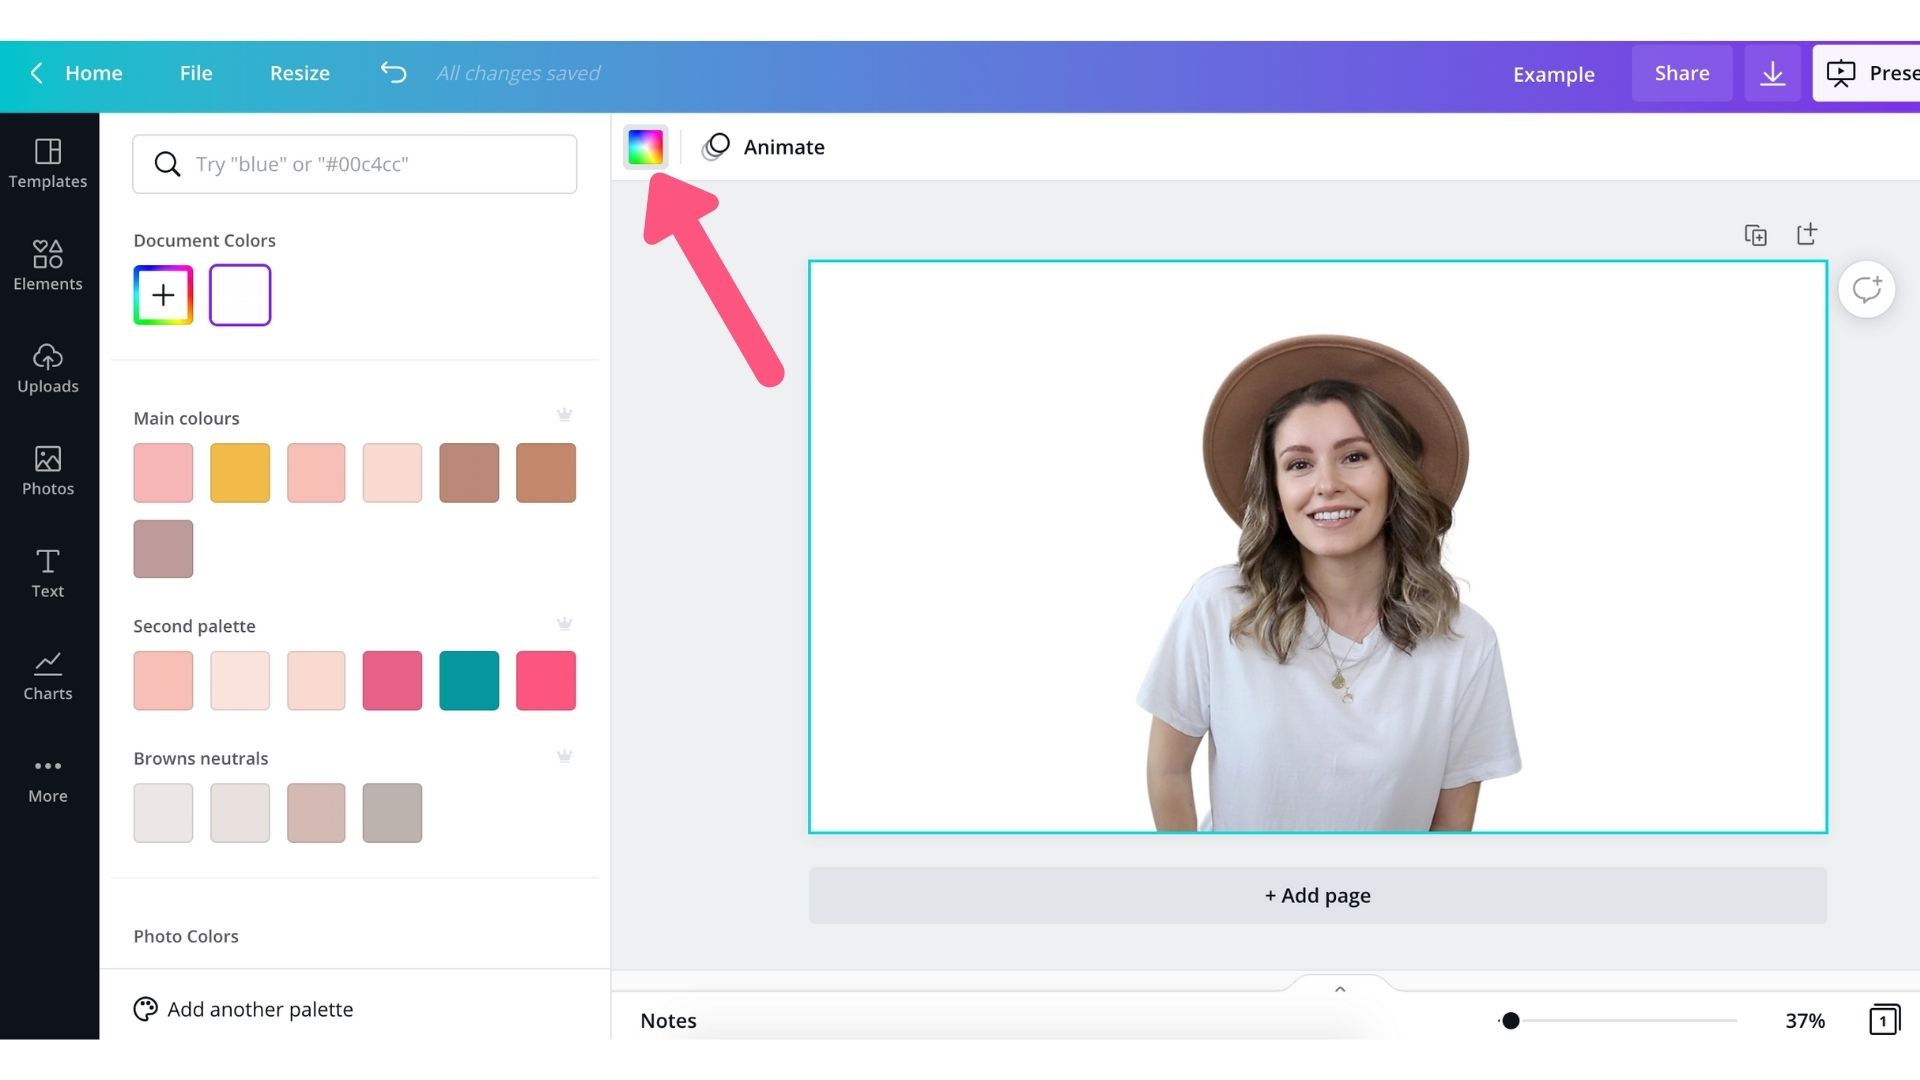
- Customize Design: Once the background is removed, you can either replace it with a new design from a vast library of templates or upload your own. This feature allows for the creation of unique Wallpapers, Aesthetic Backgrounds, or specific thematic collections, transforming a simple cutout into a complete visual story. It’s a powerful tool for Graphic Design and realizing diverse Creative Ideas.
- Auto Enhance: AI algorithms can automatically analyze your image and apply enhancements like color correction, contrast adjustment, and sharpening. This ensures your isolated subject always looks its best, contributing to High Resolution and Beautiful Photography outputs.
- Fix Pixelation: Sometimes, even high-quality images can suffer from pixelation, especially after extensive manipulation. AI-powered tools can intelligently reduce or eliminate pixelation, ensuring crisp and clear results, essential for maintaining the integrity of Digital Photography and preparing images for print or large displays.
- 3D Shadows: Adding realistic shadows is crucial for making a composited image look natural. Designify’s 3D Shadows feature can generate context-aware shadows, giving depth and realism to your isolated subjects when placed on a new background. This is a sophisticated aspect of Photo Manipulation that significantly elevates the visual quality.
- Batch Editing: For professionals dealing with large volumes of images, such as e-commerce businesses or content creators managing extensive Stock Photos, manual background removal for each image is impractical. Designify’s Batch Editor allows you to process multiple images simultaneously, applying the same background removal and enhancement settings, saving countless hours.
- API Integration: For developers and businesses requiring seamless integration into their existing workflows or custom applications, Designify offers an API (Application Programming Interface). This enables automated background removal and image processing on a larger, more integrated scale, serving as a powerful Optimizer for digital pipelines.
These features transform AI background removers from simple utility tools into comprehensive solutions for Visual Design, Digital Photography, and Image Optimization. They empower users to achieve stunning results, whether they are creating a new mood board, preparing images for a trending style, or developing a custom aesthetic for their brand, directly supporting various Image Inspiration & Collections.
Mastering Precision: Advanced Background Removal Techniques in Photoshop
While AI tools offer unparalleled speed and convenience, professional-grade software like Adobe Photoshop remains the ultimate choice for absolute precision, intricate detail work, and complete creative control. Photoshop’s robust suite of tools allows users to tackle even the most challenging backgrounds, making it indispensable for advanced Photo Manipulation and Digital Art. This section delves into the detailed techniques that leverage Photoshop’s capabilities, vital for achieving truly flawless results in High Resolution and Beautiful Photography.
Manual Control with the Background Eraser Tool: Precision for Complex Edges
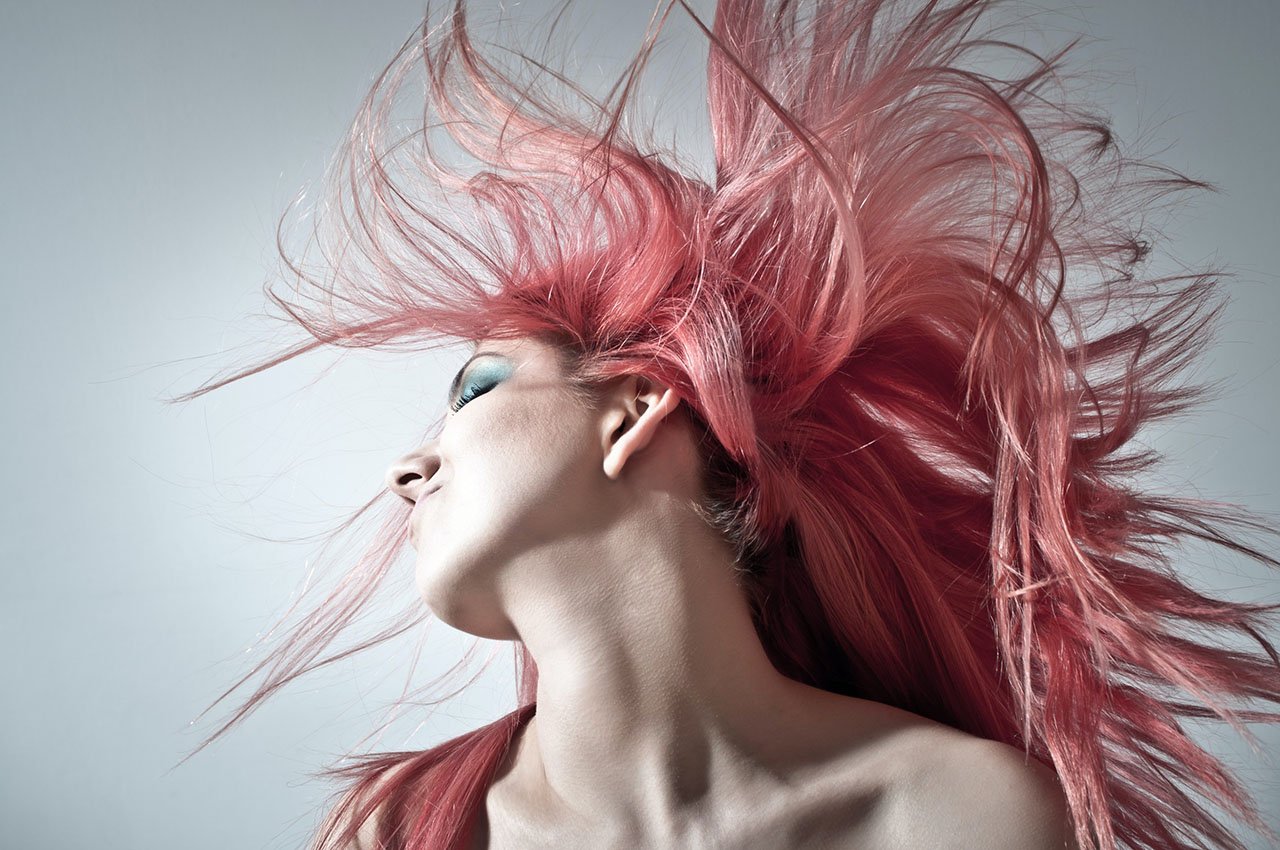
The Background Eraser Tool (E) in Photoshop is a powerful yet often underutilized instrument for background removal, especially effective for images with busy or complex backgrounds where the subject has intricate edges like hair. It works by sampling colors and erasing pixels that match the sampled color, while intelligently protecting the foreground colors.
Step-by-Step Guide to Using the Background Eraser Tool:
- Activate the Tool: Select the Background Eraser Tool from the Toolbox (it’s often nested under the standard Eraser Tool, activated by pressing ‘E’).
- Open and Duplicate Your Image: Open your desired image (File > Open). Crucially, duplicate the layer (CTRL + J or CMD + J) to preserve your original image as a backup.
- Configure Tool Settings:
- Sampling: Set to “Continuous” for images with varied background colors. This means the tool will re-sample colors as you click and drag. For more consistent backgrounds, “Once” might be suitable.
- Limits: Choose “Find Edges.” This helps the tool to intelligently detect and preserve the edges of your subject.
- Tolerance: Start with a value around 25-29%. A lower tolerance limits the erasure to colors very similar to the sampled color, ideal for distinct edges. Higher tolerance will erase a broader range of colors, useful for less precise areas but riskier near the subject.
- Protect Foreground Color: Check this option and sample a color from your subject (e.g., hair color) to prevent the tool from erasing parts of your subject that share similar tones with the background.
- Start Erasing:
- Use a hard round brush with 100% Hardness initially for clean edge detection. You can adjust brush size with
[and]. - Click and drag over the background. The tool will sample the color directly under your cursor’s crosshair and erase similar colors while trying to protect the foreground.
- For areas like hair, carefully paint along the edges. If parts of the hair are being erased, re-sample a hair color for “Protect Foreground Color.”
- Use a hard round brush with 100% Hardness initially for clean edge detection. You can adjust brush size with
- Refine with Other Tools: For larger, simpler areas of the background (like around arms or body), switch to the Pen Tool (P) to create precise paths. Convert the path to a selection, then use the Background Eraser (or a standard Eraser) within the selection for quick, clean removal.
- Address Glitches: Don’t worry about small hair glitches or lost strands; these will be addressed in later steps.
This method offers a hands-on approach, giving you nuanced control for specific Editing Styles and ensuring the integrity of your subject in Beautiful Photography.
Unleashing the Power of Select & Mask for Intricate Details
Photoshop’s “Select & Mask” workspace is a dedicated environment designed to perfect selections, particularly for complex areas like hair, fur, and other soft, challenging edges. This feature streamlines the process of isolating subjects, a critical step for Photo Manipulation and achieving High Resolution composites.
Step-by-Step Guide to Select & Mask:
- Open Your Image: Ensure your subject is on its own layer, ideally duplicated.
- Make an Initial Selection: Start by making a rough selection of your subject. You can use:
- Quick Selection Tool: Paint over your subject.
- Object Selection Tool: Draw a rectangle or lasso around the object, and Photoshop’s AI will attempt to select it.
- Select Subject: In newer Photoshop versions (2021+), go to Select > Subject. Photoshop’s AI automatically identifies and selects the main subject.
- Enter Select & Mask: With your initial selection active, go to Select > Select and Mask…
- Choose a View Mode: In the Properties panel on the right, under “View,” choose a mode that contrasts well with your subject (e.g., “On Black” or “On Layers”). Adjust the “Transparency” slider (e.g., 50-100%) to clearly see your selection edges. “Onion Skin” is also a popular choice for partial transparency.
- Refine the Selection:
- Quick Selection Tool (within Select & Mask): Use this to add or subtract large areas from your selection.
- Refine Edge Brush Tool: This is the star of the show for hair and fur. Paint along the soft edges of your subject (e.g., hair strands). Photoshop intelligently analyzes the pixels and separates the foreground from the background, creating a much more natural-looking edge.
- Global Refinements: Adjust sliders like “Smooth,” “Feather,” “Contrast,” and “Shift Edge” to fine-tune the overall selection. “Shift Edge” is particularly useful for shrinking or expanding the selection boundary.
- Refine Hair (Photoshop 2021+): This dedicated button in Select & Mask automatically attempts to refine hair details with a single click, a significant time-saver for Digital Photography professionals.
- Output Settings: Once satisfied with your selection, go to “Output To” in the Properties panel. Select “New Layer with Layer Mask.” This non-destructive approach keeps your original image intact while providing a flexible mask for further adjustments.
- Review and Adjust: After exiting Select & Mask, your subject will appear on a new layer with a mask. You can still refine the mask manually using a soft black or white brush to hide or reveal parts of the image.
This method is crucial for any Visual Design project requiring a clean cut-out, from Graphic Design to intricate Digital Art, ensuring your subject seamlessly integrates into new Aesthetic Backgrounds or thematic collections.
Crafting Realistic Composites: Recreating Hair and Adding New Backgrounds
Even after meticulous background removal, especially for subjects with complex hair, there might be areas that look unnatural or thin. This is where Photo Manipulation skills come into play, specifically the art of recreating hair and blending the subject with a new background. This process is essential for creating believable Beautiful Photography and dynamic Image Inspiration & Collections.
Step-by-Step for Realistic Composites:
- Add a New Background: Before refining hair, import your new background image onto a layer below your subject layer. This immediate context helps you assess what needs fixing and where, ensuring your efforts are focused on the visible areas. Whether it’s a Nature, Abstract, or Aesthetic Background, the goal is seamless integration.
- Recreate Hair using Custom Hair Brushes:
- Download Custom Brushes: Many resources (like Tophinhanhdep.com, or specific Photoshop tutorial sites) offer custom hair brushes that mimic individual strands or clumps of hair. These are invaluable for adding realism.
- Create a New Layer: Create a new empty layer above your subject layer for painting new hair strands. This keeps your work non-destructive.
- Sample Hair Color: Use the Eyedropper Tool (I) to sample various colors directly from your subject’s existing hair. Pick darker tones for shadows and lighter tones for highlights.
- Paint Hair Strands: Select a custom hair brush. Vary the brush size, opacity, and color. Gently paint individual flyaway hairs or fill in sparse areas along the edges. Paint in the natural direction of the hair.
- Layering for Depth: Create multiple hair layers. Some below the subject layer (for hair behind the head) and some above (for flyaways). Use a layer mask on these new hair layers to erase any unwanted parts.
- Blend with New Background: Ensure the color, lighting, and sharpness of the new hair strands match both the subject and the new background. If the new background is blurred, the new hair strands should also have a slight blur.
- Adjust Lighting and Color (Color Grading):
- Match Exposure: Use Adjustment Layers (Curves, Levels, Exposure) to match the brightness and contrast of your subject to the new background.
- Match Color Temperature: Use a Color Balance or Photo Filter adjustment layer to harmonize the color tones. If the background is warm, make the subject slightly warmer, and vice versa.
- Add Ambient Lighting: Use a soft brush on a new layer with a low opacity to paint subtle ambient light or shadows that mimic the new environment.
- Refine Edges and Details: Zoom in closely to ensure all edges are clean and natural. Use a small, soft brush on the layer mask to refine any lingering halo effects or harsh lines.
- Add Final Touches: Consider adding subtle effects like grain, depth of field (blurring parts of the new background more), or vignettes to further integrate the subject into the new scene.
This meticulous approach to Photo Manipulation transforms a basic background removal into a sophisticated Digital Art piece, allowing you to create compelling Mood Boards or adapt images to Trending Styles for your Image Inspiration & Collections.
Choosing the Right Tool for Your Creative Vision
With a diverse array of tools available, selecting the most appropriate one for background removal depends largely on your specific needs, skill level, and the complexity of the image. At Tophinhanhdep.com, we categorize these solutions under Image Tools because they serve as essential components in any visual creator’s arsenal.
-
For Speed and Simplicity (AI Tools like Designify, Remove.bg, Pixelcut):
- Best for: Quick product shots, social media graphics, e-commerce listings, general marketing materials, or when processing large batches of images efficiently. Ideal for subjects with clear outlines (people, products, cars).
- Pros: Extremely fast, requires no technical skills, often free for basic use, excellent for Image Optimizers and Batch Editing. Great for generating Photo Ideas quickly.
- Cons: Less control over intricate details (like flyaway hair or complex textures), results can be imperfect for ambiguous subjects or busy backgrounds, may require a subscription for high-resolution downloads or bulk processing.
- Integration: These tools perfectly complement Image Inspiration & Collections by allowing rapid creation of mockups and thematic visuals.
-
For Greater Control and Refinement (Photo Scissors, Clipping Magic, Fotor):
- Best for: Users who need a balance between automation and manual input, or those who require additional editing features like basic color adjustments, shadows, or collage creation.
- Pros: More control over selection areas, often browser-based, integrates basic editing capabilities, good for Visual Design and preparing images for specific Editing Styles.
- Cons: Still not as precise as Photoshop for the most challenging cases, may have a learning curve slightly steeper than fully automated tools, often subscription-based for full functionality.
-
For Ultimate Precision and Professional Control (Adobe Photoshop):
- Best for: Professional photographers, graphic designers, digital artists, or anyone needing absolute pixel-level control for High Resolution images, intricate subjects (like hair, fur, transparent objects), or complex Photo Manipulation projects.
- Pros: Unparalleled precision, a vast array of tools and non-destructive workflows (layer masks), integrates with other Adobe Creative Cloud applications, supports diverse Editing Styles and Digital Photography workflows. Essential for Beautiful Photography where every detail matters.
- Cons: Steeper learning curve, requires a subscription, demands more time and computational power.
Each tool plays a unique role in the creative process. For instance, you might use an AI tool for the initial bulk removal of Stock Photos, then bring the most critical images into Photoshop for detailed refinement and Digital Art creation. The choice depends on balancing efficiency with the level of artistic control and technical fidelity required for your specific Images and Visual Design objectives.
Elevating Your Imagery with Background Removal: Applications and Inspirations
The power to remove backgrounds from images transcends a mere technical process; it’s a gateway to boundless Creative Ideas and impactful Visual Design. At Tophinhanhdep.com, we believe that understanding this technique is fundamental to unlocking the full potential of your Images and Photography.
Practical Applications Across Industries:
- E-commerce Product Photography: This is arguably the most common and critical application. Clean, transparent backgrounds allow products to be seamlessly placed on any website background, in various marketing materials, or integrated into digital ads. It creates a professional, consistent look that highlights the product itself, directly contributing to Beautiful Photography for commercial success.
- Marketing and Advertising: From banners and posters to social media campaigns, isolating subjects allows brands to create dynamic, engaging visuals. Imagine placing your model on an Abstract Background for a modern look, or a Nature Background to convey eco-friendliness.
- Graphic Design and Digital Art: Designers frequently extract elements to create compelling compositions, logos, infographics, and Digital Art. This enables Photo Manipulation on a grand scale, allowing for imaginative and fantastical creations.
- Web Design and UI/UX: Transparent images are essential for web elements like icons, avatars, and hero images, ensuring they blend seamlessly with any website theme or layout.
- Personal Projects and Social Media: Want to create a fun, personalized Wallpaper? Or perhaps an Aesthetic Background for your profile picture? Background removal makes it easy to customize your visuals and express your unique style.
- Educational and Scientific Content: Clearly isolating subjects can improve the clarity of diagrams, illustrations, and presentations, making complex information easier to digest.
Image Inspiration & Collections:
The ability to remove backgrounds fuels endless Image Inspiration and supports the creation of curated Thematic Collections and Mood Boards:
- Custom Wallpapers: Take your favorite photo and remove its background to place it against a stunning landscape, an abstract pattern, or a personalized design.
- Aesthetic Backgrounds: Create cohesive collections of images with a consistent aesthetic by placing isolated subjects on thoughtfully chosen backdrops. This is key for Trending Styles in visual content.
- Digital Collages and Artworks: Combine elements from different images to tell new stories, experiment with surreal compositions, or develop unique Digital Art pieces.
- Thematic Collections: Build collections of subjects that can be easily dropped into various themed backgrounds, whether it’s for holidays, seasons, or specific concepts.
- Mockups and Presentations: Create professional mockups for products or designs by placing isolated elements onto presentation templates, enhancing Visual Design impact.
By mastering background removal, you gain the artistic freedom to transform ordinary images into extraordinary visual assets. Tophinhanhdep.com provides the Image Tools and Photography insights necessary to achieve these results, helping you unlock your creative potential and produce visuals that truly captivate.