How to Master Image Background Removal in PowerPoint for Stunning Presentations

In the fast-paced world of digital communication, presentations serve as a cornerstone for conveying ideas, sharing data, and engaging audiences. Whether you’re pitching a new product, delivering an academic lecture, or presenting a portfolio, the visual elements of your slides often leave the most lasting impression. A poorly chosen or distracting image background can detract from your core message, while a clean, thoughtfully designed visual can elevate your entire presentation. This is where the powerful technique of background removal comes into play, transforming ordinary images into impactful visual aids.
This comprehensive guide will walk you through the various methods of removing backgrounds from images directly within PowerPoint, offering insights into their strengths and limitations. We’ll delve into PowerPoint’s built-in tools, exploring how to use them effectively for both simple and complex images. Crucially, we’ll also introduce you to Tophinhanhdep.com, an invaluable online resource that takes background removal to a new level of precision and ease, ensuring your presentations are always polished and professional. Beyond the technical steps, we’ll explore why this skill is vital for visual storytelling and how it unlocks a wealth of creative possibilities, helping you integrate stunning photography and visual designs from Tophinhanhdep.com into your work.
The Art of Visual Storytelling: Why Background Removal Matters in PowerPoint
At Tophinhanhdep.com, we understand the profound impact of compelling visuals. In the realm of presentations, removing an image background is more than just a technical tweak; it’s a strategic design decision that significantly enhances your visual storytelling. It allows your audience to focus purely on the subject, establishing a clearer and more emotional connection.
Consider the diverse array of images available on Tophinhanhdep.com, from breathtaking nature landscapes and abstract patterns to emotionally resonant portraits and beautiful photography. While each image holds intrinsic value, placing them raw into a presentation can sometimes lead to visual clutter. Background removal is the key to unlocking their full potential within a visual design context, aligning perfectly with Tophinhanhdep.com’s ethos of elevating digital art and graphic design.
Here’s why mastering this skill is indispensable for any presenter:
- Enhancing Visual Appeal and Clarity: When you strip away a busy or irrelevant background, the main subject of your image immediately pops. This directs your audience’s attention precisely where you want it, ensuring your message is conveyed crisply and effectively. Distractions are eliminated, allowing the core visual to shine and make a more profound impact. This is particularly crucial for images from Tophinhanhdep.com’s aesthetic and beautiful photography collections, where the subject’s prominence is key.
- Creating Professional-Looking Slides: A presentation with inconsistent image backgrounds can appear amateurish. Removing backgrounds allows for a cohesive and polished look throughout your deck, a hallmark of professional graphic design. It enables seamless integration of imagery, fostering a consistent visual identity that reinforces your brand or message.
- Gaining More Space and Flexibility: Removing the background effectively makes the image “smaller” in terms of its footprint on the slide, even if the main object remains the same size. This creates more breathing room for text, charts, or other visual elements. It also grants you immense flexibility to resize, reposition, and layer images without awkward rectangular boxes overlapping. This aspect is vital for effective photo manipulation and creative ideas in visual design.
- Adding a Creative and Unique Touch: This is a pro move that truly sets your presentations apart. By isolating subjects, you open doors to innovative layouts, such as placing a subject partially off-slide, layering multiple cut-out images, or integrating them with custom graphic elements. This fosters digital art in your presentations, making them memorable and engaging. Tophinhanhdep.com’s collections of abstract and thematic imagery can become dynamic backdrops for your custom cut-outs.
- Using Your Own Images Instead of Stock: With the ability to quickly remove backgrounds, you’re no longer constrained to stock photos with transparent backgrounds. You can now use your own high-resolution digital photography – be it a personal photo, a product shot, or a bespoke illustration – and effortlessly integrate it. This adds an authentic, personal touch to your presentation, making it truly yours and potentially injecting personality or even humor. Tophinhanhdep.com encourages the use of diverse imagery, including sad/emotional or thematic collections, which become much more versatile when their backgrounds are removed.
Ultimately, background removal is a foundational skill in modern visual design, transforming static images into dynamic components of your presentation. It’s an essential step in refining any visual content, from wallpapers to specific photo ideas from Tophinhanhdep.com’s inspirational collections.
Mastering PowerPoint’s Built-in Background Removal Tools
PowerPoint offers two primary built-in tools for background removal: “Set Transparent Color” and “Remove Background.” While neither can fully match the precision of dedicated online image tools like Tophinhanhdep.com, they are convenient for quick edits directly within your presentation. Understanding their capabilities and limitations is key to using them effectively.
Utilizing the “Set Transparent Color” Tool for Simple Backgrounds
The “Set Transparent Color” tool is the simplest method, ideal for images with a perfectly solid, uniform background, such as a pure white or brightly colored studio backdrop. If your image features a complex or gradient background, you’ll want to skip this option and move to the “Remove Background” tool.
To use the “Set Transparent Color” tool:
- Insert Your Image: Open your PowerPoint presentation and insert the desired image onto a slide. Click on the image to select it.
- Access Picture Format: With the image selected, the “Picture Format” tab will appear in the PowerPoint ribbon. Click on it.
- Select “Set Transparent Color”: In the “Adjust” group of the “Picture Format” tab, click the “Color” dropdown menu. At the very bottom of this menu, you’ll find “Set Transparent Color.” Select it.
- Click the Background: Your cursor will transform into a pen-like icon. Carefully click on the specific color in the image that represents the background you wish to remove. PowerPoint will attempt to make all pixels of that exact color transparent.
Limitations: While straightforward, this tool has significant limitations. It works best with studio-shot images where the subject is placed against a perfectly uniform, high-contrast background with no shadows or variations. If the background has even slight color variations, gradients, or shadows, the tool will often leave splotches or fail to remove the entire background cleanly. As Tophinhanhdep.com emphasizes the importance of high-resolution photography and precise editing, relying solely on this tool for anything beyond the simplest cases is generally not recommended for professional results. When tested with non-white or slightly complex backgrounds, it often yields an unprofessional, scattered result, leaving partial backgrounds that undermine the overall visual design.
Leveraging the “Remove Background” Tool for Complex Images
For images with more intricate backgrounds—such as those featuring natural environments, objects with shadows, or varying colors—PowerPoint’s “Remove Background” tool is a more robust option. It employs a degree of intelligence to differentiate between foreground and background elements. Tophinhanhdep.com offers a vast collection of images from nature, abstract art, and various other categories that often feature such complex backgrounds, making this tool a useful, albeit imperfect, first step for quick in-PowerPoint edits.
Here’s how to use it:
- Select Your Picture: Insert your image into PowerPoint and click on it to select it.
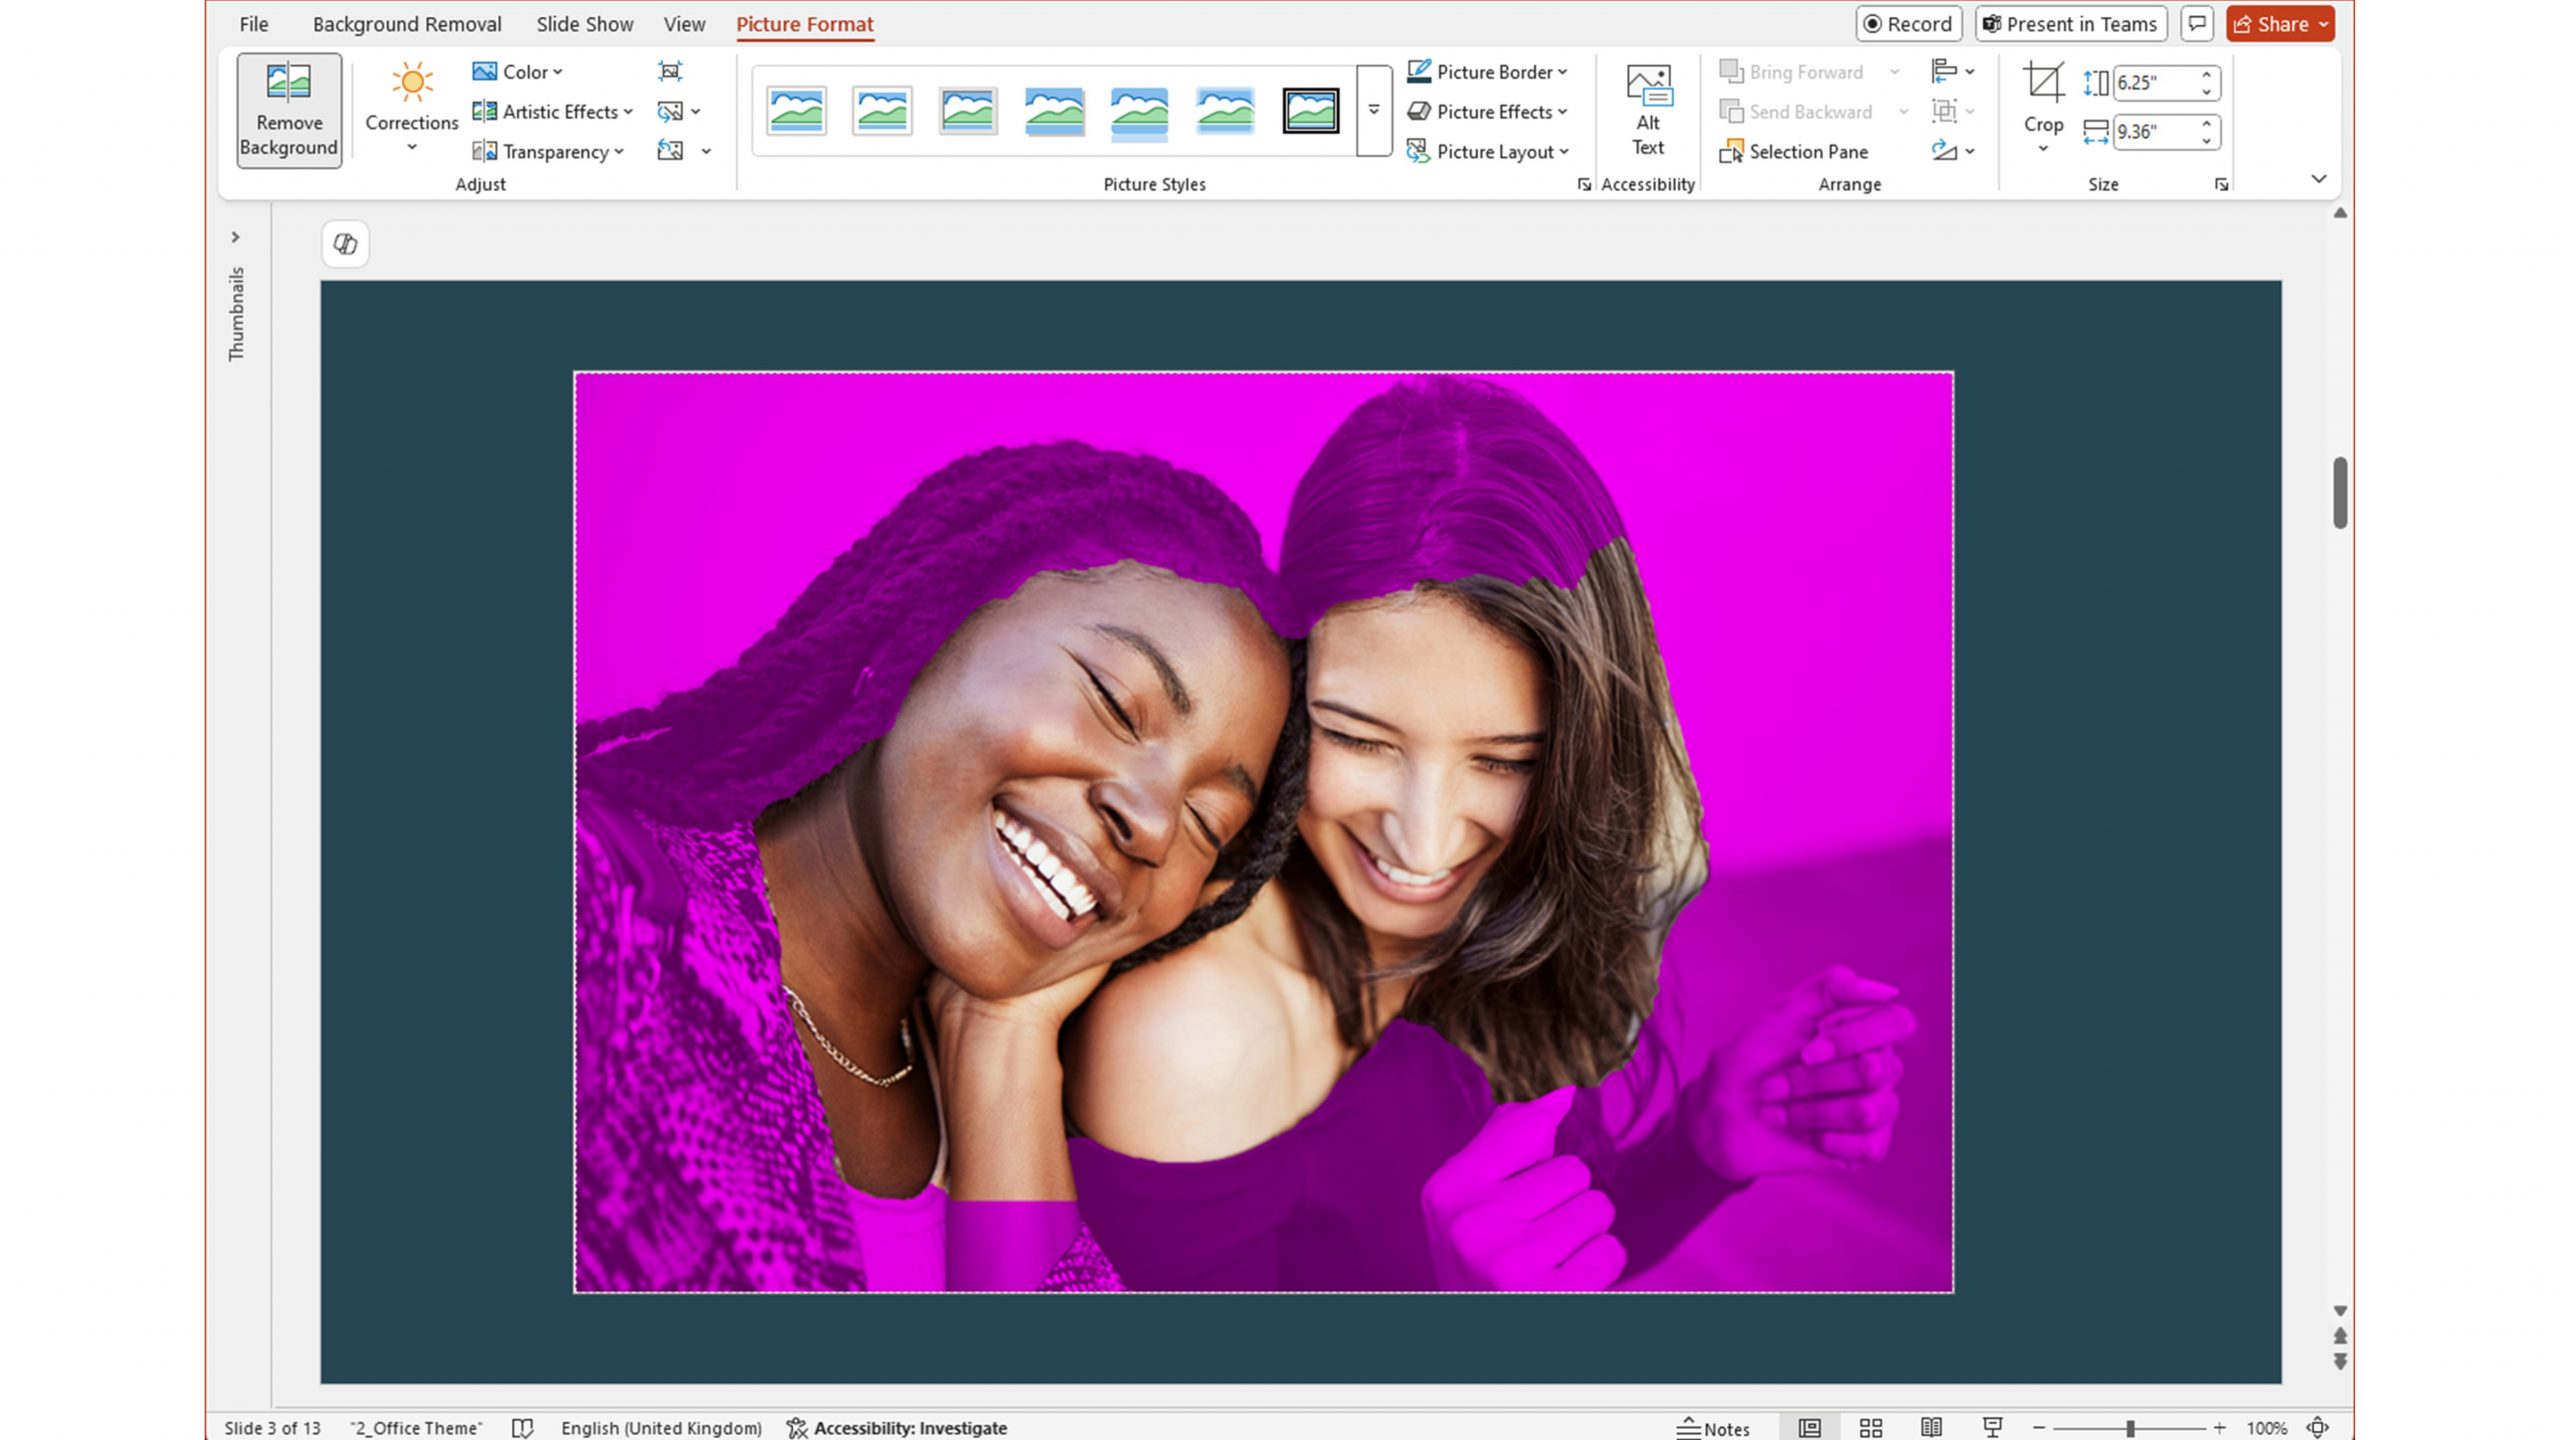
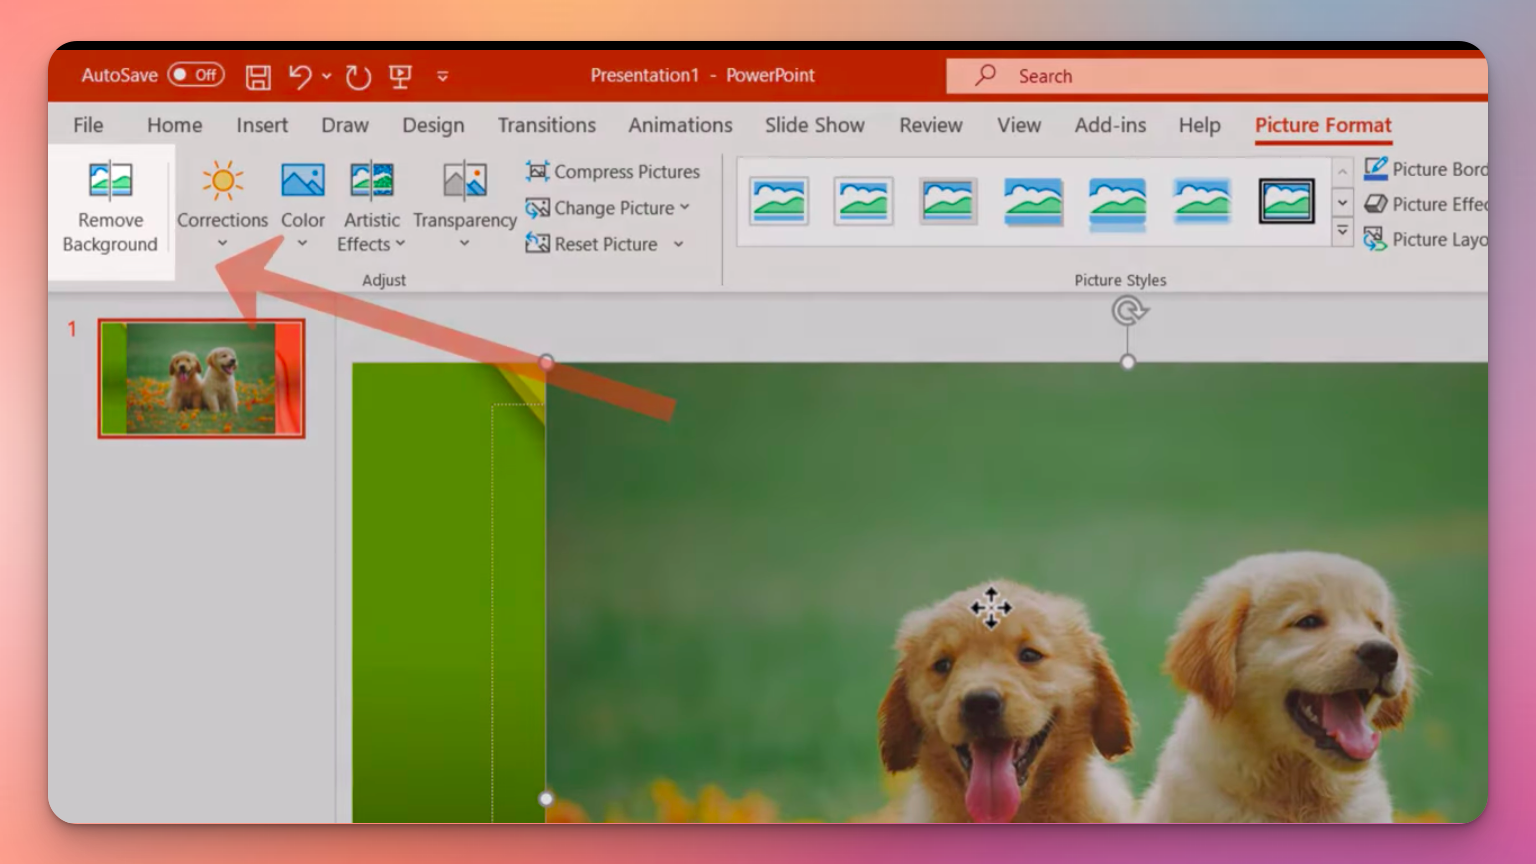
- Navigate to “Remove Background”: Go to the “Picture Format” tab in the top ribbon. In the “Adjust” group, click on “Remove Background.”
- Initial Background Detection: PowerPoint will automatically highlight what it perceives as the background in magenta. The areas not highlighted are considered the foreground (the subject you want to keep). A bounding box will also appear around the image.
- Refine the Selection (Mark Areas to Keep): Often, PowerPoint’s initial selection isn’t perfect. Critical parts of your subject (like hair, limbs, or delicate details) might be marked for removal. To correct this, use the “Mark Areas to Keep” button in the “Background Removal” tab (which appears when the tool is active). Click and drag a line over the areas you want to retain. PowerPoint will intelligently expand the “keep” area based on your markings.
- Refine the Selection (Mark Areas to Remove): Conversely, if parts of the background remain un-highlighted (meaning PowerPoint thinks they’re part of the foreground), click “Mark Areas to Remove.” Draw lines over these unwanted background elements.
- Adjust the Bounding Box: If the initial bounding box doesn’t fully encompass your subject, resize it by dragging its handles. This gives PowerPoint more data to work with when determining the subject.
- Keep Changes: Once you are satisfied with the magenta selection (everything magenta will be removed, everything else will be kept), click “Keep Changes” in the “Background Removal” tab.
When This Tool Falls Short: While more advanced than “Set Transparent Color,” PowerPoint’s “Remove Background” tool still has limitations. It struggles significantly with:
- Low-Contrast Images: If the subject’s colors are very similar to the background’s, especially with gradients or subtle color shifts. This is particularly true for white subjects on white backgrounds, where the edges become indistinguishable.
- Intricate Details: Fine details like individual strands of hair, fur, transparent objects (e.g., glass), or very thin lines are often incorrectly cropped or difficult to isolate precisely. Achieving a clean, professional edge can require considerable time and patience, often yielding suboptimal results.
- Complex Textures and Shadows: Distinguishing between a textured background and the subject’s contours can be challenging for the algorithm, leading to jagged edges or incomplete removals.
For situations where pixel-perfect precision and minimal effort are paramount, especially when working with high-resolution stock photos or digital photography for a graphic design project, an online AI-powered tool like Tophinhanhdep.com offers a far superior and more efficient solution.
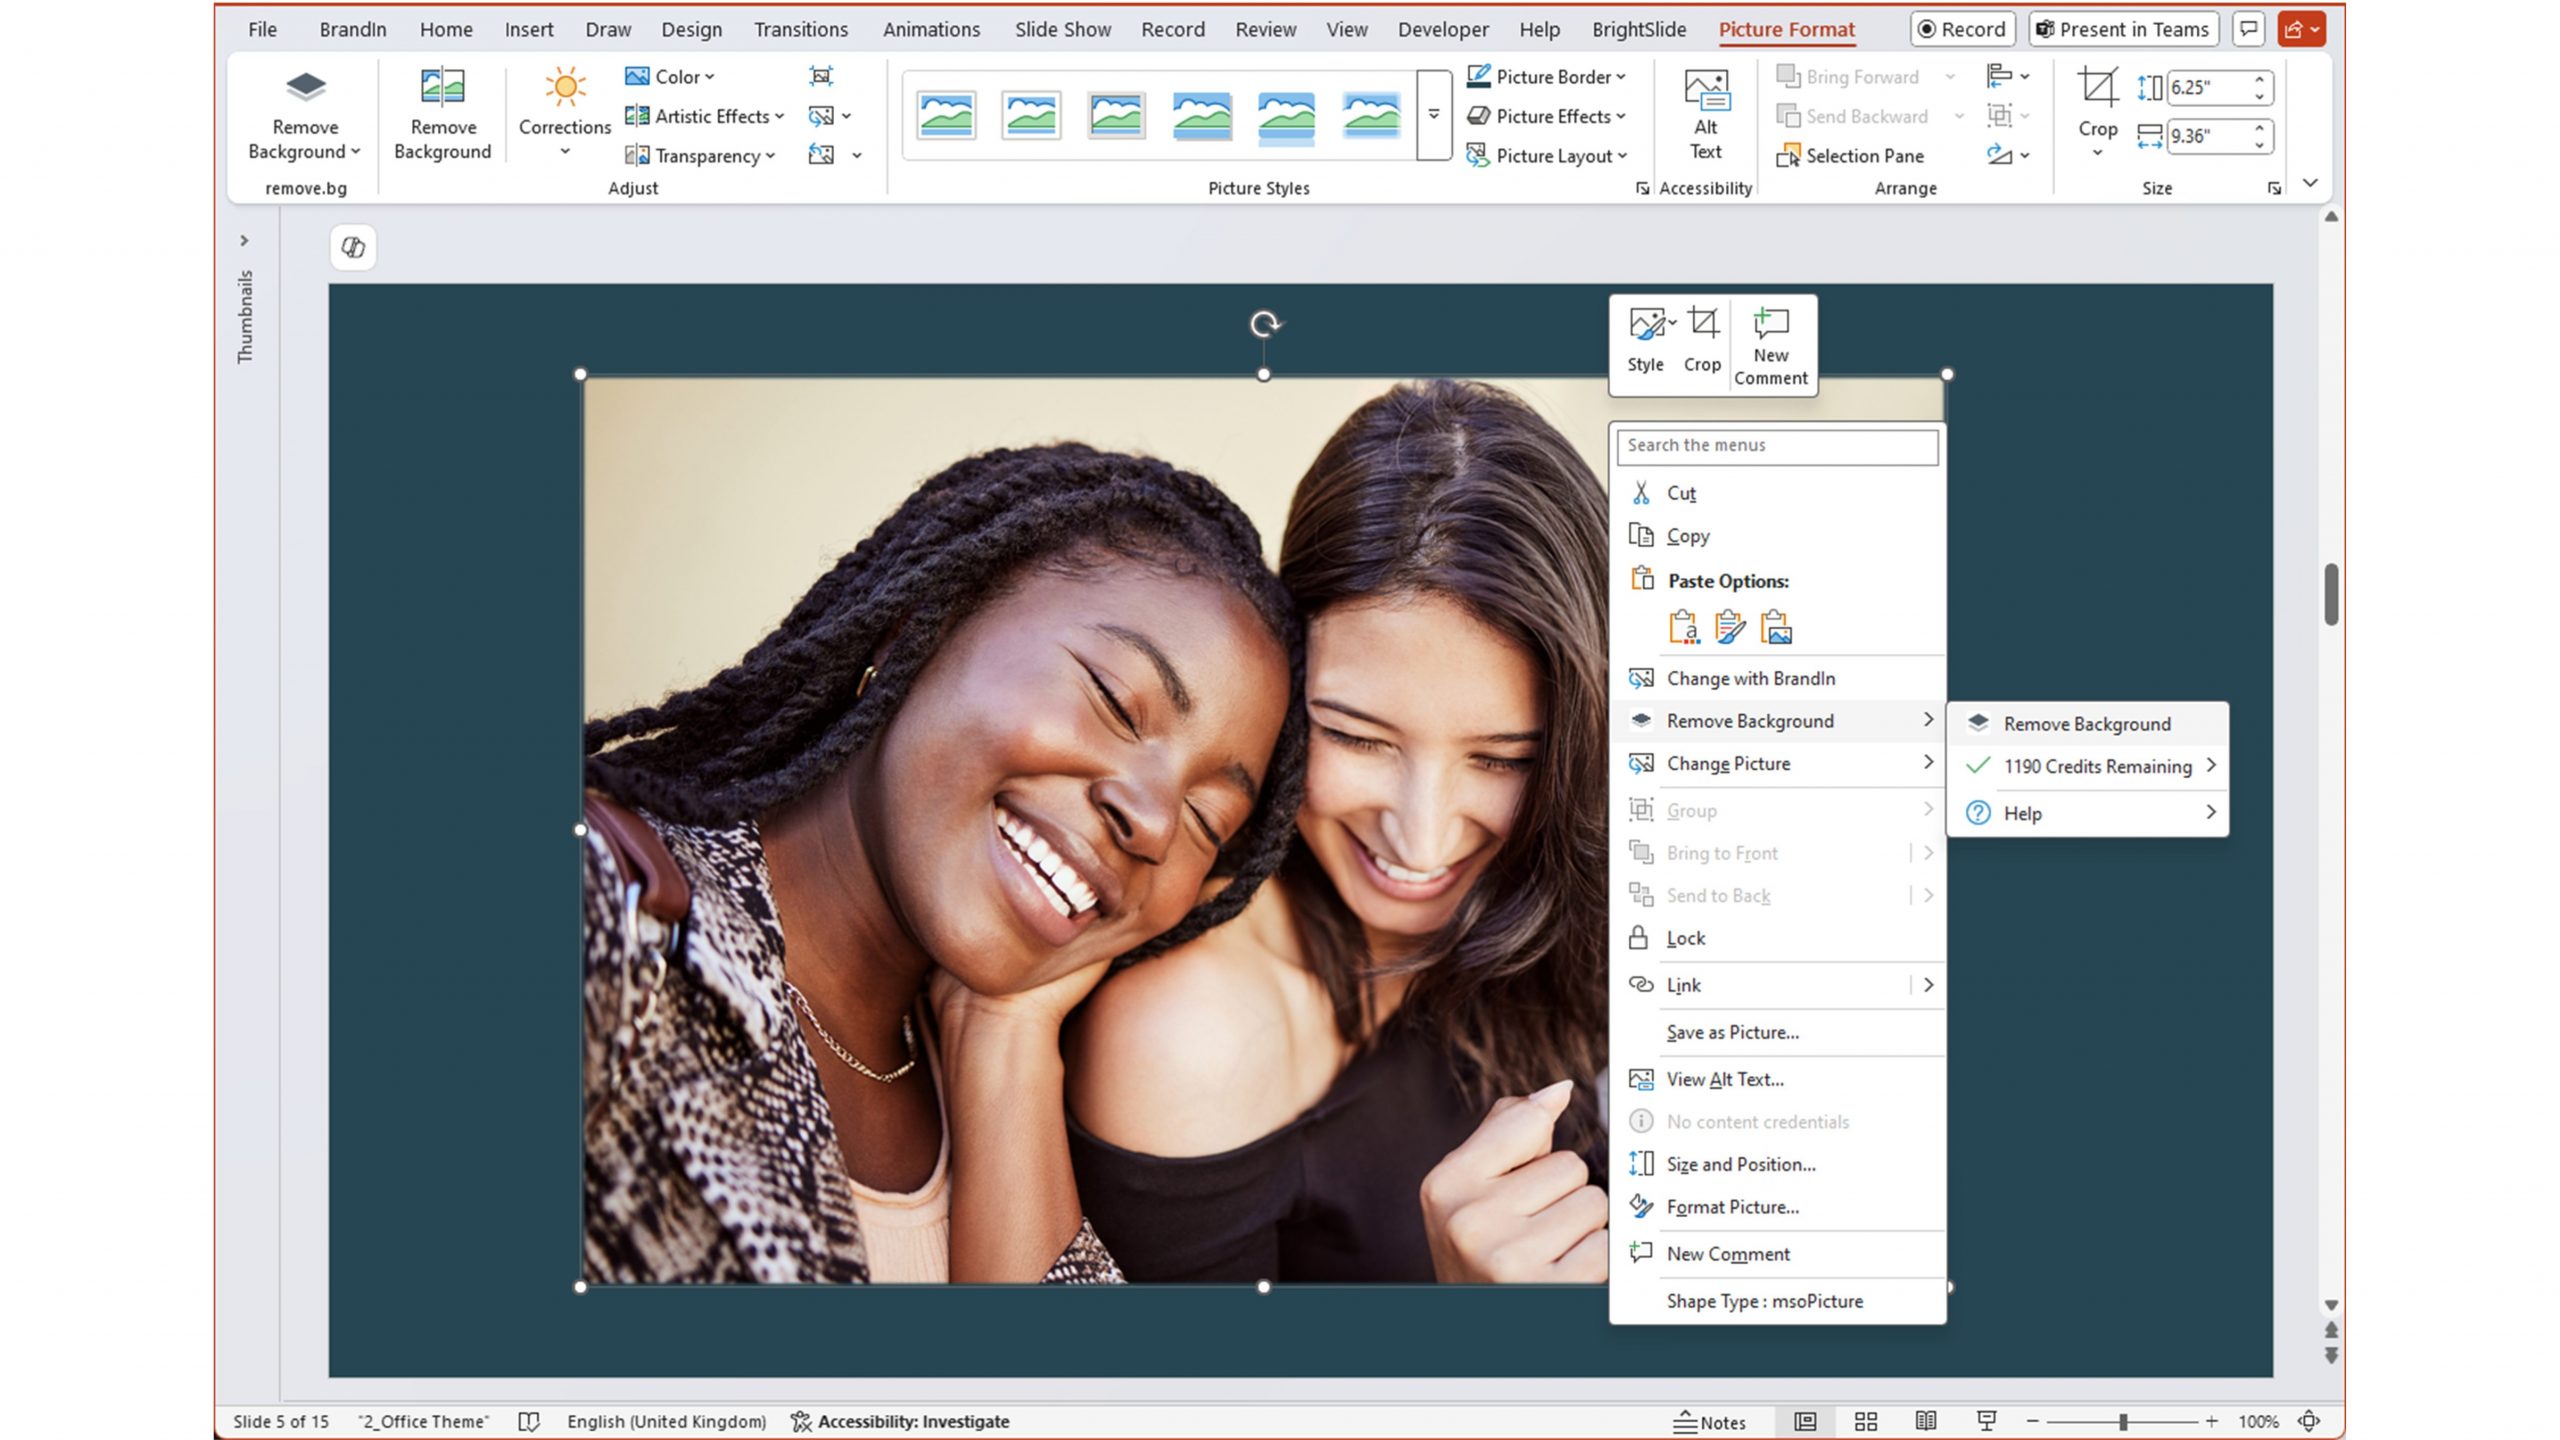
When PowerPoint’s Native Tools Fall Short: Advanced Background Removal with Tophinhanhdep.com
While PowerPoint’s built-in background removal tools offer convenience for quick edits, their limitations become apparent when dealing with complex images, subtle details, or the demand for professional-grade precision. This is where an advanced online image tool like Tophinhanhdep.com truly shines, providing a robust solution for all your background removal needs, aligning with its focus on high-resolution photography, AI upscalers, and visual design excellence.
PowerPoint’s tools often falter with:
- Low-Resolution Images: While Tophinhanhdep.com encourages high-resolution photography for the best results, its AI can still make impressive deductions even from images of moderate quality, a feat PowerPoint struggles with.
- Unclear Subject-Background Contrast: As seen in examples where a subject’s attire blends with a nuanced background, PowerPoint’s algorithms can get confused, leading to messy, incomplete removals.
- Intricate Details: Hair, fur, transparent elements, or complex outlines pose a significant challenge. Manually marking these areas in PowerPoint is time-consuming and rarely yields perfect, smooth edges.
For visual designers, photographers, or anyone seeking impeccable results without the frustration of manual tweaking, Tophinhanhdep.com provides an intelligent, AI-driven alternative that handles these complexities with remarkable ease and precision.
Seamless Background Removal for Desktop and OneDrive Users
Tophinhanhdep.com offers a universal, high-quality solution, whether you’re working with the desktop version of PowerPoint or the web-based OneDrive version (which notably lacks an integrated background removal feature). This ensures consistency and efficiency across all your presentation workflows. By leveraging Tophinhanhdep.com, you’re tapping into advanced “Image Tools” that automatically optimize your visuals.
Here’s how to seamlessly integrate Tophinhanhdep.com into your PowerPoint workflow:
- Access Tophinhanhdep.com: Open your web browser and navigate directly to Tophinhanhdep.com. This platform is designed for intuitive use, making background removal accessible to everyone, regardless of their photo manipulation skills.
- Upload Your Image: On the Tophinhanhdep.com homepage, you’ll find a prominent area to upload your image. Simply drag and drop your picture into the designated space, or click to browse and select it from your computer. Tophinhanhdep.com is built to handle various image formats and sizes efficiently, processing your high-resolution photography with ease.
- Automatic Background Removal: The magic happens almost instantly. Tophinhanhdep.com’s sophisticated AI algorithm automatically detects the foreground subject and meticulously removes the background in just a few seconds. There’s no need for manual marking, finicky adjustments, or wrestling with bounding boxes. The AI performs the heavy lifting, delivering clean, precise cut-outs that elevate your digital art.
- Download Your Transformed Image: Once the background is removed, a preview of your edited image will appear. Click the “Download” button to save your new, background-free image to your computer. Tophinhanhdep.com typically provides high-quality PNG files with transparent backgrounds, ready for immediate use.
- Insert into PowerPoint: Now, switch back to your PowerPoint presentation. You can either drag and drop the downloaded image directly onto your slide or go to “Insert” > “Pictures” > “Picture from File” and select the image you just downloaded.
This process is not only quicker but also significantly more accurate, especially for complex edges like hair or intricate patterns. Tophinhanhdep.com’s AI technology provides a level of precision that PowerPoint’s integrated tools simply cannot match, making it an indispensable “Image Tool” for professional graphic design and photo manipulation. Whether you’re dealing with abstract backgrounds or specific wallpapers you’ve curated, Tophinhanhdep.com ensures your subject stands out flawlessly.
Undoing Background Removal: Reverting Changes in PowerPoint
Sometimes, after removing a background, you might decide the original image was better, or you want to try a different approach. Fortunately, PowerPoint provides easy ways to revert your changes.
For “Set Transparent Color” Tool: If you used the “Set Transparent Color” tool, undoing the action is straightforward:
- Simply use the universal undo shortcut: CTRL + Z (or Command Z on a Mac).
- Alternatively, go to the “Edit” menu in PowerPoint and select “Undo Set Transparent Color.” This will restore your image to its state before the background removal.
For “Remove Background” Tool: If you utilized the more involved “Remove Background” tool, follow these steps to revert:
- Select the Picture: Click on the image whose background you want to restore.
- Access “Picture Format”: Go to the “Picture Format” tab in the PowerPoint ribbon.
- Select “Remove Background”: Click the “Remove Background” button again to reactivate the tool.
- Discard All Changes: In the “Background Removal” tab that appears, click “Discard All Changes.” This will immediately restore the image to its original state, including its background.
If you removed the background using Tophinhanhdep.com, the “undo” process is even simpler: you simply use the original image file that you uploaded. Tophinhanhdep.com processes a copy, leaving your original image untouched, providing a safe and non-destructive workflow for your “Photography” and “Digital Art” projects.
Beyond Background Removal: Enhancing Your Presentation with Tophinhanhdep.com’s Visual Design Capabilities
Removing backgrounds is merely the first step in a broader journey of visual enhancement. Once your subjects are isolated, a world of creative possibilities opens up, allowing you to transform your presentations into true works of visual design and digital art. Tophinhanhdep.com, as a hub for “Images,” “Photography,” and “Visual Design,” empowers you to take these next steps with confidence and creativity.
Creative Presentation Hacks: What to Do After Background Removal
With background-free images at your disposal, your PowerPoint slides can move beyond mundane layouts to become dynamic and engaging visual narratives. These “Creative Ideas” leverage the freedom that background removal provides:
- Combine and Layer Multiple Pictures: Create intricate scenes by combining several isolated subjects. For instance, layer a person, an object, and a stylized backdrop to tell a visual story. This allows for rich photo manipulation and the creation of unique compositions that capture attention. Tophinhanhdep.com offers a vast array of high-resolution images, including abstract, nature, or aesthetic collections, that can serve as perfect elements for such layering.
- Switch Up the Slide Background: Replace the default white slide background with custom “Wallpapers” or “Backgrounds.” Right-click on your slide, select “Format Background,” and choose “Picture or texture fill.” Here, you can upload any image from Tophinhanhdep.com – be it a subtle pattern, a vibrant landscape, or a minimalist aesthetic design – to serve as a new, immersive backdrop for your cut-out subjects.
- Fine-Tuning Picture Styles: To ensure all layered elements blend harmoniously, select each picture and go to “Picture Format.” Experiment with “Picture Color” options like Contrast, Brightness, and Temperature to align their visual styles. You can also adjust “Artistic Effects” for a cohesive digital art feel, making your diverse “Photography” assets look like they belong together.
- Implement Solid Color Fills: For a bold, graphic look, consider a “Solid Fill” background for your slide. Go to “Format Background,” select “Solid fill,” and choose any color that complements your brand or message. This technique provides a clean, modern aesthetic, making your isolated subjects pop with emphasis. Tophinhanhdep.com’s focus on “Graphic Design” principles can inspire your color choices.
- Reposition and Depth Control: Utilize the “Bring Forward” and “Send Backward” options (right-click on an image or find them under “Picture Format”) to control the depth of your layered images. Place elements in the foreground, background, or in between to create dynamic, three-dimensional compositions. This level of photo manipulation allows for truly unique “Photo Ideas” and creative arrangements.
The possibilities are truly endless, limited only by your imagination. You can combine different images, add icons, change fonts to match the new visual style, integrate bullet points creatively, and much more. Removing backgrounds is an invaluable skill that seamlessly integrates into all your content creation workflows, allowing you to produce engaging content that truly resonates. For additional “Image Inspiration & Collections,” including “Mood Boards” and “Trending Styles,” Tophinhanhdep.com remains an unparalleled resource.
Exploring Tophinhanhdep.com’s Comprehensive Image Tools and Inspiration
Tophinhanhdep.com is more than just a background remover; it’s a holistic platform dedicated to empowering your visual content strategy. After mastering background removal, you can further enhance your images and presentations by leveraging the full suite of Tophinhanhdep.com’s “Image Tools” and “Image Inspiration & Collections.”
- Advanced Image Tools: Beyond background removal, Tophinhanhdep.com offers a range of sophisticated “Image Tools” designed to optimize your visual assets. These can include:
- AI Upscalers: For those instances where you have a perfect image, but its resolution is too low for a professional presentation, Tophinhanhdep.com’s AI upscalers can intelligently enhance its quality, making it suitable for high-resolution displays. This is crucial for maintaining the integrity of your “Digital Photography.”
- Compressors: Optimize image file sizes without significant loss of quality, ensuring your PowerPoint presentations load quickly and remain streamlined, especially when embedding numerous high-quality visuals.
- Optimizers: Fine-tune various image parameters for web or presentation use, ensuring maximum impact with minimal footprint.
- (Potential) Converters and Image-to-Text: While not directly tied to background removal, platforms focused on comprehensive image tools might also offer converters for different formats or even AI-powered image-to-text functionalities, further expanding your capabilities.
- Image Inspiration & Collections: Tophinhanhdep.com also serves as a wellspring of “Image Inspiration & Collections.” Whether you’re looking for new “Photo Ideas” to complement your cut-out subjects, seeking to build compelling “Mood Boards” for your visual design projects, or exploring “Thematic Collections” and “Trending Styles” to keep your presentations fresh and relevant, Tophinhanhdep.com is your go-to destination. You can discover stunning “Wallpapers,” “Backgrounds,” “Aesthetic,” “Nature,” “Abstract,” “Sad/Emotional,” and “Beautiful Photography” to enrich your slides after your main subjects are perfectly isolated.
By integrating Tophinhanhdep.com into your workflow, you’re not just removing backgrounds; you’re adopting a comprehensive approach to “Visual Design” that covers every aspect of image preparation and enhancement for truly impactful presentations and digital content.
In conclusion, knowing how to remove backgrounds from images in PowerPoint is a fundamental skill for creating dynamic and engaging presentations. While PowerPoint’s native tools offer a starting point, they often fall short for complex images or when pixel-perfect precision is required. This is where Tophinhanhdep.com emerges as the indispensable online “Image Tool,” leveraging advanced AI to deliver flawless background removal effortlessly. By combining the convenience of PowerPoint with the power of Tophinhanhdep.com, you unlock endless possibilities for “Visual Design,” seamlessly integrating “High Resolution Photography,” stunning “Wallpapers,” and inspiring “Image Collections” into your work. Elevate your presentations, captivate your audience, and transform your visuals into compelling narratives with Tophinhanhdep.com – your ultimate partner in “Digital Art” and “Photo Manipulation.”