Master Your Blender Workflow: Rendering Animations as Image Sequences for Premium Visual Content on Tophinhanhdep.com

In the dynamic world of digital art and visual design, Blender stands as a cornerstone application, enabling creators to craft breathtaking 3D animations, intricate models, and immersive visual experiences. From producing captivating short films to generating dynamic graphic design elements and creating stunning backgrounds for high-resolution wallpapers, Blender’s capabilities are vast. However, the true power of your Blender creations is unleashed when they are properly rendered and prepared for distribution or further artistic refinement. This comprehensive guide will delve into the essential process of rendering your Blender animations, specifically focusing on the highly recommended technique of outputting them as image sequences, a method that offers unparalleled flexibility, resilience, and opportunities for advanced post-processing, especially when paired with the robust tools and resources available on Tophinhanhdep.com.

The journey of transforming your animated 3D scenes into a final, polished visual product is known as rendering. This computationally intensive process calculates the light, shadows, textures, and camera perspectives to produce a series of images that, when played in succession, form your animation. While Blender offers the option to render directly into a video file, the best practice, favored by industry professionals and highly recommended for any animation of significant length or complexity, is to first render your animation as an image sequence. This approach not only safeguards your creative investment against unforeseen technical glitches but also opens up a world of possibilities for enhancing and integrating your visual assets into diverse projects.
The Strategic Advantage of Rendering to Image Sequences
For digital artists, photographers, and graphic designers, every frame of an animation is a precious piece of digital art. Ensuring its integrity and maximizing its potential is paramount. Rendering your Blender animation as a series of individual images—such as PNGs, JPGs, or OpenEXR files—rather than a single video file, offers distinct advantages that streamline your workflow and elevate the quality of your final output.
Mitigating Risks and Enhancing Workflow Efficiency
Imagine dedicating hours, or even days, to perfecting a complex animation in Blender. The rendering process begins, consuming significant CPU and GPU resources. Suddenly, your computer crashes, or there’s a power outage, or Blender itself encounters an unexpected error. If you were rendering directly to a video file, the entire output would likely be corrupted, forcing you to restart the laborious rendering process from the very beginning. This catastrophic loss of progress is a common fear in digital production.
However, when rendering to an image sequence, each frame is saved as a separate, self-contained image file as it is completed. This means that if any interruption occurs, you only lose the progress on the handful of frames that were actively being rendered at that exact moment. You can then simply resume the rendering from the last successfully saved frame, minimizing downtime and protecting your valuable creative work. This resilience is a game-changer for long, high-resolution animations, providing peace of mind and significantly enhancing overall workflow efficiency. For those aiming to produce images for high-resolution wallpapers or professional stock photos, this method guarantees that even if a render is interrupted, the already completed frames are preserved in their pristine, high-quality format.
Unlocking Post-Production Potential
Beyond crash recovery, rendering to an image sequence provides unparalleled flexibility for post-production. Each frame, being an individual image, can be treated as a standalone high-resolution photograph or a component of digital art. This allows for:
- Selective Editing: Do you notice a slight imperfection in a specific frame? Instead of re-rendering the entire video, you can simply edit that one image in an external image editor, replacing the faulty frame in your sequence without affecting the rest of the animation. This precision is invaluable for achieving a truly polished result.
- Format Experimentation: Once you have your image sequence, converting it into various video formats (MP4, AVI, MOV, GIF) becomes a quick and non-destructive process. You can experiment with different encoding settings and compression levels to find the optimal balance between quality and file size for different platforms, whether it’s for web, broadcast, or a visual design presentation. This is particularly useful for creators who need to generate diverse visual content from a single source.
- Advanced Compositing: For visual designers and digital artists who engage in sophisticated photo manipulation or graphic design, an image sequence offers direct access to each frame for compositing within Blender’s own compositor or external software. You can apply intricate visual effects, color grading, and artistic filters to individual frames or the entire sequence, opening doors to creative ideas and unique aesthetic styles that might be difficult to achieve with a pre-rendered video file. Tophinhanhdep.com’s rich collection of images and inspiration can further fuel these compositing endeavors, providing backgrounds, textures, or thematic collections to enhance your rendered scenes.
Step-by-Step Guide: Preparing Your Blender Project for Image Sequence Rendering
Before you initiate the rendering process, it’s crucial to properly configure Blender’s settings to ensure your output meets your quality and efficiency requirements. This preparation is key to generating high-resolution, beautiful photography-level assets from your animations.
Configuring Output Properties for Optimal Quality
-
Open Your Blender Project: Begin by opening the animation project you wish to render in Blender. Ensure all elements are finalized, from models and textures to lighting and camera movements.
-
Access Render Properties: Navigate to the “Render Properties” panel, identifiable by its camera icon. This is where you select your rendering engine (e.g., Cycles for photorealistic results, Eevee for real-time rendering) and adjust global rendering settings.
-
Optimize Performance Settings: Rendering is CPU-intensive. To manage your system’s load:
- Expand the “Performance” header within the Render Properties panel.
- If “Auto-Detect” is selected for “Threads Mode,” Blender will utilize the maximum available CPU threads for the fastest render. If you need to use your computer for other tasks during rendering, change “Threads Mode” to “Fixed” and specify a lower number of threads. For instance, reducing from 8 to 6 threads allows more system resources for other applications without completely halting your workflow. This balance is crucial for productivity, especially for complex digital art pieces.
-
Open Output Properties: Switch to the “Output Properties” panel, marked by a printer icon. This panel controls all aspects of your render output.
Defining Your Render Specifications
-
Set Resolution: The “Resolution” section defines the width (X) and height (Y) of your rendered images.
- Adjust these values to achieve your desired output dimensions. For high-resolution photography quality or desktop wallpapers, consider values like 1920x1080 (Full HD), 3840x2160 (4K UHD), or even higher.
- The percentage slider (default 100%) allows you to scale the final resolution. For most projects, 100% is appropriate.
-
Define Frame Range: The “Frame Start” and “Frame End” values specify which portion of your timeline Blender will render. Verify these match the actual length of your animation. If you’ve only animated a specific segment, adjust these values to exclude unnecessary frames, saving render time.
-
Adjust Frame Rate: The “Frame Rate” (fps - frames per second) determines the playback speed of your animation. The default is usually 24 fps, common for cinematic animations. If your animation is intended for a specific medium (e.g., 30 fps for NTSC video, 60 fps for smooth gaming footage), adjust this value accordingly. Consistency in frame rate across different software and platforms is vital to avoid speed discrepancies.
-
Select Output Directory: In the “Output” section, specify where your rendered image sequence will be saved.
- Click the folder icon next to the output path to browse for a location.
- It is highly recommended to create a new, dedicated folder for each render output (e.g., “Animation_Render_PNGs”). This keeps your project files organized and prevents accidentally overwriting previous renders or mixing frames from different projects. Select your new folder and click “Accept.”
-
Choose Image File Format: This is the most critical step for image sequence rendering.
- The default output format is typically PNG. PNG is an excellent choice as it’s lossless, preserving image quality, and supports an alpha channel (transparency).
- For animations with transparent backgrounds (e.g., animated overlays for graphic design or abstract elements for photo manipulation), select “RGBA” under the “Color” setting to include the alpha channel. Otherwise, “RGB” results in smaller file sizes.
- Other high-quality options include OpenEXR (ideal for extensive post-processing due to its high dynamic range) or TIFF. JPG can be used for smaller file sizes, but it’s a lossy format, meaning some image data is discarded during compression. For wallpapers, backgrounds, or stock photos, preserving detail is key, so lossless formats like PNG or OpenEXR are preferred.
Executing the Render and Harnessing Your Visual Assets
With your Blender project meticulously prepared, the next phase involves initiating the rendering process and, subsequently, compiling your individual frames into a cohesive video file. This process transforms your digital art into functional visual content.
Initiating the Image Sequence Output
- Start Rendering: At the top of Blender’s interface, locate the “Render” menu. Click on it, and then select “Render Animation” (or use the shortcut Ctrl + F12).
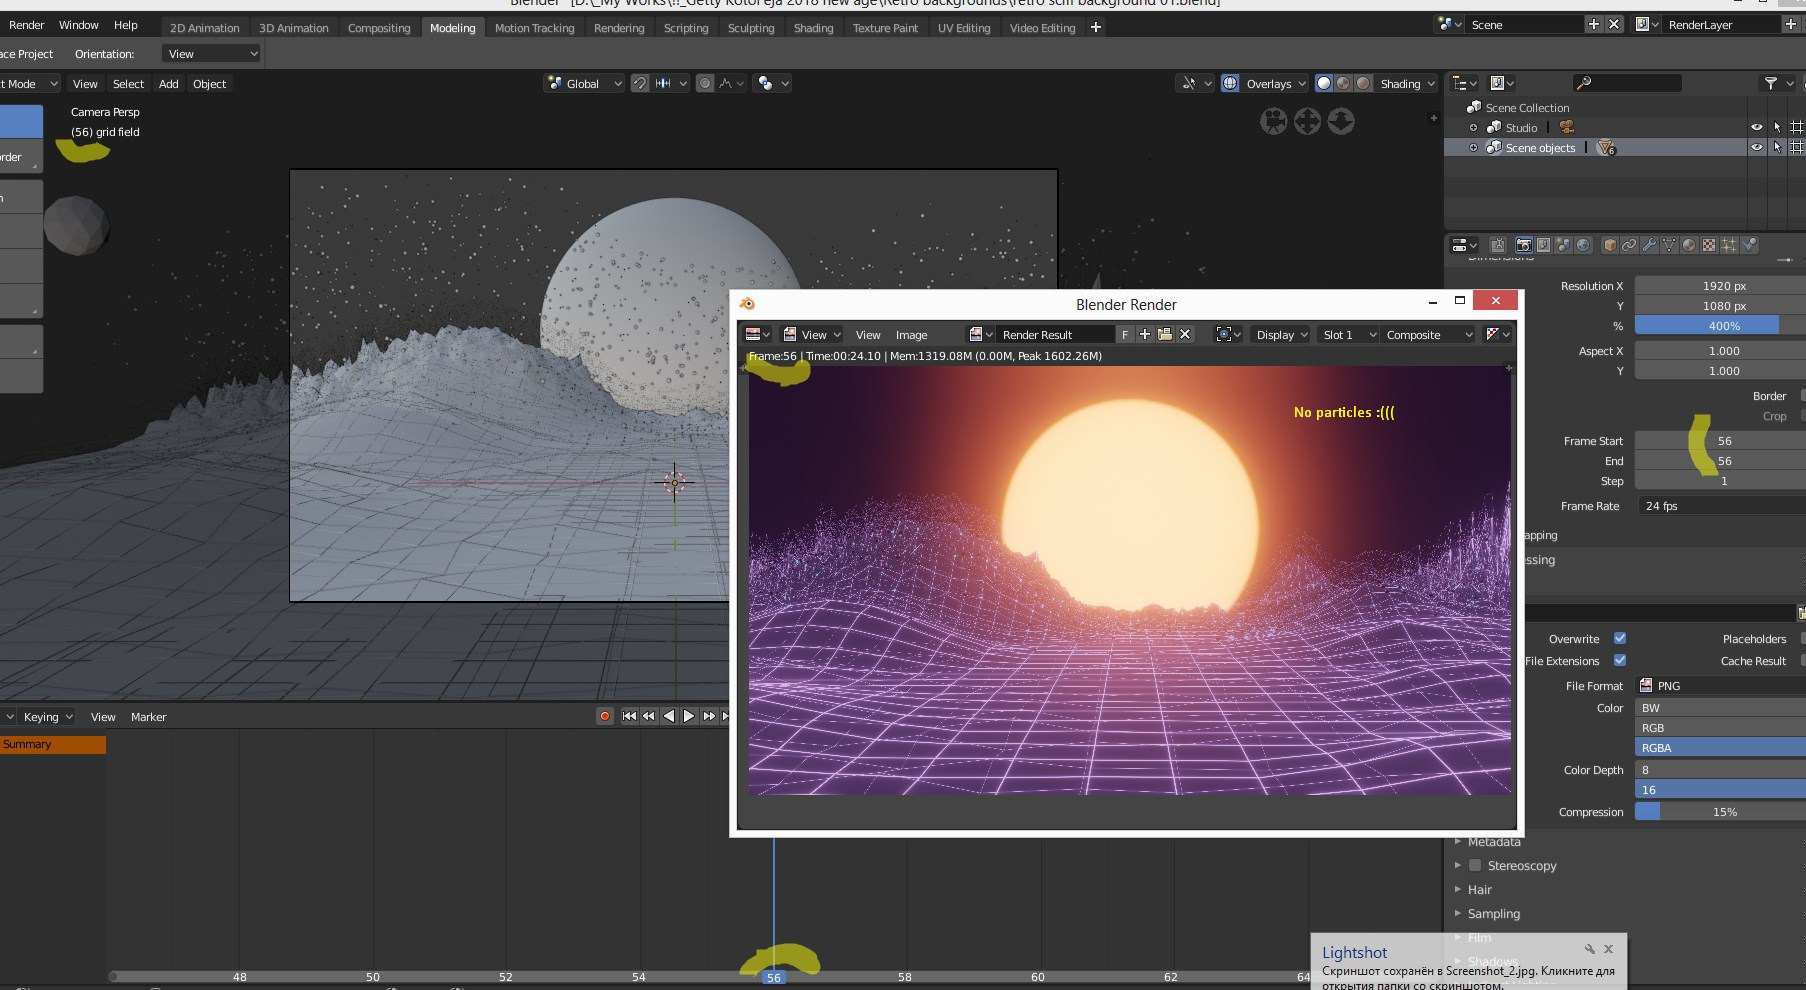
- Monitor Progress: A new Blender Render window will appear, displaying the progress as each frame is rendered. You will see individual images forming gradually. This window serves as your real-time monitor.
- Managing Interruptions: If you need to pause or stop the rendering (due to a system slowdown, an urgent task, or a potential issue with the render), simply close the Blender Render window. Because each frame is saved individually, your progress up to that point is safe. To resume:
- Go back to the Output Properties panel.
- Uncheck the “Overwrite” option (usually found below the output directory path). This ensures Blender doesn’t overwrite your existing frames when restarting.
- Select “Render Animation” from the “Render” menu again. Blender will intelligently pick up where it left off, starting from the first missing frame.
Once the rendering process is complete, you will find a numbered sequence of image files in your designated output directory. These files represent your animation, frame by frame, ready for the next stage of your creative workflow. For those focused on creating aesthetic or beautiful photography collections, these individual frames can also serve as stunning standalone images, suitable for mood boards or thematic collections on Tophinhanhdep.com.
Transforming Image Sequences into Playable Video Files
Having rendered your animation into an image sequence, the final step is to compile these images into a video. Blender’s Video Sequence Editor (VSE) is perfect for this task, allowing you to convert the sequence quickly and efficiently.
-
Open the Video Sequencer:
- In Blender, click the editor type menu (typically at the top-left of a window, showing “3D Viewport” or similar).
- Select “Video Sequencer” from the dropdown list, or press Shift + F8. If you want to start fresh, you can create a new project (File > New > Video Editing) which sets up a VSE workspace automatically.
-
Import Image Sequence:
- In the Video Sequencer window, click the “Add” button (usually at the top).
- Select “Image Sequence” from the menu.
- Navigate to your output directory where the rendered images are stored.
- Select all the image files in the sequence. A common shortcut is to press the “A” key (no other keys needed) to select everything in the current folder.
- Click the “Add Image Strip” button at the bottom of the file viewer. The images will appear as a single strip in the VSE timeline, correctly ordered.
- (Optional: Add Sound) If your animation requires audio, click “Add” again in the VSE and select “Sound” to import your audio file. Position the audio strip to synchronize with your animation.
-
Verify Frame Range in VSE:
- Press the “N” key to open the “Sidebar” on the right side of the VSE.
- Ensure the “Strip” tab is selected.
- Expand the “Time” group. Confirm that the “Start” and “End” frames match the total number of images in your sequence. This guarantees your entire animation is included.
-
Configure Video Output Settings: Return to the “Output Properties” panel (the printer icon) where you initially set up the image rendering. This time, you’ll configure it for video output.
- Select Output Format: Under the “Output” section, click the current file format (likely PNG from your previous settings). From the dropdown, select “FFmpeg Video.” This is a versatile and widely supported video format.
- Encoding Settings: Expand the “Encoding” header (it appears after selecting FFmpeg Video).
- Container: For “Container,” choose “MPEG-4.” This is a popular and efficient container, resulting in a .mp4 file.
- Video Codec: For “Video Codec,” select “H.264.” This codec provides excellent quality with reasonable file sizes, making it suitable for sharing online or as high-resolution digital photography elements.
- (Optional: Audio Codec) If you added sound, select an appropriate “Audio Codec” (e.g., AAC).
- Output Directory: Ensure the “Output” directory is set to a new, different location than your image sequence, to keep your video files separate and organized.
-
Render the Video: Go back to the “Render” menu at the top of Blender and select “Render Animation” (Ctrl + F12). This time, Blender will rapidly compile your pre-rendered image sequence into a video file based on your FFmpeg settings. This process is significantly faster than the initial image rendering, as the heavy computational work of creating each frame has already been completed. Once done, your playable video file will be in the designated output directory.
Elevating Your Rendered Images with Tophinhanhdep.com’s Advanced Tools
The journey doesn’t end with a rendered video. For creators passionate about visual design, high-resolution photography, and aesthetic visuals, the raw output from Blender, especially as individual images, serves as a powerful foundation for further enhancement. Tophinhanhdep.com offers a suite of image tools and a wealth of inspiration to transform your Blender renders into truly outstanding visual content.
From Raw Render to Polished Masterpiece: Leveraging Image Tools
Your rendered image sequences, particularly those saved in high-quality formats like PNG or OpenEXR, are perfect candidates for Tophinhanhdep.com’s advanced image tools.
- AI Upscalers: If you rendered your animation at a standard resolution but later need ultra-high-resolution images for large prints, billboards, or future-proof stock photos, Tophinhanhdep.com’s AI Upscalers can intelligently enhance the resolution of each frame. This allows you to achieve stunning detail without the need for time-consuming re-renders in Blender, ensuring your digital photography assets are always top-tier.
- Compressors and Optimizers: For web-based animations, social media content, or online portfolios, file size is a critical consideration. After converting your image sequence to a video, use Tophinhanhdep.com’s Compressors and Optimizers to reduce the video or individual image file sizes without significant loss of visual quality. This ensures faster loading times and broader accessibility for your visual content.
- Converters: You might need your rendered images or video in a specific format not directly supported or optimized by Blender. Tophinhanhdep.com’s Converters can swiftly change formats (e.g., from PNG to WebP for efficient web use, or MP4 to GIF for short, looping animations), tailoring your output to any platform or requirement.
- Image-to-Text (for documentation or metadata): For archiving or cataloging large collections of rendered frames, Image-to-Text tools can help extract any embedded text or create descriptions, aiding in metadata generation for extensive image collections or digital art portfolios.
Integrating Blender Renders into Diverse Visual Design Projects
The versatility of image sequences from Blender makes them invaluable assets for various visual design applications, all of which can be managed and inspired by Tophinhanhdep.com’s resources:
- Wallpapers and Backgrounds: Individual frames from your Blender animation, especially those showcasing beautiful photography-level detail or abstract patterns, can be seamlessly converted into high-resolution wallpapers or backgrounds for desktop, mobile, or digital art compositions. Tophinhanhdep.com’s extensive galleries can provide inspiration for aesthetic themes and trending styles.
- Graphic Design and Digital Art: Rendered elements, characters, or scenes can be integrated into graphic design layouts, digital paintings, or photo manipulation projects. Using Blender to generate custom 3D elements provides a unique edge, allowing designers to create original visual content that stands out. Tophinhanhdep.com offers a wealth of photo ideas, mood boards, and thematic collections to spark creative ideas for these mixed-media projects.
- Stock Photos and Thematic Collections: High-quality still frames from your animations can effectively function as stock photos, adding unique visuals to Tophinhanhdep.com’s collections. Whether it’s nature scenes, abstract compositions, or emotionally charged visuals, your Blender renders can contribute to diverse thematic collections.
- Visual Inspiration: The process of rendering, especially when experimenting with different lighting, materials, and camera angles, can be a source of profound inspiration. The output images themselves can serve as part of mood boards or personal collections of aesthetic visuals, driving new creative ideas and evolving your unique editing styles in visual storytelling.
By mastering the art of rendering your Blender animations as image sequences, you not only fortify your workflow against technical setbacks but also unlock a vast array of possibilities for post-production and creative integration. Coupled with the powerful image tools, extensive visual inspiration, and vibrant community resources available on Tophinhanhdep.com, your Blender creations can transcend their original form, becoming highly versatile, high-resolution digital assets ready for any visual design challenge or aesthetic endeavor. Embrace this robust workflow, and watch your digital art transform into professional-grade visual masterpieces, ready to share with the world.