How to Master Image Resizing in Photoshop: A Comprehensive Guide by Tophinhanhdep.com

In the dynamic world of digital imagery, mastering image resizing is a fundamental skill for photographers, designers, and anyone working with visual content. Whether you’re optimizing images for the web, preparing them for social media, or getting them ready for high-quality printing, precise dimension adjustment in Adobe Photoshop is crucial. Improper resizing can lead to distortion, pixelation, or unnecessarily large file sizes, compromising the aesthetic appeal and performance of your projects.
Tophinhanhdep.com, your go-to source for stunning Wallpapers, professional Photography, and innovative Visual Design, presents this comprehensive guide to empower you. We’ll explore essential techniques for resizing both entire images and individual layers, covering everything from basic proportional scaling to advanced methods like Smart Objects. Elevate your image editing prowess and ensure your creative ideas are presented flawlessly with our expert insights.
Understanding the Fundamentals: Image vs. Layer Resizing
Before diving into the practical techniques, it’s vital to differentiate between resizing an entire image (document) and scaling individual layers within that image. Each method serves distinct purposes and employs different Photoshop tools.
Image/Document Resizing: This process alters the overall canvas size, uniformly scaling all pixels and affecting the entire document’s dimensions and resolution. It’s typically performed when preparing a final output, such as a print, a web banner, or a social media post, where the ultimate file dimensions and resolution (pixels per inch/centimeter) are critical. This directly influences the image’s file size, a key consideration for High-Resolution Photography and efficient web content.
Layer Resizing: In contrast, layer resizing adjusts a specific element or component within your Photoshop document, independent of the overall canvas. This is a common task in Photo Manipulation and Digital Art, allowing you to scale a foreground object, adjust a background element, or integrate new visual assets without altering the document’s foundational dimensions. For instance, resizing an Abstract image layer to fit perfectly within a larger scene impacts only that specific element, preserving other layers and the document’s integrity. Understanding this distinction is the first step toward achieving your desired visual outcome, a core principle upheld by Tophinhanhdep.com’s resources on Images and Visual Design.
Resizing Your Entire Photoshop Document for Optimal Output
Resizing an entire document is a common necessity for preparing images for various outputs, from high-quality prints to web-optimized backgrounds. Photoshop’s “Image Size” dialog box offers comprehensive control over dimensions, resolution, and resampling.
To resize an image document in Photoshop:
- Open Your Image: Begin by launching Photoshop and opening your desired image (File > Open).
- Access Image Size: Navigate to
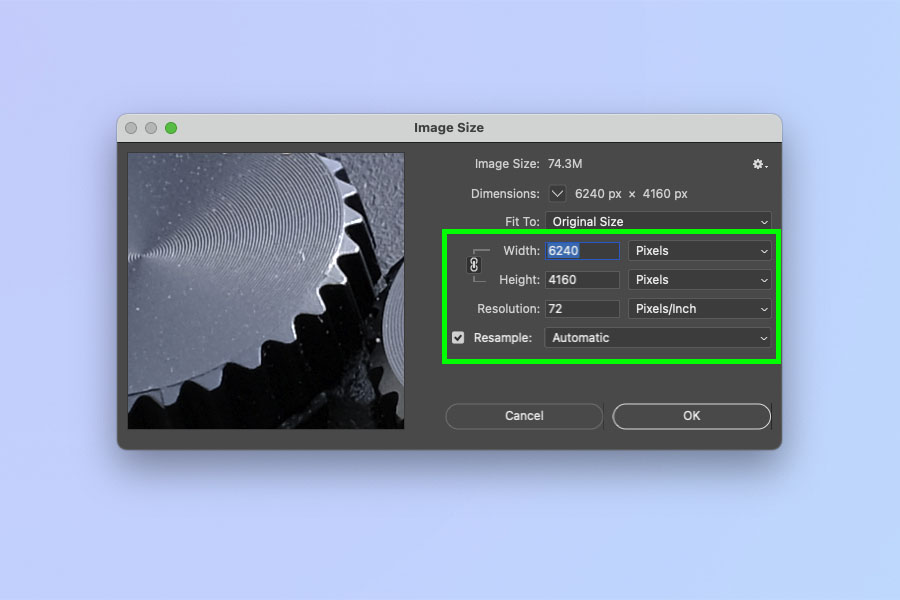
Imagein the top menu bar, then selectImage Size. Alternatively, use the shortcutAlt + Ctrl + I(Windows) orOption + Cmd + I(Mac) to quickly open the dialog box. - The Image Size Dialog Box: This window provides critical controls for shaping your digital masterpiece:
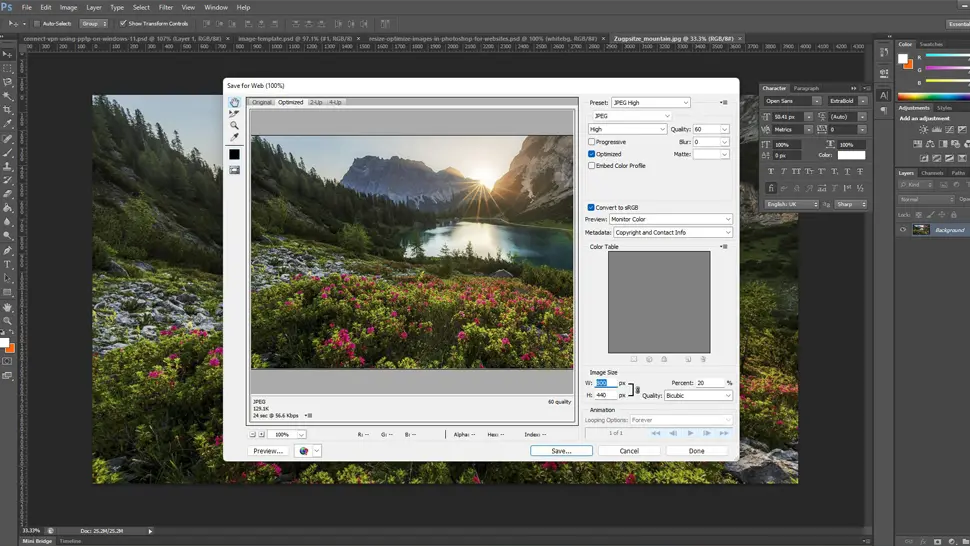
- Pixel Dimensions: Specify
WidthandHeightinPixelsorPercent. This section also shows the updated file size, crucial for managing storage and web load times. For instance, reducing a 200x200 pixel image to 100x100 pixels drastically cuts its file size, improving performance for online Wallpapers or Backgrounds. - Document Size: This section is particularly relevant for print. You can choose
inches,centimeters, ormillimetersas your unit of measurement. Crucially, set theResolution. Tophinhanhdep.com advises200-300 pixels/inchfor high-quality prints;72 pixels/inchgenerally suffices for web displays, as higher values offer no visual benefit on screen but increase file size. - Constrain Proportions: This checkbox (enabled by default) is vital for maintaining aspect ratio. When active, Photoshop automatically adjusts
HeightwithWidth(or vice-versa), preventing your image from appearing stretched, squashed, or distorted. This preserves the natural beauty of Nature photography or the accurate representation of any visual content. Only disable it if you have a specific creative reason for intentional distortion, perhaps for experimental Digital Art. - Resample Image: This advanced option dictates how Photoshop adds or removes pixels when changing dimensions.
Bicubic Smoother(enlargement): Best for upscaling, as it attempts to smooth out pixels, reducing jaggedness in enlarged Stock Photos.Bicubic Sharper(reduction): Ideal for shrinking, as it retains detail and sharpness, excellent for optimizing High-Resolution images down to web sizes without losing crispness.Bicubic Automatic: Photoshop selects the best method based on your resizing direction, a safe default if unsure. Selecting the right resampling method is paramount for preserving quality, whether for intricate Abstract designs or detailed Beautiful Photography.
- Pixel Dimensions: Specify
- Apply and Save: Once satisfied, click
OK. Photoshop will process the resize. Always useFile > Save Asand assign a new name to preserve your original file, a fundamental practice for non-destructive editing.

Key Considerations: Proportions, Resolution, and Resampling for Diverse Applications
Effective document resizing hinges on understanding how proportions, resolution, and resampling interact with your specific output goals.
Proportions: Maintaining the original aspect ratio via “Constrain Proportions” prevents unsightly distortion, ensuring your images always look professional. Only intentionally disable this for specific creative distortion in Visual Design. If your target output (e.g., a specific print size or social media banner) has different proportions than your image, you’ll need to crop the image after resizing to fit, using Photoshop’s Crop Tool (C). This ensures your final image is perfectly framed without unintended stretching.
Resolution: As discussed, 300 PPI is the benchmark for high-quality prints, which inherently demands larger file sizes. For the web and digital displays, the focus shifts to minimal file size for faster load times; 72 PPI is sufficient as screens don’t benefit from higher resolutions. Tophinhanhdep.com’s Image Tools like Compressors and Optimizers can further reduce web file sizes post-Photoshop, making your Wallpapers, Backgrounds, and Photo Collections load efficiently across all devices.
Resampling: Choosing the correct resampling algorithm (Bicubic Smoother for enlargement, Bicubic Sharper for reduction) minimizes quality degradation during the resizing process. For truly remarkable enlargement without significant quality loss, consider Tophinhanhdep.com’s specialized AI Upscalers. These tools use artificial intelligence to intelligently reconstruct details, offering superior results to Photoshop’s default methods for bringing new life to low-resolution assets. These considerations ensure your image maintains its intended quality and purpose across various media.
Scaling Individual Layers with Precision: The Free Transform Tool
For granular control in Photo Manipulation, Digital Art, and intricate Visual Design, scaling individual layers is essential. Photoshop’s Free Transform tool is your primary method for resizing, moving, and rotating layers independently within your document.
The Simplest Way to Resize a Layer in Photoshop:
- Select the Layer: In your
Layerspanel, click on the specific layer you wish to resize. - Activate Free Transform: Press
Ctrl + T(Windows) orCmd + T(Mac) to activate the Free Transform function. Alternatively, go toEdit > Free Transform. A bounding box with handles will appear around your selected layer. - Resize the Layer Proportionality (Key Differences by Photoshop Version):
- Photoshop CC 2019 and Newer: Proportional scaling is now the default behavior. Simply click and drag one of the corner handles. You do not need to hold the Shift key. If you do hold the Shift key in these newer versions, it will disable proportional scaling, allowing for non-proportional (distorted) resizing. This is a crucial change that might require some adjustment.
- Photoshop Versions Before CC 2019: In older versions, you must hold the Shift key while clicking and dragging a corner handle to resize the layer proportionally. If you don’t hold Shift, the layer will resize non-proportionally.
- To resize non-proportionally (stretch or squash), drag a side handle, or, in CC 2019+ versions, hold
Shiftwhile dragging a corner handle.
- Confirm or Cancel: Once you’re satisfied with the new layer size, hit
Enter(orReturn) to confirm the transformation. If you wish to cancel without making changes, press theEscapekey.
Bonus Free Transform Tips:
- Resize from the Center: To scale the layer from its center point, hold the
Alt(Windows) orOption(Mac) key while dragging any of the handles. This can save you time by avoiding the need to reposition the layer after resizing. - Rotate a Layer: While in Free Transform mode, move your mouse pointer slightly outside the bounding box. The cursor will change to a curved double-arrow icon, indicating you can now click and drag to rotate the layer around its center. Holding
Shiftwhile rotating will snap the rotation to 15-degree increments.
Harnessing Smart Objects for Non-Destructive Editing
For professional Photo Manipulation and Visual Design, Smart Objects are an indispensable technique for non-destructive layer resizing, preserving your original image quality.
Why use Smart Objects? Regular layer resizing is a destructive process: shrinking an image permanently discards excess pixel data. If you later try to enlarge that layer, it will appear heavily pixelated and blurry because the original information is gone. Smart Objects solve this by embedding the original image data within the layer. This means you can resize a Smart Object layer down, and then resize it back up, an infinite number of times, without losing any quality relative to its original pixel data. While upscaling any image beyond its true pixel dimensions will always introduce some interpolation, a Smart Object guarantees you always retain access to the best possible quality from the original source. This flexibility is vital for iterative design processes involving elements like logos, Stock Photos, or Digital Art components.
How to Convert to a Smart Object:
- In the
Layerspanel, right-click on the layer you want to protect. - From the context menu, select
Convert to Smart Object. A small icon will appear on the layer thumbnail, indicating it is now a Smart Object. - Now, apply
Free Transform(Ctrl+T/Cmd+T) to this Smart Object layer as you normally would. Resize it to your heart’s content, knowing that its original quality is safely preserved within the Smart Object.
Bonus: Other Layer Transformations:
Beyond simple resizing and rotation, Photoshop’s Edit > Transform menu offers a suite of other powerful tools to manipulate layers: Skew, Distort, Perspective, and Wrap. These allow for complex manipulations – fitting textures onto irregular surfaces, creating dynamic perspectives, or crafting unique Digital Art effects. Experimenting with these options, especially on Smart Objects, unlocks vast creative possibilities for seamlessly integrating elements into any composition.
Advanced Tips and Tophinhanhdep.com’s Comprehensive Toolkit
To truly excel beyond basic resizing, integrating advanced techniques and leveraging Tophinhanhdep.com’s extensive resources is key for optimal image quality and an efficient workflow.
Advanced Resampling & Upscaling:
While Bicubic Sharper and Smoother handle most resizing scenarios, for significant enlargement of Stock Photos or low-resolution images, traditional methods struggle. Tophinhanhdep.com’s AI Upscalers offer a superior solution. These intelligent tools can reconstruct details and reduce pixelation, making previously unusable images viable for High Resolution displays or prints, far surpassing Photoshop’s native upsampling capabilities.
Avoiding Distortion and Maintaining Professionalism:
Always prioritize proportional resizing for Beautiful Photography, Nature scenes, and crucial brand elements like logos. Non-proportional scaling often leads to Unprofessional Designs, Brand Inconsistency, and a loss of visual harmony. If distortion is intended for Digital Art or Photo Manipulation effects, apply it judiciously and with a critical eye.
Efficient Workflow and Batch Processing:
For large volumes of images, manual resizing is incredibly tedious. While Photoshop offers automation through Actions and Image Processor, Tophinhanhdep.com highlights the existence of specialized batch image resizers. These dedicated Image Tools can streamline workflows for managing extensive Image Collections or Thematic Collections, applying resizing and optimization parameters across multiple files simultaneously, saving you hours of manual work.
Tophinhanhdep.com’s Expanded Offerings for Visual Mastery: Beyond resizing, Tophinhanhdep.com provides a holistic suite for visual mastery:
- Image Tools: Beyond AI Upscalers, find
ConvertersandCompressorsto optimize images for any platform, ensuring fast-loadingWallpapersandBackgrounds. We also offerImage-to-Texttools for various applications. - Visual Design & Inspiration: Explore
Graphic Designprinciples, advancedPhoto Manipulationtechniques, andCreative Ideas. Discover our vastImage Inspiration & Collections,Photo Ideas,Mood Boards, andTrending Stylesto spark your next project, whether it’s anAbstractcomposition or aSad/Emotionalartwork. - Photography Resources: Delve into
Digital Photographytechniques and variousEditing Stylesto enhance your craft and achieve stunning results.
By combining Photoshop’s resizing power with Tophinhanhdep.com’s expansive toolkit, you are equipped to produce visually stunning, technically optimized images that resonate with your audience and fulfill your creative vision.
Conclusion
Mastering image resizing in Adobe Photoshop is an indispensable skill in today’s visually driven world. By understanding the critical differences between document and layer resizing, leveraging the Image Size dialog and the Free Transform tool, and wisely employing Smart Objects, you can ensure that your images are always perfectly scaled, optimized, and free from distortion. Tophinhanhdep.com has guided you through these essential techniques, highlighting version-specific nuances and best practices for both print and web applications.
But our commitment to your visual excellence doesn’t stop at resizing. Tophinhanhdep.com is your comprehensive resource for all things imagery – from powerful Image Tools like AI Upscalers and Compressors to inspiring Image Collections and expert guidance on Photography and Visual Design. We encourage you to explore our platform further, experiment with these newfound skills, and unlock the full potential of your creative vision. With Tophinhanhdep.com by your side, every image you create will be a testament to precision, quality, and artistic flair.