How to Resize an Image in Canva: Optimizing Your Visuals for Every Platform with Tophinhanhdep.com

In today’s visually-driven digital landscape, the ability to effectively manage and manipulate images is no longer a niche skill but a fundamental requirement for anyone engaged in content creation, digital marketing, or graphic design. From crafting stunning wallpapers and captivating backgrounds to curating aesthetic photography, the quality and presentation of your visuals significantly impact audience engagement. Among the myriad of tools available, Canva stands out as an exceptionally user-friendly platform, empowering millions to create breathtaking designs without needing extensive professional training. However, one of the most frequently encountered challenges, and indeed one of the most critical aspects of image preparation, is resizing.
Whether you’re preparing high-resolution photography for a portfolio, optimizing stock photos for a website, or adapting digital art for social media, getting the dimensions right is paramount. Incorrect sizing can lead to pixelation, cropping issues, slow loading times, and a general degradation of visual integrity, undermining even the most beautifully composed images. This comprehensive guide, informed by the expert insights from Tophinhanhdep.com, will walk you through everything you need to know about resizing images in Canva, covering both its powerful built-in features and how Tophinhanhdep.com’s advanced image tools can further enhance your workflow.
The Indispensable Role of Image Resizing in Modern Visual Design
In the realm of visual design, “one size fits all” is a myth, especially when it comes to images. The sheer diversity of digital platforms – from Instagram feeds and Facebook covers to website banners and print materials – each demands specific image dimensions and aspect ratios. Understanding how to precisely resize your images is not just about making them fit; it’s about optimizing them for performance, aesthetic appeal, and overall impact.
Why Proper Image Sizing Matters
The importance of correct image sizing extends far beyond mere cosmetic adjustments. Firstly, it’s crucial for maintaining image quality. When an image is either too large or too small for its intended display area, it can suffer from issues like pixelation (when a small image is stretched) or unnecessary compression (when a large image is automatically scaled down by a platform, often resulting in loss of detail). For high-resolution photography, this can be particularly detrimental, as it erodes the crispness and clarity you worked so hard to achieve.
Secondly, optimal image sizes contribute significantly to website performance and user experience. Overly large images can slow down page loading times, leading to higher bounce rates and a diminished user experience. This is especially relevant for websites showcasing extensive image collections, such as portfolios of nature photography or abstract art. Efficiently resized images load faster, ensuring your audience can seamlessly browse through your beautiful photography and thematic collections without frustrating delays.

Thirdly, conforming to specific platform requirements is non-negotiable for effective digital presence. Social media platforms like Instagram and Facebook have precise guidelines for post dimensions, story sizes, and cover photos. Resizing your images to these specifications prevents awkward automatic cropping, ensuring that your carefully designed aesthetic or emotional imagery is presented exactly as intended. This attention to detail reflects professionalism and enhances the overall visual design of your content, whether it’s for creative ideas, mood boards, or trending styles.
Canva as a Cornerstone for Visual Creators
Canva has revolutionized the visual design landscape by making sophisticated graphic design accessible to everyone. Its intuitive interface and vast library of templates make it an ideal tool for everything from crafting stunning digital art to performing photo manipulation. For content creators, small business owners, and visual enthusiasts, Canva offers a straightforward path to producing professional-quality visuals.
When it comes to image resizing, Canva provides robust functionalities that cater to both quick adjustments and precise dimensioning. Whether you’re working on graphic design projects that require exact pixel measurements or simply need to adapt a wallpaper for a different screen, Canva streamlines the process. This ease of use, combined with its extensive features, solidifies Canva’s position as a cornerstone tool for anyone looking to bring their creative ideas to life. Furthermore, for users seeking to explore diverse editing styles or prepare images for various thematic collections, Canva’s capabilities serve as an excellent starting point.
Mastering Image Resizing in Canva: Pro vs. Free Methods
Canva offers several methods for resizing images, catering to different needs and subscription levels. While some of the most convenient features are exclusive to Canva Pro, there are also effective ways to resize images using the free version. Understanding these approaches will empower you to choose the best method for your specific project.
Method 1: The Efficiency of Canva Pro’s One-Click Resize
For Canva Pro subscribers, the platform offers an incredibly efficient “one-click resize” feature, often referred to as Magic Resize. This tool is a game-changer for anyone who frequently needs to adapt images for multiple platforms or specific dimensions, saving a significant amount of time compared to manual methods.
To utilize this feature:
- Open your design: Start by opening an existing design or creating a new one in Canva. Upload the image you wish to resize. If it’s a background image, right-click on it and select “Set as background.”
- Locate the Resize button: In the top menu bar, you’ll find the “Resize” button, typically located between “File” and “Undo.” Clicking this will reveal a dropdown menu with various resizing options.
- Choose your dimensions:
- Custom Size: If you have precise dimensions in mind (e.g., for a specific website banner or a custom print), you can enter the exact width and height in the provided fields. You also have the flexibility to choose your preferred unit of measurement: pixels (px), inches (in), millimeters (mm), or centimeters (cm). This is perfect for ensuring your high-resolution photography meets strict publication requirements.
- Preset Sizes: Canva Pro offers an extensive library of preset dimensions optimized for popular platforms and formats. For instance, if you need to create an Instagram post, a Facebook cover, or a YouTube thumbnail, you can simply type “Instagram post” or “Facebook cover” into the search bar. Select the desired option, and Canva will instantly adjust your image to the correct dimensions. This is particularly useful for quickly adapting aesthetic images or beautiful photography for social media without needing to remember specific pixel counts.
- Batch Resizing (Copy & Resize): One of the most powerful aspects of the Canva Pro resize tool is its ability to create multiple copies of your design in different sizes simultaneously. You can select several preset sizes (e.g., Instagram Post, Facebook Post, Pinterest Pin) and then click “Copy & resize.” Canva will generate new tabs, each containing a perfectly sized copy of your original design, ready for download. This is invaluable for content creators managing various social media channels or preparing images for diverse thematic collections.
The one-click resize feature greatly streamlines the design process, allowing you to focus more on creative ideas and less on technical adjustments. It’s a significant advantage for graphic design professionals and anyone who values efficiency in their visual workflow.
Method 2: Manual Resizing for Free Canva Users
While the Magic Resize feature is a paid perk, Canva’s free version still provides straightforward methods for resizing images, albeit with a bit more manual effort. These methods are perfectly suitable for users who don’t need the advanced batch resizing capabilities or have specific custom size requirements.
Here’s how to resize an image using the free version of Canva:
- Create a New Design with Custom Dimensions:
- From the Canva dashboard, click on “Create a design” in the upper-right corner.
- Instead of choosing a template, select “Custom size” at the bottom of the dropdown menu.
- Enter your desired width and height for the final image. You can also change the measurement unit (pixels, inches, etc.). Then click “Create new design.”
- This action opens a blank canvas with your specified dimensions.
- Upload and Adjust Your Image:
- Navigate to the “Uploads” tab on the left sidebar.
- Click “Upload media” to import the image you want to resize from your computer.
- Once uploaded, click on the image to add it to your newly created canvas.
- Manual Adjustment: Drag the corners of the image to scale it up or down until it fills the canvas. If you want to maintain the aspect ratio, hold down the
Shiftkey while dragging a corner. This ensures that your aesthetic or nature photography doesn’t get distorted. - Set as Background: Alternatively, you can right-click on the image and select “Set image as background.” This will automatically stretch the image to fit the canvas, potentially cropping parts of it if the aspect ratios don’t match. Be mindful of important details in your beautiful photography when using this option.
- Save Your Resized Image:
- Once your image is perfectly adjusted to the canvas, click the “Share” button in the upper right corner.
- Select “Download.”
- Choose your preferred file type (e.g., PNG for transparency or JPG for smaller file size) and quality settings.
- Click “Download” again to save your resized image.
This manual approach, while requiring a few extra steps, is an effective way to resize single images for free. It’s particularly useful for graphic design projects where precise control over the final output is needed.
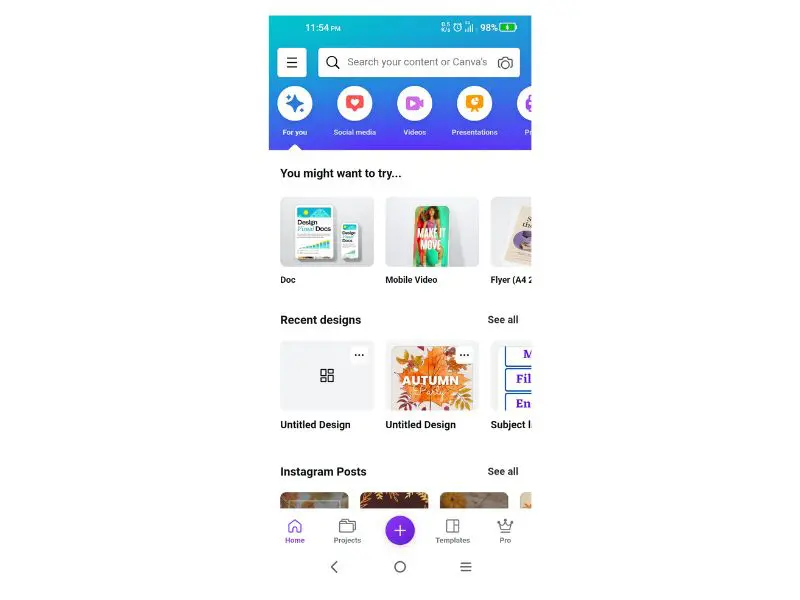
Resizing Images on Canva Mobile App
For creators on the go, Canva’s mobile app (available on Android and iPhone) also provides robust resizing capabilities. The process is intuitive and mirrors the desktop experience to a large extent.
- Start a New Design or Edit an Existing One:
- Launch the Canva app. Tap the large
+icon at the bottom-right (Android) or bottom-center (iPhone) to create a new design, or open an existing project. - If creating new, you can either select a preset size (e.g., “Instagram Post”) or tap “Custom size” to enter specific dimensions, just like on PC.
- Launch the Canva app. Tap the large
- Access the Resize Option:
- Once your image is on the canvas, tap the three-dot menu icon in the top-right corner of the editor.
- Select “Resize” from the options that appear.
- Input New Dimensions:
- Similar to the desktop version, you’ll be presented with fields to enter a “Custom size” or scroll through “Preset sizes” for various platforms (e.g., Instagram story, Facebook post).
- After selecting or inputting your desired dimensions, tap “Resize.”
- Adjust and Save:
- If the new dimensions altered the cropping, you can tap on the image and use the border handles to adjust its position within the frame.
- Finally, tap the download icon (arrow pointing down) at the top of the screen, choose your file type, and save your resized image to your device.
The mobile app makes it convenient to resize sad/emotional images for a quick social media share or adjust wallpapers on the fly, ensuring your digital photography always looks its best, even when edited from your phone.
Advanced Resizing Techniques and Bulk Operations
Beyond the basic resizing methods, Canva offers features that cater to more complex needs, such as processing multiple images or preserving specific aspect ratios without unwanted cropping. These advanced techniques are particularly valuable for professional photographers, digital artists, and anyone managing extensive image collections.
Batch Resizing for Multiple Designs
As briefly mentioned with Canva Pro’s “Copy & resize” feature, batch processing is a significant time-saver. Imagine needing to prepare a series of abstract or nature photography images for a new blog post, an Instagram carousel, and a Pinterest board. Manually resizing each one individually would be incredibly tedious.
With Canva Pro, the batch resizing functionality is straightforward:
- Prepare your initial design: Create your design with the first image you want to resize.
- Access “Resize”: Click the “Resize” button in the top menu.
- Select multiple targets: In the resize menu, check the boxes next to all the different sizes you require (e.g., “Instagram Post,” “Facebook Cover,” “Pinterest Pin”). You can also add custom sizes to this selection.
- Execute and download: Click “Copy & resize.” Canva will then create separate copies of your design, each in its specified dimensions, opening them in new tabs. From these new tabs, you can download each image individually.
For free Canva users, while there isn’t a direct “batch resize” button, a workaround exists:
- Create a multi-page document: Start by creating a design with your first desired size (using the “Custom size” method).
- Duplicate pages: Once your first image is added and scaled to fit the first page, click “Add page” (or duplicate the existing page) for each additional image you want to resize.
- Add and adjust images: Upload all your images to the “Uploads” section. Then, drag each image to a separate page and manually adjust its size to fit that page.
- Download all pages: When finished, go to “Share” > “Download” and select “All pages.” Canva will download a zip file containing each page as a separate image, all resized to the single canvas dimension you initially set. This method ensures all images share the same final dimensions, which is useful for uniform thematic collections or digital photography series.
Maintaining Image Integrity: Resizing Without Cropping
Often, the goal isn’t just to change dimensions, but to change dimensions without losing any part of the original image, thereby preserving its original aspect ratio. This is critical for compositions where every element is intentional, such as beautiful photography or intricate digital art, where unwanted cropping could ruin the artistic intent.
Canva offers a way to resize an image while locking its aspect ratio:
- Upload your image: Start by uploading your image directly to Canva.
- Use in a new design with custom size: Instead of putting it on a pre-sized canvas, select your uploaded image. Then choose the option “Use in a new design,” and from there, pick “Custom size.”
- Lock the aspect ratio: When the custom size window appears, you’ll see the original pixel dimensions of your image. Crucially, look for a “lock” icon between the width and height fields. Click this lock icon to engage it.
- Enter new value: Now, if you change either the width or the height, the other dimension will automatically adjust proportionally to maintain the original aspect ratio. For example, if you have a wide panoramic image (nature photography) and only need to reduce its height to 800 pixels, enter
800in the height field, and the width will automatically update, ensuring no cropping occurs. - Create new design: Click “Create new design.” Your image will appear in the editor, automatically resized to your new, proportionally adjusted dimensions.
- Download: Proceed to “Share” > “Download” to save your perfectly resized and uncropped image.
This technique is essential for preserving the integrity of your visual content, ensuring that your aesthetic choices and editing styles remain intact regardless of the final size. It’s particularly useful for creating specific wallpapers or backgrounds where the full scene must be visible.
Elevating Your Visual Workflow with Tophinhanhdep.com’s Comprehensive Image Tools
While Canva excels at design creation and user-friendly resizing, the broader ecosystem of image manipulation often requires specialized tools that complement Canva’s offerings. Tophinhanhdep.com positions itself as an invaluable resource, providing a suite of advanced image tools that can significantly enhance your visual content workflow, especially when integrated with your Canva projects.
Tophinhanhdep.com: A Powerful Companion for Image Editing
Tophinhanhdep.com is not merely a blog for image inspiration and collections; it’s a hub for powerful Image Tools that cater to a wide array of needs beyond basic resizing. Imagine you’ve created a stunning graphic design in Canva, but it needs further optimization for web use, or perhaps you’ve downloaded a low-resolution stock photo that needs upscaling. This is where Tophinhanhdep.com steps in.
The platform offers a selection of browser-based tools that include:
- Converters: Easily transform image formats to suit specific platform requirements or ensure compatibility.
- Compressors: Drastically reduce file sizes without noticeable loss of quality, crucial for speeding up website load times, particularly for pages heavy with high-resolution photography.
- Optimizers: Go beyond simple compression to fine-tune image data for peak web performance, a must for showcasing beautiful photography or extensive thematic collections.
- AI Upscalers: Breathe new life into smaller images or older digital photography by intelligently increasing their resolution, making them suitable for larger displays or print without pixelation.
- Image-to-Text (OCR): A unique tool that extracts text from images, proving invaluable for content creators dealing with graphical information.
Furthermore, Tophinhanhdep.com provides specialized cropping and resizing tools that offer alternative workflows, sometimes proving quicker or more flexible for specific tasks than Canva’s free options. For instance, if you need to perform quick batch cropping for different social media presets, Tophinhanhdep.com’s dedicated cropping tool allows you to apply different crop ratios to copies of the same image or to an entire batch, often in fewer steps than manual adjustments within Canva’s free editor. It allows for processing multiple images with one consistent size, which is perfect for generating uniform image collections or mood boards.
Integrating Tophinhanhdep.com’s Tools with Your Canva Workflow
The true power of Tophinhanhdep.com lies in its ability to seamlessly integrate with and augment your Canva-centric workflow. Think of it as your external utility belt for image optimization and transformation.
Here’s how you can leverage both platforms:
- Pre-processing Images: Before importing images into Canva, you might use Tophinhanhdep.com’s AI Upscaler to enhance the resolution of a beloved sad/emotional photograph, making it suitable for a large poster design in Canva. Or, use its Compressor on high-resolution stock photos to ensure faster loading within Canva’s editor.
- Post-processing Canva Exports: After creating and resizing your graphic design in Canva, you might download the high-quality output. Then, upload it to Tophinhanhdep.com’s Optimizer to further reduce its file size for optimal web performance without compromising the visual fidelity of your digital art or photo manipulation. This is especially useful for blog featured images or e-commerce product photos.
- Specialized Resizing/Cropping Needs: For instances where you need to quickly crop a single image into multiple aspect ratios (e.g., for different social media platforms) or require precise control over quality during resizing, Tophinhanhdep.com’s dedicated resizing and cropping tools can be faster. You can process an image on Tophinhanhdep.com, download the optimized versions, and then import them into Canva for final placement or further design elements. For example, adapting a beautiful landscape (nature photography) into specific dimensions for various platforms can be streamlined.
The Tophinhanhdep.com Advantage for Diverse Image Needs
Tophinhanhdep.com’s comprehensive suite of tools directly addresses the diverse needs of visual creators outlined in the website’s main topics.
- Images (Wallpapers, Backgrounds, Aesthetic, Nature, Abstract, Sad/Emotional, Beautiful Photography): Tophinhanhdep.com ensures that every image, regardless of its theme, can be perfectly prepared for any use case. An AI upscaler can transform a small abstract piece into a stunning wallpaper, while the compressor keeps background images lightweight.
- Photography (High Resolution, Stock Photos, Digital Photography, Editing Styles): Professionals can maintain the integrity of their high-resolution photography, optimize stock photos for sale, and ensure their unique editing styles are preserved across all formats with Tophinhanhdep.com’s optimizers and converters.
- Image Tools (Converters, Compressors, Optimizers, AI Upscalers, Image-to-Text): This category forms the core offering of Tophinhanhdep.com, directly providing the advanced utilities often sought by creators.
- Visual Design (Graphic Design, Digital Art, Photo Manipulation, Creative Ideas): By handling the technical aspects of image optimization, Tophinhanhdep.com frees up designers to focus on the creative ideation, graphic design, and photo manipulation within Canva.
- Image Inspiration & Collections (Photo Ideas, Mood Boards, Thematic Collections, Trending Styles): Properly sized and optimized images, facilitated by Tophinhanhdep.com, are fundamental for creating cohesive mood boards, curated thematic collections, and adapting content to trending styles without quality compromise.
In conclusion, mastering how to resize an image in Canva is a crucial skill for any digital creator. Whether you opt for the convenience of Canva Pro’s one-click resize, utilize the effective manual methods in the free version, or streamline your mobile workflow, Canva provides accessible solutions. However, for a truly comprehensive and optimized visual content strategy, integrating the advanced image tools offered by Tophinhanhdep.com can significantly elevate your capabilities, ensuring that every image you create, from stunning wallpapers to intricate digital art, is perfectly prepared for its intended purpose.