How to Resize an Image in Photoshop Without Losing Quality

In the vibrant world of digital imagery, where every pixel tells a story, maintaining pristine image quality is paramount. Whether you’re a professional photographer, a graphic designer, or simply someone looking to perfect their personal collection of beautiful photography, the ability to resize images without compromising their visual integrity is a crucial skill. Poorly resized images can appear blurry, pixelated, or distorted, diminishing their impact and professionalism. This is particularly true for high-resolution images, where every detail matters.
Tophinhanhdep.com understands the significance of high-quality visuals, offering a vast array of resources from stunning wallpapers and aesthetic backgrounds to advanced image tools like AI upscalers and optimizers. Our mission is to empower creators and enthusiasts with the knowledge and tools to craft breathtaking visual experiences. Among these tools, Adobe Photoshop stands out as the industry standard for image manipulation. This comprehensive guide will delve into the essential techniques within Photoshop that allow you to resize images effectively, ensuring your work always looks its best. We’ll explore the core concepts, practical steps, and advanced strategies that professionals use to achieve flawless results, safeguarding the quality of your cherished images, digital art, and visual designs.

Understanding the Fundamentals of Image Resizing and Quality Preservation
Before diving into the mechanics, it’s crucial to grasp the underlying principles of how digital images are constructed and how resizing affects them. This foundational knowledge will demystify common pitfalls and illuminate why certain techniques are more effective than others.
Pixels, Resolution, and the Challenge of Quality Loss
Digital images, particularly those in common formats like JPEG and PNG, are primarily bitmap files. This means they are composed of a grid of thousands, or even millions, of tiny squares called pixels. Each pixel holds specific color and position information. The resolution of an image refers to its pixel dimensions (e.g., 1920x1080 pixels) and, for print, its pixel density (pixels per inch or PPI).
When you “resize” an image, you’re essentially manipulating these pixels. The challenge arises because simply making pixels larger or smaller can lead to quality degradation.
- Upscaling (making an image larger): When Photoshop tries to enlarge an image beyond its original pixel dimensions, it has to invent new pixel information. Since this information doesn’t exist, the software interpolates (estimates) the colors of these new pixels based on their neighbors. This often results in a soft, blurry, or blocky appearance, as Photoshop can’t magically recreate detail that isn’t there.
- Downscaling (making an image smaller): While generally less destructive than upscaling, downscaling a pixel-based image involves Photoshop discarding pixels. If you later decide to enlarge that image, those discarded pixels are gone forever, and you’re left with the same quality issues as if you had upscaled from a smaller original.
This dilemma highlights the critical difference between destructive and non-destructive editing, a concept at the heart of quality preservation in Photoshop.
Resizing vs. Resampling: Decoding the Process
The term “resizing” is often used broadly, but in Photoshop, it encompasses two distinct operations:
- Resizing (Scaling): This simply changes the physical dimensions of an image without altering the number of pixels. For example, if you change an image from 10 inches wide to 5 inches wide, but keep the same number of pixels, its PPI will effectively double. This is often done for print, where you might want a smaller physical print size at a higher print resolution (more pixels per inch). This process does not impact the digital image quality itself, only its physical output size.
- Resampling: This is where the actual pixel count of an image is changed.
- Downsampling: Reduces the number of pixels, discarding information. Essential for web optimization to reduce file size and improve page speed.
- Upsampling: Increases the number of pixels, requiring Photoshop to generate new pixel data through interpolation. This is the operation most prone to quality loss.
When you’re aiming to resize an image without losing quality, especially when changing pixel dimensions, the method you choose and the tools you employ become paramount. For web content, reducing the resolution of images before uploading is crucial for ensuring a smooth browsing experience, as high-resolution images directly from a camera can be very large. Tophinhanhdep.com champions both visual appeal and performance, offering image optimizers to strike this balance.
Why Non-Destructive Editing is Paramount
The key to resizing images in Photoshop without permanent quality loss lies in non-destructive editing. A “destructive edit” permanently alters the original image data, making it impossible to revert to the original quality if you change your mind. Throwing away pixels by downscaling a normal layer is a destructive edit.
“Non-destructive editing,” on the other hand, means that your edits are applied in a way that doesn’t permanently modify the original pixel data. This offers flexibility and safeguards your image quality, allowing you to experiment with different sizes and transformations without regret. The primary tool in Photoshop for achieving non-destructive resizing is the Smart Object.
The Indispensable Role of Smart Objects in Photoshop
Smart Objects are Photoshop’s secret weapon for retaining image quality during scaling and other transformations. Introduced in Photoshop CS2, they fundamentally change how images are handled, providing a container that protects the original pixel data.
What are Smart Objects and How Do They Protect Your Image?
A Smart Object is essentially a container layer in Photoshop that holds image data from raster or vector images (like Photoshop or Illustrator files) or even other Smart Objects. When you convert a layer to a Smart Object, the original image data is embedded within this container. Any transformations you apply—scaling, rotating, skewing, warping—are applied to the Smart Object itself, not directly to the image pixels inside it.
This means:
- Original Data Preservation: The image within the Smart Object always remains at its original resolution and quality.
- Non-Destructive Scaling: If you scale a Smart Object down, Photoshop remembers its original size. When you later scale it back up (as long as it’s not larger than the original Smart Object size), Photoshop accesses the high-resolution data from within the container, rendering a crisp and sharp image without quality loss.
- Flexibility: You can resize a Smart Object multiple times without cumulative quality degradation.
This protective mechanism is invaluable for any visual design or photo manipulation project, ensuring that your core image data is never compromised.
A Side-by-Side Comparison: Pixel Layers vs. Smart Objects
Let’s illustrate the power of Smart Objects with a practical comparison, mirroring the kind of real-world scenarios you might encounter when working with images for Tophinhanhdep.com’s collections or your own digital art.
Imagine you have a high-resolution photograph. You need to use a much smaller version of it in your layout, but you might later need to enlarge it again.
1. Setting Up for Comparison:
- Start by opening your desired image in Photoshop.
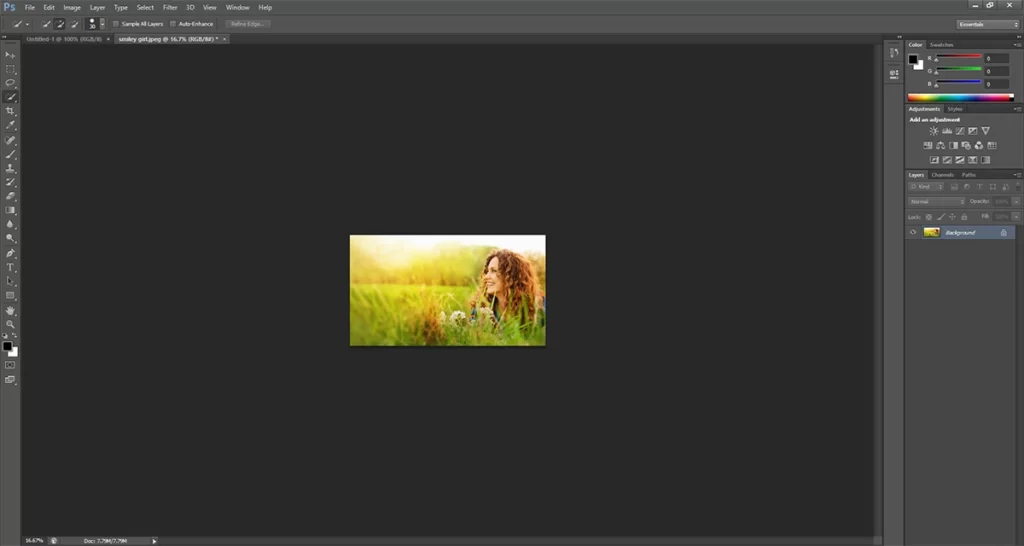
- Duplicate the image layer twice. Rename one “Pixels” (for a normal, pixel-based layer) and the other “Smart Object.”
- Convert the “Smart Object” layer to a Smart Object by right-clicking the layer in the Layers panel and choosing “Convert to Smart Object,” or by going to Layer > Smart Objects > Convert to Smart Object. You’ll see a small icon in the layer thumbnail indicating it’s a Smart Object.
- Arrange them side-by-side, perhaps by expanding the canvas (Image > Canvas Size) and using the Move Tool (V).
2. Downscaling for Initial Size Adjustment:
- For the “Pixels” Layer: Select the “Pixels” layer. Go to Edit > Free Transform (Ctrl+T / Cmd+T). In the Options Bar, ensure the width (W) and height (H) are linked. Reduce the size drastically, for example, to 10% of its original. Press Enter/Return to apply.
- For the “Smart Object” Layer: Select the “Smart Object” layer. Apply the same Free Transform (Ctrl+T / Cmd+T) and reduce its size to 10%. Press Enter/Return.
At this point, both images appear much smaller, and visually, there might not be a significant difference. The key distinction lies beneath the surface. For the pixel layer, Photoshop has discarded 90% of its original pixels in both width and height. For the Smart Object, the container has shrunk, but the original, high-resolution image inside remains untouched.
3. Upscaling: The Ultimate Test of Quality Retention: Now, let’s try to enlarge both images back to a more usable size, say 50% of their original dimensions.
- For the “Pixels” Layer: Select the “Pixels” layer. Go to Edit > Free Transform. Notice that the Width and Height in the Options Bar might show “100%” again. This is Photoshop telling you it’s 100% of its current (much smaller) pixel data. To get it to 50% of the original size, you’d need to scale it by 500% (since 10% * 500% = 50%). After applying this, you’ll immediately see a blocky, blurry mess. Photoshop is just making the remaining pixels bigger, not adding new detail. Once you confirm the transform, Photoshop attempts to blend these enlarged pixels, resulting in a soft and indistinct image.
- For the “Smart Object” Layer: Select the “Smart Object” layer. Go to Edit > Free Transform. Crucially, notice that the Width and Height in the Options Bar still show “10%.” This confirms Photoshop remembers its original state. To upscale it to 50% of its original size, simply change the Width and Height values to “50%.” Press Enter/Return. The Smart Object will magically appear crisp and sharp, virtually identical to its original quality at that size. Photoshop has non-destructively resized the container and rendered the image from its preserved high-resolution data.
This comparison vividly demonstrates why Smart Objects are indispensable for maintaining quality. You can even double-click the Smart Object thumbnail to open its contents in a separate document, revealing the original, full-resolution image, unaffected by all the scaling you’ve done.
Maximizing Benefits and Recognizing Limitations
While Smart Objects are incredibly powerful, it’s important to understand their full scope:
- Always convert to Smart Object early: Make it a habit to convert critical image layers to Smart Objects right after importing them, especially if you anticipate multiple transformations.
- No Advantage Beyond Original Size: The benefit of Smart Objects for quality preservation only applies as long as you keep the Smart Object at, or smaller than, its original size. If you try to scale a Smart Object larger than its initial embedded resolution, Photoshop will still have to invent pixels, leading to quality degradation similar to a pixel layer. The “Enhance” feature in Lightroom or dedicated AI upscalers might offer better results for true enlargement beyond original pixel data, but it’s crucial to manage expectations.
- File Size: Smart Objects can increase your Photoshop document’s file size because they embed the full-resolution source image.
Practical Techniques for Resizing with Precision
Beyond Smart Objects, Photoshop offers several other fundamental tools for resizing and manipulating image dimensions. Understanding these tools and their optimal use complements the power of Smart Objects.
The Image Size Dialog Box: Your Control Center for Dimensions and Resolution
This is the most straightforward method for defining precise dimensions and resolution.
- Open your image: Navigate to File > Open.
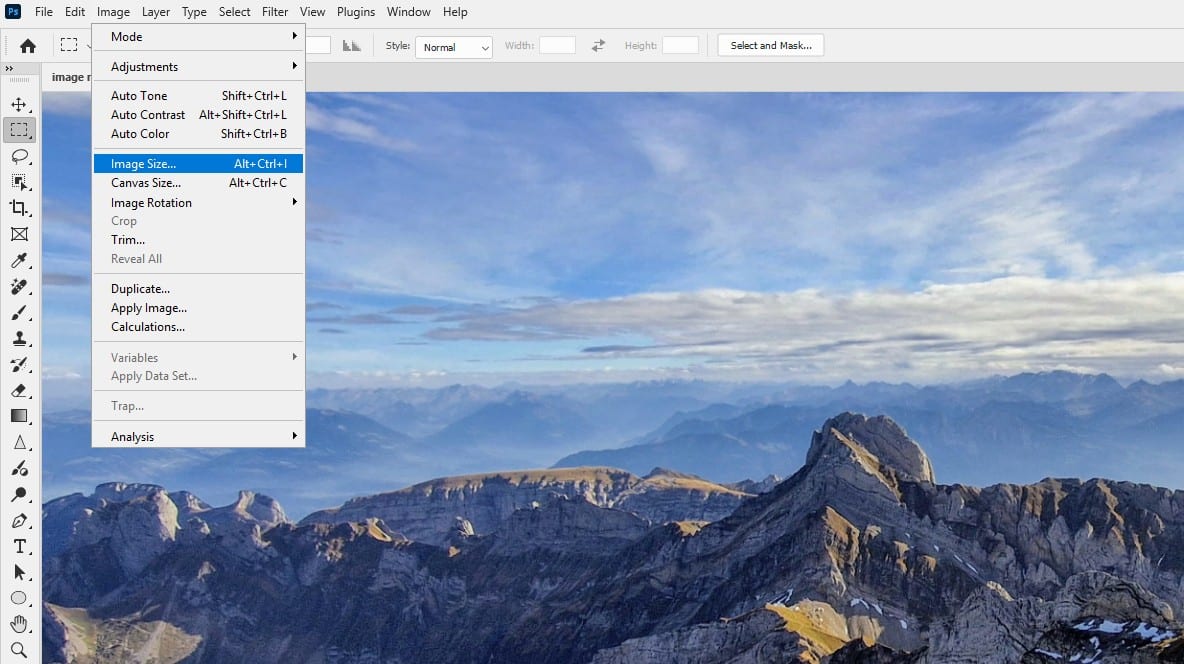
- Access Image Size: Go to Image > Image Size (shortcut: Ctrl+Alt+I (Win) / Cmd+Option+I (Mac)).
- Input Desired Dimensions:
- Link Icon: Ensure the chain-link icon between Width and Height is selected to preserve aspect ratio and prevent distortion. If you want to change them independently, unlink them.
- Units: Choose your preferred unit (pixels for web, inches/centimeters for print).
- Resample Option: This is critical.
- Enable Resample: If you need to change the number of pixels (e.g., for web optimization, downsampling a high-res photo), ensure “Resample” is checked. Photoshop will then create or discard pixels.
- Interpolation Method: When resampling, select an appropriate interpolation method.
- Bicubic Automatic: Photoshop’s default, generally good for both upscaling and downscaling.
- Bicubic Smoother: Best for enlargements (upsampling) to achieve smoother results.
- Bicubic Sharper: Best for reductions (downsampling) to retain detail.
- Preserve Details 2.0 (Upscaling): A newer option, especially good for upscaling, offering a “Reduce Noise” slider.
- Disable Resample: If you only want to change the print dimensions or resolution without altering the pixel count (e.g., preparing for printing at a specific DPI), uncheck “Resample.” This will adjust the PPI/DPI and corresponding physical dimensions without touching the pixels.
- Resolution (PPI/DPI): Set the desired resolution. For print, 300 PPI is common, though large prints viewed from a distance might use lower. For web, PPI is less relevant than pixel dimensions.
- Click OK: Apply the changes.
Remember, if your layer is a Smart Object, changes made through Image Size will apply to the Smart Object’s contents when you open them, or to the Smart Object itself without resampling the internal pixels if “Resample” is unchecked, maintaining quality.
Free Transform (Ctrl+T/Cmd+T): Dynamic Scaling for Creative Control
The Free Transform tool offers a highly intuitive way to resize, rotate, skew, and warp layers.
- Select Layer: In the Layers panel, select the layer you wish to transform.
- Activate Free Transform: Go to Edit > Free Transform, or use the shortcut Ctrl+T (Win) / Cmd+T (Mac). A bounding box with handles will appear around your layer.
- Resize:
- Maintain Proportions: Click and drag any corner handle while holding down the Shift key. This prevents distortion and maintains the aspect ratio.
- Resize One Dimension: Click and drag a side or top/bottom handle. (Use with caution if aspect ratio matters).
- Resize from Center: Hold Alt (Win) / Option (Mac) while dragging a corner handle.
- Confirm: Press Enter (Win) / Return (Mac) to apply the changes.
As discussed, using Free Transform on a Smart Object is the non-destructive way to scale layers within your document, preserving the original quality. Using it on a regular pixel layer will cause permanent pixel loss if downscaled, or quality degradation if upscaled.
Mastering Cropping and Canvas Adjustments
While not strictly “resizing” in the sense of changing pixel dimensions, cropping and canvas adjustments are essential for framing and presentation.
- Crop Tool (C):
- Select the Crop Tool from the Toolbar. A crop border appears.
- Drag the corners or edges to define your desired composition.
- Drag the image within the border to reposition it.
- For straightening, drag outside a corner handle to rotate the crop box.
- Press Enter/Return or click the checkmark in the Options Bar to apply. Cropping removes pixels outside the selection, so consider saving a copy first.
- Canvas Size (Image > Canvas Size):
- This tool adjusts the size of your document, not the image itself.
- Use it to add extra space around your image (e.g., for creating a border or adding more elements, as we did for the Smart Object comparison) or to trim existing canvas space.
- You can choose an “Anchor” point to specify where the new canvas space is added.
Advanced Strategies and Best Practices for Optimal Image Output
To truly master image resizing, particularly for the diverse needs of Tophinhanhdep.com users—from high-resolution backgrounds to digital art and stock photos—it’s beneficial to explore advanced strategies and workflow optimizations.
Tailoring Resolution for Web, Print, and Digital Displays
The “ideal” resolution and size for an image depend heavily on its final destination.
- For Web/Digital Displays:
- Pixel Dimensions are Key: Instead of PPI, focus on the actual pixel width and height. For example, a full-screen background might be 1920x1080 pixels (or higher for 4K displays).
- File Size Matters: Smaller file sizes mean faster loading times, which is crucial for user experience and SEO. After resizing, use File > Export > Save for Web (Legacy) or File > Export As to optimize JPEG (for photos), PNG (for graphics with transparency), or WEBP (modern, efficient format) for the smallest file size with acceptable quality. Tophinhanhdep.com provides image compressors and optimizers to streamline this.
- Responsive Design: As many users noted, images scale on different devices. Create the image at the largest practical size it will be needed, and let the browser handle downscaling. Avoid upscaling in the browser as it leads to blurriness.
- For Print:
- DPI/PPI is Critical: For high-quality prints, 300 PPI (or DPI) is a common standard. For large prints viewed from a distance (like a tarpaulin or banner), lower resolutions (e.g., 100-150 PPI) might be acceptable, but always consult your printer for their specific requirements.
- Physical Dimensions: Set the desired width and height in inches or centimeters in the Image Size dialog, ensuring “Resample” is unchecked if you only want to adjust print resolution without changing pixel count, or checked with appropriate interpolation if you need to resample.
- For Logos and Graphics: Whenever possible, use vector-based logos (e.g., created in Adobe Illustrator) that can be scaled infinitely without losing quality. If you must use a rasterized logo in Photoshop, ensure it’s a Smart Object for non-destructive scaling within the document.
Enhancing Quality with Interpolation and AI Upscaling Tools
While Smart Objects protect original quality, sometimes you genuinely need to enlarge an image beyond its native resolution, or you start with a low-quality image.
- Interpolation Options: When using the “Image Size” dialog with “Resample” checked, the choice of interpolation method can influence the outcome. “Preserve Details 2.0” in newer Photoshop versions is specifically designed for upscaling with better detail retention and noise reduction.
- Third-Party Plugins and AI Upscalers: For significant upscaling, Photoshop’s built-in interpolation has limits. Tophinhanhdep.com recognizes the growing power of AI-driven solutions. Plugins like Topaz Gigapixel AI, OnOne’s Perfect Resize (formerly Genuine Fractals), or Alien Skin Blow Up (now part of Exposure Software) use advanced algorithms to intelligently add detail and minimize artifacts when enlarging images. Many online AI upscalers, including those linked through Tophinhanhdep.com’s image tools section, can also dramatically improve low-resolution images.
- Layer Sharpening: After downscaling an image significantly, especially for web, a slight amount of sharpening can often help restore lost perceived detail. Use subtle applications of “Unsharp Mask” or “Smart Sharpen” to avoid halos or over-sharpening artifacts.
Efficient Workflow: Batch Processing and Smart File Management
For professionals dealing with numerous images, efficiency is key.
- Photoshop Actions: For repetitive resizing tasks (e.g., creating multiple web-optimized versions of images), record an Action (Window > Actions). You can then run this action on individual files or automate it for an entire folder using File > Automate > Batch.
- Image Processor Pro: This Photoshop utility (File > Automate > Image Processor Pro) is excellent for batch processing, allowing you to resize, convert formats, and save multiple copies with different settings simultaneously.
- File Formats for Large Files: When working with extremely large composite images or panoramas (e.g., +4GB), save them in PSB format (Photoshop Large Document Format). This handles massive pixel dimensions and file sizes that standard PSD files cannot.
Conclusion
Resizing an image in Photoshop without losing quality is not just a technical task; it’s an art form that preserves the integrity of your visual creations. By understanding the fundamental differences between pixel layers and Smart Objects, mastering Photoshop’s core resizing tools, and adopting advanced strategies, you gain unparalleled control over your image assets.
Tophinhanhdep.com is dedicated to providing the knowledge and tools necessary for visual excellence, from inspiring image collections to powerful editing resources. Embracing Smart Objects as your primary method for non-destructive scaling is the most critical takeaway for maintaining quality. When combined with intelligent use of the Image Size dialog, Free Transform, and an awareness of resolution requirements for different outputs, you can confidently manipulate any image, ensuring it always looks its best. Whether for striking wallpapers, professional stock photos, or intricate digital art, your visuals will remain crisp, clear, and impactful, reflecting the high standards that Tophinhanhdep.com champions.