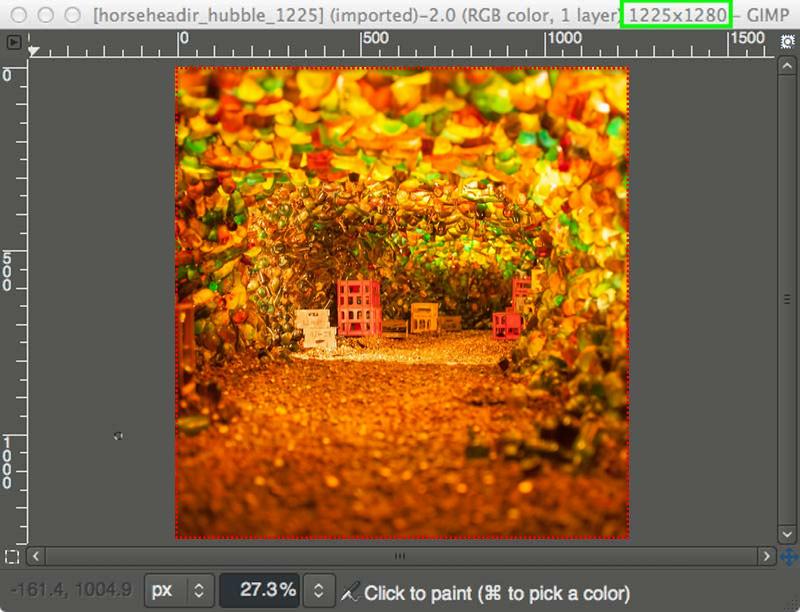
How to Resize an Image in GIMP: Essential Techniques for Perfect Visuals on Tophinhanhdep.com

In the dynamic world of digital imagery and visual content, the ability to effectively manipulate image sizes is not just a technical skill—it’s an artistic necessity. Whether you’re a professional photographer, a graphic designer, a digital artist, or simply someone who loves to curate beautiful visuals, mastering image resizing in GIMP is a fundamental step toward achieving your creative vision. GIMP, the GNU Image Manipulation Program, stands as a beacon of free and open-source software, offering a robust suite of tools that rival many commercial alternatives. On Tophinhanhdep.com, where we celebrate everything from stunning “Beautiful Photography” to “Aesthetic” wallpapers and intricate “Digital Art,” understanding how to properly resize your images is paramount to ensuring they look their best, load quickly, and serve their intended purpose.
Resizing isn’t just about making something bigger or smaller; it’s a strategic decision that impacts quality, file size, and overall presentation. A high-resolution photograph might need to be significantly reduced for web display to ensure fast loading times, aligning with our “Image Optimizers” and “Compressors” categories, while maintaining its crisp detail. Conversely, a small graphic might need careful scaling for print without pixelation, a common challenge in “Graphic Design.” This comprehensive guide on Tophinhanhdep.com will walk you through the various methods of resizing images, layers, and canvases in GIMP, offering best practices and insights tailored to help you create perfect visuals for any project.
Understanding Image Resizing Fundamentals in GIMP
Before diving into the mechanics, it’s crucial to grasp the different facets of resizing within GIMP. The term “resize” can apply to three distinct elements: the entire image (which includes all its layers and the canvas), an individual layer, or just the canvas itself. Each serves a unique purpose and is vital for different “Visual Design” scenarios.
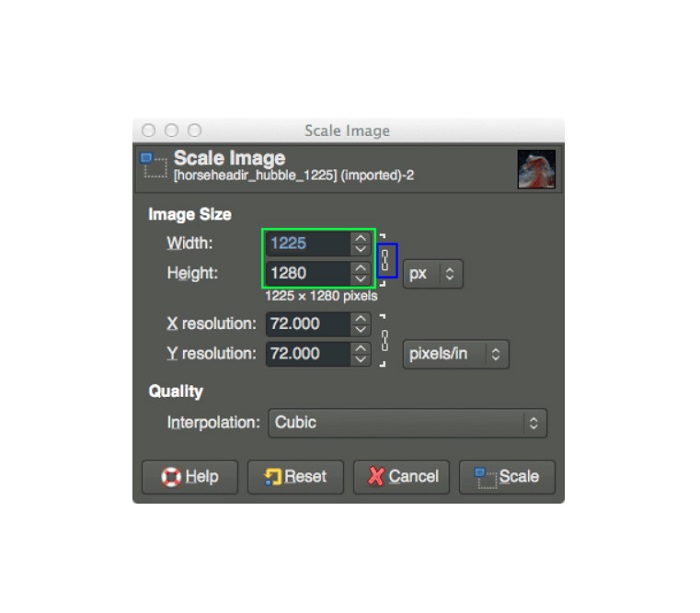
Image vs. Layer vs. Canvas: A Crucial Distinction
When you begin working in GIMP, you’ll encounter three key components that define your workspace:
- Image: This refers to the entire composition. When you resize the image, you are globally adjusting the dimensions of your entire project, including the canvas and all layers contained within it, proportionally. This is the go-to method when you have a finished piece, such as a “Wallpaper” or “Background,” and need to change its overall output size for a specific platform or display. For instance, scaling a high-resolution “Nature” photograph down for a standard desktop background will involve resizing the entire image.
- Layer: Layers are individual components within your image composition. A single image in GIMP can consist of many layers—perhaps a background layer, a text layer, and several image overlays. Resizing a layer means you are only altering the dimensions of that specific element, leaving other layers and the canvas untouched. This flexibility is indispensable for “Photo Manipulation” and “Digital Art,” allowing you to combine various “Stock Photos” or graphic elements into a cohesive “Creative Idea.” Imagine integrating a small logo onto a larger “Abstract” background; you’d resize only the logo layer to fit.
- Canvas: The canvas is the visible workspace or the “page” upon which your image and layers reside. Resizing the canvas changes the boundaries of this workspace without directly scaling your image content. You might enlarge the canvas to add borders or extra space around an image, or shrink it to crop away transparent areas. This is particularly useful in “Graphic Design” when you need to adjust the overall layout without distorting your carefully placed elements.
Why Resize? Practical Applications for Your Visuals
The reasons for resizing are diverse and directly relate to the breadth of content we explore on Tophinhanhdep.com:
- Web Optimization: This is perhaps the most common reason. Large image files significantly slow down website loading times, leading to a poor user experience. For “Aesthetic” image galleries or “Thematic Collections,” reducing image dimensions and file sizes (ideally below 500 KB per image for optimal web performance) is essential. Our “Image Compressors” and “Optimizers” tools often involve this fundamental resizing to ensure your content is delivered efficiently.
- Printing: For “Beautiful Photography” or “Digital Art” intended for physical prints, specific dimensions and high resolutions are critical. Printing typically requires images to be 300 pixels per inch (PPI) or higher to avoid a pixelated or blurry output, a stark contrast to web resolutions.
- Visual Design & Digital Art: When crafting complex “Graphic Design” projects or intricate “Photo Manipulation” pieces, you frequently import elements from various sources. Resizing these individual components, such as adjusting a “Stock Photo” to fit into a collage or scaling a “Creative Idea” graphic, ensures everything aligns perfectly within your composite image.
- Social Media & Online Platforms: Different social media platforms have specific recommended image dimensions and aspect ratios for profile pictures, cover photos, or post images. Resizing your visuals to meet these specifications ensures they display correctly and maintain their integrity across various “Trending Styles” and feeds.
- Storage & Archiving: Smaller file sizes take up less storage space, which can be a practical consideration for managing extensive collections of “High Resolution” images or “Digital Photography.”
Understanding these distinctions and motivations sets the stage for effectively utilizing GIMP’s resizing capabilities, ensuring your visuals are always optimized for their intended use.
Resizing Your Entire Image: The “Scale Image” Method
When your goal is to change the overall dimensions and resolution of your entire visual composition—affecting all layers and the canvas uniformly—GIMP’s “Scale Image” feature is your primary tool. This method provides precise control, making it ideal for final output adjustments for web, print, or any fixed-size display.
Setting Precise Dimensions and Resolution
To access this powerful feature, navigate to Image > Scale Image in the GIMP menu. This action opens the “Scale Image” dialogue box, a central hub for controlling your image’s fundamental properties.
-
Width and Height: These input fields allow you to define the exact dimensions of your resized image. You can type in specific numerical values.
-
Units: To the right of the Width and Height fields, a dropdown menu (often defaulting to “px” for pixels) allows you to select your preferred unit of measurement. Options include pixels (px), percentage (%), millimeters (mm), inches (in), and more. For web content, pixels are standard, while for print, inches or millimeters are often used.
-
Aspect Ratio Lock: This crucial chain-link icon, located between the Width and Height input fields, is your best friend. When locked (which is the default and highly recommended), changing one dimension (e.g., width) will automatically adjust the other (height) proportionally. This prevents your image from appearing stretched or squished, preserving its original “Aesthetic” and visual integrity, especially important for “High Resolution” photography. You can unlock it if you deliberately need to distort the image, but proceed with caution.
-
X and Y Resolution: Beneath the dimensions, you’ll find settings for X and Y resolution, typically measured in pixels/inch (PPI) or pixels/mm. This setting is critical, particularly when preparing images for print or specific display contexts:
- For Web Use: A resolution of 72 PPI is standard. Web browsers don’t typically display more detail than this, and higher resolutions only increase file size unnecessarily, hindering fast page loads for “Wallpapers” or “Backgrounds.”
- For Print: A resolution of 300 PPI (or sometimes 240-360 PPI) is generally recommended for high-quality prints. This ensures that the physical print is sharp, detailed, and free from pixelation, vital for showcasing “Beautiful Photography” or intricate “Digital Art.” Using a lower resolution for print will result in a blurry or blocky output.
- Note that changing the resolution here will affect the image’s pixel dimensions if the print size remains constant, or vice-versa. It’s about the density of pixels.
-
Interpolation: This setting determines the algorithm GIMP uses to calculate new pixel values when resizing. It’s especially important for maintaining image quality during scaling:
- Cubic: A good all-around option that balances speed and quality, often producing smoother results than linear interpolation.
- Sinc (Lanczos3): Often considered the highest quality interpolation method for downscaling and upscaling, producing sharper results, though it might take a bit longer to process. It’s highly recommended when preserving the detail of “High Resolution Photography” is paramount. Choosing the right interpolation method is key to preventing visual artifacts and ensuring your scaled “Digital Photography” retains its “Editing Styles” and clarity.
Once you have set your desired dimensions, units, resolution, and interpolation method, click the “Scale” button to apply the changes to your entire image. Remember, this action is irreversible with a single undo step, so it’s always a good practice to save your work before making significant global changes, or work on a duplicate file.

Manipulating Individual Layers with the GIMP Scale Tool
While “Scale Image” modifies the entire composition, the GIMP “Scale Tool” offers granular control, allowing you to resize specific layers independently. This is indispensable for “Photo Manipulation,” creating “Digital Art,” or assembling complex “Graphic Design” where multiple elements need to interact within the same canvas.
Activating and Using the Scale Tool
To begin, you need to activate the Scale Tool. You can do this in several ways:
- Toolbox: Locate the Scale Tool icon (which often looks like a rectangle with diagonal arrows) in GIMP’s main Toolbox, usually positioned on the left side of your screen.
- Keyboard Shortcut: Press
Shift + Son your keyboard for quick access. - Menu: Navigate to
Tools > Transform Tools > Scale.
Once the Scale Tool is active, select the specific layer you wish to resize from your Layers panel (usually on the bottom right). Then, click anywhere within the boundaries of that active layer on your canvas. This action will reveal a set of “transform handles”—small squares located at the corners and midpoints of your layer’s bounding box.
- Interactive Scaling: To resize your layer manually, click and drag any of these transform handles.
- Dragging a corner handle (with the aspect ratio locked) scales the layer proportionally from that corner.
- Dragging a middle handle (top, bottom, left, or right) scales the layer non-proportionally in that single direction (if the aspect ratio is unlocked).
- Scale Toolbox: When the Scale Tool is active and a layer is selected, a “Scale Toolbox” dialog box appears. This provides numerical input fields for Width and Height, offering precise control even when scaling manually. You’ll see the values update in real-time as you drag the handles.
- The chain-link icon here functions identically to the “Scale Image” dialogue—keep it locked to maintain the aspect ratio and prevent distortion, crucial for preserving the “Aesthetic” of elements like “Stock Photos.”
- The Reset button reverts your layer to its original size before any adjustments within the current Scale Tool session.
- The Readjust button repositions the handles if they become off-screen.
- The Scale button applies the transformation.
- Scaling from Center (Ctrl Key): A powerful tip for more intuitive scaling: hold down the
Ctrlkey while dragging any corner handle. This will cause the layer to scale symmetrically from its center point, useful when you want to maintain the layer’s central position in your composition. - Repositioning (Middle Handles): The middle transform handles (the four central squares) also double as a temporary “Move Tool.” You can click and drag these handles to reposition your layer within the canvas while the Scale Tool is active.
Achieving Visual Harmony in Multi-Layer Designs
For complex “Visual Design” or “Photo Manipulation” projects with multiple layers, precision is key.
- Using Guides: GIMP’s guides are invaluable for precise alignment. You can create a new guide by going to
Image > Guides > New Guide (By Percent)orNew Guide (by Pixels). For example, adding a vertical guide at 50% helps divide your canvas into halves, perfect for arranging two elements side-by-side, such as in a “Mood Board” or a “Thematic Collection” layout. You can then align your resized layers to these guides, ensuring perfect symmetry and balance. - Aligning Across Layers: When you need to match the size of objects across different layers (e.g., making two models in separate “Digital Photography” layers appear to be the same height), the Scale Tool offers a clever trick. Temporarily move one layer on top of the other, reduce its opacity (found in the Layers panel), and then scale it until the objects align perfectly. Once scaled, you can restore its opacity and reposition it to its desired spot. This technique is excellent for maintaining consistent scale in “Creative Ideas” involving multiple composite elements.
After adjusting your layer to your satisfaction, remember to click the “Scale” button in the Scale Toolbox or press Enter on your keyboard to finalize the transformation. If you don’t, the changes will not be applied.
Adjusting Your Canvas: Cropping and Fitting
After resizing individual layers, you might find that your canvas no longer perfectly matches the content of your image. GIMP provides dedicated tools to adjust the canvas size, ensuring a clean presentation for your “Visual Design.”
Cropping to Content for a Clean Finish
When you scale a layer down using the Scale Tool, it often leaves transparent (represented by a checkerboard pattern) or empty space around your image content. To eliminate this excess space and make the canvas fit your new, smaller content precisely, use Crop to Content:
- Navigate to
Image > Crop to Content. - GIMP will automatically analyze the active layers and resize the canvas to the smallest possible dimensions that still encompass all visible content. This is a quick way to trim unwanted blank areas and deliver a streamlined final output for your “Aesthetic” images or “Creative Ideas.”
Expanding the Canvas to Fit Enlarged Layers
Conversely, if you’ve scaled a layer up and it now extends beyond the original canvas boundaries, portions of your layer will be cut off or hidden. To expand the canvas to accommodate all your layer content:
- Go to
Image > Fit Canvas to Layers. - GIMP will automatically enlarge the canvas to ensure all parts of all layers are fully visible. This is particularly useful when you’ve imported “High Resolution” “Stock Photos” as layers and need to expand the workspace to see and work with their full dimensions.
Resizing the Print Size
Beyond pixel dimensions and canvas size, GIMP also allows you to define the physical print size of your image, which is crucial for “Beautiful Photography” or “Digital Art” destined for physical output.
- Go to
Image > Print Size. - In this dialogue, you can set the desired physical width and height (e.g., in inches or centimeters) and the X and Y resolution (PPI).
- It’s important to understand that changing the print size here does not alter the total number of pixels in your image. Instead, it changes how densely those pixels are packed when printed. If you reduce the print size for a given pixel count, the PPI will increase, resulting in a sharper print. If you increase the print size, the PPI will decrease, potentially leading to a less sharp, more “pixelated” print. This tool helps you visualize and prepare your “Photography” for specific print dimensions, ensuring the best possible quality for your physical art pieces or “Image Inspiration.”
Exporting Your Resized Images for Optimal Use
Resizing your images in GIMP is only half the battle; the final, crucial step is to properly save and export your work. The method you choose here will determine the quality, file size, and compatibility of your image for its intended use, whether it’s for “Wallpapers,” “Backgrounds,” “Digital Photography,” or sharing on Tophinhanhdep.com.
Saving Your Work (XCF)
For any ongoing project, it’s vital to save your work in GIMP’s native format:
- Go to
File > Save As.... - Choose a location and name your file. GIMP will default to the
.xcffile extension. - Why XCF? This format preserves all your layers, masks, paths, and other editable GIMP-specific data. If you’re working on a “Graphic Design” project, a “Digital Art” piece, or a complex “Photo Manipulation,” saving as XCF allows you to return to the project later and make further edits without losing any flexibility.
Choosing the Right File Format and Quality
Once your resizing and editing are complete, you’ll typically want to export your image into a universally accessible format:
- Go to
File > Export As...or use the shortcutCtrl + Shift + E. - This dialogue allows you to choose the file format and location for your final image.
The most common export formats for images are:
- JPEG (.jpg or .jpeg): This is the go-to format for photographs and images with continuous tones, such as “Nature” scenes, “Beautiful Photography,” or general “Digital Photography.” JPEG uses lossy compression, meaning some image data is discarded to achieve smaller file sizes.
- Quality Slider: When exporting as JPEG, you’ll encounter a “Quality” slider (typically 0-100%). A setting of 60-80% often provides a good balance between file size and visual quality for web use, ensuring fast loading times for your “Aesthetic” images. For maximum quality (e.g., for very specific “High Resolution” images or prints), you can set it to 100%, but be aware of the significantly larger file size. Tophinhanhdep.com encourages balancing quality and file size for optimal user experience. This directly relates to our “Image Compressors” and “Optimizers” tools.
- PNG (.png): PNG uses lossless compression, meaning no image data is lost. It’s the best choice for images that require transparency (e.g., logos, icons for “Visual Design,” “Digital Art” with transparent backgrounds) or graphics with sharp edges and blocks of color. While typically larger than JPEGs, PNGs preserve quality perfectly.
- TIF (.tif or .tiff): TIFF is a lossless format often used for high-quality archival or professional print work. It supports various color spaces and multiple layers, making it suitable for uncompressed “High Resolution” images.
- PDF (.pdf): While primarily a document format, GIMP can export images as PDFs, which can be useful for sharing “Graphic Design” layouts or “Thematic Collections” in a document-friendly format.
Preserving Image Quality During Resizing
- Interpolation Matters: As discussed earlier, selecting the correct interpolation method (Cubic or Sinc (Lanczos3)) during scaling (especially for “Scale Image”) plays a significant role in maintaining image sharpness and detail.
- Avoid Excessive Upscaling: While GIMP allows you to enlarge images, scaling an image up significantly beyond its original pixel dimensions will introduce blurriness and pixelation. This is because GIMP has to invent new pixel data. For serious enlargement of lower-resolution images, consider using “AI Upscalers,” which leverage artificial intelligence to intelligently add detail and preserve quality, a technology we frequently feature on Tophinhanhdep.com under our “Image Tools” section.
- Balance for Purpose: Always consider the final destination of your image. A detailed “Beautiful Photography” piece meant for a large print will require different resolution and export settings than a small “Aesthetic” image intended for a social media post. Optimize accordingly to ensure your visual assets always shine.
By diligently following these export guidelines, you ensure that the time and effort you invest in resizing your images within GIMP translate into high-quality, perfectly optimized visuals, ready for display on Tophinhanhdep.com and beyond.
Conclusion
Mastering image resizing in GIMP is an indispensable skill for anyone navigating the world of digital visuals. From optimizing “High Resolution” photographs for rapid web display to meticulously crafting “Digital Art” compositions with perfectly scaled layers, GIMP offers a comprehensive suite of tools to meet every need.
We’ve explored the critical distinctions between resizing the entire image, individual layers, and the canvas, empowering you to choose the right approach for any “Visual Design” challenge. You now understand how to leverage the “Scale Image” dialogue for precise numerical adjustments, control resolution for both web and print, and employ the powerful “Scale Tool” for interactive, layer-specific transformations. Furthermore, we’ve covered how to intelligently adjust your canvas and, crucially, how to export your final masterpieces in the ideal format and quality, ensuring they maintain their integrity and “Aesthetic” appeal.
The capabilities of GIMP extend far beyond these resizing techniques, inviting you to delve deeper into “Photo Manipulation,” “Editing Styles,” and creating stunning “Image Inspiration.” We encourage you to practice these methods on Tophinhanhdep.com with various “Wallpapers” and “Backgrounds,” experiment with different settings, and discover how these foundational skills will elevate your creative projects. With GIMP and the insights from Tophinhanhdep.com, the potential for producing breathtaking and perfectly optimized visuals is truly limitless.