Mastering Image Resizing in Adobe Photoshop with Tophinhanhdep.com

In today’s visually-driven world, precise control over image dimensions is a fundamental skill for anyone working with digital media. Whether you’re preparing captivating “Wallpapers” and “Backgrounds,” curating an “Aesthetic” collection, or showcasing “Beautiful Photography,” the size and resolution of your images are paramount. Adobe Photoshop, as the industry standard, provides powerful tools to achieve this. At Tophinhanhdep.com, we recognize that “High Resolution” and perfectly scaled images are crucial for professional “Digital Photography” and compelling “Visual Design.”
This comprehensive guide from Tophinhanhdep.com will walk you through the essential methods of resizing images and individual layers within Photoshop. We’ll explore both foundational techniques for adjusting an entire image’s canvas and advanced strategies for manipulating specific elements, ensuring your creations maintain their integrity and impact. From optimizing “Stock Photos” for web display to preparing your “Nature” and “Abstract” artwork for print, understanding these processes is key to elevating your “Photo Manipulation” and “Creative Ideas.” We’ll also touch upon how smart resizing contributes to optimal image performance, linking to concepts like “Image Optimizers” and the pursuit of “Trending Styles” in “Image Inspiration & Collections.”
Resizing an Entire Image (Canvas Size) for Optimal Visual Impact
Adjusting the overall dimensions of your image—often referred to as changing the “Image Size”—is essential for adapting your visuals to various platforms and purposes. This process changes the total pixel count of your image, effectively scaling all its content. It’s a critical step for everything from preparing “Sad/Emotional” photography for a gallery exhibition to ensuring “High Resolution” images fit a specific web layout.
Understanding Image Size vs. Canvas Size in Photoshop
Before we begin, it’s important to distinguish between “Image Size” and “Canvas Size” in Photoshop. When you alter the Image Size, you are scaling the actual content and resolution of your picture. This means pixels are either added (upscaling) or removed (downscaling) across the entire image. Conversely, Canvas Size modifies only the boundaries of your workspace, either cropping the existing image or adding empty, transparent space around it without scaling the content itself. For the purpose of resizing the visual content of your photo, our focus will be on the “Image Size” function.
Step-by-Step Guide to Adjusting Image Dimensions
Follow these detailed steps to precisely resize your entire image in Photoshop, ensuring your “Beautiful Photography” is perfectly tailored for its intended use:
- Open Your Image and Create a Backup:
Launch Adobe Photoshop and open the desired image by navigating to
File > Openor dragging the file into the Photoshop window. As a best practice recommended by Tophinhanhdep.com, always create a copy before making significant changes. Go toFile > Save As...and rename your file (e.g., “myphoto-resized.jpg”). This safeguards your original “High Resolution” image, allowing you to experiment freely.
-
Access the Image Size Dialog Box: From the top menu bar, click
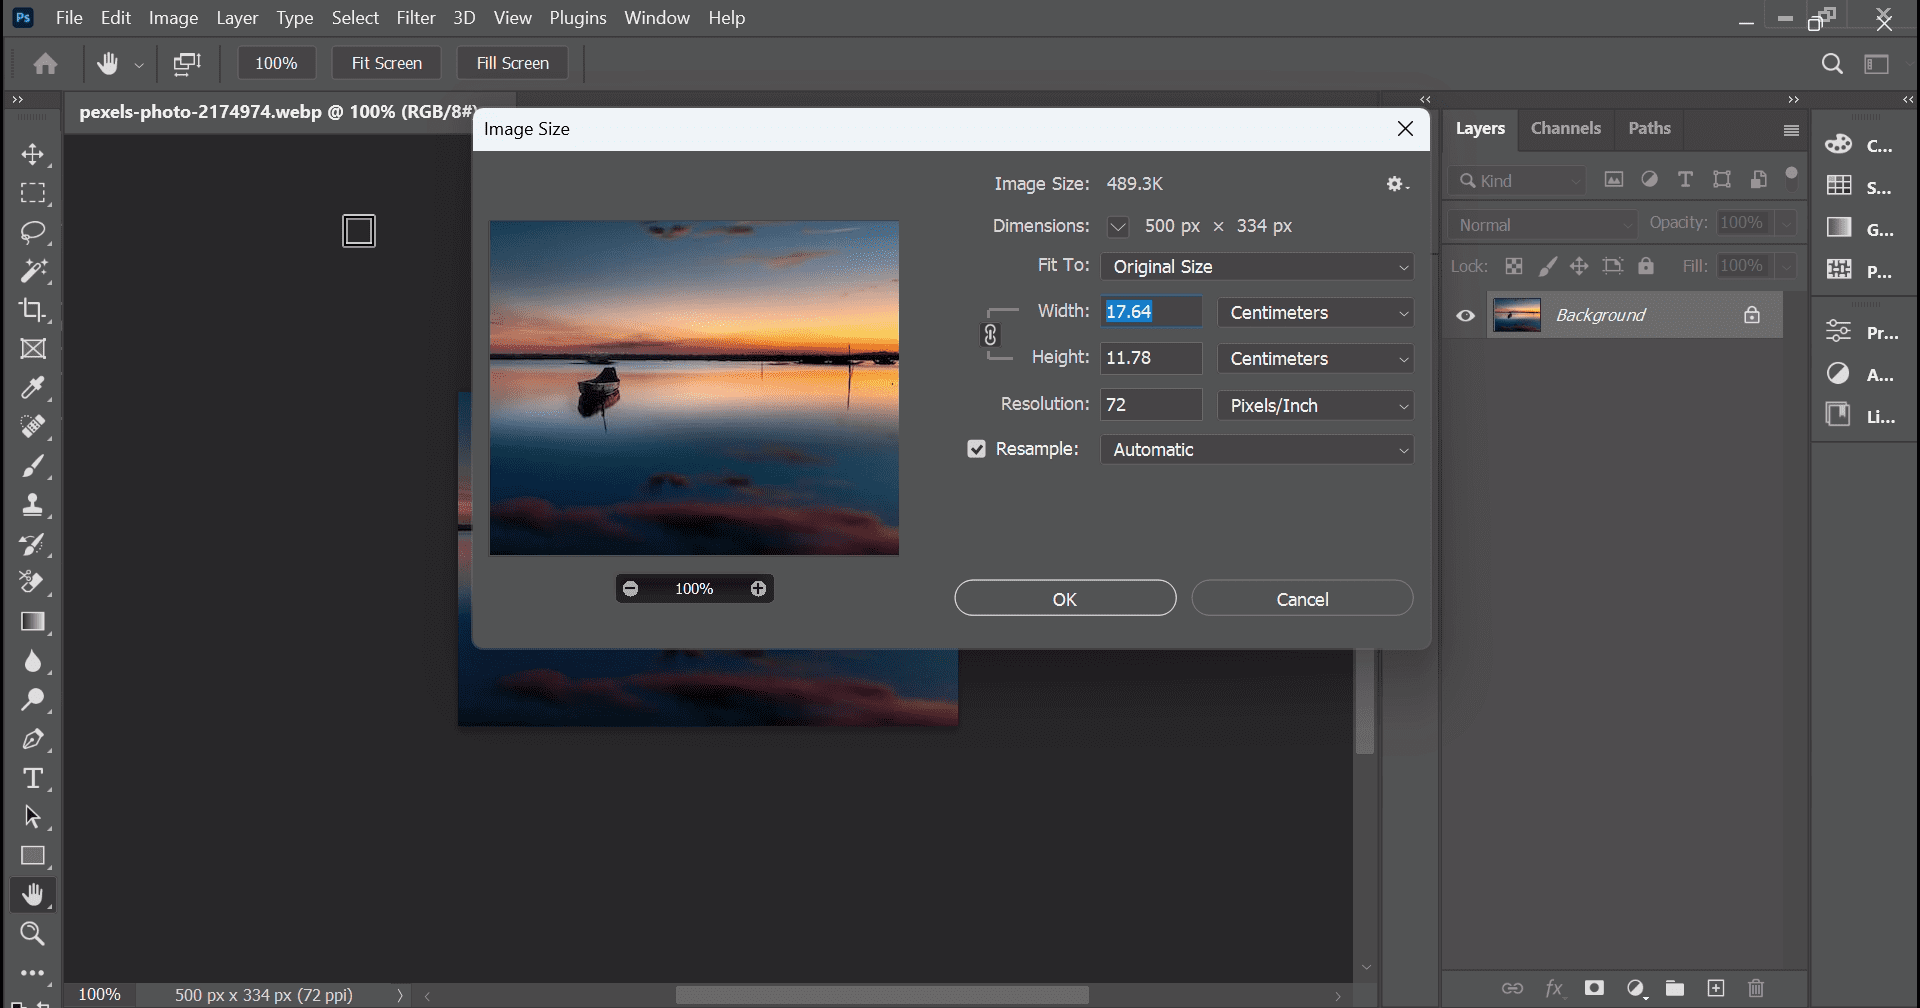
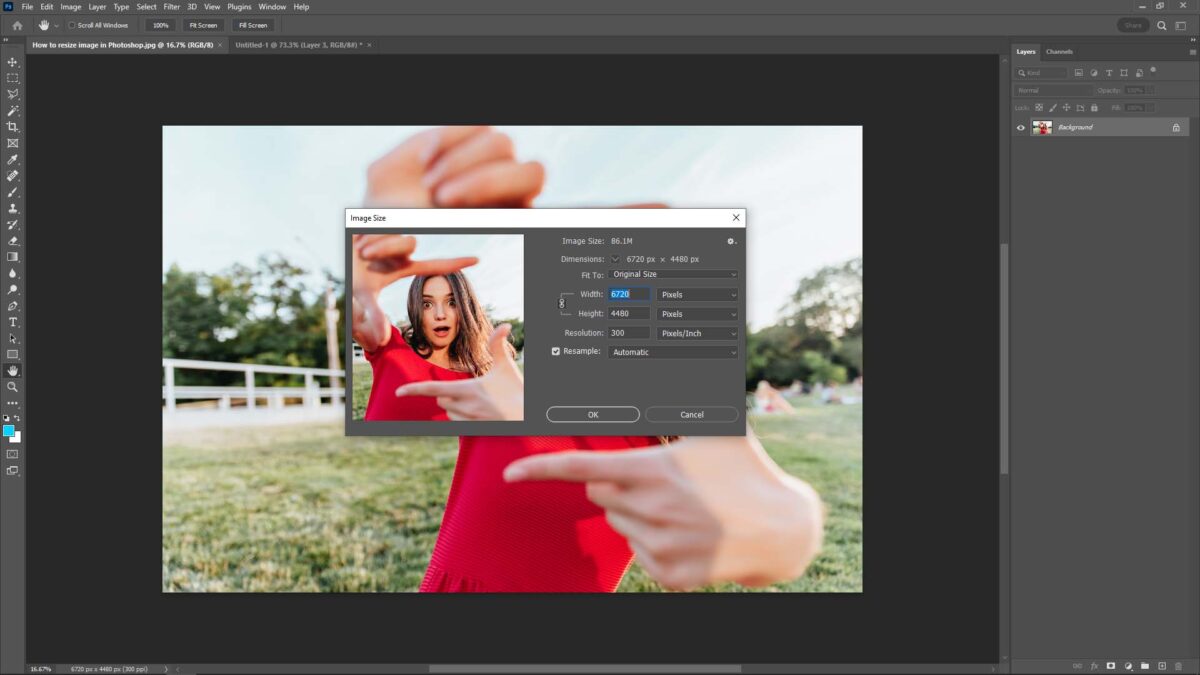
Image, then selectImage Size.... Alternatively, use the keyboard shortcutAlt + Ctrl + I(Windows) orOption + Cmd + I(macOS). This action will open the comprehensive “Image Size” dialog box, which serves as your central control for dimensional adjustments. -
Configure Dimensions and Resolution in the Dialog Box: The “Image Size” dialog box provides crucial settings for precise resizing:
-
Pixel Dimensions: At the top, you’ll see the current “Width” and “Height” in pixels. You can directly input new pixel values here. The adjacent dropdown menus allow you to switch between “Pixels” and “Percent,” enabling you to scale the image proportionally by a percentage of its current size. For instance, entering 50% will halve the image’s dimensions, useful for quick previews of “Image Inspiration & Collections.”
-
Document Size (for Print): This section is vital for physical outputs like prints of your “Nature” or “Aesthetic” photographs. Here, you can specify units like “Inches,” “Centimeters,” or “Millimeters.” Crucially, adjust the Resolution. While
72 pixels/inch(dpi) is standard for web and digital screens, Tophinhanhdep.com recommends200 to 300 pixels/inchfor high-quality printing. A higher DPI ensures that your “Digital Photography” retains crisp details and avoids pixelation when reproduced on paper, preserving its visual impact. -
Constrain Proportions: This essential setting, indicated by a chain-link icon between the width and height fields, is typically checked by default. When active, changing one dimension (e.g., width) automatically adjusts the other (height) to maintain the image’s original aspect ratio. This is critical for preventing unwanted stretching or squashing, ensuring your “Abstract” or “Sad/Emotional” compositions look natural. Only uncheck this if you deliberately wish to distort the image for specific “Photo Manipulation” effects.
-
Resample Image: This option dictates how Photoshop handles pixel data when resizing. It controls the interpolation algorithm used:
- Bicubic Automatic: Photoshop intelligently selects the best method for your operation. This is often a reliable default.
- Bicubic Sharper (reduction): Ideal for shrinking images, as it helps preserve sharpness and fine details. This setting is often used in conjunction with “Image Compressors” that include scaling capabilities.
- Bicubic Smoother (enlargement): Recommended when increasing image size to minimize jagged edges and produce smoother transitions. While it cannot create new detail from scratch, it can make upsizing less harsh. For significant enlargements of lower-resolution images, Tophinhanhdep.com suggests exploring “AI Upscalers” for superior results.
-
-
Finalize and Save: After configuring your settings, click “OK.” Photoshop will apply the changes, and your image will appear in its new size. Finally, go to
File > Saveto update your resized copy. If you need to crop the image after resizing (e.g., if the original aspect ratio didn’t perfectly match your desired print size), you can use the Crop Tool (C) to refine the composition.
Dynamically Resizing and Transforming Individual Layers for Creative Visual Design
Beyond adjusting the entire canvas, Photoshop provides unparalleled flexibility in manipulating individual elements within your composition. For “Graphic Design,” refining “Digital Art,” or executing intricate “Photo Manipulation,” the ability to precisely resize and transform layers is indispensable. This section focuses on the robust “Free Transform” tool and introduces “Smart Objects”—a cornerstone for maintaining image quality during iterative design processes, a core principle at Tophinhanhdep.com.
The Power of Free Transform (Ctrl/Cmd+T)
The Free Transform tool is your primary asset for quickly and intuitively altering the size, position, and rotation of any selected layer. It’s a dynamic feature that enables fluid composition within your “Visual Design” projects.
- Select Your Layer: In the Layers panel, click on the specific layer you intend to transform.
- Activate Free Transform: Press
Ctrl + T(Windows) orCmd + T(macOS). Alternatively, go toEdit > Free Transform. A bounding box with handles will appear around your layer, signaling it’s ready for manipulation. - Resize with Handles: Click and drag any of the handles on the corners or sides of the bounding box:
- Proportional Scaling: Since Photoshop CC 2019, simply dragging a corner handle without holding
Shiftwill resize the layer proportionally, maintaining its aspect ratio. This modern default streamlines “Graphic Design” workflows. - Non-Proportional Scaling: In CC 2019+, holding
Shiftwhile dragging a corner handle, or dragging a side handle withoutShift, allows you to stretch or squash the layer. Use this only for intentional distortion. - Resizing from the Center: Hold
Alt(Windows) orOption(macOS) while dragging any handle to scale the layer from its central point, saving you time from repositioning later.
- Proportional Scaling: Since Photoshop CC 2019, simply dragging a corner handle without holding
- Move and Rotate: While Free Transform is active, click and drag inside the bounding box to move the layer. Move your cursor outside a corner handle until it changes to a curved arrow, then click and drag to rotate the layer.
- Confirm or Cancel: Press
Enter(orReturn) to apply changes, orEscapeto cancel and revert. This flexibility is key for experimenting with “Creative Ideas.”
Mastering Non-Destructive Layer Resizing with Smart Objects
For “Digital Photography” and intricate “Photo Manipulation,” Smart Objects are a game-changer. They are essential when you need to repeatedly resize layers or anticipate scaling elements up and down throughout your design process.
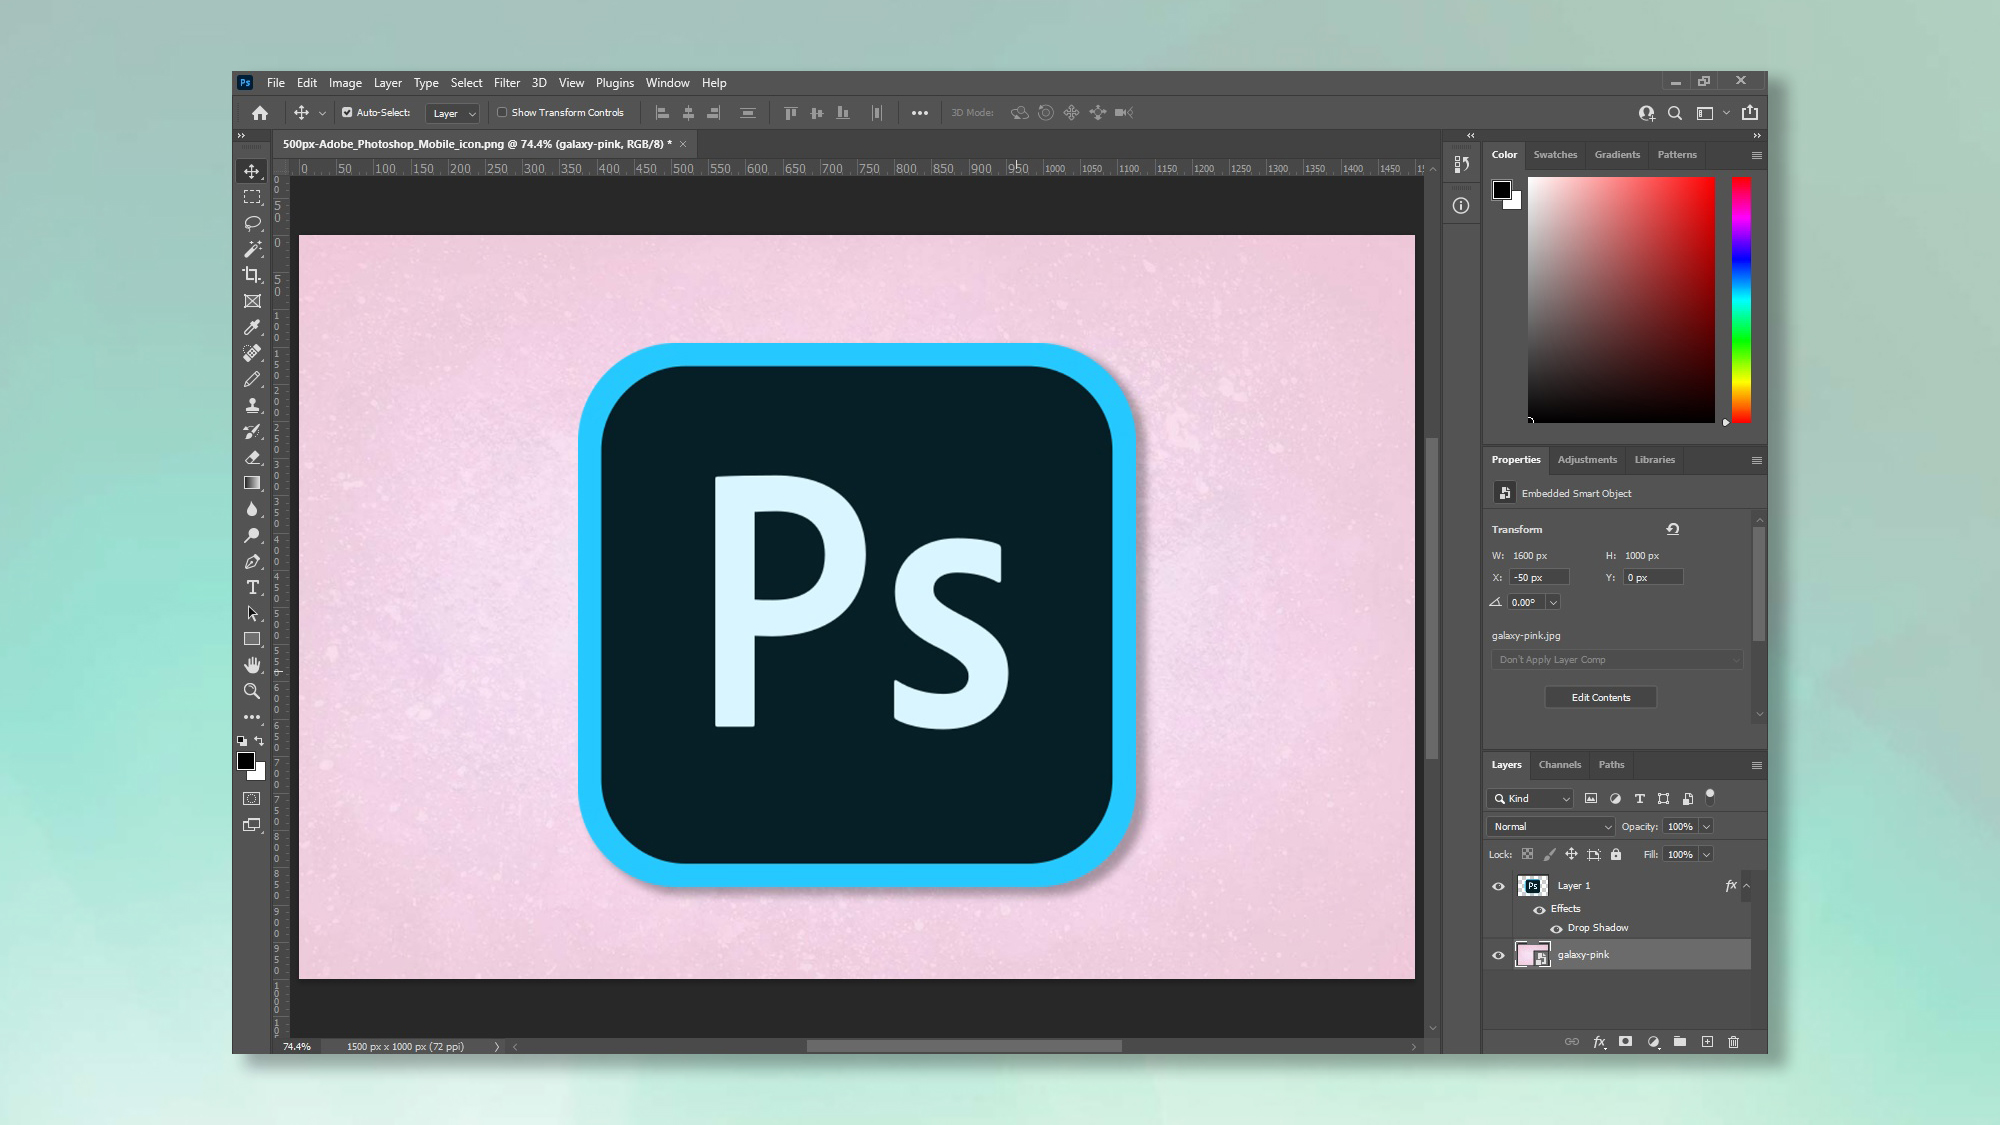
What are Smart Objects? A Smart Object is a special layer container that embeds or links to raster or vector image data. Crucially, it preserves an image’s source content with all its original characteristics, regardless of how you scale it within your Photoshop document.
Why are they vital for non-destructive resizing? When you resize a standard (raster) layer, Photoshop permanently discards pixel information if you make it smaller. If you later try to enlarge that same layer, Photoshop must guess at the missing pixels, leading to noticeable quality degradation and pixelation. This can quickly compromise the clarity of “High Resolution” images or delicate “Visual Design” elements.
However, by converting a layer to a Smart Object before resizing, you can scale it down and then back up to its original dimensions (or any size within that range) infinitely without any loss of quality. The Smart Object retains the full original pixel data. While you cannot magically increase quality beyond the original source, Smart Objects guarantee you always preserve the best possible quality available from your source image. This non-destructive workflow is invaluable for “Graphic Design,” “Digital Art,” and the iterative refinement of your “Aesthetic” compositions.
How to Convert a Layer to a Smart Object:
- In the Layers panel, right-click (Windows) or Control-click (macOS) on the desired layer.
- Select
Convert to Smart Objectfrom the context menu. - A small icon will appear on the layer thumbnail, confirming it’s a Smart Object.
Now, use Free Transform (
Ctrl/Cmd + T) on this Smart Object. This approach is highly recommended by Tophinhanhdep.com for professional “Editing Styles” and ensures the longevity and quality of your “Creative Ideas.”
Best Practices for Resizing Images on Tophinhanhdep.com
Effective image resizing involves more than just knowing Photoshop’s tools; it requires strategic thinking about the image’s final purpose and desired quality. Tophinhanhdep.com emphasizes these best practices to help you achieve optimal results for all your “Images,” “Photography,” and “Visual Design” projects.
Choosing the Right Dimensions and Resolution
The intended use of your image should always guide its size and resolution. What works for a printed billboard is impractical for a mobile website.
- For Web & Digital Display: Target
72 pixels/inch(dpi) resolution. Higher resolutions won’t improve screen appearance but will inflate file size, slowing load times for “Wallpapers” and “Backgrounds.” For dimensions, consider the maximum display size (e.g.,1920 pixelswide for a web hero image) and specific social media platform requirements. Utilizing “Image Compressors” and “Optimizers” (discussed in other Tophinhanhdep.com guides) is crucial here. - For Print: Aim for
200-300 pixels/inch(dpi) at the final print size. This ensures crisp detail for “High Resolution” “Beautiful Photography.” For example, an8x10 inchphoto printed at300 dpirequires2400 x 3000 pixels. If your original aspect ratio differs from the print size, plan to crop after resizing to avoid distortion.
Maintaining Image Quality: A Core Principle of Tophinhanhdep.com
Preserving the quality of your “Digital Photography” and “Digital Art” during resizing is paramount to prevent pixelation or blurriness.
- Avoid Over-Enlarging Raster Images: Never significantly enlarge a low-resolution raster image, as Photoshop cannot magically create missing detail. Always start with the highest possible resolution source.
- Leverage Smart Objects: As highlighted, converting layers to Smart Objects before transformation is the best method for maintaining quality and flexibility for individual elements, especially in “Photo Manipulation” and “Graphic Design.”
- Consider “AI Upscalers”: When you must enlarge a low-resolution image (e.g., an old photo), specialized “AI Upscalers” (some integrated into Photoshop or available as external “Image Tools” via Tophinhanhdep.com) use artificial intelligence to intelligently enhance detail and clarity, often yielding impressive results.
Creative Applications and Workflow Tips
Resizing isn’t just a technical necessity; it’s a powerful tool for enhancing “Image Inspiration & Collections” and “Mood Boards.”
- Batch Resizing: For large volumes of “Stock Photos” or “Thematic Collections,” Photoshop’s “Image Processor” (File > Scripts > Image Processor) or custom “Actions” can automate resizing. Tophinhanhdep.com also reviews dedicated batch “Image Tools” for this purpose.
- “Graphic Design” Integration: Precisely sized elements are vital for harmonious layouts. Resizing logos, text, and background textures directly contributes to cohesive “Visual Design.”
- Developing “Photo Ideas”: Experimenting with different aspect ratios and crops after resizing can open new compositional possibilities, transforming a simple photo into compelling “Digital Art.”
- Regular Backups: Always maintain robust backups of your “Photography” and “Digital Art” to safeguard original “High Resolution” files.
Beyond Resizing: Exploring Photoshop’s Transformative Tools on Tophinhanhdep.com
While resizing is fundamental, Photoshop offers a broader suite of transformation tools that go beyond simple scaling. These functions, found under the Edit > Transform menu, enable sophisticated “Photo Manipulation” and unleash boundless “Creative Ideas” for your “Digital Art.” Tophinhanhdep.com encourages artists and photographers to explore these to add depth, perspective, and unique flair to their “Images.”
Beyond Basic Resizing: Advanced Layer Transformations
Once you’re comfortable with Free Transform, delve into these related tools to further sculpt your layers:
- Scale and Rotate: These dedicated options offer focused control for simple size adjustments or rotational changes, allowing for precise alignment within your “Aesthetic” compositions.
- Skew: This tool allows you to slant a layer along horizontal or vertical axes, adding subtle depth or dynamic movement to elements, ideal for “Photo Manipulation.”
- Distort: Distort provides greater control, letting you drag each corner handle independently. This is invaluable for matching a layer to the perspective of another object, making insertions appear seamless in your “Graphic Design.”
- Perspective: This tool applies a one-point perspective effect, making objects appear to recede or project forward. It enhances the three-dimensional feel of your “Visual Design” or creates dramatic shifts in scale for “Thematic Collections.”
- Warp: One of the most creatively liberating tools, Warp lets you bend and mold a layer using a grid or custom mesh. You can use preset shapes or freely drag control points to create organic transformations, perfect for advanced “Digital Art” and pushing the boundaries of “Creative Ideas.”
These advanced transformation tools, when combined with your understanding of resizing and Smart Objects, provide an extensive toolkit for any digital artist. They enable you to not only adjust the size of your images but to fundamentally alter their shape, orientation, and perceived depth, unlocking endless possibilities for creating truly unique and impactful visuals. Tophinhanhdep.com encourages you to experiment and integrate these into your personal “Editing Styles.”
Conclusion
Mastering image resizing in Adobe Photoshop is an indispensable skill for anyone working with digital media. From curating “Mood Boards” to executing professional “Graphic Design” and “Digital Photography,” understanding how to effectively manipulate image dimensions is crucial. By grasping the nuances of resizing entire images versus individual layers, and by leveraging powerful features like “Constrain Proportions,” “Resample Image,” and especially “Smart Objects,” you ensure your visual assets consistently meet the highest quality standards.
Tophinhanhdep.com is dedicated to equipping you with the knowledge and “Image Tools” to elevate your creative projects. Whether your goal is to prepare “High Resolution” images for print, optimize “Stock Photos” for the web, or craft intricate “Photo Manipulation” pieces, the techniques outlined here provide a robust foundation. We encourage you to explore the full spectrum of Photoshop’s capabilities, continually refine your “Editing Styles,” and draw “Image Inspiration” from the vast resources available. With practice, you’ll not only become proficient at resizing but also discover new dimensions in your “Visual Design” journey, creating “Beautiful Photography” and captivating “Aesthetic” content that truly resonates with your audience.