Mastering Image Resizing in Paint: A Comprehensive Guide for Tophinhanhdep.com Users

In the digital age, images are the cornerstone of communication, expression, and visual appeal. From stunning wallpapers and aesthetic backgrounds to professional high-resolution photography and abstract digital art, visual content dominates our online and offline experiences. However, the journey from capturing or creating an image to its optimal display often involves a crucial step: resizing. Whether you’re preparing images for your website, sharing them on social media, or integrating them into a graphic design project, understanding how to resize an image paint – and when to turn to more advanced tools – is an invaluable skill.
Tophinhanhdep.com, your ultimate resource for everything related to beautiful images, high-quality photography, and powerful image tools, recognizes the diverse needs of creators and consumers alike. This comprehensive guide will walk you through the straightforward process of resizing images using Microsoft Paint, a readily available tool on most Windows platforms. Furthermore, we’ll explore how Paint fits into a broader workflow and introduce you to the advanced capabilities offered by Tophinhanhdep.com’s suite of image tools, ensuring your visual content always looks its best.
The Fundamentals of Image Resizing and Its Importance
Before diving into the practical steps, it’s essential to grasp why image resizing is so critical in today’s visually driven world. It’s not just about making a picture bigger or smaller; it’s about optimizing it for its intended purpose, ensuring quality, performance, and aesthetic integrity across all your platforms.
Why Size Matters: Optimizing Your Visual Content for Tophinhanhdep.com
The dimensions and file size of an image significantly impact its utility and effectiveness. A picture that is too large can slow down website loading times, consume excessive storage, and be cumbersome to share. Conversely, an image that is too small for its display area will appear pixelated and unprofessional, detracting from its original beauty.
- For Tophinhanhdep.com’s Wallpapers and Backgrounds: Users browsing Tophinhanhdep.com for stunning wallpapers, serene nature scenes, or captivating abstract backgrounds often need images tailored to their specific screen resolutions. Resizing ensures a perfect fit without stretching or cropping essential elements, preserving the artistic vision and high-resolution photography.
- For High-Resolution and Stock Photos: Digital photography, especially high-resolution and stock photos found on Tophinhanhdep.com, typically start at very large dimensions suitable for printing. For web use, these often need to be downscaled to reduce file size and improve loading speed, making them accessible to a wider audience without sacrificing core quality.
- For Visual Design and Creative Projects: In graphic design, digital art, and photo manipulation, precise image dimensions are paramount. Designers need to resize elements to fit layouts, create engaging mood boards, or ensure consistency across thematic collections. Improper resizing can lead to distorted visuals, hindering creative ideas.
- File Size and Performance: Reducing an image’s dimensions, even slightly, often results in a smaller file size. This is particularly important for sharing images via email or uploading them to websites, where faster download speeds and reduced bandwidth usage are highly beneficial. Tophinhanhdep.com’s focus on high-quality visuals is complemented by tools that help you manage file sizes effectively.
Understanding these considerations forms the bedrock of effective image management. While professional tools offer comprehensive features, Microsoft Paint serves as an excellent starting point for basic resizing, readily available on most Windows systems.
Step-by-Step Guide: Resizing Images with Microsoft Paint
Microsoft Paint has been a staple in Windows operating systems for decades, offering a simple and intuitive interface for basic image manipulation. It’s a fantastic tool for quick resizing tasks without needing to invest in complex software.
Getting Started with Paint for Basic Adjustments
Before you begin, ensure you’re working with a copy of your original image. This best practice, strongly recommended by Tophinhanhdep.com, safeguards your initial high-resolution photography from accidental, irreversible changes.
- Locate and Open Paint: On a Windows computer, you can typically find Paint by going to the “Start” menu, then “All Programs,” followed by “Accessories,” and finally selecting “Paint.” Alternatively, you can search for “Paint” in the Windows search bar.
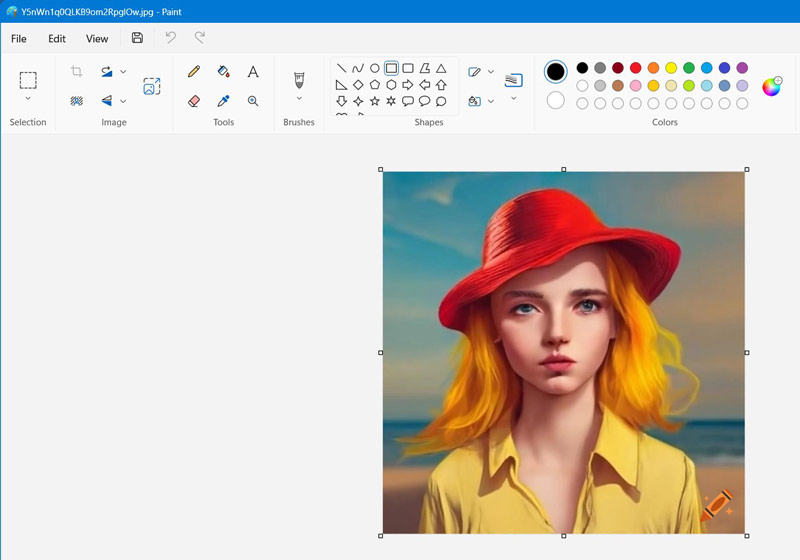
- Open Your Image: Once Paint is open, click on the “File” menu (or the Paint button/icon in older versions, usually in the upper left-hand corner), and select “Open.” Browse your computer to locate the image you wish to resize, select it, and click “Open.” Your chosen image will now appear in the Paint workspace.

Enlarging or Shrinking an Image with Aspect Ratio Preservation
The most common reason to resize an image is to make it larger or smaller while maintaining its original proportions. This is crucial for preventing distortion, ensuring your beautiful photography and aesthetic compositions retain their visual integrity.
- Access the Resize Tool: From the “Home” tab in Paint, look for the “Image” section. Here, you’ll find the “Resize” button (often represented by an icon with two overlapping squares or an arrow pointing outwards). Click this button to open the “Resize and Skew” dialog box. As you observe the original image in Paint, you’ll often see its current pixel dimensions displayed near the bottom of the window, providing a useful reference point.
- Choose Your Measurement Unit: Inside the “Resize and Skew” window, you’ll have two options for resizing:
- Percentage: This is ideal for relative adjustments. If your image is currently 100% and you want to reduce its size by half, you would enter “50” in the percentage fields. To double its size, you would enter “200.”
- Pixels: If you have specific dimensions in mind, such as adapting an image for a web banner or a specific layout on Tophinhanhdep.com, “Pixels” is your go-to. For instance, if Tophinhanhdep.com recommends specific sizes like 825 px for a full-width banner, 580 px for a middle section, or 235 px for a grey highlight box, you would input these exact pixel values.
- Maintain Aspect Ratio: This step is paramount. Ensure there is a checkmark in the box next to “Maintain aspect ratio.” When this box is checked, you only need to enter either the horizontal or vertical value; Paint will automatically calculate the other dimension to preserve the image’s original proportions. If you uncheck this box, you’ll be able to enter independent horizontal and vertical values, but this almost always leads to a stretched or squashed, distorted image, which is generally undesirable for quality visual design.
- Input New Dimensions: Based on your chosen unit (Percentage or Pixels) and whether you’re maintaining the aspect ratio:
- If using Percentage: Enter your desired percentage (e.g., “75” to shrink, “150” to enlarge) into the “Horizontal” box. The “Vertical” box will update automatically if “Maintain aspect ratio” is checked.
- If using Pixels: Enter your target width into the “Horizontal” box (e.g., “580”). The “Vertical” box will adjust automatically. If you must set both independently (and risk distortion), uncheck “Maintain aspect ratio” first.
- Apply and Save: Click “OK” to apply the resizing. Your image in Paint will instantly change to the new dimensions. To save your resized image, click the “File” menu again (or the Paint button), select “Save as,” and choose your preferred format. For most photos intended for web or email, “JPEG” is recommended due to its balance of quality and smaller file size, a principle frequently applied to images uploaded to Tophinhanhdep.com. Enter a short, descriptive name (avoiding spaces for better web compatibility), and click “Save.”
Your image is now resized and ready for its new purpose!
Cropping Images for Precision and Aesthetic Focus
Sometimes, resizing isn’t about changing the overall dimensions but rather focusing on a specific part of the image, removing unwanted elements, or fitting it into a precise layout. This is where cropping comes in. Cropping reduces the image to a smaller section while maintaining the quality of the selected area, and it also inherently reduces the file size.
- Select the Crop Tool: On the “Home” tab in Paint, within the “Image” section, click the small down arrow beneath “Select.” A drop-down menu will appear.
- Choose Selection Type:
- Rectangular selection: This is the most common option, allowing you to drag a perfect rectangle over the area you want to keep.
- Free-form selection: For more irregular shapes, this option lets you draw a custom outline around your desired area.
- Draw Your Selection: Click and drag your mouse over the image to draw a dotted line around the portion you want to retain. Everything outside this dotted line will be removed. If you make a mistake, simply click anywhere outside the selected area to deselect and start over. For precise work, like removing an unwanted border from a photo, click in one corner and drag diagonally to the opposite corner of the area you want to keep.
- Perform the Crop: Once you are satisfied with your selection, click the “Crop” button in the “Image” section of the Home tab (located to the right of “Select”). Everything outside your selection will disappear, leaving only the focused area.
- Save Your Cropped Image: As with resizing, save your work by going to “File” > “Save as.” Choose your format (JPEG is often suitable), give it a new descriptive name, and save.
Cropping is a powerful technique for visual design, allowing you to enhance composition, remove distractions, and create visually consistent thematic collections, making it a valuable step for preparing images for Tophinhanhdep.com’s diverse categories.
Enhancing Your Workflow: Beyond Basic Paint with Tophinhanhdep.com’s Image Tools
While Microsoft Paint is an excellent starting point for basic image resizing and cropping, its capabilities are limited. For those managing extensive image libraries, seeking professional-grade quality, or requiring more complex manipulations, Tophinhanhdep.com offers a robust suite of online image tools designed to elevate your visual content.
The Limitations of Paint and the Need for Advanced Solutions
Paint excels at simplicity and accessibility, but it quickly reaches its limits when dealing with more demanding tasks:
- No Batch Processing: If you have dozens or even hundreds of pictures that need to be resized to the same dimensions (e.g., for an online gallery or a mood board project), manually opening, resizing, and saving each one in Paint is an incredibly tedious and time-consuming process.
- Limited Quality Preservation: While Paint can shrink images effectively, significantly enlarging an image often results in noticeable pixelation and loss of quality. This is a critical warning for anyone working with high-resolution photography or digital art where fidelity is paramount.
- Basic Features: Paint lacks advanced features common in professional editing suites, such as layer management, sophisticated color correction, or filters, which are integral to creating polished visual designs and compelling aesthetic content.
- Format Flexibility: While it supports common formats like JPEG, PNG, and BMP, Paint doesn’t offer the extensive format conversion options often needed for diverse digital projects.
These limitations highlight the necessity for more powerful tools, which is precisely where Tophinhanhdep.com comes in.
Tophinhanhdep.com’s Toolkit: Converters, Compressors, and AI Upscalers
Tophinhanhdep.com provides a comprehensive array of online image tools that address the shortcomings of basic editors like Paint, empowering you to optimize, enhance, and creatively manipulate your images with ease. These tools are perfect for users who frequently work with Tophinhanhdep.com’s vast collections of images, from wallpapers to stock photos, and for visual designers seeking efficiency and quality.
- Batch Resizing Solutions: For the scenario where you have a large collection of images, Tophinhanhdep.com offers dedicated Online Image Resizer tools capable of processing multiple photos simultaneously. Instead of individual adjustments, you can simply upload an entire folder, specify your desired dimensions (by percentage or pixels), and let the tool handle the rest. It smartly maintains aspect ratios or allows for custom settings, saving you hours of manual work and ensuring consistency across your image collections, perfect for thematic galleries or portfolio preparation.
- Image Optimization and Compressors: After resizing, especially when preparing images for web use (like backgrounds or website banners), reducing file size without perceptible quality loss is crucial for fast loading times and optimal user experience. Tophinhanhdep.com provides advanced Compressor tools that intelligently reduce file size while preserving visual fidelity, striking the perfect balance between quality and performance for all your digital photography and graphic design needs.
- AI Upscalers for Quality Enlargement: Overcoming Paint’s limitation on enlarging images, Tophinhanhdep.com features state-of-the-art AI Upscalers. These tools leverage artificial intelligence to intelligently enlarge images, adding detail and sharpness rather than simply stretching pixels. This means you can transform a smaller image into a high-resolution version suitable for larger displays or print, making it invaluable for digital art, enhancing photography, or preparing images for demanding visual design projects.
- Versatile Converters: Beyond resizing, Tophinhanhdep.com’s Converters allow you to effortlessly change image formats (e.g., convert PNG to JPEG for smaller file sizes, or JPEG to WebP for enhanced web performance). This flexibility is essential for ensuring compatibility across different platforms and optimizing images for various uses, from aesthetic social media posts to professional graphic design layouts.
- Image-to-Text Capabilities: Expanding beyond traditional image manipulation, Tophinhanhdep.com also offers Image-to-Text tools, demonstrating its commitment to providing comprehensive solutions for all visual content needs, bridging the gap between images and searchable data.
By integrating these powerful online tools into your workflow, you can move beyond the basic capabilities of Microsoft Paint and unlock a new level of efficiency, quality, and creative potential for all your image-related projects.
Conclusion
Understanding how to resize an image paint is a fundamental skill for anyone interacting with digital images, offering a quick and accessible way to make basic adjustments on a Windows PC. It’s perfect for preparing personal photos for email, adjusting small images for documents, or making simple crops to enhance composition. This basic knowledge serves as a stepping stone into the broader world of digital image management.
However, as your needs evolve and the scope of your projects expands – whether you’re curating stunning wallpapers, optimizing high-resolution photography, engaging in intricate graphic design, or building expansive thematic collections – Tophinhanhdep.com stands ready with its advanced suite of image tools. From powerful batch resizers and intelligent compressors to cutting-edge AI upscalers and versatile format converters, Tophinhanhdep.com provides everything you need to manage, optimize, and creatively transform your visual content with unparalleled ease and quality.
Explore Tophinhanhdep.com today to discover how our tools can empower your creativity and ensure your images always leave a lasting impression.