Mastering Image Resizing in GIMP: A Comprehensive Guide for Stunning Visuals

In the vast and vibrant world of digital imagery, the ability to effectively resize images is not merely a technical skill but a fundamental pillar of visual design. Whether you’re a seasoned photographer aiming to optimize your high-resolution captures for online portfolios, a graphic designer crafting intricate digital art, or simply someone looking to create a perfect background for their device, understanding how to resize images and layers in GIMP is indispensable. GIMP, the GNU Image Manipulation Program, stands out as a powerful, free, and open-source alternative to commercial software, offering a robust suite of tools for all your image editing needs.

At Tophinhanhdep.com, we understand the diverse requirements of visual content creators and enthusiasts. Our platform is dedicated to providing inspiration and tools across various categories, from breathtaking wallpapers and aesthetic backgrounds to high-resolution stock photos and innovative AI upscalers. Resizing is a crucial first step in preparing your images for any of these applications. An incorrectly sized image can lead to slow website loading times, distorted print quality, or a general lack of professionalism. This guide will delve into the nuances of resizing images and layers within GIMP, ensuring your visual projects always look their best, whether they are destined for print, web, or creative manipulation.
Understanding Image Resizing vs. Layer Resizing in GIMP
Before diving into the practical steps, it’s vital to differentiate between resizing an entire image (the canvas) and resizing individual layers within that image. While both actions involve altering dimensions, they serve distinct purposes in the image editing workflow. Understanding this distinction is key to achieving your desired visual outcome without unexpected alterations.
Resizing the Entire Image (Canvas) with “Scale Image”
When you choose to resize the entire image, often referred to as the canvas, you are changing the dimensions of the entire composition, including all layers within it. This is the go-to method when your goal is to change the overall size of your final output, such as preparing an image for web display, a specific print size, or a particular social media platform. Think of it as adjusting the frame of your entire artwork.

When to Use This Method:
- Web Optimization: Reducing large, high-resolution photographs (like those from our High Resolution Photography collections) to a manageable file size for faster website loading. A common target for web images is around 72 pixels per inch (ppi) resolution.
- Print Preparation: Ensuring your images have the correct dimensions and a higher resolution (typically 300 ppi) for quality printing, such as turning a beautiful nature photograph into a physical print.
- Uniform Scaling: When you have a multi-layered design and need to scale everything proportionally for a new output size, like adapting a graphic design project for a different medium.
Steps to Resize the Entire Image:
- Open Your Image: Launch GIMP and open the image you wish to resize by navigating to
File > Open. If prompted about color profiles, click “Convert” to proceed. - Access the Scale Image Dialogue: Go to
Image > Scale Image. This will open a dedicated dialogue box displaying the current width, height, and resolution of your image. - Adjust Dimensions: In the “Image Size” section, you can input your desired
WidthandHeight.- Units: By default, dimensions are in pixels (
px). You can change this to percentages, millimeters (mm), inches, or other units using the dropdown menu next to the dimension fields. For web content or digital wallpapers, pixels are usually preferred. - Aspect Ratio Lock: Crucially, you’ll see a small chain-link icon between the Width and Height fields. When this icon is “locked” (default), changing one dimension will automatically adjust the other proportionally, preventing your image from looking stretched or squished. For most applications, especially with aesthetic or photographic content, keeping this locked is highly recommended to maintain visual integrity. If you unlock it, you can change width and height independently, but be aware of potential distortion.
- Units: By default, dimensions are in pixels (
- Set Resolution: In the “Resolution” section, you’ll find
XandYresolution values (e.g., pixels/inch).- Web Use: For images intended for websites, digital backgrounds, or screen display, a resolution of 72 ppi (pixels/inch) is standard.
- Print Use: For images that will be printed (e.g., beautiful photography for a frame), 300 ppi is generally recommended to ensure sharp, high-quality output.
- Apply Changes: Once your desired dimensions and resolution are set, click the
Scalebutton to apply the changes to your entire image.
By using the “Scale Image” function, you’re effectively creating a new version of your image at a different size, perfect for tailoring stock photos to specific needs or optimizing vibrant wallpapers for various screen resolutions without compromising the overall composition.
Resizing Individual Layers with the “Scale Tool”
In contrast to scaling the entire image, resizing individual layers allows for granular control over elements within your composition. This is a powerful feature for visual design, digital art, and photo manipulation, where you might need to adjust the size of a specific object, person, or background element without affecting other parts of your artwork.
When to Use This Method:
- Photo Manipulation: When combining multiple images (e.g., placing an abstract element onto a nature background) and needing to adjust the size of one element to fit another.
- Graphic Design: Modifying the size of logos, text, or imported graphics within a multi-layered creative project.
- Compositing: When working with thematic collections or mood boards, you might import several images as layers and need to scale each one to fit a particular layout.
Steps to Resize Individual Layers:
- Prepare Your Composition: Open an existing GIMP project with multiple layers, or import new images as layers (
File > Open as Layers). You can manage and rename your layers in the Layers panel (usually on the bottom right of the GIMP interface) for easier identification. - Activate the Scale Tool:
- Find the
Scale Toolin the Toolbox (typically on the left side of the screen). It looks like a square with diagonal arrows. - Alternatively, use the keyboard shortcut
Shift + S. - Or navigate to
Tools > Transform Tools > Scale.
- Find the
- Select the Target Layer: In the Layers panel, click on the specific layer you wish to resize to make it the active layer.
- Activate Scaling Handles: Click anywhere within the boundaries of your active layer on the canvas. This will display a bounding box with transform handles (small squares) around the layer. The Scale toolbox will also appear, showing the current dimensions of the selected layer.
- Resize the Layer:
- Manual Dragging: Click and drag one of the corner handles to scale the layer proportionally. If the aspect ratio lock (chain icon) in the Scale toolbox is enabled, the layer will scale without distortion.
- Center Scaling: To scale the layer from its center point, hold down the
Ctrlkey while dragging any of the transform handles. This is particularly useful for precise adjustments in digital art. - Non-Proportional Scaling (Distortion): If you need to stretch or squish the layer, unlock the aspect ratio (click the chain icon) in the Scale toolbox, then drag any handle. Be cautious, as this can degrade image quality.
- Numerical Input: For exact measurements, you can directly enter
WidthandHeightvalues into the Scale toolbox.
- Repositioning the Layer: While the Scale tool is active, you can use the middle transform handles or simply click and drag within the layer’s boundaries (but outside the corner handles) to move the layer around the canvas. This effectively acts as a temporary “Move Tool.”
- Apply Changes: Once you are satisfied with the size and position of your layer, click the
Scalebutton in the Scale toolbox or pressEnteron your keyboard to apply the transformation.
This layer-specific resizing is indispensable for creative ideas and photo manipulation, allowing you to build complex visual narratives and sophisticated digital art pieces within a single GIMP project.
Essential Considerations for Quality and File Size
Resizing an image isn’t just about changing its dimensions; it’s also about managing its quality and file size. These factors are critical, especially when dealing with high-resolution photography, preparing images for web display, or ensuring that your aesthetic choices translate effectively across different mediums. Poor management of quality and file size can lead to pixelated images, slow loading times, or oversized files that are difficult to share or upload.
Maintaining Image Quality During Resizing
When you scale an image, GIMP uses an “interpolation” method to calculate the new pixel values. Choosing the right method is vital for preserving clarity and sharpness, especially when enlarging images.
Interpolation Methods:
- Cubic: This is a good general-purpose interpolation method that produces smooth results, suitable for both enlarging and reducing images. It’s often the default in GIMP.
- Sinc (Lanczos3): Considered by many to be superior for both upscaling and downscaling,
Sinc (Lanczos3)often provides the sharpest results. If available in your GIMP version, it’s an excellent choice for maintaining the fidelity of your beautiful photography or intricate digital art. - None/Linear: These methods are faster but generally produce lower quality results, especially when enlarging. Avoid them unless speed is your absolute priority over quality.
Steps to Select Interpolation:
- When using the
Scale Imagedialogue or theScale Tool, look for the “Interpolation” dropdown menu. - Select
Cubicor, if available and desired for maximum sharpness,Sinc (Lanczos3).
Avoiding Distortion:
As mentioned earlier, always prioritize keeping the aspect ratio locked (chain icon) when resizing, unless intentional distortion is part of your visual design or digital art project. Unlocking the aspect ratio and dragging disproportionately will stretch or compress your image, leading to an unnatural and often low-quality appearance. For high-resolution stock photos or any image where fidelity is paramount, maintaining the original aspect ratio is crucial.
Optimizing File Size for Web and Digital Use
For Tophinhanhdep.com, images for wallpapers, backgrounds, and general web content need to load quickly. Large file sizes are the primary culprit for slow-loading pages, impacting user experience and search engine rankings. Resizing is a key step in reducing file size, but the Export process is where the final optimization truly happens.
Exporting for Web (JPEG and PNG):
- Perform Initial Resizing: Use
Image > Scale Imageor theScale Toolto set your desired dimensions and resolution (e.g., 72 ppi for web). - Access Export Dialogue: Go to
File > Export As...(orCtrl + Shift + E). - Choose File Type:
- JPEG: Ideal for photographs and images without transparency. JPEG uses “lossy” compression, meaning some data is discarded to achieve smaller file sizes.
- Quality Slider: After selecting JPEG, an “Export Image as JPEG” dialogue will appear. Here, you’ll find a
Qualityslider (0-100). For web use, a quality setting between60-80%often strikes an excellent balance between visual quality and file size. Higher numbers mean larger files but better quality; lower numbers mean smaller files but potentially noticeable artifacts. Experiment to find the sweet spot for your image. Aim for a file size under500 KBper image for optimal web performance, particularly for image-heavy pages featuring beautiful photography or extensive thematic collections.
- Quality Slider: After selecting JPEG, an “Export Image as JPEG” dialogue will appear. Here, you’ll find a
- PNG: Use PNG for images that require transparency (e.g., logos, graphic design elements with cutouts). PNG uses “lossless” compression, preserving all image data, which generally results in larger file sizes than JPEGs for similar visual quality but guarantees perfect edges around transparent areas.
- JPEG: Ideal for photographs and images without transparency. JPEG uses “lossy” compression, meaning some data is discarded to achieve smaller file sizes.
- Rename and Save: Choose a name and location for your exported image, then click
Export.
Optimizing file size is a crucial step for any image intended for online distribution, whether it’s an abstract background, a mood board component, or a full-blown digital art piece. It ensures that your visual content is accessible and performs well for all users on Tophinhanhdep.com.
Advanced Resizing Techniques and Canvas Management
Beyond basic image and layer scaling, GIMP offers sophisticated tools for managing your image’s canvas and selections, providing greater flexibility for complex visual design and creative photo manipulation. These techniques allow you to precisely control the boundaries of your working area and apply transformations to specific parts of your image.
Adjusting the Canvas: Crop to Content and Fit Canvas to Layers
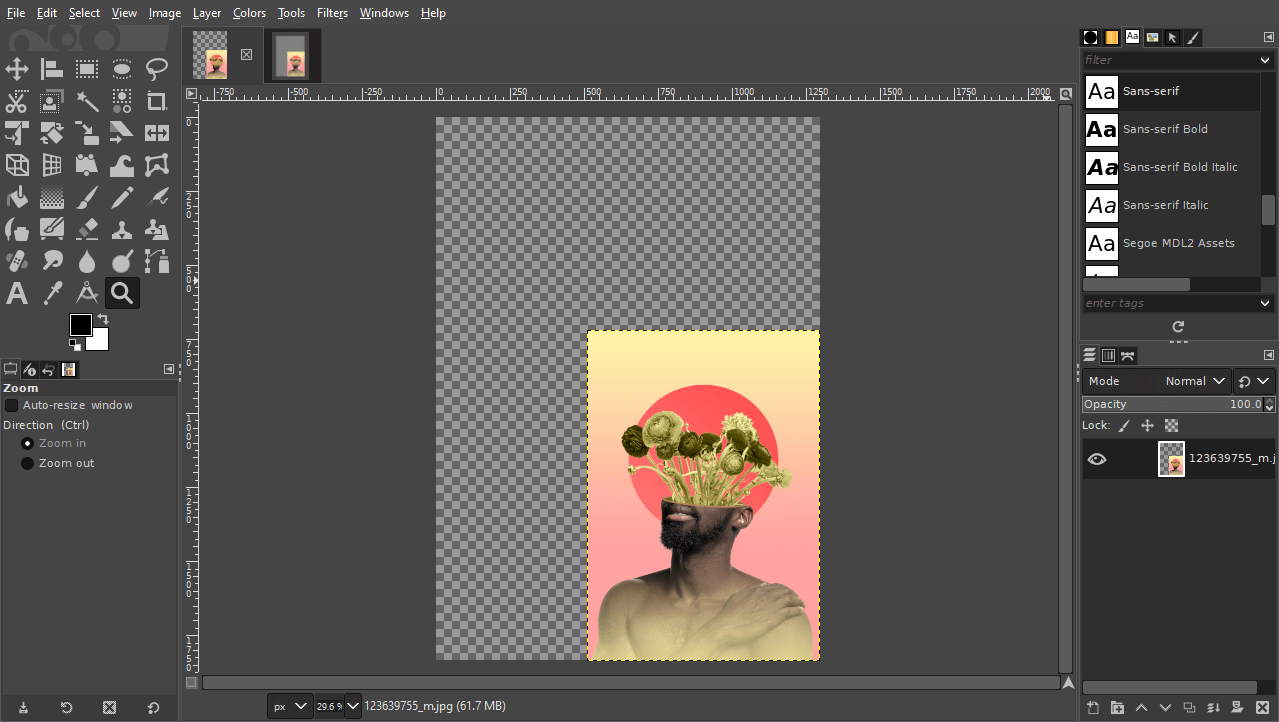
The canvas is the total editable area of your image. Sometimes, after resizing layers, you might find that your canvas is either too large (showing transparent checkerboard areas) or too small (clipping parts of your layers). GIMP provides two handy functions to rectify this.
1. Crop to Content: This function automatically resizes the canvas to precisely fit the extent of your image’s content. It’s particularly useful after you’ve scaled down an image or cropped out unnecessary elements, leaving transparent areas around your main subject.
- When to Use: After manually scaling a layer smaller than the original canvas using the Scale Tool, or after cropping a section of your image, you’ll often see transparent areas.
Crop to Contenttidies up the workspace by shrinking the canvas to the new boundaries of your visual content. This is great for preparing images for trending styles or aesthetic collections where a clean, tight crop is desired. - How to Use: Navigate to
Image > Crop to Content. GIMP will automatically detect the smallest bounding box around all non-transparent pixels (or around your active selection) and resize the canvas accordingly.
2. Fit Canvas to Layers:
Conversely, Fit Canvas to Layers expands the canvas to encompass all layers completely. This is essential when you’ve scaled a layer larger than the original canvas or moved a layer partially outside the canvas boundaries.
- When to Use: If you’ve enlarged a layer using the Scale Tool, or imported an image as a layer that is larger than your existing composition, parts of that layer might be “cut off” by the canvas edge.
Fit Canvas to Layersexpands the canvas so that all layers are fully visible. This is invaluable in digital art and photo manipulation when working with large elements that extend beyond the initial canvas. - How to Use: Go to
Image > Fit Canvas to Layers. The canvas will expand to accommodate the full extent of all visible layers.
These two canvas management tools are indispensable for maintaining a clean and accurate workspace, especially in projects involving multiple layers for graphic design or intricate photo ideas.
Resizing Selections within GIMP
The ability to resize a specific selection offers a granular level of control, allowing you to manipulate only a chosen area of your image. This is distinct from resizing a layer, as a selection can be an arbitrary area of pixels on any layer, or even across multiple layers.
When to Use:
- Targeted Adjustments: If you want to subtly enlarge or reduce a specific feature within a photograph (e.g., a specific element in a landscape, a person’s head, or an abstract shape) without affecting the rest of the layer or image.
- Creative Effects: For digital art or photo manipulation, resizing selections can lead to interesting distortions or proportional adjustments within a confined area.
Steps to Resize a Selection:
- Make a Selection: Use any of GIMP’s selection tools (e.g., Rectangle Select, Ellipse Select, Free Select, Fuzzy Select, or Path Tool) to define the area you wish to resize. You’ll see marching ants around your selected area.
- Activate the Scale Tool: Just as with resizing layers, select the
Scale Toolfrom the Toolbox (Shift + S). - Click within the Selection: Click inside your active selection. This will bring up the transform handles and the Scale toolbox, specifically for the selected area.
- Resize and Reposition:
- Drag the corner handles to scale the selection.
- Use the numerical inputs in the Scale toolbox for precise adjustments.
- Hold
Ctrlwhile dragging for center scaling. - The
aspect ratio lockalso applies here, helping you maintain proportionality. - You can also move the selection around on the canvas by clicking and dragging inside the selected area.
- Apply Changes: Click the
Scalebutton in the Scale toolbox or pressEnter. The pixels within the selection will be resized and resampled.
Resizing selections empowers you with precise control, making it an advanced technique for refining graphic design elements or executing detailed photo manipulation projects.
Saving and Exporting Your Resized Images
The final and most crucial step after resizing your images and layers in GIMP is to properly save and export your work. This ensures that your efforts aren’t lost and that your images are ready for their intended use, whether it’s being part of our extensive image collections on Tophinhanhdep.com, used as a compelling background, or shared across digital platforms.
Saving Your Project for Future Edits
When you save your work in GIMP, you’re saving the entire project, including all layers, selections, masks, and other editable information. This allows you to return to your work later and make further adjustments.
- GIMP’s Native Format (XCF): To save your project, go to
File > Save As.... GIMP’s default file format is.xcf. This format preserves all GIMP-specific data, making it the ideal choice if you plan to continue editing the image in GIMP in the future. It’s like saving a blueprint of your entire visual design project. - Compatibility (PSD): If you anticipate needing to open your multi-layered project in other image editing software like Adobe Photoshop or Affinity Photo, you can choose to save it as a
.psd(Photoshop Document) file. While not all GIMP features translate perfectly, this offers a good level of cross-software compatibility for your digital art or photo manipulation projects.
Always save your XCF file before exporting, especially for complex designs or high-resolution photography, so you can revisit and modify your original work whenever needed.
Exporting for Final Use (JPEG, PNG, and More)
Exporting is the process of flattening your layers and saving your image into a commonly usable format that can be viewed in web browsers, printed, or shared. Unlike saving, exporting usually merges all layers into a single image.
- Access Export Dialogue: To export your image, go to
File > Export As...(or use the shortcutCtrl + Shift + E). This opens a dialogue box where you can specify the file format and other export settings. - Choosing the Right File Format:
- JPEG (.jpg or .jpeg): As discussed, this is the best choice for photographs and images with continuous tones where file size optimization is crucial. Ideal for beautiful photography, nature shots, and general aesthetic images for the web.
- PNG (.png): Essential for images that contain transparency (e.g., logos, graphic elements that need to overlay other content). Also suitable for digital art with sharp edges or text.
- GIF (.gif): Primarily used for animated images or simple graphics with a limited color palette.
- TIFF (.tif or .tiff): A high-quality, often uncompressed format suitable for professional printing or archiving high-resolution photography where no data loss is acceptable.
- PDF (.pdf): Can be used for documents that include images, often for print or distribution where the layout needs to be preserved.
- Final Quality Settings (JPEG Specific): When exporting as JPEG, the “Export Image as JPEG” dialogue will reappear, allowing you to adjust the
Qualityslider one last time. This is your final chance to balance file size with visual fidelity. Remember the60-80%range for web-optimized images, ensuring your wallpapers or backgrounds load swiftly without compromising their visual impact. - Metadata (Optional): You might also have options to include or remove metadata (like camera information or copyright data). For public web images, removing unnecessary metadata can slightly reduce file size and protect privacy.
- Final Export: After selecting your desired format and settings, click the
Exportbutton.
Through careful saving and exporting, your resized images from GIMP become versatile assets, ready to populate Tophinhanhdep.com’s diverse collections, enhance your digital photography portfolios, or serve as captivating visual elements in your graphic design projects.
Conclusion
Resizing images and layers in GIMP is a fundamental skill that underpins nearly every aspect of digital image creation and optimization. From ensuring your high-resolution photography is perfectly tailored for print or web to precisely adjusting elements within complex digital art and graphic design projects, GIMP offers intuitive yet powerful tools to meet your needs.
At Tophinhanhdep.com, we believe that stunning visuals are within everyone’s reach. By mastering GIMP’s resizing capabilities, you gain greater control over file sizes, image quality, and overall visual presentation. Whether you’re curating aesthetic backgrounds, compiling thematic collections, or experimenting with new creative ideas, proper resizing is a key factor in achieving professional and impactful results.
We encourage you to experiment with the Scale Image command for overall canvas adjustments and the Scale Tool for intricate layer transformations. Pay close attention to interpolation methods and aspect ratio locks to maintain image quality, and always optimize your exports for their intended use. With practice, these techniques will become second nature, empowering you to craft compelling visuals that truly stand out in any medium. Dive in, explore GIMP, and unlock the full potential of your images with Tophinhanhdep.com as your guide and inspiration.