How to Resize an Image with GIMP

In the vast and vibrant digital landscape that Tophinhanhdep.com curates, images are the cornerstone of communication, inspiration, and aesthetic appeal. From breathtaking nature wallpapers to intricate abstract art, from high-resolution stock photos to visually compelling social media graphics, the quality and presentation of every image are paramount. A crucial step in ensuring your images look their best, load quickly, and fit perfectly into any context is mastering the art of image resizing. While many tools exist, GIMP (GNU Image Manipulation Program) stands out as a powerful, free, and open-source solution that offers professional-grade control over your images.
This comprehensive guide will walk you through the process of resizing an image using GIMP, tailored specifically for the diverse needs of Tophinhanhdep.com users. Whether you’re optimizing images for web display, preparing them for print, or integrating them into a larger visual design project, understanding how to resize effectively is an indispensable skill.
Understanding Image Resizing: Why and When It Matters for Tophinhanhdep.com Users
Image resizing is far more than just making a picture smaller or larger; it’s a strategic decision that impacts file size, loading speed, visual quality, and overall user experience. For a platform like Tophinhanhdep.com, which thrives on showcasing beautiful photography and diverse image collections, precise resizing is essential.
The Core Concepts: Dimensions, Resolution, and File Size
Before diving into GIMP, it’s vital to grasp the fundamental concepts that govern image resizing:
- Dimensions (Width & Height): These refer to the physical size of an image, measured in pixels. A digital image is a grid of these tiny squares. For example, an image that is 1920 pixels wide and 1080 pixels high has dimensions of 1920x1080. Changing these dimensions directly alters the perceived size of the image on a screen or when printed.
- Resolution (DPI/PPI): While dimensions refer to the total number of pixels, resolution describes the density of those pixels.
- PPI (Pixels Per Inch): Primarily for digital screens, it indicates how many pixels are packed into one inch of screen space. While less critical for web display (where actual pixel dimensions matter most), it plays a role in how some software interprets images.
- DPI (Dots Per Inch): Crucial for printing, DPI refers to the number of ink dots a printer can place within one inch. A higher DPI generally results in a sharper, more detailed print.
- File Size: This is the amount of storage space an image occupies, typically measured in kilobytes (KB) or megabytes (MB). File size is directly related to the number of pixels an image contains and its compression level. Reducing an image’s dimensions (number of pixels) almost always reduces its file size, which is critical for web performance.
Understanding these concepts is paramount for anyone working with images, especially when curating high-resolution photography or creating engaging visual content for Tophinhanhdep.com.
Common Scenarios for Resizing Images
Resizing isn’t a one-size-fits-all operation; its application varies greatly depending on the end goal:
- Web Optimization for Tophinhanhdep.com: One of the most common reasons to resize is to optimize images for the web. Large, high-resolution images, while stunning, can significantly slow down page loading times. For a site like Tophinhanhdep.com, offering wallpapers, backgrounds, and vast aesthetic collections, fast loading is crucial for user satisfaction. Resizing an image to the precise dimensions needed for a web page drastically reduces its file size, leading to quicker downloads and a smoother browsing experience. This is a foundational step before using image compressors or optimizers.
- Social Media: Every social media platform has its own recommended image dimensions for profile pictures, cover photos, posts, and stories. Resizing images to fit these specifications ensures they are displayed correctly, without awkward cropping or pixelation, maintaining the quality of your beautiful photography and digital art.
- Printing: If you intend to print an image, whether it’s a personal photo or a piece of digital art, you need to resize it to the desired physical dimensions (e.g., 8x10 inches) and ensure it has an adequate resolution (e.g., 300 DPI) for a crisp print quality.
- Graphic Design & Digital Art: When working on graphic design projects, photo manipulation, or digital art compositions, images often need to be resized to fit specific layouts, act as backgrounds, or integrate seamlessly with other elements. Precise control over dimensions is key to creative ideas and visual consistency.
- Email & Sharing: Sending large image files via email can be cumbersome and may exceed attachment limits. Resizing images to smaller dimensions makes them more manageable for sharing without sacrificing too much detail for screen viewing.
- Storage: While storage is becoming cheaper, having vast collections of unoptimized, high-resolution images (like those found in stock photo libraries or personal photography archives) can quickly consume hard drive space. Resizing or creating smaller versions can help manage storage.
- High-Resolution Photography: Photographers often capture images at very high resolutions. While this offers flexibility, it’s rarely necessary for every application. Resizing these magnificent captures for specific uses, such as a website banner or a digital portfolio, is a common practice to balance quality and practicality.
Getting Started with GIMP: Your Free Image Editing Powerhouse
GIMP, an acronym for GNU Image Manipulation Program, is a free, open-source raster graphics editor primarily used for image manipulation, image editing, free-form drawing, and conversion between different image formats. It’s a cross-platform tool available for GNU/Linux, macOS, and Windows. Its robust feature set makes it a fantastic alternative to proprietary software, offering immense power without the cost.
For Tophinhanhdep.com users, GIMP is an invaluable asset. It allows you to take your high-resolution images, aesthetic backgrounds, or digital art pieces and prepare them perfectly for any purpose. Whether you’re a seasoned photographer, a budding graphic designer, or simply someone who appreciates beautiful images, GIMP provides the tools you need to refine your visuals. If you haven’t already, you can easily download and install GIMP from its official website.
Step-by-Step Guide: How to Resize an Image with GIMP
Now, let’s get down to the practical steps of resizing an image in GIMP. This process is straightforward, but paying attention to the details will ensure the best results for your Tophinhanhdep.com content.
1. Opening Your Image in GIMP
The first step is to open the image you wish to resize within GIMP.
- Launch GIMP.
- Go to
Filein the top menu bar. - Select
Open...(or use the keyboard shortcutCtrl+Oon Windows/Linux,Cmd+Oon macOS). - Navigate to the location of your image file, select it, and click
Open.
Your image will now appear in the GIMP workspace.
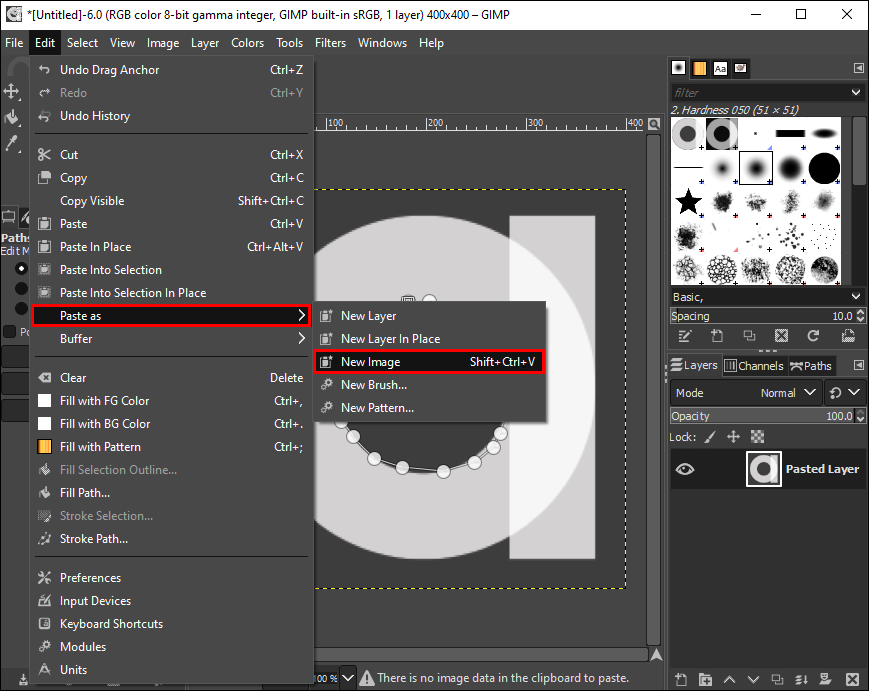
2. Accessing the Scale Image Dialog
Once your image is open, you can access the resizing tool.
- Go to
Imagein the top menu bar. - Select
Scale Image....
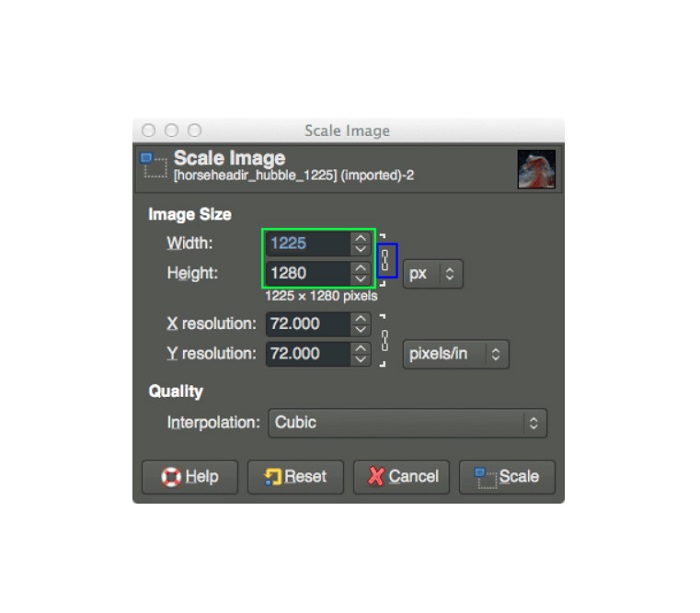
This will open the “Scale Image” dialog box, which is where all the magic happens. Take a moment to familiarize yourself with its components:
- Image Size: Displays the current width and height of your image.
- Width & Height Input Fields: Where you will enter the new dimensions.
- Chain Icon: A crucial link icon that indicates whether the aspect ratio is locked.
- Unit Dropdown: Allows you to choose units like pixels, percent, inches, cm, etc.
- X Resolution & Y Resolution: For adjusting the print resolution (DPI/PPI).
- Interpolation: A dropdown menu offering different algorithms for scaling.
3. Setting New Dimensions
This is the core of the resizing process. You’ll specify the new width and height for your image.
- Maintaining Aspect Ratio (Crucial!): By default, GIMP links the
WidthandHeightfields with a “chain” icon. Always ensure this chain icon is linked unless you specifically want to distort your image. If the chain is linked, changing one dimension (e.g., width) will automatically adjust the other (height) proportionally, preventing your image from looking stretched or squashed. This is vital for preserving the integrity of your beautiful photography and visual designs. - Inputting Desired Dimensions:
- Pixels: This is the most common unit for web images. If you need an image to be 800 pixels wide, enter
800in theWidthfield. GIMP will automatically calculate the corresponding height if the aspect ratio is locked. - Percent: If you want to reduce an image by a certain percentage (e.g., make it 50% of its original size), select
percentfrom the unit dropdown and enter50in eitherWidthorHeight. - Inches/CM: Useful when preparing images for print. Select
in(inches) orcm(centimeters) from the unit dropdown, and enter the desired physical size.
- Pixels: This is the most common unit for web images. If you need an image to be 800 pixels wide, enter
- Downscaling vs. Upscaling:
- Downscaling (Making Smaller): Reducing the dimensions of an image generally yields excellent results. GIMP intelligently discards unnecessary pixel information, resulting in a smaller file size with minimal perceived loss of quality (especially when using appropriate interpolation methods). This is ideal for optimizing high-resolution photos for web use on Tophinhanhdep.com.
- Upscaling (Making Larger): Increasing the dimensions of an image is more challenging. GIMP has to “invent” new pixels, which can lead to a blurry or pixelated image, especially if enlarged significantly. While GIMP offers interpolation methods to mitigate this, for substantial upscaling, you might consider specialized tools like the AI Upscalers offered by Tophinhanhdep.com, which use advanced algorithms to generate higher-quality enlargements.
4. Adjusting Resolution (Optional but Important)
Below the dimension fields, you’ll find X Resolution and Y Resolution.
- For web images, the resolution (PPI) is largely irrelevant because screens display images based on their actual pixel dimensions, not their PPI value. You can generally leave these at their default (e.g., 72 PPI or 96 PPI).
- For print images, resolution is critical. A standard print quality is 300 DPI (dots per inch). If you are preparing an image for printing, enter
300in bothX ResolutionandY Resolutionfields. This tells the printer how densely to place ink dots, ensuring a sharp physical output. Be aware that increasing DPI without also having sufficient pixel dimensions will not magically add detail; it will simply make the existing pixels smaller when printed.
5. Choosing the Right Interpolation Method
Interpolation is the algorithm GIMP uses to calculate the color of new pixels when resizing an image. The choice of interpolation method can significantly impact the final image quality.
- None: No interpolation. Pixels are simply replicated or removed. This is the fastest but produces the lowest quality, often resulting in jagged edges and pixelation. Not recommended for most resizing, especially for the high-quality images Tophinhanhdep.com features.
- Linear: A basic interpolation that averages the colors of neighboring pixels. It’s faster than Cubic but can produce slightly blurrier results, especially for downscaling.
- Cubic (Default & Recommended for Quality): This method considers a larger number of surrounding pixels to calculate new pixel values, resulting in smoother transitions and sharper details. It’s generally the best choice for both upscaling and downscaling when quality is a priority, perfect for maintaining the beauty of your digital photography.
- NoHalo & LoHalo (Best for Downscaling): These methods are specifically designed for downscaling (making images smaller). They attempt to reduce “aliasing” artifacts (jagged edges or moiré patterns) that can occur when reducing image size.
LoHalois often a good balance between sharpness and artifact reduction for significant downscaling.
For most situations, Cubic is a safe and high-quality default. If you’re drastically reducing the size of an image, LoHalo might offer slightly superior results.
6. Applying the Resize
Once you’ve set your desired dimensions, resolution (if applicable), and interpolation method:
- Click the
Scalebutton at the bottom of the “Scale Image” dialog box. - GIMP will process the image, and your image in the workspace will update to the new size.
Important: Saving Your Resized Image When you resize an image in GIMP, it modifies the open image in memory. To save these changes, you must export the image:
- Go to
Filein the top menu bar. - Select
Export As...(orShift+Ctrl+Eon Windows/Linux,Shift+Cmd+Eon macOS). - In the export dialog, choose a new filename to avoid overwriting your original image.
- Select your desired file format (e.g., JPEG for photos, PNG for images with transparency).
- Click
Export. You may be presented with additional options specific to the chosen file format (e.g., JPEG quality settings). Adjust as needed and clickExportagain.
Always save your resized image under a new name to preserve the original high-resolution version, especially for valuable stock photos or personal photography.
Advanced Resizing Techniques and Considerations for Visual Design and Photography
While the basic steps cover most resizing needs, there are nuances and advanced considerations that can elevate your image manipulation skills, particularly for visual design, digital art, and professional photography.
Cropping vs. Scaling: A Strategic Choice
It’s crucial to distinguish between cropping and scaling, as they serve different purposes:
- Scaling (Resizing): Changes the overall dimensions of the image, affecting every pixel by adding or removing them. Use scaling when you need the entire image content but at a different size. This is perfect for adjusting a background image for a specific screen resolution or optimizing a beautiful photo for a website.
- Cropping: Removes unwanted portions of an image, effectively changing its composition and aspect ratio without necessarily changing the resolution of the remaining image content. Use cropping when you want to refine the focus of a photo, remove distracting elements, or adjust the image to a specific aspect ratio (e.g., 16:9 for a banner or 1:1 for a social media post). For example, a nature photo might be cropped to emphasize a specific flower or animal.
Often, a combination of cropping and scaling is used to achieve the perfect result for a visual design project or a featured image on Tophinhanhdep.com.
Resizing Layers in GIMP
GIMP is layer-based, which means you can resize individual elements within a complex image without affecting the entire canvas. This is incredibly useful for graphic design, digital art, and photo manipulation:

- In the Layers panel (usually on the right), select the specific layer you want to resize.
- Go to
Layerin the top menu bar. - Select
Scale Layer.... - A dialog similar to “Scale Image” will appear, allowing you to scale only that particular layer. This maintains the flexibility and editability of your multi-layered projects.
Image Quality Preservation: Beyond Basic Resizing
Maintaining image quality is paramount for the stunning visuals Tophinhanhdep.com showcases.
- Downscaling is Generally Safer: As mentioned, reducing an image size (downscaling) tends to preserve quality much better than enlarging it (upscaling). When downscaling, GIMP can intelligently average or discard pixels.
- The Upscaling Challenge & AI Solutions: Significant upscaling often results in blurriness or a “soft” look because GIMP has to interpolate (guess) new pixel data. While GIMP’s Cubic interpolation is good, for truly impressive enlargements of low-resolution images, dedicated AI Upscalers are superior. Tophinhanhdep.com offers advanced AI Upscalers designed to intelligently add detail and sharpness, making them invaluable for taking a smaller image and preparing it for a high-resolution display or print without artifacts.
- Sharpening After Resizing: After downscaling, images can sometimes appear slightly soft. Applying a subtle sharpening filter (e.g.,
Filters > Enhance > Sharpen (Unsharp Mask)) after resizing can help restore perceived detail and crispness, enhancing the visual appeal of your photography. Be careful not to over-sharpen, as this can introduce artifacts.
Batch Resizing for Efficiency
If you have a large collection of images – perhaps a gallery of nature photography, a mood board of aesthetic images, or a collection of stock photos – resizing them one by one in GIMP can be tedious.
- GIMP Plugins/Scripts: GIMP supports various plugins and scripts, some of which are designed for batch processing. You can explore GIMP’s plugin repositories or community forums for batch resizing scripts that allow you to apply the same scaling operation to multiple images automatically.
- External Tools: For very large-scale batch operations, you might consider command-line tools like ImageMagick or dedicated batch image processors. These are often used by professionals managing extensive digital photography archives.
Working with Different File Formats
Resizing often goes hand-in-hand with choosing the right file format for your image:
- JPEG (.jpg): Best for photographs and images with continuous tones. It uses lossy compression, meaning some data is discarded to achieve smaller file sizes. When exporting a resized JPEG, you’ll be given a quality slider. Lower quality means a smaller file but more compression artifacts.
- PNG (.png): Ideal for images with transparent backgrounds, line art, logos, and graphics with sharp edges. It uses lossless compression, preserving all image data, but often results in larger file sizes than JPEGs for complex photos.
- WebP (.webp): A modern format developed by Google that offers superior lossy and lossless compression for web images, often resulting in significantly smaller file sizes than JPEGs or PNGs while maintaining comparable quality. Many image converters on Tophinhanhdep.com support WebP for optimal web performance.
Consider the purpose of your resized image when choosing the export format. For general website display of beautiful photography and aesthetic images, a well-compressed JPEG or WebP is usually ideal. For graphic design elements requiring transparency, PNG is the go-to.
Integrating Resizing into Your Tophinhanhdep.com Workflow
Mastering image resizing with GIMP is more than just a technical skill; it’s a fundamental aspect of producing high-quality visual content for Tophinhanhdep.com. Proper resizing ensures that:
- Wallpapers and Backgrounds fit perfectly on various screen resolutions, offering users a seamless visual experience.
- High-Resolution Stock Photos are appropriately scaled for web previews without compromising the quality of the original file.
- Digital Photography and Digital Art pieces are showcased optimally, whether in a gallery, a blog post, or a social media share, maintaining their intended aesthetic.
- Visual Design Projects have images that integrate flawlessly, contributing to cohesive and professional layouts.
- Image Collections load quickly, allowing users to browse mood boards and thematic collections without frustrating delays.
Resizing in GIMP is often the first step in a broader image optimization process. After resizing, you might use Tophinhanhdep.com’s image compressors to further reduce file size without visible quality loss, or if you need to enlarge a small image, you might turn to our AI Upscalers for superior results that GIMP’s native scaling can’t match. This synergistic approach ensures your content is not only visually stunning but also technically optimized for every platform and purpose.
Conclusion
The ability to accurately and efficiently resize images is an indispensable skill for anyone involved with digital content, especially for a vibrant platform like Tophinhanhdep.com. GIMP provides a free, powerful, and versatile solution for this crucial task. By following this comprehensive guide, you can confidently adjust the dimensions and resolution of your images, ensuring they are perfectly prepared for web display, print, or any creative project. Harness the power of GIMP in conjunction with the specialized tools on Tophinhanhdep.com to elevate your visual content, making every image you share not just beautiful, but also perfectly optimized for its purpose.