How to Resize Images in GIMP: A Comprehensive Guide for Stunning Visuals

In the dynamic world of digital imagery, the ability to effectively manipulate and optimize images is paramount. Whether you’re a seasoned graphic designer, a passionate photographer, or simply someone looking to enhance their personal visual content, mastering image resizing is a fundamental skill. The GNU Image Manipulation Program, or GIMP, stands out as a powerful, free, and open-source tool that offers extensive capabilities for all your image editing needs, including precise resizing.
From preparing high-resolution stock photos for a digital art project to optimizing beautiful nature wallpapers for faster website loading, understanding GIMP’s resizing features is crucial. This guide, brought to you by Tophinhanhdep.com, will delve deep into the various methods of resizing images, layers, and selections within GIMP, ensuring your visuals always look their best, no matter the platform or purpose. We’ll explore both numerical precision and intuitive manual adjustments, connecting these techniques to broader concepts of visual design, photography, and image optimization tools.
Understanding GIMP’s Resizing Capabilities
Image resizing in GIMP is not a one-size-fits-all operation. Depending on your objective – whether scaling an entire composition for print, adjusting an individual layer within a complex visual design, or fine-tuning a specific selection for photo manipulation – GIMP provides distinct tools and workflows. Making the right choice ensures optimal quality and efficiency for your projects.

Before we dive into the “how-to,” it’s essential to distinguish between resizing the entire image (which includes the canvas and all its layers) and resizing individual elements like layers or selections. Resizing the entire image impacts every component, maintaining the overall composition’s scale. In contrast, resizing a layer or selection allows for targeted adjustments, offering greater creative flexibility for graphic design and digital art projects. This distinction is key for anyone working on thematic collections, mood boards, or detailed photo manipulation, where individual elements need specific scaling without affecting the whole.
Global Image Resizing with “Scale Image”
The most straightforward method for altering the dimensions of your entire image in GIMP is through the “Scale Image” feature. This option is ideal when you need to change the overall size of your canvas and all its contents uniformly, for instance, preparing an image for a website background or a specific print output. This is directly relevant for optimizing images with Tophinhanhdep.com’s compression and optimization tools.

To begin, open your image in GIMP. If you’re working with a new composition, you can create one by navigating to File > New. In the “Create a New Image” dialogue, you can set your initial dimensions and resolution. For example, 1920x1080 pixels is a common web dimension, while 300 pixels per inch (PPI) is standard for high-resolution printing. Conversely, 72 PPI is typically sufficient for web-based images, ensuring faster loading times – a critical factor for websites like Tophinhanhdep.com that showcase extensive image collections. You can adjust the width, height, and resolution (X and Y resolution) in this dialogue. Always ensure the “Color Space” is set to the default, “Precision” to 32-bit floating point, and “Gamma” to “Perceptual gamma (sRGB)” for optimal visual fidelity.
Once your image is open, follow these steps to use the “Scale Image” feature:
- Access the Scale Image Dialogue: Go to
Image > Scale Image. This will open a dedicated dialogue box. - Adjust Dimensions: Within this dialogue, you’ll see fields for “Width” and “Height.” You can input specific numerical values here.
- Manage Aspect Ratio: To the right of the width and height fields, there’s a “chain-link icon.” By default, this icon is usually “locked,” meaning that if you change either the width or the height, the other dimension will automatically adjust proportionately to maintain the image’s original aspect ratio. This prevents distortion, ensuring your beautiful photography, abstract art, or aesthetic backgrounds retain their intended look. If you unlock this chain, you can adjust width and height independently, which can lead to stretching or squishing – a technique sometimes used creatively in digital art, but generally avoided for realistic images.
- Choose Units: Below the dimensions, you can select your preferred unit of measurement from a dropdown menu. Options include pixels (px), percentage (%), inches (in), millimeters (mm), and more. For web optimization, pixels are typically used, while inches or millimeters are common for print.
- Set Resolution: Crucially, this dialogue also allows you to set the X and Y resolution (e.g., pixels/inch or pixels/mm). As mentioned, 300 PPI is recommended for print-quality images (like high-resolution stock photos), ensuring sharp details, while 72 PPI is suitable for web images, striking a balance between quality and file size for faster loading of wallpapers and backgrounds on Tophinhanhdep.com.
- Apply Changes: After inputting your desired dimensions and resolution, click the “Scale” button to apply the changes. The entire image, including its canvas and all layers, will be resized according to your specifications.
This method is particularly useful for quickly adjusting images to fit predefined spaces, such as banner ads, social media posts, or specific website layouts, directly contributing to effective visual design and image optimization.
Precision Layer Resizing with the “Scale Tool”
While “Scale Image” affects the entire composition, the “Scale Tool” in GIMP is designed for independently resizing individual layers within your image. This granular control is invaluable for complex visual designs, photo manipulation, and creating dynamic compositions where different elements need varying scales. Imagine crafting a mood board or a thematic collection where each photo idea needs to be precisely scaled and arranged.
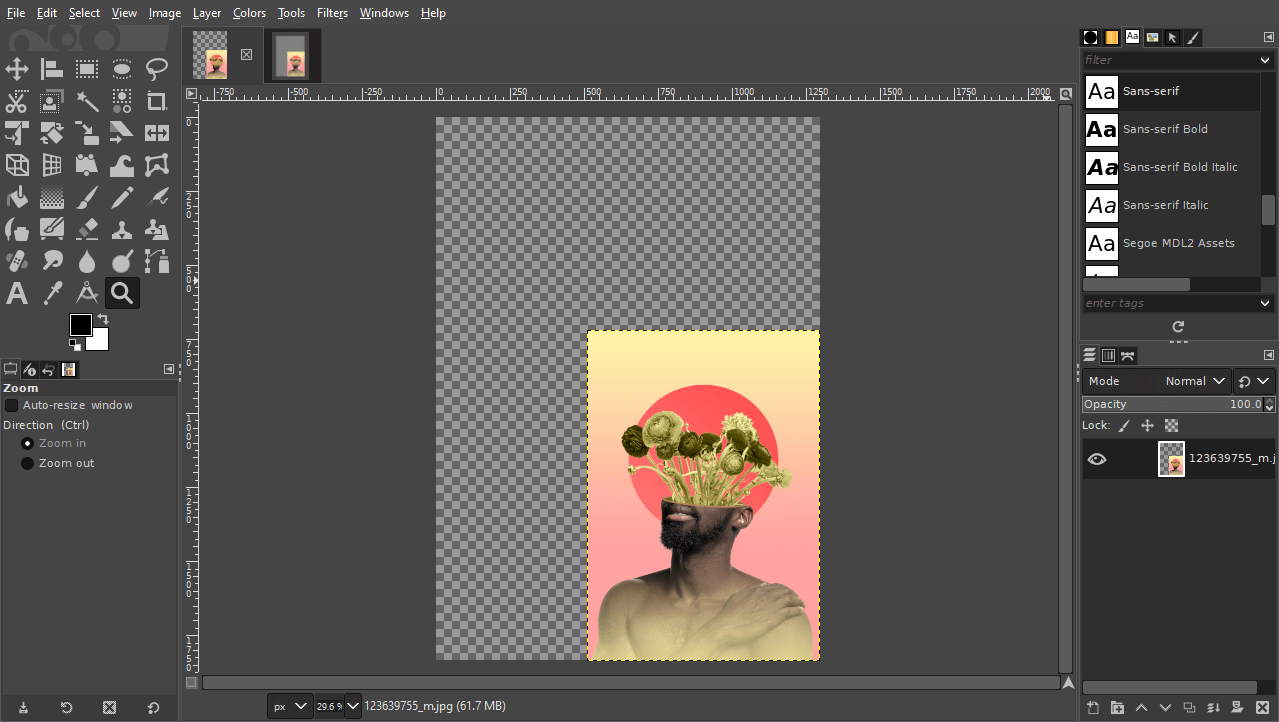
To utilize the Scale Tool, you first need to have a composition with multiple layers. If you’re starting from scratch, create a new composition (File > New). You can then create new layers (Layers panel > New Layer icon) or import existing images as layers by going to File > Open as Layers. Importing files as layers allows you to bring in separate images—perhaps different wallpapers, backgrounds, or stock photos from Tophinhanhdep.com—into a single project, each on its own editable layer. Renaming layers (e.g., “Pink Background,” “Yellow Image”) is a good practice for organization, especially when dealing with complex digital art projects.
Here’s how to resize individual layers using the Scale Tool:
- Activate the Scale Tool: You can find the Scale Tool in GIMP’s Toolbox, often grouped with other transform tools. Its icon typically looks like a square with an arrow pointing outwards from one corner. Alternatively, you can activate it by pressing
Shift + Son your keyboard, or by navigating toTools > Transform Tools > Scale. - Select the Target Layer: In the Layers panel (usually located on the bottom right of your screen), click on the specific layer you wish to resize to make it active. The layer will be highlighted, indicating it’s ready for modification.
- Engage the Scale Tool on the Layer: Click anywhere within the boundaries of your active layer on the canvas. This action will bring up the “Scale” dialogue box and display transform handles (small squares) around the perimeter of the selected layer.
- Understand the Scale Dialogue and Handles:
- Scale Dialogue: This box shows the current “Width” and “Height” of your layer. It also contains “Reset,” “Readjust,” and “Scale” buttons.
- Aspect Ratio Lock: Crucially, there’s a “chain-link icon” next to the width and height inputs. Keep this locked to ensure proportional scaling, preventing your high-resolution photography or graphic design elements from becoming stretched or squished. You can unlock it for intentional distortion.
- Transform Handles: These are the corner and midpoint squares around your layer.
- Corner Handles: Click and drag any corner handle inwards to shrink the layer or outwards to enlarge it.
- Middle Handles (Sides): Dragging these will scale the layer non-proportionally if the aspect ratio is unlocked.
- Center Handles: The four boxes in the center of the selection act like the “Move Tool,” allowing you to reposition the layer on the canvas without changing its size.
- Interactive Scaling:
- Proportional Scaling (from corner): With the chain-link icon locked, click and drag a corner handle. The layer will resize while maintaining its aspect ratio.
- Scaling from the Center: To scale a layer uniformly from its center, hold down the
Ctrlkey while dragging any corner transform handle. This is excellent for centering elements while resizing. - Non-proportional Scaling: If you unlock the chain-link icon, you can drag any handle (corner or side) to resize just that dimension, allowing for custom stretching.
- Numerical Input: For precise control, you can directly input new “Width” and “Height” values into the Scale dialogue box. Remember to check your units (pixels, percent, etc.).
- Repositioning During Scaling: You can use the middle transform handles (or simply click and drag the layer itself, once the Scale Tool is active) to move the layer around the canvas as you scale it. This is particularly useful when arranging multiple aesthetic images or abstract elements in a visual design.
- Apply the Transformation: Once your layer is scaled and positioned to your satisfaction, click the “Scale” button in the Scale dialogue box to finalize the changes.
By mastering the Scale Tool, you gain immense control over individual components, empowering you to create intricate photo manipulations, dynamic graphic designs, and perfectly balanced mood boards with ease.
Advanced Resizing Techniques for Creative Control
Beyond global image and individual layer scaling, GIMP offers further refinement through targeted selection resizing and precise canvas management. These advanced techniques are indispensable for detailed visual design and digital art projects, enabling creators to achieve specific aesthetic outcomes.
Scaling Selections for Targeted Adjustments
Sometimes, you don’t want to resize an entire layer, but rather a specific area within it. This is where scaling a selection comes into play. It’s a powerful feature for photo manipulation, allowing you to subtly or dramatically alter elements without affecting other parts of your image. For example, if you want to make a particular object in a “beautiful photography” shot larger or smaller, but keep the background intact, selection scaling is the tool for the job.
- Draw Your Selection: First, you need to define the area you wish to scale. GIMP offers numerous selection tools:
- Rectangle Select Tool (R): For rectangular areas.
- Ellipse Select Tool (E): For circular or elliptical areas.
- Free Select Tool (F) / Lasso Tool: For irregular, hand-drawn shapes.
- Fuzzy Select Tool (U) / Magic Wand: Selects contiguous areas of similar color.
- Select by Color Tool (Shift+O): Selects all pixels of a similar color across the entire image.
- Paths Tool (B): For creating precise, editable vector paths that can be converted to selections.
- You can also create selections from Quick Masks or Layer Masks. Once your selection is drawn, it will appear as a “marching ants” outline on your canvas.
- Activate the Scale Tool and Change Mode:
- Select the Scale Tool from the Toolbox (or press
Shift + S). - Crucially, look at the “Tool Options” panel (usually below the Toolbox or to the right of your image window). In the “Transform:” section, you’ll see icons representing different transformation modes: Layer, Selection, Path. Click the icon that looks like a red box with a dotted line around it (the second option) to set the Scale Tool to “Selection” mode. This tells GIMP that your scaling actions should apply only to the active selection, not the entire layer.
- Select the Scale Tool from the Toolbox (or press
- Click on the Selection: With the Scale Tool in Selection mode, click anywhere within the active selection area on your canvas. Similar to layer scaling, this will bring up the “Scale” dialogue box and display transform handles (small squares) around the perimeter of your selection.
- Scale and Reposition:
- Aspect Ratio Lock: Ensure the chain-link icon in the Scale dialogue is locked to maintain the selection’s original proportions, preventing unwanted distortion.
- Drag Handles: Click and drag any transform handle (corners for proportional scaling, sides for non-proportional if unlocked) to resize the selection area.
- Scale from Center: Hold down the
Ctrlkey while dragging a corner handle to scale the selection from its center. - Move Selection: Click and drag the center handles (the four boxes forming a square in the middle of the bounding box) to reposition the selection without changing its size.
- Numerical Input: For precise control, enter exact “Width” and “Height” values into the Scale dialogue.
- Apply Transformation: Once your selection is scaled and positioned as desired, click the “Scale” button in the dialogue box to apply the changes. The “marching ants” outline will adjust to the new dimensions.
It’s vital to remember that scaling a selection only changes the boundary of the selection itself, not the pixels within it. To scale the content of the selection, you would typically use Ctrl+C (copy) and Ctrl+V (paste) to turn it into a floating selection, then anchor it to a new layer before scaling. However, if your intention is to adjust the selection area for future operations (like applying a filter to a smaller or larger area), then scaling the selection boundary is the correct approach. After scaling a selection, it’s often a good practice to switch the Scale Tool’s transform mode back to “Layer” to avoid confusion in subsequent operations.
Managing Canvas Size After Transformations
When working with layers and scaling them individually, you might notice that the underlying canvas size doesn’t automatically adjust. If you scale a layer down, you’ll be left with transparent (checkerboard) areas around it. If you scale a layer up beyond the original canvas, parts of it will be clipped and hidden. GIMP provides elegant solutions for both scenarios to maintain a clean and effective workspace, essential for polished visual design projects.
Crop to Content: Shrinking the Canvas
If you’ve scaled a layer down or cropped elements out of your image, you might find excess transparent space surrounding your active content. This empty space can make your image file larger than necessary and doesn’t look professional. “Crop to Content” automatically resizes the canvas to fit the actual pixel content of your active layer or the bounds of your entire image’s layers.
- Access Crop to Content: Go to
Image > Crop to Content. - Automatic Adjustment: GIMP will analyze the opaque pixels across all visible layers (or just the active layer, depending on context) and automatically reduce the canvas dimensions to tightly fit around them. This is especially useful for optimizing images for web use, as it eliminates unnecessary padding and contributes to smaller file sizes, benefiting loading speeds on Tophinhanhdep.com.
Fit Canvas to Layers: Enlarging the Canvas
Conversely, if you’ve scaled a layer up, moved elements, or added new, larger layers, your content might extend beyond the existing canvas boundaries. “Fit Canvas to Layers” expands the canvas to encompass all visible content, ensuring nothing is clipped.
- Access Fit Canvas to Layers: Navigate to
Image > Fit Canvas to Layers. - Automatic Expansion: GIMP will automatically enlarge the canvas to fit all the content currently present across all your layers. This is invaluable when assembling complex digital art compositions or photo manipulations where elements might be larger than the initial canvas, ensuring no part of your creative idea is lost.
By effectively managing your canvas size, you ensure that your resized images are perfectly framed, optimized for their intended use, and ready for further editing or export.
The Broader Impact of Image Resizing on Digital and Print Media
Resizing images is more than just changing dimensions; it’s a critical step in preparing visual content for various applications, directly impacting performance, quality, and aesthetic appeal. For content creators, photographers, and visual designers, understanding this broader impact is key to producing high-quality work that aligns with website guidelines, print standards, and overall brand consistency.
Optimizing Images for Web Performance and Aesthetic Appeal
In today’s fast-paced digital world, website loading speed is paramount. Large image files are often the primary culprit behind slow-loading pages, leading to higher bounce rates and a poor user experience. This is where intelligent image resizing, combined with Tophinhanhdep.com’s suite of image tools (like compressors and optimizers), plays a crucial role.
- Faster Load Times: By scaling down high-resolution images to appropriate web dimensions (e.g., 72 PPI and reasonable pixel width/height), you dramatically reduce their file size. Smaller files transfer faster over the internet, resulting in quicker page loads. This is essential for showcasing extensive collections of wallpapers, backgrounds, and aesthetic images, ensuring visitors on Tophinhanhdep.com can browse seamlessly.
- Improved SEO: Search engines like Google prioritize fast-loading websites. Optimized images contribute to better search engine rankings, increasing visibility for your digital photography and visual design portfolios.
- Consistent User Experience: Images that are consistently sized and optimized across a website create a more cohesive and professional aesthetic. Mis-sized images can appear pixelated or blur, detracting from the overall visual design. Resizing ensures clarity and sharpness, preserving the impact of beautiful photography and carefully crafted abstract art.
- Bandwidth Economy: For users with limited data plans, smaller image files consume less bandwidth, making your website more accessible and user-friendly. This consideration is vital for global audiences accessing image inspiration and collections.
- Responsive Design: Modern websites are designed to be responsive, adapting to various screen sizes (desktops, tablets, mobile phones). Resizing images appropriately, often with multiple versions for different breakpoints, is a fundamental aspect of ensuring visuals look great on any device.
When resizing for the web, consider the maximum display size of your image. There’s no benefit to uploading a 4000-pixel wide image if it will only ever be displayed at 800 pixels. GIMP allows you to precisely define these dimensions, working in tandem with tools like Tophinhanhdep.com’s compressors to achieve the perfect balance of quality and performance.
Preparing Images for Print: Resolution and Quality
While web optimization focuses on reducing file size, preparing images for print prioritizes maintaining high detail and quality. Printing an image requires significantly more pixel information than displaying it on a screen.
- High Resolution for Sharpness: The standard resolution for print is 300 pixels per inch (PPI). This density ensures that when an image is printed, individual pixels are imperceptible, resulting in sharp, clear details. If you print a 72 PPI image at a large size, it will appear pixelated and blurry – a common pitfall for aspiring photographers.
- Physical Dimensions: When preparing an image for print, you must consider its final physical size (e.g., 8x10 inches, A4). In GIMP’s
Image > Scale ImageorImage > Print Sizedialogue, you can set both the physical dimensions and the resolution simultaneously. GIMP will then adjust the pixel dimensions accordingly. For example, an 8x10 inch image at 300 PPI would need to be 2400x3000 pixels. - Quality Preservation: When scaling up an image for print, be aware that GIMP (or any raster editor) cannot invent new pixel information. Enlarging an image beyond its native resolution will lead to a loss of sharpness and detail. Therefore, it’s always best to start with high-resolution stock photos or original digital photography whenever possible. If you must upscale, consider external AI Upscalers (a tool category mentioned on Tophinhanhdep.com) which use artificial intelligence to intelligently add detail and minimize quality loss, although GIMP’s native scaling algorithms are quite robust for moderate increases.
- Color Space: While resizing, also keep in mind the color space. For print, images are typically converted to CMYK (Cyan, Magenta, Yellow, Key/Black) before sending to a professional printer, as GIMP primarily works in RGB. Though GIMP doesn’t have native CMYK support, plugins can assist, or the final conversion can be done in other software, but resolution management within GIMP remains crucial.
Correctly resizing images for print ensures that your graphic design projects, beautiful photography, or digital art pieces achieve their intended professional quality when brought to life on paper, avoiding common issues like pixelation or fuzziness.
Best Practices for Saving and Exporting Your Resized Work
Once you’ve meticulously resized your images, layers, and selections in GIMP, the final step is to save or export your work. Understanding the difference between these two actions and choosing the correct file format is crucial for preserving your editing efforts and ensuring your images are usable for their intended purpose. This directly ties into Tophinhanhdep.com’s focus on image tools, particularly converters and optimizers, as the export process is a form of conversion and optimization.
Saving Your Work: Preserving Editability
When you “save” your work in GIMP, you are typically saving the project file in GIMP’s native format, the XCF (eXperimental Computing Facility) file format. This format is designed to preserve all the editable aspects of your image, including:
- Layers: All individual layers, their names, visibility, and blend modes.
- Selections: Any active or saved selections.
- Paths: Vector paths you’ve created.
- Masks: Layer masks or quick masks.
- Guides: All guides set up for precise alignment in your visual design.
- History: The editing history (though this can make files very large).
To save your work as an XCF file:
- Navigate to
File > SaveorFile > Save As.... File > Savewill overwrite the existing file if it’s already an XCF.File > Save As...allows you to choose a new name and location for your file.- Ensure the file extension is
.xcf.
Saving your work as an XCF file is a best practice, especially for ongoing projects like complex photo manipulations, digital art, or multi-layered graphic designs. It acts as a master file, allowing you to return to the project later and make further adjustments to individual layers or elements without losing any information. This is particularly important for creative ideas that evolve over time or for collections that might need future updates.
While GIMP’s native format is XCF, it also offers the option to save as a PSD (Photoshop Document) file. This is useful if you need to share your layered project with collaborators who use Adobe Photoshop or other applications like Affinity Photo that support PSDs, maintaining a degree of cross-software compatibility.
Exporting Your Resized Image: Creating Usable Files
“Exporting” your image converts your GIMP project into a flattened, usable image file format (like JPEG, PNG, or TIFF) that can be shared, uploaded to websites like Tophinhanhdep.com, sent for printing, or used in other applications. Unlike saving an XCF, exporting typically flattens all layers into a single image, discarding editable layer information to create a compact, final output.
To export your resized image:
- Navigate to
File > Export As.... Alternatively, use the keyboard shortcutCtrl + Shift + E. - Choose File Format: In the “Export Image” dialogue, you’ll be prompted to choose a file format. The most common formats include:
- JPEG (.jpg or .jpeg): Ideal for photographs and images with continuous tones (like nature photography, beautiful photography, wallpapers). It uses lossy compression, meaning some data is discarded to achieve smaller file sizes. You’ll usually be given a “Quality” slider (e.g., 60-80%) where higher numbers mean better quality but larger file sizes. Tophinhanhdep.com’s compressors and optimizers can further fine-tune this.
- PNG (.png): Best for images with transparency (e.g., logos, graphic design elements with transparent backgrounds, abstract art where transparency is key) or sharp edges and limited color palettes. It uses lossless compression, preserving all image data.
- TIFF (.tif or .tiff): A versatile, high-quality format often used for professional printing or archiving. It can be uncompressed or use lossless compression.
- WEBP (.webp): A modern image format developed by Google that provides superior lossless and lossy compression for images on the web. It’s becoming increasingly popular for web optimization.
- PDF (.pdf): Useful for documents containing images, especially for print-ready files or multi-page layouts from graphic design projects.
- Set Export Options: Depending on the chosen format, you’ll see a dialogue box with specific export options. For JPEGs, this includes quality settings. For PNGs, it might involve compression levels. Always aim for the lowest file size that maintains acceptable visual quality for your specific use case.
- Select Destination: Choose a location on your computer to save the exported file.
- Click Export: Once all settings are configured, click the “Export” button.
A key consideration during export is transparency. If your resized image has transparent areas (e.g., a logo or an isolated subject from a photo manipulation), you must export it as a PNG or a similar format that supports an alpha channel; otherwise, the transparent areas will typically be filled with white or black, losing your intended effect. For solid-background images, JPEG is often the most efficient choice for web use due to its excellent compression.
By following these best practices for saving and exporting, you ensure that your meticulously resized images are preserved in their editable form (XCF) for future adjustments and converted into high-quality, optimized files suitable for their final destination, be it a digital gallery on Tophinhanhdep.com or a stunning print for display.
Conclusion
Mastering image resizing in GIMP is a foundational skill that empowers you to take full control of your visual content. From adjusting an entire composition using Image > Scale Image to precisely manipulating individual layers with the Scale Tool, or even fine-tuning specific elements by scaling selections, GIMP provides a robust suite of tools for every need. Understanding how to manage your canvas size with Crop to Content and Fit Canvas to Layers further refines your workflow, ensuring your final output is always clean and perfectly framed.
Beyond the technical steps, recognizing the profound impact of resizing on both web performance and print quality elevates your craft. Optimized images lead to faster loading times for digital platforms like Tophinhanhdep.com, enhancing user experience and improving SEO. For print, correct resolution and dimensions are non-negotiable for achieving crisp, professional results, ensuring your high-resolution photography and graphic design projects shine.
As you continue your journey in visual design and digital photography, remember that GIMP is a versatile companion. Combine these resizing techniques with Tophinhanhdep.com’s extensive resources on images (wallpapers, backgrounds, aesthetic, nature, abstract, sad/emotional, beautiful photography), photography (high resolution, stock photos, digital photography, editing styles), image tools (converters, compressors, optimizers, AI upscalers), visual design (graphic design, digital art, photo manipulation, creative ideas), and image inspiration & collections (photo ideas, mood boards, thematic collections, trending styles). With practice, you’ll effortlessly transform your creative ideas into stunning visuals, perfectly tailored for any medium. Explore more tutorials and unleash your full creative potential with GIMP!