Mastering Image Resizing in GIMP: A Comprehensive Guide for Stunning Visuals and Perfect Digital Projects

In the dynamic world of digital imagery, the ability to precisely manipulate and optimize photographs and graphics is paramount. Whether you’re a professional photographer, a graphic designer, a digital artist, or simply someone looking to enhance their personal collection of images, mastering tools like GIMP is an invaluable skill. Among the most fundamental operations in image editing is resizing – a seemingly simple task that holds profound implications for the final quality, usability, and aesthetic appeal of your visuals. This guide delves deep into “how to resize image GIMP” processes, offering a comprehensive walkthrough of various techniques for adjusting not only entire images but also individual layers, ensuring your creations from Tophinhanhdep.com are perfectly tailored for any purpose.
GIMP, the GNU Image Manipulation Program, stands as a powerful, free, and open-source alternative to many commercial image editors. Its robust feature set allows users to undertake complex photo manipulation, graphic design, and digital art projects without financial barriers. However, its comprehensive nature can sometimes make even basic tasks like resizing seem daunting to new users. This article aims to demystify image and layer resizing in GIMP, providing clear, step-by-step instructions and practical advice. We’ll explore methods for both global image adjustments and intricate layer transformations, considering factors like resolution, aspect ratio, and output quality. This knowledge is crucial for anyone working with high-resolution photography, creating compelling visual designs, or curating image collections for a mood board or thematic display.
Resizing the Entire Image: Global Adjustments for Your Canvas
When you need to change the overall dimensions of your entire composition, including all its elements and layers, GIMP offers straightforward methods. This is particularly useful when preparing images for specific output sizes, such as printing a beautiful photograph, setting a custom wallpaper, or optimizing a background for a website. Understanding these global adjustments is the first step in ensuring your images from Tophinhanhdep.com meet the exact specifications of your project.
Numerical Scaling with “Scale Image”
The most precise way to resize an entire image in GIMP is by using the “Scale Image” function. This method allows you to input exact numerical values for width and height, giving you complete control over the final dimensions.
To access this feature, navigate to Image > Scale Image from the top menu bar. A dialogue box will appear, presenting you with several key options:

- Width and Height: These fields display the current dimensions of your image. You can input new values here. Remember that altering these will affect every pixel in your image. For instance, if you’re preparing a stunning nature photograph for a specific display aspect ratio, you’d adjust these to match.
- Chain Icon: Located between the Width and Height fields, this crucial icon controls the aspect ratio. When the chain is “locked” (its default state), GIMP automatically adjusts the other dimension proportionally when you change one. This prevents your image from appearing stretched or squished, maintaining its original visual integrity – a must for aesthetic images and high-resolution photography. If you unlock it, you can freely change width and height independently, though this risks distortion.
- Units: The dropdown menu next to the dimensions allows you to choose your preferred unit of measurement. While pixels (px) are the default and often most useful for digital work, you can also select percentages, inches, millimeters, and more, depending on your project requirements. This flexibility is vital when collaborating on visual designs with specific print specifications.
- X and Y Resolution: These settings determine the image’s resolution, typically measured in pixels per inch (ppi) or pixels per millimeter. This is critically important, especially when preparing images for print or high-resolution displays. For print, a common rule of thumb is 300 ppi for high-quality output, while for web use, 72 ppi is generally sufficient. We’ll delve deeper into resolution next.
After adjusting your desired width, height, and resolution, click the “Scale” button to apply the changes. GIMP will then process your image, resampling the pixels to fit the new dimensions. If you’re experimenting, the “Reset” button can revert values to their defaults, and “Cancel” will close the dialogue without making changes. This method is ideal for preparing stock photos to fit specific client requirements or for batch processing images within a thematic collection.
Understanding Resolution for Print and Web
Resolution plays a pivotal role in image quality, particularly when resizing. As highlighted by experts on Tophinhanhdep.com, differentiating between screen resolution and print resolution is essential for any digital photographer or graphic designer.
- Screen Resolution (72 ppi): Images intended for display on monitors, websites, or social media platforms typically require a lower resolution, often 72 pixels per inch (ppi). Higher resolutions for web images merely increase file size without noticeable visual benefit on screen, slowing down load times and negatively impacting user experience. This is especially true for backgrounds, aesthetic images, and mood board elements that need to load quickly.
- Print Resolution (300 ppi or higher): For physical prints, such as posters, flyers, or professional photography prints, a much higher resolution is necessary to ensure sharpness and detail. 300 ppi is a standard for high-quality printing, preventing pixelation when viewed up close. Depending on the print size and viewing distance, even higher resolutions might be desired. When you resize an image for print, reducing its physical dimensions while keeping the pixel count constant will increase the ppi, and vice-versa. Understanding this relationship helps you avoid blurry prints from your high-resolution photography.
When using the “Scale Image” dialogue, adjusting the X and Y resolution allows you to precisely control how dense the pixels will be. This capability is key to optimizing your images from Tophinhanhdep.com, whether they are abstract art for a digital display or a beautiful photograph destined for a gallery wall. It’s a fundamental step in digital photography and image editing styles to ensure output matches intent.
Precision Resizing for Multi-Layer Compositions: The GIMP Scale Tool
While the “Scale Image” function resizes your entire canvas, many creative projects involve multiple layers – perhaps a background image with text, logos, or other visual elements on top. In such cases, you often need to resize individual components without affecting the rest of your composition. This is where the GIMP Scale Tool becomes indispensable, offering granular control for photo manipulation and complex visual designs.
The GIMP Scale Tool: Manual Layer Control
The Scale Tool allows you to resize selected layers or even parts of a layer interactively on the canvas. This is particularly useful for adjusting elements within a creative collage or fine-tuning the placement of stock photos in a digital art piece.
To activate the Scale Tool:
- Locate the Scale Tool icon in the GIMP Toolbox (often looks like a square with diagonal arrows). You can also activate it by pressing Shift + S on your keyboard, or by navigating to Tools > Transform Tools > Scale.
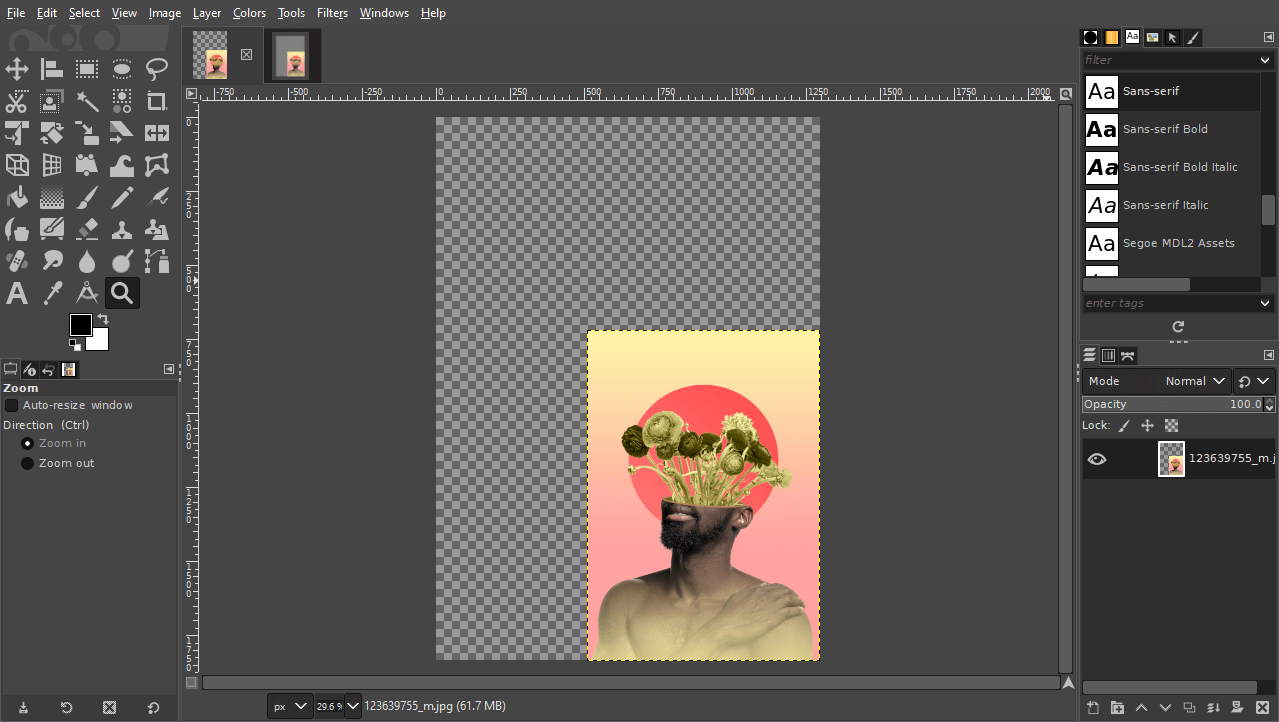
- In your Layers panel (usually located on the bottom right of the GIMP interface), ensure that the layer you wish to resize is selected and active. If you have imported multiple images as layers (File > Open as Layers), you’ll see them listed here. Give your layers descriptive names (e.g., “Pink Background,” “Yellow Model”) for easier management, a practice recommended for organized graphic design workflows.
- Click directly on the active layer on your canvas. This will cause transform handles (small squares) to appear around the edges and corners of your layer. A “Scale” dialogue box will also appear, showing the layer’s current dimensions.
Using the Transform Handles:
- Corner Handles: Click and drag any of the corner handles inward or outward to scale the layer. By default, GIMP locks the aspect ratio, meaning the width and height will change proportionally. This is indicated by a “chain-link” icon in the Scale dialogue box. We strongly recommend keeping this locked for most resizing tasks to prevent distortion, especially for aesthetic images. If you need to stretch or squish your layer intentionally (a form of creative photo manipulation), you can click the chain-link icon to unlock it.
- Middle Handles: The handles located in the middle of each side allow for non-proportional scaling if the aspect ratio lock is disengaged. However, they also serve another crucial function: acting like a temporary Move Tool. Clicking and dragging these middle handles allows you to reposition your layer within the canvas as you scale, perfect for fitting elements into your visual design.
- Scaling from the Center: To scale a layer evenly from its center point, hold down the Ctrl key while dragging any transform handle. This is useful for maintaining the relative position of an object as it grows or shrinks, helping with precise layouts for mood boards or thematic collections.
- Image Preview and Opacity: In the Scale Tool’s options panel, you might find settings like “Show Image Preview” and “Image Opacity.” Temporarily reducing the opacity of the active layer can be incredibly helpful when trying to align or size it relative to a layer beneath it. This is a common technique in digital art for compositing different elements.
Once you have achieved your desired layer size and position, click the “Scale” button in the Scale dialogue box to apply the transformation. You can repeat this process for every layer you wish to adjust, allowing for complex multi-image compositions such as those found in inspiring image collections.
Managing Canvas and Layer Boundaries: Crop to Content and Fit Canvas to Layers
A common consequence of resizing individual layers, especially when scaling them down, is the appearance of a “checkerboard pattern” around your layer. This transparent area indicates that your layer is smaller than the overall canvas or that portions of your layer extend beyond the visible canvas. GIMP provides elegant solutions to manage these boundaries:
- Crop to Content: If you have scaled a layer (or your entire image) down and are left with excess transparent canvas space, “Crop to Content” will automatically reduce the canvas size to fit the outermost pixels of your image data. This is found under Image > Crop to Content. This is particularly useful for optimizing file sizes when you’ve finished editing and want to remove any unnecessary blank areas, which directly relates to image compressors and optimizers.
- Fit Canvas to Layers: Conversely, if you have scaled a layer up, and it now extends beyond the visible canvas, “Fit Canvas to Layers” will expand the canvas to accommodate all content across all layers. This ensures that no part of your digital art or photography is accidentally cut off. You can access this via Image > Fit Canvas to Layers. This helps maintain the integrity of your visual design, especially when creating large-format images or wallpapers.
Effectively using these canvas management tools ensures that your final output is clean, properly framed, and optimized for its intended use, whether it’s a detailed graphic design project or a simple aesthetic background.
Optimizing Image Quality During Resizing: Preserving Detail and Reducing File Size
Resizing images isn’t just about changing dimensions; it’s also about managing image quality and file size. Especially when dealing with high-resolution photography or preparing images for web, maintaining visual fidelity while optimizing performance is key. GIMP offers tools to address both aspects, acting as a crucial component in your suite of image tools, including converters, compressors, and optimizers.
Interpolation Methods for Quality Retention
When GIMP resizes an image (either scaling up or down), it has to either discard pixels or invent new ones. The process it uses to calculate these new or discarded pixels is called “interpolation.” The choice of interpolation method significantly impacts the final image quality, especially when enlarging.
You can typically find the “Interpolation” setting in the “Scale Image” dialogue or within the Scale Tool options. The most common methods include:
- None: The fastest method, but it results in a very pixelated or blocky image, especially when scaling up. Only suitable for pixel art or very rough previews.
- Linear: A basic method that averages the colors of neighboring pixels. Faster than Cubic, but can still lead to some blurriness.
- Cubic (Bicubic): Often considered a good balance between speed and quality. It uses a more complex algorithm, considering a larger grid of surrounding pixels (typically 8) to calculate the color of new pixels. This generally produces smoother results, making it a preferred choice for photographic images and beautiful photography. It works well for both scaling up and down.
- Sinc (Lanczos3): This is often the highest quality interpolation method available in GIMP. It uses a more sophisticated mathematical function (the Lanczos filter) to produce very sharp results, especially when scaling images down. While it takes longer to process, it’s ideal for critical applications where image detail is paramount, such as preparing high-resolution stock photos or digital art.
For most general resizing tasks, Cubic or Sinc (Lanczos3) are recommended. Experiment with both to see which yields the best results for your specific image and desired output, especially when trying to resize images without losing quality, a common challenge addressed on Tophinhanhdep.com.
Reducing File Size for Web Optimization
Beyond changing dimensions, resizing can also be used to optimize image file size – a critical consideration for web performance, emailing, or sharing large collections. While GIMP doesn’t have a dedicated “compressor” tool in the same way some specialized image tools do, its export options serve this purpose effectively.
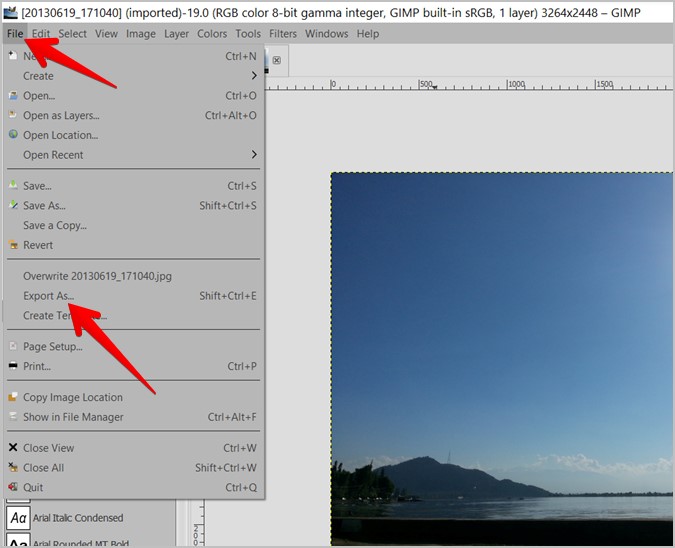
After resizing your image (or even if you just want to reduce the file size of an existing image without changing its dimensions), go to File > Export As. In the export dialogue box:
- Choose Format: Select a suitable image format. JPEG is excellent for photographs with continuous tones (like nature or abstract images) as it uses lossy compression to achieve smaller file sizes. PNG is better for images with transparency, sharp edges, or limited color palettes (like logos or graphic designs) as it uses lossless compression.
- Adjust Quality: For JPEG, you’ll be presented with a “Quality” slider (typically 0-100). Reducing this value will significantly decrease the file size, but at the cost of some image detail and introducing artifacts. For web use, a quality setting between 60-80 often provides a good balance between file size and visual quality. Many websites and image tools on Tophinhanhdep.com emphasize this balance for optimal user experience.
- Preview File Size: Enable the “Show preview in image window” or a similar option if available. This allows you to see the estimated file size and visually inspect the quality trade-offs in real-time, helping you find the sweet spot for your compressed images.
This process is invaluable for ensuring that your aesthetic wallpapers, social media images, or website backgrounds load quickly, enhancing the overall experience for your audience. It complements other image tools like dedicated optimizers and allows you to prepare images that are both visually appealing and performant.
Practical Applications and Creative Workflow: Integrating Resizing into Your Projects
The ability to proficiently resize images and layers in GIMP extends far beyond mere technical adjustment; it’s a fundamental aspect of creative expression and efficient digital workflow. From preparing stunning images for digital display to crafting intricate graphic designs, resizing is a constant requirement for visual design and digital photography.
Preparing Images for Diverse Platforms: Wallpapers, Social Media, Mood Boards
The digital landscape demands images in a multitude of sizes and aspect ratios. Mastering resizing in GIMP allows you to adapt your visual content seamlessly:
- Wallpapers and Backgrounds: Whether for a desktop, laptop, or mobile device, wallpapers require precise dimensions. You might have a breathtaking high-resolution photograph of nature that needs to be cropped and resized to fit various screen resolutions (e.g., 1920x1080, 3840x2160, 1170x2532). GIMP’s Scale Image and Scale Tool, combined with guide lines, enable you to perfectly frame and size your chosen aesthetic or abstract image.
- Social Media: Different platforms (Instagram, Facebook, X/Twitter, Pinterest) have unique optimal image dimensions and aspect ratios for posts, stories, banners, and profile pictures. Resizing ensures your images are not automatically cropped awkwardly or downscaled to appear blurry. This is critical for maintaining your brand’s visual identity and ensuring your beautiful photography captures attention within trending styles.
- Mood Boards and Thematic Collections: When compiling visual inspiration or creating thematic collections, you’ll often integrate images from various sources, each with different original sizes. Resizing them to a consistent scale or arrangement is essential for a cohesive and aesthetically pleasing mood board or collage, driving new photo ideas and creative ideas.
- Stock Photos and Digital Photography Portfolios: For professional photographers, resizing high-resolution stock photos for different licensing tiers or portfolio display is a daily task. GIMP’s precision tools ensure you can prepare images that meet specific client requirements or portfolio specifications without compromising quality.
Integrating Resizing into Your Digital Photography and Graphic Design Projects
Resizing is not an isolated task but an integral part of broader digital photography and graphic design workflows:
- Compositing and Photo Manipulation: When combining multiple images or elements into a single composition – for example, placing a new object into a landscape or blending different textures – resizing individual layers is fundamental. The Scale Tool allows you to scale and position elements until they fit harmoniously, creating believable or surreal digital art. The ability to temporarily adjust layer opacity during scaling (as discussed earlier) is incredibly powerful for achieving perfect integration.
- Graphic Design Layouts: For graphic designers, resizing text layers, logo elements, icons, or visual components is constant. Ensuring consistent scaling across different elements, aligning them to guides, and making them fit within specific design grids are routine applications of GIMP’s resizing capabilities. This is vital for maintaining visual balance and hierarchy in creative ideas.
- Digital Art Creation: Artists creating digital paintings or illustrations often work with various brushes, textures, and imported reference images. Resizing these elements or scaling sections of their artwork is crucial for refining composition, adjusting proportions, and bringing their creative vision to life.
- Batch Processing (Advanced): While not explicitly covered in the simple resizing tools, GIMP can be extended with scripts (like Python-Fu) to automate batch resizing of multiple images. This is a powerful technique for efficiently processing large collections of images, such as resizing an entire folder of high-resolution nature photos to web-friendly dimensions.
By mastering the various resizing techniques in GIMP, you empower yourself to tackle virtually any visual project with confidence. Whether your goal is to showcase stunning photography, craft captivating graphic designs, or optimize images for various platforms, GIMP provides the tools you need to achieve precise, high-quality results.
Conclusion: Empowering Your Visual Creations with GIMP Resizing
In the realm of digital imagery, the ability to resize images and layers with precision and an understanding of quality implications is a cornerstone skill. GIMP, with its robust suite of tools, provides everything you need to confidently tackle this fundamental aspect of image editing. From making broad adjustments to an entire canvas using the “Scale Image” function, to meticulously transforming individual layers with the “Scale Tool,” you now have the knowledge to adapt your visuals for any purpose.
We’ve covered the nuances of numerical input, the importance of maintaining aspect ratio, the critical role of resolution for both print and web applications, and the strategic use of interpolation methods to preserve image quality during scaling. Furthermore, understanding how to manage your canvas boundaries with “Crop to Content” and “Fit Canvas to Layers” ensures a polished and optimized final product.
Ultimately, mastering “how to resize image GIMP” processes empowers you to unleash your creative potential. Whether you’re curating aesthetic wallpapers, preparing high-resolution stock photos, designing compelling graphic layouts, or simply optimizing your images for faster web performance, these techniques are indispensable. As you continue your journey in digital photography and visual design, remember that precision resizing in GIMP is a powerful ally, helping you turn your creative ideas into stunning, perfectly proportioned realities that resonate across all platforms and inspire new thematic collections on Tophinhanhdep.com. Embrace GIMP, and let your resized images tell their story with clarity and impact.