How to Resize Images in Paint: A Fundamental Skill for Digital Content Creators

In today’s visually-driven digital world, images are everywhere. From stunning wallpapers and aesthetic backgrounds to captivating photography and intricate digital art, visual content is key to communication and expression. Whether you’re a professional photographer curating a high-resolution stock photo collection, a graphic designer crafting a new project, or simply someone looking to optimize images for online sharing, the ability to resize and manipulate images is an indispensable skill. While advanced image editing suites like Photoshop offer a plethora of complex features, sometimes all you need is a quick, straightforward solution. This is where Microsoft Paint, the venerable graphic editor built into Windows, shines.
Paint might be considered basic, but its resizing and cropping capabilities are robust enough for many common tasks. This comprehensive guide from Tophinhanhdep.com will walk you through the process of resizing and cropping images using Paint, ensuring your visuals are perfectly tailored for any platform. We’ll also touch upon how these fundamental techniques integrate with the broader world of image tools, visual design, and image inspiration that Tophinhanhdep.com champions.
Mastering Basic Image Resizing with Microsoft Paint
The most common reason to resize an image is to adjust its dimensions, typically to make it smaller for faster loading on websites or easier sharing via email. High-resolution images, while offering incredible detail for professional digital photography and large prints, can be cumbersome for web use or digital presentations. Learning to adjust these dimensions efficiently is a core aspect of digital photography workflow and content creation.
Preparing Your Image: The Essential First Steps
Before you dive into changing dimensions, it’s crucial to adopt a safe practice to protect your original work. Imagine dedicating hours to capturing a beautiful nature shot or crafting a complex abstract piece; you wouldn’t want to accidentally alter the master file.
- Make a Copy of Your Image: Always work on a duplicate. Navigate to the image file you wish to resize, right-click it, and select “Copy” from the drop-down menu. Then, right-click an empty space in the same folder or on your desktop and choose “Paste.” This creates an identical copy, leaving your original image untouched and preserved. This step is particularly important for those managing extensive image collections, ensuring the integrity of your stock photos or personal photography archives.

- Open the Image in Paint: Once you have your copy, right-click on it. In the context menu, hover over “Open with” and then select “Paint.” Alternatively, you can open Paint first (usually found in
Start Menu > All Programs > Accessories > Paint) and then go to the “File” menu (or the Paint button in older versions, typically in the upper left corner), select “Open,” and browse to your copied image.
Step-by-Step Guide to Changing Dimensions
With your image loaded into Paint, you’re ready to adjust its size. This process is straightforward and allows you to specify dimensions either by percentage or by exact pixels, catering to different requirements for visual design and digital display.
-
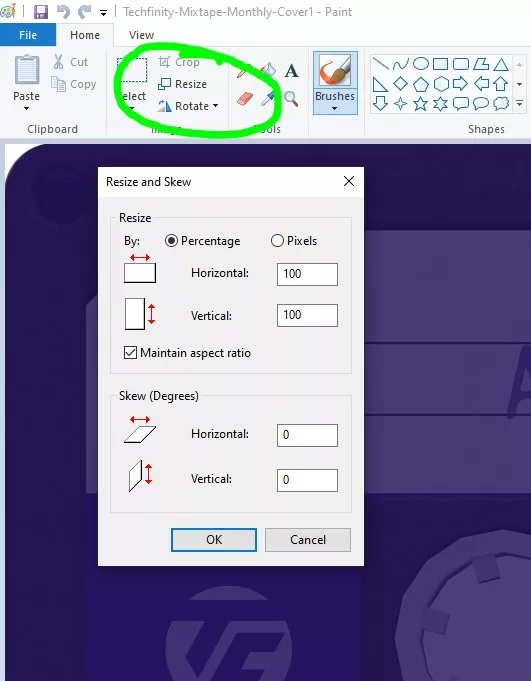
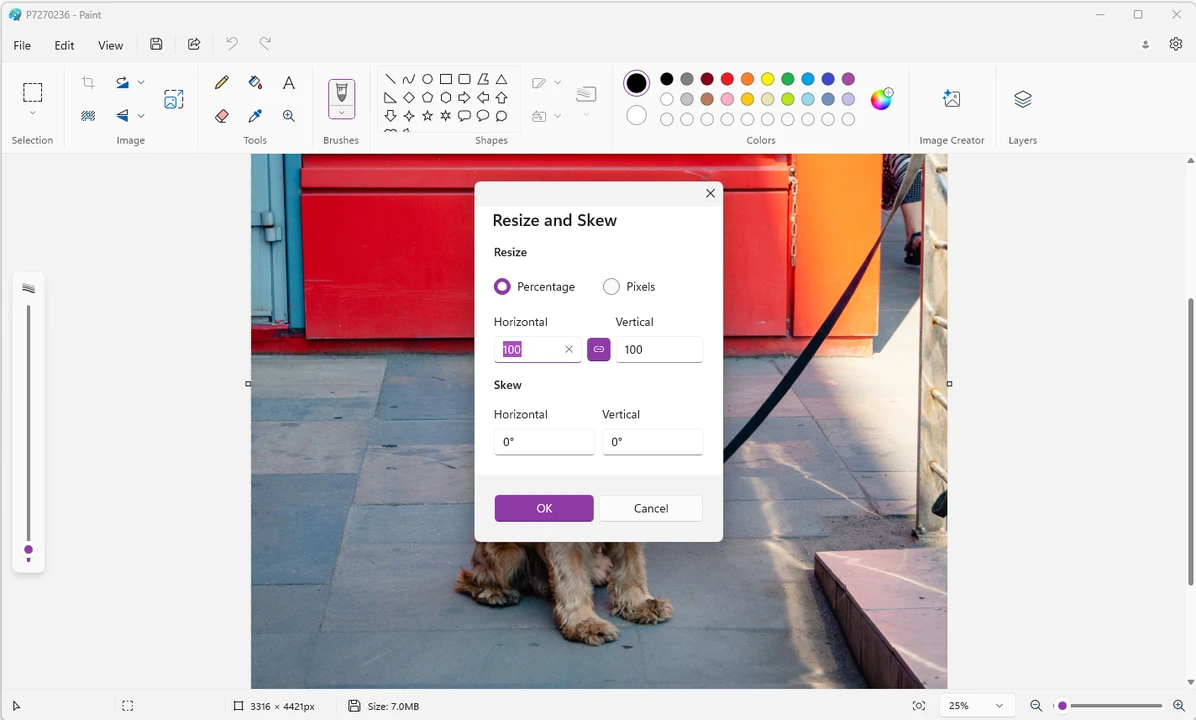
Locate the Resize Feature: On the “Home” tab of the Paint ribbon, look for the “Image” section. Here, you’ll find the “Resize” button (or “Resize and Skew” icon, depending on your Paint version). Click on it to open the “Resize and Skew” dialog box. Pay attention to the original pixel size displayed near the bottom of the Paint window before you make changes; this provides a useful reference point.
-
Choose Your Resizing Method: Inside the dialog box, you’ll be presented with two main options for resizing:
- Percentage: This is often the most intuitive method. If your image starts at 100% horizontally and vertically, entering “50” will reduce its size by half. Entering “200” would double its size. This is ideal when you need to make a general reduction or enlargement.
- Pixels: If you have specific pixel requirements – for instance, an online banner needs to be 825px wide, a website content image 580px, or a small highlight box 235px (as per common web design standards) – then selecting “Pixels” is your go-to.
-
Maintain Aspect Ratio (Highly Recommended): Below the percentage and pixel options, you’ll see a checkbox labeled “Maintain aspect ratio.” Ensure this box has a checkmark. When selected, changing either the “Horizontal” or “Vertical” value will automatically adjust the other dimension proportionally. This is critical for preserving the original look of your photo, preventing it from appearing stretched or squashed. For most image optimization tasks, maintaining the aspect ratio is paramount for aesthetic and professional results, especially for beautiful photography or digital art where composition is key.
-
Enter Your Desired Values:
- If “Percentage” is selected: Type a number into the “Horizontal” text box. As long as “Maintain aspect ratio” is checked, the “Vertical” value will update automatically. Numbers below 100 will shrink the image, while numbers above 100 will enlarge it. Be mindful that significantly enlarging an image will typically reduce its quality, making the pixels more visible and the image appear blurry or pixelated.
- If “Pixels” is selected: Enter your desired pixel value into either the “Horizontal” or “Vertical” text box. Again, with “Maintain aspect ratio” enabled, the other dimension will adjust automatically. If you uncheck “Maintain aspect ratio,” you can enter independent horizontal and vertical pixel values, but this risks distorting your image. Only do this if you understand the implications and have a specific visual design need that requires non-proportional scaling.
-
Apply and Save Your Changes: Click “OK” to apply the resizing to your image in Paint. If you’re happy with the result, proceed to save it. Go to the “File” menu (or Paint button) and select “Save as.”
- Choose a Format: For most photographs, “JPEG” is the recommended format. It offers good compression, resulting in smaller file sizes suitable for web and email, and is widely supported. Other options like PNG (good for images with transparency or sharp lines, like logos), BMP (uncompressed, larger files), or GIF (for simple animations or images with limited colors) are also available but less common for general photo resizing.
- Name and Location: Enter a short, descriptive name for your resized file, ideally without spaces (e.g.,
my_resized_image.jpg). Choose a destination on your computer where you want to save it. Click “Save.” Your image is now ready for upload or sharing.
Cropping Images for Impact and Efficiency
Resizing changes the overall dimensions of an image, but sometimes you need to remove unwanted portions of the visual canvas. This is where cropping comes in handy. Cropping allows you to focus on a specific area of an image, remove distracting elements, or adjust the composition to better suit your visual design ideas.
Understanding the Art of Cropping
Cropping is more than just cutting off edges; it’s a powerful tool for photo manipulation and enhancing the narrative of your images. Unlike enlarging, which can degrade quality, cropping retains the quality of the selected area. It also inherently reduces the file size, making it an effective method for image optimization. For graphic designers working on mood boards or thematic collections, precise cropping can dramatically improve the aesthetic coherence of their layouts.
Executing a Precise Crop
Just like with resizing, it’s wise to work on a copy of your image. This ensures your original high-resolution photography or digital art remains intact.
-
Open Your Image in Paint: Follow the same steps as above to open your copied image in Microsoft Paint.
-
Select the Selection Tool: On the “Home” tab, in the “Image” section, locate the “Select” button. Click the small arrow beneath it to reveal a drop-down menu.
- Rectangular selection: This is the most common and easiest option for cropping, allowing you to draw a perfect rectangular selection.
- Free-form selection: If you need to select an irregular shape, this tool lets you draw a custom outline. For typical cropping, however, the rectangular selection is sufficient.
-
Draw Your Crop Area: With “Rectangular selection” chosen, click and drag your mouse over the part of the image you wish to keep. A rectangular dotted line will appear, outlining your selection. Everything inside this dotted line will remain; everything outside will be removed.
- Refining Your Selection: If you’re trying to remove a border or perfectly frame a subject, start from a corner (e.g., top-left) and drag diagonally to the opposite corner (e.g., bottom-right). If you’re not happy with your selection, simply click anywhere outside the dotted lines to deselect and start over.
-
Perform the Crop: Once you have precisely outlined the area you want to keep, click the “Crop” button. This button is also located in the “Image” section of the “Home” tab, usually to the right of the “Select” tool. Clicking it will instantly remove all the pixels outside your selection, leaving only the focused portion of your image.
-
Save Your Cropped Image: As with resizing, save your work. Go to “File” > “Save as,” choose your preferred format (JPEG is often best for photos), give it a descriptive name, and select a save location. Your image is now perfectly cropped and optimized.
Beyond Basic Resizing: When to Consider Advanced Tools
While Microsoft Paint is excellent for quick, fundamental image adjustments, the vast landscape of digital imaging often calls for more specialized tools. Tophinhanhdep.com, with its focus on high-quality images and advanced editing, recognizes that different projects demand different levels of sophistication.
Optimizing for Web and Digital Display
For professional web design, creating stunning backgrounds, or optimizing images for various screen sizes, precise control over file size and quality is paramount. While Paint can reduce file size by shrinking dimensions, it doesn’t offer advanced compression algorithms. This is where dedicated image optimizers and compressors offered by Tophinhanhdep.com come into play. These tools can drastically reduce file sizes without noticeable loss in visual quality, ensuring faster website loading times and a better user experience for your beautiful photography or abstract art collections. For images intended for digital art galleries or online portfolios, sophisticated compression helps balance visual fidelity with performance.
Handling Multiple Images: Batch Processing Solutions
Imagine having dozens, or even hundreds, of stock photos from a recent digital photography session that all need to be resized to specific dimensions for a website gallery. Manually opening and resizing each one in Paint would be incredibly tedious and time-consuming.
This is a scenario where Tophinhanhdep.com’s advanced image tools become invaluable. Features like batch image resizers allow you to process multiple images simultaneously. You simply select a folder of images, specify your desired dimensions (either by percentage or pixels), and the tool automatically resizes and saves them, often maintaining the aspect ratio smartly even with non-proportional pixel inputs. This kind of efficiency is crucial for content creators who frequently manage large volumes of visual content, from thematic collections to aesthetic wallpapers. Similarly, for converting image formats, AI upscalers to enhance resolution, or even image-to-text tools, Tophinhanhdep.com offers a suite of advanced functionalities that extend far beyond Paint’s capabilities.
Best Practices and Creative Applications
Beyond the technical steps, understanding the nuances of resizing and cropping can significantly elevate your visual content, whether for graphic design, digital art, or enhancing your personal image inspiration boards.
Maintaining Image Quality and Aspect Ratio
Always prioritize maintaining the aspect ratio unless there’s a specific artistic reason to distort an image. Disproportionate resizing can lead to unprofessional and unappealing results. Furthermore, be cautious when enlarging images. Unlike vector graphics, raster images (like photos) consist of pixels. When you enlarge a raster image significantly, Paint has to “guess” new pixel data, which often results in a pixelated or blurry appearance. If you need to enlarge a lower-resolution image without losing quality, consider using advanced AI upscalers available through platforms like Tophinhanhdep.com, which employ sophisticated algorithms to add detail and maintain sharpness.
Resizing for Specific Visual Design Needs
Different digital canvases require different image dimensions.
- Web Banners: Often have precise pixel requirements (e.g., 825px wide for a full-width banner).
- Social Media Profile Pictures: Usually square and of a specific size to avoid cropping by the platform itself.
- Website Content Images: Sized to fit within content columns (e.g., 580px wide) to ensure readability and consistent visual flow.
- Highlight Boxes/Thumbnails: Smaller, often square or rectangular, images (e.g., 235px) that serve as visual cues.
- Mood Boards & Thematic Collections: Images might need to be uniformly sized or cropped to create a cohesive aesthetic, a key component of visual design and creative ideas.
By understanding these requirements and using Paint’s resizing and cropping features, you can ensure your images integrate seamlessly into any visual layout.
Adding Captions in Paint
Paint also offers a simple text tool that allows you to add captions directly to your resized or cropped images. On the “Home” tab, locate the “Text” tool (represented by an ‘A’ icon). Click on it, then click on your image where you want to add text. A text box will appear, allowing you to type your caption and adjust its font, size, and color. This can be useful for quickly labeling images for presentations or personal collections.
Conclusion
Microsoft Paint remains a reliable, accessible tool for fundamental image resizing and cropping. It’s an excellent starting point for anyone in digital photography, visual design, or simply managing personal image collections like wallpapers and backgrounds. Mastering these basic functions empowers you to prepare your images for various digital contexts, from email attachments to web content.
However, as your needs evolve and projects become more complex, the comprehensive suite of image tools at Tophinhanhdep.com offers advanced solutions for everything from batch processing and AI upscaling to format conversion and sophisticated compression. By combining the simplicity of Paint for everyday tasks with the power of specialized tools for professional workflows, you can ensure your visual content consistently meets the highest standards of quality, efficiency, and aesthetic appeal, truly bringing your creative ideas to life.