How to Resize Images Effectively for Optimal Visuals and Performance

In the vast and ever-evolving landscape of digital media, images are the cornerstone of communication, expression, and engagement. From breathtaking Wallpapers and evocative Backgrounds to the intricate details of Abstract art and the profound emotion captured in Sad/Emotional or Beautiful Photography, visuals define our online experience. As a hub for premium visual content and expert guidance, Tophinhanhdep.com understands that the journey of an image from raw capture to final display often involves a crucial, yet frequently misunderstood, step: resizing.
Resizing an image isn’t merely about making it bigger or smaller; it’s an art and a science that profoundly impacts image quality, website performance, and the overall professional impression you convey. Whether you’re a seasoned Digital Photography enthusiast, a Graphic Design professional, or someone simply looking to optimize a picture for a social media post, mastering image resizing is indispensable. Poorly resized images can appear stretched, pixelated, blurry, or significantly slow down a website, undermining even the most stunning High Resolution Stock Photos. This comprehensive guide, informed by the expertise at Tophinhanhdep.com, will walk you through the essential techniques, tools, and considerations for resizing images correctly, ensuring your visuals always look their best and perform optimally across all platforms.
The Indispensable Art of Image Resizing: Why Quality and Proportion Matter
The digital realm is a dynamic stage where every pixel plays a role. In a world saturated with visual content, the distinction between professional and amateur often hinges on the quality and presentation of images. Tophinhanhdep.com, with its rich collections spanning Aesthetic, Nature, and various Thematic Collections, emphasizes that optimal image sizing is not just a technicality but a critical component of effective Visual Design and impactful storytelling.
Why Resize Images Without Losing Quality
The primary goal of resizing images is to achieve the desired dimensions and file size without compromising the integrity and visual appeal of the original. High-quality images lend credibility, professionalism, and enhance user engagement. Conversely, blurry, distorted, or pixelated images can diminish trust, detract from your message, and make your content appear amateurish. Even for something as seemingly minor as a profile picture or a thumbnail for a blog post on Tophinhanhdep.com, the quality of your images directly impacts how your audience perceives your brand or content.
Understanding how to resize an image and preserve its quality is paramount. Proper techniques ensure that your images maintain their aspect ratio, sharpness, clarity, and color accuracy, irrespective of the new dimensions. This allows your visuals to continue captivating your audience, effectively communicating your ideas, and representing your brand or personal aesthetic in the best possible light. Whether you are showcasing your latest Photo Ideas, building a Mood Board, or preparing images for a Digital Art exhibition, quality preservation during resizing is non-negotiable.

How to Resize an Image Without Stretching It
One of the most common pitfalls in image resizing is inadvertently stretching or warping the image. This usually occurs when the aspect ratio – the proportional relationship between an image’s width and height – is not maintained. Many instinctively drag the corners of an image in basic document editors like Microsoft Word or Google Docs. While convenient, this method almost always leads to distortion, making the image appear elongated or squashed, and often blurry.
To prevent stretching, it is crucial to constrain proportions or maintain aspect ratio during the resizing process. Most professional and even basic image editing tools offer this option, often represented by a chain-link icon or a checkbox. When this option is enabled, adjusting one dimension (either width or height) will automatically adjust the other dimension proportionately, ensuring the image scales uniformly without distortion. This simple yet critical step guarantees that your resized image retains its original visual integrity, looking crisp and professional, whether it’s a vibrant landscape from a Nature collection or a detailed piece of Photo Manipulation.
How to Resize an Image Without Losing Quality
Maintaining quality while resizing, especially when enlarging, presents a unique challenge due to the inherent nature of digital images.
Making an Image Smaller: Reducing an image’s size or dimensions is generally less problematic in terms of quality. When you decrease the dimensions, you are essentially discarding pixels, which usually doesn’t lead to noticeable quality degradation unless the reduction is extremely drastic. The key is to reduce the file size optimally without introducing unnecessary compression artifacts.
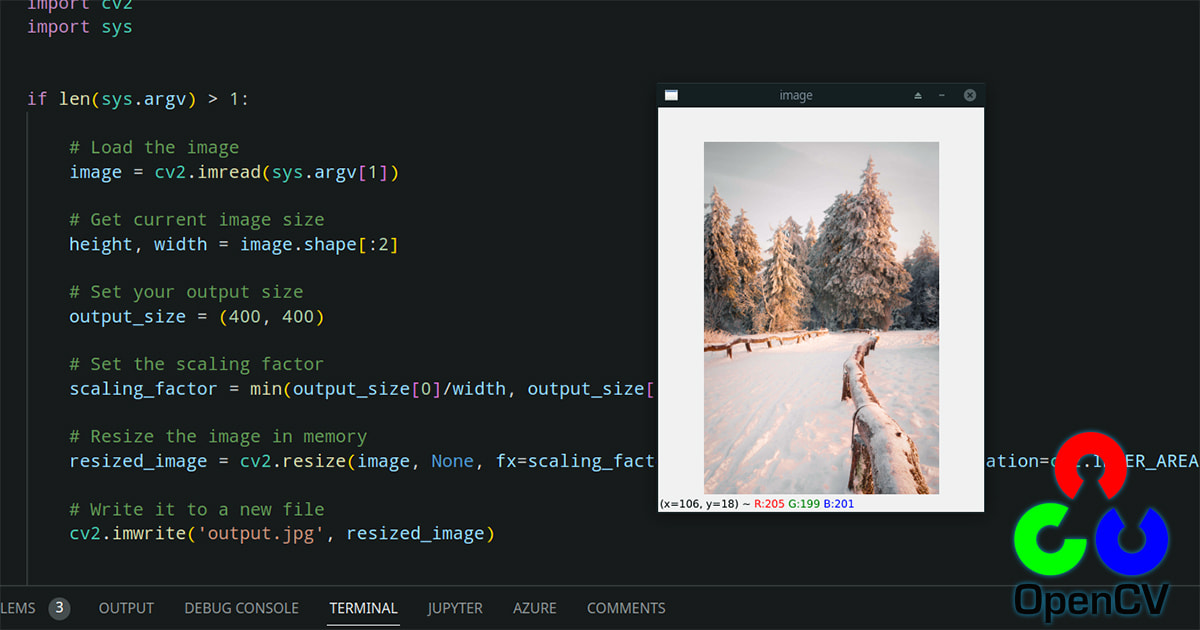
Making an Image Larger: Enlarging an image, however, is a different story. When you increase the dimensions of a raster (bitmap) image (like JPEGs, GIFs, or TIFFs), the software has to “invent” new pixels to fill the expanded space. This process, known as resampling, can lead to blurriness, pixelation, and a general loss of sharpness if not handled correctly. This is why starting with a higher-resolution image than you think you’ll need is always recommended. If you begin with a large, high-resolution image, you can always crop it or reduce its size without worrying about significant quality loss.
Bitmap vs. Vector Files: It’s important to distinguish between bitmap and vector image formats.
- Bitmap (Raster) Files: These are composed of a grid of pixels (e.g., JPEGs, PNGs, GIFs, TIFFs). Photographs, scanned documents, and most images you capture with a camera or screenshot tool are bitmap files. They have a fixed resolution, meaning their quality degrades when enlarged beyond their original pixel dimensions.
- Vector Files: These are composed of mathematical paths, curves, and points (e.g., EPS, SVG, AI). Logos, illustrations, and digital art created in programs like Adobe Illustrator are typically vector files. They can be scaled to any size – from a tiny icon to a giant billboard – without any loss in picture quality because the software recalculates the paths rather than manipulating fixed pixels.
For bitmap images, the challenge is to use resampling methods that intelligently interpolate new pixel data to minimize quality loss. This is where advanced tools and understanding resampling options become vital for anyone dealing with Photography, Digital Art, or preparing images for print. Tophinhanhdep.com advocates for these careful considerations to ensure your visual assets always meet the highest standards.
Mastering Image Resizing with Professional and Free Tools
The digital toolkit for image manipulation is vast, ranging from industry-standard professional software to free, accessible online utilities. Tophinhanhdep.com believes in empowering creators with the knowledge to choose the right tool for their specific needs, whether it’s for intricate Photo Manipulation or quick optimization of images for a website.
How to Resize Images in Photoshop
Adobe Photoshop is the undisputed industry leader for Image Editing Styles, offering unparalleled control over every aspect of an image, including resizing. It’s available in select computer labs on campus for students and professionals alike, providing a robust environment for precise image adjustments.
To resize an image in Photoshop, follow these detailed steps:
- Open Your Image: Launch Photoshop and open the image you wish to resize.
- Access Image Size: Go to “Image” in the top menu bar, then select “Image Size.” This will open a dedicated dialog box.
- The Image Size Dialog Box: This updated dialog box offers numerous features for ease of use and precision:
- Preview Window: A preview image displays the effect of your resizing parameters in real-time. You can resize the dialog box itself to enlarge the preview.
- Navigation and Magnification: Drag within the preview to view different areas. Ctrl-click (Windows) or Command-click (Mac OS) to increase magnification, and Alt-click (Windows) or Option-click (Mac OS) to reduce it. The current magnification percentage briefly appears at the bottom.
- Constrain Proportions: Crucially, ensure the “Constrain Proportions” option is enabled. This is represented by a link icon between the Width and Height fields. Click it to toggle on/off. When enabled, changing one dimension automatically adjusts the other, preventing stretching. If you need to scale width and height independently (rarely recommended for quality), unlink them.
- Dimensions Pop-up Menu: Choose different units of measurement (pixels, inches, centimeters, percent) to display the dimensions of the final output. You can also set units for Width and Height independently.
- Resample Option: This is arguably the most critical setting for quality.
- Selected (Resample ON): If “Resample” is selected, Photoshop will adjust the total number of pixels in the image when you change its size or resolution. This is necessary for making images larger (interpolation) or smaller (decimation) and is where resampling methods come into play.
- Deselected (Resample OFF): If “Resample” is deselected, you can change the image size or resolution without changing the total number of pixels. This means you’re only changing the pixel density (e.g., for printing), which directly affects the physical print size but not the digital dimensions.
- Fit To Menu (Optional):
- Choose a preset to resize the image to common dimensions.
- Select “Auto Resolution” to resize for a specific printing output. In the “Auto Resolution” dialog box, specify the “Screen” value (lines per inch) and select a “Quality” level.
- Input Dimensions and Resolution:
- Document Size: When “Resample” is off, these fields control the physical print size and resolution. For printing, select “inches” for the unit of measurement. Check that the resolution is no lower than “200 pixels/inch,” with “300 pixels/inch” being ideal for high-quality printing. Input your desired width and height.
- Pixel Dimensions: When “Resample” is on, these fields directly control the pixel width and height. Enter values for Width and Height in your preferred units.
- File Size: The new image file size appears at the top of the dialog box, showing the old file size in parentheses, helping you monitor the impact of your changes.
- Scale Styles (Gear Icon): If your image has layers with styles (like drop shadows or strokes), select “Scale Styles” from the gear icon in the upper right corner to scale these effects proportionally with the resized image. This option is only available when “Constrain Proportions” is enabled.
- Confirm and Save: Once all options are set, click “OK.”
- Save Your File: Go to “File” > “Save As” to save your resized image. It’s a good practice to save it with a new name to preserve your original file, especially when dealing with valuable Photography or Digital Art assets. To restore initial values in the “Image Size” dialog, hold Alt (Windows) or Option (Mac OS) and click “Reset.”
Resampling Options | Photoshop
When “Resample” is enabled, Photoshop offers several interpolation methods to calculate new pixels, each suited for different scenarios:
- Automatic: Photoshop intelligently chooses the best resampling method based on the document type and whether you are scaling up or down. A good starting point for most users.
- Preserve Details (enlargement): Specifically designed for upsizing images, this method includes a “Noise reduction” slider to smooth out artifacts that can appear when enlarging. Ideal for maintaining clarity in High Resolution images.
- Bicubic Smoother (enlargement): A superior method for enlarging images. Based on Bicubic interpolation, it’s tailored to produce smoother results, minimizing jagged edges and pixelation.
- Bicubic Sharper (reduction): Excellent for reducing image size while maintaining detail. This method, based on Bicubic interpolation, applies subtle sharpening. If it oversharpens, the standard Bicubic method might be preferred.
- Bicubic (smoother gradients): A slower but more precise method. It examines surrounding pixel values and uses complex calculations to produce smoother tonal gradations than simpler methods like Nearest Neighbor or Bilinear. Recommended for general resizing where quality is paramount.
- Bilinear: A mid-quality method that adds pixels by averaging the color values of surrounding pixels. It produces better results than Nearest Neighbor but is less precise than Bicubic options.
- Nearest Neighbor (hard edges): The fastest but least precise method. It replicates existing pixels, preserving hard edges in illustrations or graphics that are not anti-aliased, and results in smaller files. However, it can introduce “jagged” or “stair-stepping” effects, especially when distorting or significantly scaling an image. Generally not recommended for photographic images.
Choosing the correct resampling option is crucial for achieving the desired outcome, particularly when working with delicate visuals like Beautiful Photography or intricate Digital Art from Tophinhanhdep.com’s collections.
Free and Easy Image Resizing Tools
For those who don’t have access to Photoshop or need quicker, less complex solutions, several free tools offer excellent image resizing capabilities. These are perfect for everyday tasks like preparing images for web portfolios, social media, or basic document integration. Tophinhanhdep.com encourages exploring these alternatives for their convenience and efficiency.
-
Preview (Mac): If you’re a Mac user, you have a powerful, pre-installed tool at your disposal.
- Open your image in Preview.
- Go to “Tools” > “Adjust Size.”
- In the dialog box, ensure “Scale proportionally” and “Resample image” are checked to avoid warping and maintain original proportions.
- Adjust dimensions (pixels, inches, etc.) and resolution as needed.
-
Paint (PC): For Windows users, Paint is a readily available, basic photo editor.
- Open your image in Paint.
- Click “Resize” (or “Image” > “Resize/Skew” in older versions).
- You can set dimensions by percentage or pixels.
- Select “Maintain aspect ratio” to prevent distortion.
- A more advanced, free version, Paint.NET, is available for download, offering more robust editing and retouching tools, making it a great step up from basic Paint.
-
GIMP (GNU Image Manipulation Program): GIMP is a fantastic open-source alternative to Photoshop, offering professional-level editing and retouching tools for both Mac and PC. It’s fast, lightweight, customizable, and user-friendly.
- Download and install GIMP from its official website.
- Open your image.
- Go to “Image” > “Scale Image.”
- Enter your desired width and height, ensuring the chain-link icon is active to maintain aspect ratio.
- Choose an interpolation method (similar to Photoshop’s resampling options, with ‘Cubic’ being a good general choice).
- Click “Scale.”
-
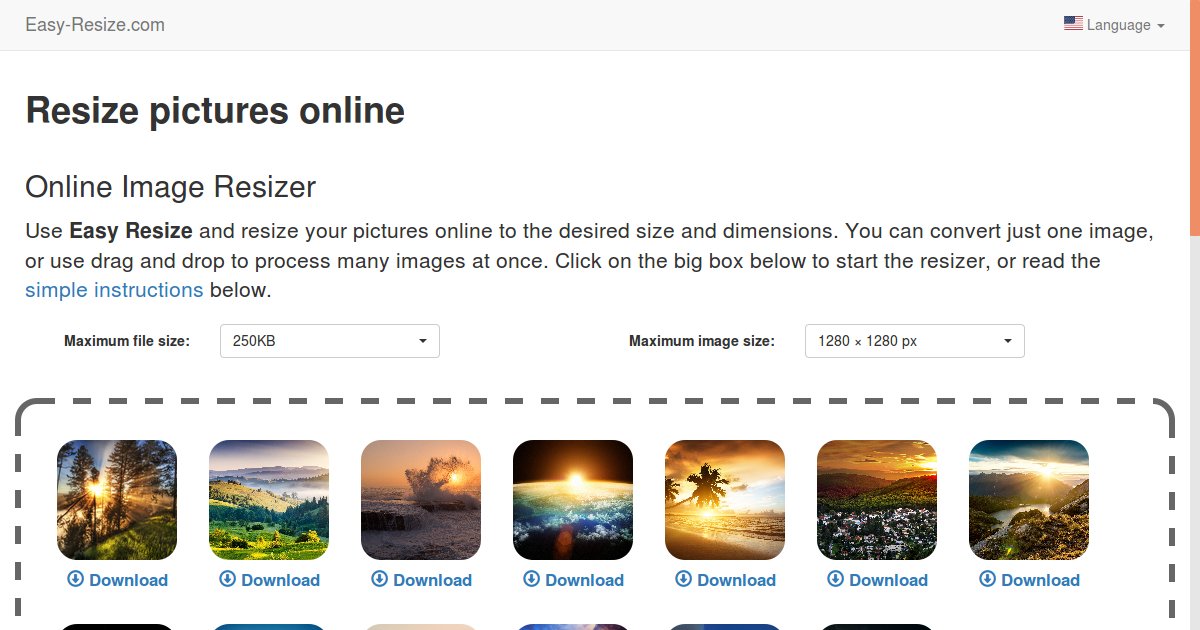
Simple Image Resizer (Online/Chrome Extension/Mobile): As its name suggests, this tool excels at one thing: resizing images quickly. It’s ideal when you’re in a hurry and need a straightforward solution.
- Visit their website (or use the Chrome extension/mobile version).
- Upload your image.
- Select “dimensions” or “percentage.”
- Enter the desired width or height (the tool usually handles proportionality automatically).
- Click “Resize,” and your proportionate, resized image is ready for download. This is a great tool for quickly optimizing images for sharing on Tophinhanhdep.com or other social platforms.
-
Pic Resize (Online Batch Resizer): For users who need to process multiple images simultaneously, Pic Resize offers a batch resizing mode. This is particularly useful for preparing entire Image Collections or portfolios, like those for CaFÉ™ portfolio requirements (JPEG only, min 1200 pixels longest side, 72 ppi/dpi, 5 MB max).
- Visit their website.
- Upload multiple images.
- Select your size preference.
- Click “Submit Batch Job!”
- Note: Batch mode typically doesn’t support cropping or special effects, which must be done individually in “Normal Mode.”
These tools, highlighted by Tophinhanhdep.com, provide versatile solutions for a wide range of resizing needs, from casual adjustments to preparing professional submissions.
Optimizing for Performance and Visual Integrity: Advanced Resizing Strategies
Beyond the basic mechanics of resizing, understanding the interplay between dimensions, resolution, and file format is crucial for achieving optimal results. Tophinhanhdep.com consistently emphasizes that effective Image Optimization is key for everything from rapid website loading speeds to the pristine display of Digital Photography and high-quality Graphic Design.
Tips for Resizing Images
Incorporating these tips into your workflow will ensure your resized images not only look great but also contribute positively to overall performance, especially for online platforms where every kilobyte counts.
Dimensions: Finding the Right Fit
The “correct” dimensions for an image are highly dependent on its intended use. There is no one-size-fits-all answer, but general guidelines can help:
- For Web Screens: Dimensions between 600 and 1200 pixels on the longest side are generally a good fit for most screens without compromising quality or causing excessively slow load times. This range typically works well for blog post images, small banners, or gallery thumbnails.
- Specific Use Cases:
- Website Banners/Headers: May require much larger widths (e.g., 1920 pixels or more) to span the full width of a screen, but their height should be controlled to avoid pushing content too far down.
- Social Media: Each platform (Facebook, Instagram, Twitter, LinkedIn) has its own recommended image dimensions for profile pictures, cover photos, posts, and stories to ensure optimal display and avoid automatic cropping or compression.
- High-Resolution Photography Galleries: Images on Tophinhanhdep.com’s High Resolution sections might be larger to allow for detailed viewing, but even these are optimized to balance detail with web performance.
- Print: Requires much higher resolution (e.g., 300 pixels/inch) and physical dimensions (inches or centimeters) compared to web images, where 72-96 ppi/dpi is standard.
Ultimately, the goal is to ensure that your resized image looks crisp and clear on its target platform without causing layout issues or significantly slowing down your website’s load times. Always consider the platform’s requirements and the visual impact you want to achieve.
Lowest File Size vs. Quality: The Balancing Act
The key to effective image resizing lies in finding the “sweet spot” between reducing the file size and maintaining perfect quality. Larger file sizes lead to slower load times, which can negatively impact user experience (leading to higher bounce rates) and even search engine rankings.
- Aim for < 100KB: As a general rule, Tophinhanhdep.com suggests aiming for a file size of 100KB or less for most web images. This size typically provides a good balance between image quality and web performance. For hero images or full-screen backgrounds, you might go slightly higher (e.g., up to 200-300KB), but always strive for the smallest possible file size without visible degradation.
- Compression: This is where Image Tools like Compressors and Optimizers become invaluable. These tools reduce file size by intelligently removing unnecessary data or reducing the quality in ways that are imperceptible to the human eye. Most image editing software (including Photoshop and GIMP) allows you to set the compression level when saving a JPEG. Experiment to find the lowest setting that still looks good.
- Image-to-Text for SEO: While not directly related to resizing, remember that search engines cannot “see” images. Using descriptive alt text and captions for your images not only helps with accessibility but also boosts your SEO, making your stunning visuals from Tophinhanhdep.com more discoverable.
JPG vs. PNG: Choosing the Right Format
Understanding the differences between common image file formats is essential for making informed decisions about resizing and overall image optimization. Tophinhanhdep.com, with its diverse categories like Aesthetic and Nature photography, leverages the strengths of various formats.
-
JPG (JPEG):
- Best for: Photographic images, images with continuous tones and many colors (e.g., Wallpapers, Backgrounds, Beautiful Photography).
- Compression: Uses “lossy” compression, meaning some data is discarded permanently to achieve smaller file sizes. You can control the compression level (quality).
- Resizing & Compression: JPG files are generally easier to resize and compress for web use compared to PNGs, making them ideal for performance-critical scenarios.
- Transparency: Does NOT support transparency. If any part of your image needs to be transparent, a JPG is not suitable.
-
PNG (Portable Network Graphics):
- Best for: Images requiring transparency (e.g., logos, icons, graphics with cut-out backgrounds), images with sharp lines and areas of solid color (e.g., Graphic Design elements, Digital Art).
- Compression: Uses “lossless” compression, meaning no data is discarded. This results in higher quality but generally larger file sizes compared to JPGs for the same visual complexity.
- Resizing & Compression: While PNGs can be resized, compressing them for web use often requires specialized optimizers, or it’s often better to convert them to JPGs if transparency is not needed, to significantly reduce file size while maintaining quality.
- Transparency: Supports alpha channel transparency, allowing for varying degrees of opacity, which is crucial for intricate Visual Design and Photo Manipulation.
Practical Advice:
- If your image is a photograph and does not require transparency, save it as a JPG and experiment with compression levels to find the optimal balance between file size and visual quality.
- If your image needs a transparent background (e.g., a logo to be placed over various backgrounds on Tophinhanhdep.com), or if it’s a graphic with sharp edges and minimal color variation, use PNG.
- Tools like Tophinhanhdep.com’s Converters can help you switch between formats when necessary, ensuring you always have the right tool for the job.
Leveraging AI Upscalers and Advanced Techniques
The landscape of image manipulation is continually evolving. As Tophinhanhdep.com explores Trending Styles and innovative approaches to visual content, tools like AI Upscalers are becoming increasingly relevant.
- AI Upscalers: These Image Tools use artificial intelligence to intelligently enlarge images beyond their original resolution with minimal quality loss. Unlike traditional resampling methods that “guess” new pixel data, AI upscalers analyze image patterns and reconstruct details, often producing remarkably sharp and clear results even from lower-resolution sources. This is a game-changer for those who need to scale up older images or prepare smaller digital art pieces for larger prints or displays without pixelation. While they can’t create information that wasn’t there, they are far superior to conventional enlargement methods.
- Batch Processing: For large collections of images, especially when dealing with Stock Photos or preparing multiple assets for Image Inspiration & Collections, batch processing capabilities (like those in Pic Resize or even Photoshop actions) save immense amounts of time.
- Dedicated Optimizers: Beyond basic resizing, specialized Optimizers focus purely on reducing file size without perceptible quality loss. They analyze image data and apply advanced compression algorithms that often outperform standard “Save for Web” options in general editors.
By incorporating these advanced techniques and understanding the nuances of image formats, dimensions, and compression, you can ensure that every image you present, from a simple background to a complex piece of Photo Manipulation, is perfectly optimized for its purpose. Tophinhanhdep.com is dedicated to providing these insights, empowering you to create and share visual content that is both stunning and high-performing.
Conclusion: Crafting Visual Excellence with Smart Resizing
In the vibrant ecosystem of digital content, images are not just embellishments; they are integral to storytelling, branding, and user engagement. From the breathtaking vistas captured in Nature Photography to the intricate designs of Digital Art, every visual asset contributes to the overall narrative and aesthetic. As a leading resource for Images, Photography, and Visual Design, Tophinhanhdep.com firmly believes that mastering the art of image resizing is a foundational skill for anyone interacting with digital media.
This guide has traversed the critical aspects of resizing, from the precise control offered by professional tools like Photoshop and its nuanced resampling options, to the accessibility of free, user-friendly alternatives such as Preview, Paint, GIMP, Simple Image Resizer, and Pic Resize. We’ve delved into the fundamental principles of maintaining aspect ratio, preserving quality (especially when enlarging images with the aid of AI Upscalers), and the crucial balance between file size and visual fidelity. Furthermore, we’ve highlighted the strategic importance of choosing the right file format – JPG for photographs and PNG for transparency and graphics – to optimize performance across various platforms.
The insights provided here are designed to empower you to not only avoid common pitfalls like stretching and pixelation but to actively enhance the quality and impact of your visual content. Whether you’re curating Aesthetic collections, preparing high-resolution Stock Photos for a project, or simply optimizing a background for your desktop, intelligent resizing ensures your images convey professionalism and maintain their intended visual appeal.
At Tophinhanhdep.com, we understand that every pixel matters. By applying the techniques and tips outlined in this article, you’re not just changing the size of a picture; you’re safeguarding its quality, enhancing its performance, and elevating your entire visual presentation. Let the power of perfectly resized images amplify your message and captivate your audience, making every visual a testament to excellence.