How to Resize Images in GIMP: A Comprehensive Guide for Stunning Visuals

In today’s visually driven world, images are everywhere, from captivating wallpapers and intricate digital art to professional stock photos and personal aesthetic collections. Whether you’re a seasoned photographer, a graphic designer, or simply someone looking to optimize their personal image gallery, the ability to effectively resize images is a fundamental skill. Improperly sized images can lead to slow-loading websites, pixelated prints, or frustrating social media posts. Fortunately, GIMP (GNU Image Manipulation Program) stands out as a powerful, free, and open-source solution for all your image editing needs, including precise and versatile resizing.
At Tophinhanhdep.com, we understand the nuances of working with diverse visual content, from high-resolution nature photography to abstract designs and emotionally evocative shots. This guide will walk you through the essential techniques for resizing images within GIMP, ensuring your visuals maintain their quality, fit their intended purpose, and contribute to an optimized user experience. We’ll cover everything from adjusting the overall composition to manipulating individual layers and preparing your final output for both web and print, integrating seamlessly with your journey through digital photography, visual design, and curating inspiring image collections.
Understanding GIMP’s Resizing Capabilities
Before diving into the practical steps, it’s crucial to understand the different ways GIMP approaches resizing. The program offers distinct tools and menu options depending on whether you want to adjust the entire image composition or just specific elements within it. Grasping this distinction is key to achieving your desired results without unexpected distortions or changes to your artwork.

Image vs. Layer Resizing: A Crucial Distinction
One of the most common points of confusion for new GIMP users is the difference between resizing an “image” and resizing a “layer.” While they both involve changing dimensions, their scope and impact on your project are entirely different:
-
Resizing the Image (Composition): When you resize the image in GIMP (via
Image > Scale Image), you are altering the dimensions of the entire canvas and, consequently, all layers within that composition proportionally. This method is ideal when you need to change the overall resolution or physical size of your final output, such as preparing an image for a specific print size or reducing its dimensions for a webpage. If you have multiple layers, they will all scale together, maintaining their relative positions and sizes. This is perfect for when you’ve completed your design and need to scale the entire piece to a new resolution or physical size. -
Resizing a Layer: In contrast, resizing a layer (using the Scale Tool or
Layer > Scale Layer) allows you to modify the dimensions of a single, active layer without affecting other layers or the overall canvas size. This is an indispensable feature for visual design and photo manipulation, where you might be combining several elements (e.g., a background image, a logo, and text overlays). You can independently scale each component to fit your creative vision, arranging them precisely within your composition. For instance, if you import a large stock photo as a new layer into an existing design, you’ll use layer resizing to scale it down to fit your layout.
Understanding this fundamental difference will empower you to choose the correct resizing method for your specific task, whether you’re creating a stunning digital art piece, compiling a mood board with various photographic elements, or simply preparing images for a website’s background.
Resizing the Entire Image (Canvas and All Layers)
When your goal is to change the overall dimensions or resolution of your entire creative project, including all its visual components, the Scale Image function is your primary tool. This method is often employed as a final step in preparing an image for its intended use, whether it’s for print or web display.
Step-by-Step Guide to Numerical Image Scaling

The Scale Image dialogue in GIMP provides precise control over your image’s dimensions and resolution. This numerical approach is invaluable when you have specific size requirements, common in digital photography and graphic design.
-
Open Your Image: Launch GIMP and open the image you wish to resize by navigating to
File > Open. If prompted to convert the image from a color profile, simply clickConvert. -
Access the Scale Image Menu: Go to the top menu bar and click
Image > Scale Image. This will open the “Scale Image” dialogue box. -
Adjust Dimensions (Width and Height):
- You’ll see input fields for “Width” and “Height.” Here, you can type in your desired new dimensions.
- Lock Aspect Ratio: To the right of the width and height fields, you’ll notice a chain-link icon. By default, this is usually linked, meaning that when you change either the width or height, the other dimension will automatically adjust proportionally. This prevents your image from appearing stretched or squished, preserving its original aspect ratio. For most resizing tasks, especially for beautiful photography or wallpapers, keeping this locked is highly recommended to maintain image integrity.
- Unlock for Independent Scaling: If, for a specific creative effect or unusual layout, you need to change width and height independently (and accept potential distortion), you can click the chain-link icon to unlink them.
- Units of Measurement: Next to the dimensions, there’s a dropdown menu (often defaulting to “px” for pixels). You can change this to various units like percentages, millimeters, centimeters, inches, and more. Selecting “Percent” allows you to scale the image relative to its current size, which can be useful for quick reductions or enlargements.
-
Set Resolution (X and Y Resolution):
- Below the dimensions, you’ll find “X resolution” and “Y resolution,” typically measured in “pixels/inch” (ppi) or “pixels/mm.” This setting is crucial, especially when preparing images for print or specific screen displays.
- For Web/Screen Use: A common standard for web images, backgrounds, and general screen display is 72 pixels per inch (ppi). While screens render images based on pixel dimensions, setting 72 ppi can sometimes help streamline workflows, especially if the image might eventually be interpreted by print drivers.
- For Print Use: For high-quality prints, a resolution of 300 pixels per inch (ppi) is generally recommended. This ensures that the physical print is sharp and detailed. If you scale down an image for print, the resolution (ppi) will naturally increase, which is usually beneficial for quality. Conversely, scaling up too much will decrease the ppi and can lead to a blurry or pixelated print.
- Keep the X and Y resolutions linked unless you have a very specific reason not to.
-
Choose Interpolation Method:
- This dropdown menu determines how GIMP calculates new pixel values when resizing, influencing the output quality.
- Cubic (default): A good general-purpose option that offers a balance between sharpness and smoothness.
- Sinc (Lanczos3): Often considered the best option for downscaling images, as it can produce sharper results with fewer artifacts. It’s a high-quality choice for maintaining the aesthetic appeal of your beautiful photography.
- Other options like “None” (fastest, but very blocky) and “Linear” (faster than Cubic, but less smooth) are generally not recommended for quality-critical tasks.
-
Apply Changes: Once all settings are to your liking, click the
Scalebutton. GIMP will process the image, and its entire composition will be resized according to your specifications.
This numerical method is particularly useful for tasks like preparing high-resolution stock photos for a website (reducing dimensions and resolution) or ensuring a digital art piece is perfectly sized for a print collection. It’s an essential part of the Image Tools suite that Tophinhanhdep.com advocates for efficient visual workflow.
Resizing Individual Layers, Selections, and Canvas Adjustments
While scaling the entire image is useful for final output, much of the creative work in visual design and photo manipulation involves adjusting individual elements. GIMP provides dedicated tools for this, along with flexible options for managing your canvas to perfectly frame your resized content.
Mastering Layer Resizing with the Scale Tool
The Scale Tool is your go-to for interactively resizing individual layers within your GIMP composition. This offers both visual, drag-and-drop control and precise numerical input, making it incredibly versatile for crafting dynamic visual designs and manipulating photography.
-
Open or Create Your Composition: Start with your GIMP project open. This could be a new composition created via
File > New(setting your desired dimensions and resolution, e.g., 1920x1080 pixels at 72ppi for web or 300ppi for print) or an existing project with multiple layers. -
Import or Create Layers: You can create new blank layers (
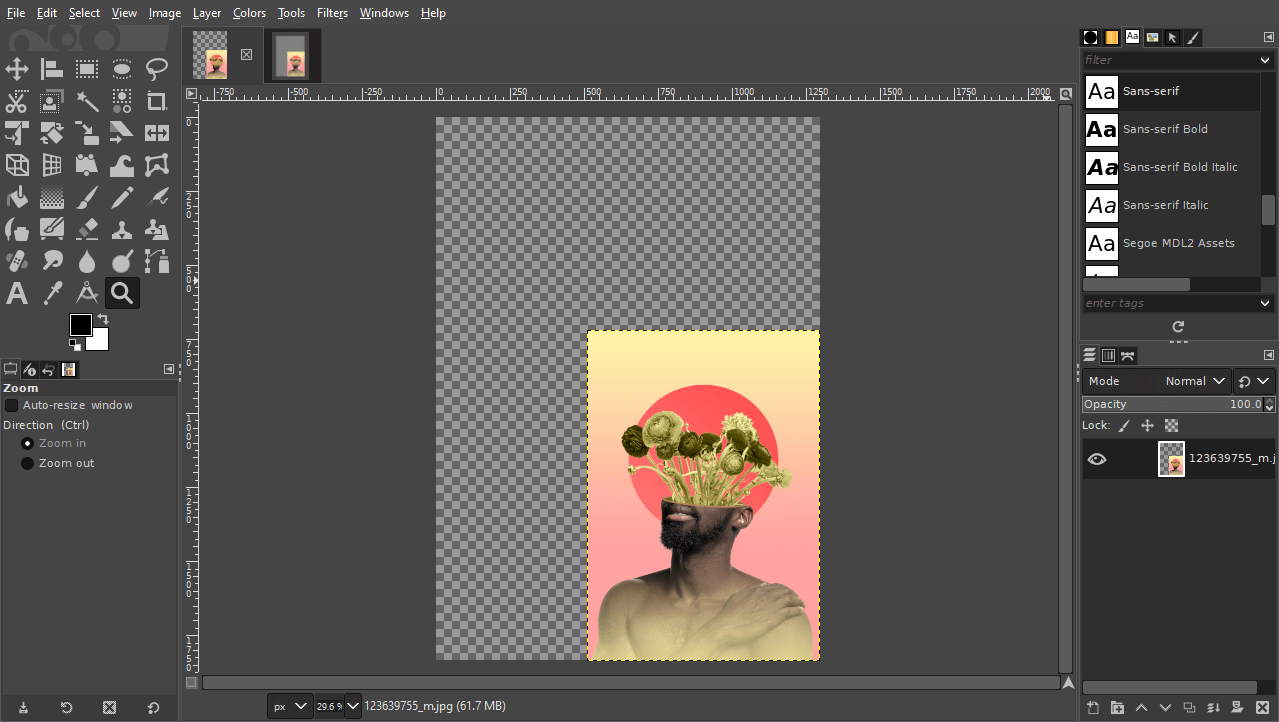
Layer > New Layer) or import existing images as new layers usingFile > Open as Layers.... For example, you might import two different stock photos – say, a “Pink” background image and a “Yellow” background image – and rename their layers for easy identification. -
Activate the Scale Tool:
- Locate the Scale Tool in your Toolbox (usually found on the left side of the GIMP interface). It often looks like two overlapping squares with an arrow.
- Alternatively, you can access it by pressing
Shift + Son your keyboard, or by navigating toTools > Transform Tools > Scale.
-
Select the Target Layer: In the Layers panel (typically on the bottom right), click on the specific layer you wish to resize to make it the active layer.
-
Activate Scaling Handles: Click anywhere within the boundaries of your active layer on the canvas. This will cause a grid of square “transform handles” to appear around the layer’s edges and corners, along with a “Scale” dialogue box.
-
Resizing Methods:
- Manual Dragging:
- Proportional Scaling: Click and drag any of the corner handles (e.g., top-left or bottom-right). By default, GIMP will maintain the layer’s aspect ratio, scaling both width and height proportionally. Zoom out (
Ctrl + mouse wheel) if the handles are off-screen. - Scaling from Center: Hold down the
Ctrlkey while dragging a corner handle. This will scale the layer both inward or outward from its center point, which can be very useful for maintaining an element’s position. - Non-Proportional/Distorted Scaling: If you need to stretch or squish your layer (e.g., for a specific visual effect), you can click the chain-link icon in the “Scale” dialogue box to unlink the width and height. Then, drag the middle handles on the sides or top/bottom to adjust only one dimension.
- Proportional Scaling: Click and drag any of the corner handles (e.g., top-left or bottom-right). By default, GIMP will maintain the layer’s aspect ratio, scaling both width and height proportionally. Zoom out (
- Numerical Input: In the “Scale” dialogue box that appears, you can precisely input new “Width” and “Height” values for your layer. Remember to keep the aspect ratio locked (chain icon) for most cases to prevent distortion. You can also change the units of measurement here.
- Manual Dragging:
-
Repositioning During Scaling: While the Scale Tool is active, you can also reposition your layer. Click and drag the center of the layer (or use the middle transform handles) to move it around the canvas. This is particularly handy when composing elements, such as aligning a resized image with a guide or another layer.
-
Using Guides for Precision: For meticulous alignment, especially in visual design, create guides. Go to
Image > Guides > New Guide (By Percent)orNew Guide (by Pixels). For example, a vertical guide at 50% can help you perfectly center or divide your composition. You can then drag your layer’s edges to snap to these guides. -
Applying the Changes: Once your layer is sized and positioned as desired, click the
Scalebutton in the “Scale” dialogue box, or pressEnteron your keyboard, to apply the transformations.
Repeat this process for all layers you wish to resize individually. This detailed control is what makes GIMP invaluable for digital artists, graphic designers, and photographers looking to create intricate compositions from various images.
Resizing Specific Selections
Beyond entire layers, GIMP also allows you to scale specific selections within a layer. This is useful if you only want to resize a portion of an image, leaving the rest untouched.
-
Make a Selection: Use any of GIMP’s selection tools (e.g., Rectangle Select Tool, Ellipse Select Tool, Free Select Tool, Fuzzy Select Tool, or Path Tool) to define the area you want to resize on your active layer.
-
Activate the Scale Tool: Access the Scale Tool (Toolbox,
Shift + S, orTools > Transform Tools > Scale). -
Scale the Selection: Click within your active selection. Transform handles will appear around the selection boundary. You can then drag these handles or use the numerical input in the Scale dialogue to resize only the content within that selection. The area outside the selection will remain unchanged.
-
Apply Changes: Click
Scalein the dialogue or pressEnter. The selected content will be resized, filling the new area with stretched or compressed pixels.
Adjusting the Canvas to Fit Your Content
When you resize layers or selections, the canvas size (the overall background area of your image) might not automatically adjust. This can result in excess transparent space (represented by a checkerboard pattern) around a scaled-down layer, or parts of a scaled-up layer being cut off. GIMP offers several ways to manage your canvas:
-
Crop to Content: If you’ve scaled down a layer or removed content, leaving transparent space,
Image > Crop to Contentwill automatically reduce the canvas size to fit the visible content of your image. This is particularly useful after cropping or reducing the size of your primary image. -
Fit Canvas to Layers: If you’ve scaled a layer up and it now extends beyond the original canvas boundaries,
Image > Fit Canvas to Layerswill automatically expand the canvas to encompass all visible parts of every layer. This ensures that no part of your digital art or beautiful photography is inadvertently clipped. -
Canvas Size: For precise numerical control over the canvas dimensions, go to
Image > Canvas Size.... Here, you can manually input new width and height values, change the units, and even specify the offset (where the existing content will be placed on the new canvas, usually centered). This is ideal when you need to add extra space around your composition or trim it to exact dimensions.
Mastering these canvas adjustment techniques, alongside layer scaling, provides complete control over your visual design projects, enabling seamless photo manipulation and creative layouts.
Optimizing and Exporting Your Resized Images
Resizing isn’t just about changing dimensions; it’s also about preparing your image for its final destination. This involves optimizing file size, choosing the right format, and maintaining quality – crucial steps whether you’re uploading a collection of images to a website or preparing high-resolution prints.
Ensuring Quality and Managing File Size
The balance between image quality and file size is paramount, especially for web content and digital photography. Larger files mean slower loading times, which can deter visitors from Tophinhanhdep.com.
-
Understand the Quality-Size Trade-off: When you reduce an image’s dimensions, its file size naturally decreases. However, when exporting, particularly to lossy formats like JPEG, you can further reduce file size by lowering the quality setting. The trick is to find the sweet spot where the visual quality is acceptable, but the file size is minimal. For web images, aiming for 500 KB or less per image is a good rule of thumb for optimal page load speed.
-
Interpolation Matters (Again): As mentioned in the “Scale Image” section, using “Sinc (Lanczos3)” for downscaling and “Cubic” or “Sinc” for other resizing operations helps preserve image detail and prevent artifacts, ensuring your abstract or nature photography looks its best.
-
Choosing the Right File Format:
- JPEG (.jpg): Best for photographs, wallpapers, and complex images with many colors and gradients where some loss of quality is acceptable in exchange for a smaller file size. When exporting, GIMP will offer a “Quality” slider (typically 0-100). For web, a quality of 60-80% often provides a good balance.
- PNG (.png): Ideal for images with transparency (like logos, overlays, or graphic design elements) or sharp-edged graphics and line art. PNG is a lossless format, meaning it retains all original image data, but often results in larger file sizes compared to JPEG.
- TIFF (.tif): Often used for high-quality print images and professional photography due to its lossless compression and support for various color spaces.
- GIF (.gif): Best for simple animations and images with a very limited color palette, though largely superseded by PNG for static images.
Practical Applications for Various Visual Projects
Effective image resizing in GIMP serves a multitude of purposes, directly enhancing the utility and appeal of your visual content across various platforms and applications.
-
Web Optimization: Reduce large, high-resolution images (like those from digital photography) to appropriate dimensions (e.g., 1920px wide for hero images, 800px for blog posts) and optimize their file size (under 500KB) for faster loading on websites. This is critical for improving user experience and SEO.
-
Social Media: Different platforms (Instagram, Facebook, X, etc.) have specific aspect ratio and dimension requirements for profile pictures, cover photos, and posts. Resizing in GIMP ensures your aesthetic images or beautiful photography fit perfectly without being awkwardly cropped or compressed.
-
Print Preparation: When preparing images for printing (e.g., a photo for a frame, a digital art piece for a poster), ensure they are scaled to the correct physical dimensions and set to a high resolution (e.g., 300 ppi) to guarantee sharpness and detail.
-
Graphic Design & Digital Art: Resizing individual layers is fundamental for composing intricate graphic designs, manipulating photos, and creating digital art. It allows for flexible arrangement and scaling of elements like text, logos, and textures within a composition.
-
Wallpapers & Backgrounds: When creating custom wallpapers or website backgrounds, resizing ensures they perfectly fit the screen or designated area without tiling or distortion.
-
Image Collections & Mood Boards: Curating thematic collections or mood boards often involves combining images of various sizes. GIMP’s layer resizing capabilities allow you to uniformly scale and arrange these diverse photos into a cohesive visual narrative.
Saving and Exporting Your Work
After all the resizing and adjustments, it’s crucial to save and export your work correctly.
-
Save Your GIMP Project: Always save your work in GIMP’s native format, XCF (
File > Save As...). This preserves all your layers, masks, selections, and other GIMP-specific data, allowing you to return and edit the project later. -
Export Your Final Image: To get a usable image file (like JPEG or PNG) for sharing, printing, or web use, you need to
Export As...(File > Export As...orCtrl + Shift + E).- In the export dialogue, choose your desired file type (e.g., JPEG for photos, PNG for images with transparency) and destination folder.
- Click
Export. If you chose JPEG, you’ll get another dialogue to adjust the quality. - Click
Exportagain to finalize the process.
Conclusion
The ability to proficiently resize images in GIMP is a cornerstone skill for anyone engaging with digital visuals. Whether you’re optimizing images for web performance, crafting intricate digital art, preparing high-resolution photography for print, or simply curating aesthetic image collections, GIMP provides a comprehensive toolkit. By understanding the distinction between image and layer resizing, mastering the Scale Image and Scale Tool functions, and thoughtfully handling canvas adjustments and export options, you can ensure your visual content consistently meets the highest standards.
Tophinhanhdep.com is dedicated to helping you harness the full potential of your images. With GIMP, you have a free, powerful partner to transform your raw photos into optimized, stunning visuals for any project, perfectly aligning with your goals in Images, Photography, Image Tools, Visual Design, and Image Inspiration. Dive in, experiment, and unlock a world of creative possibilities with your resized images!