Master the Art of Image Resizing in GIMP for Stunning Visuals

In the vibrant world of digital imagery, where every pixel contributes to the aesthetic and impact of your visual narrative, the ability to properly resize images is not just a technicality – it’s an art form. Whether you’re crafting breathtaking wallpapers, designing captivating backgrounds, curating an aesthetic collection, or preparing your latest beautiful photography for the web, getting the dimensions right is paramount. Incorrect sizing can lead to slow loading times, distorted visuals, or poor print quality, ultimately diminishing the allure of your carefully selected nature, abstract, or even sad/emotional images.
The GNU Image Manipulation Program, or GIMP, stands as a powerful, free, and open-source solution for all your image editing needs. Far from being an intimidating complex software, GIMP offers intuitive tools that empower both beginners and seasoned designers to achieve professional results. Among its most frequently used functionalities is image resizing – a skill crucial for optimizing your high-resolution photographs, preparing stock photos for various platforms, and executing precise photo manipulation in your digital art projects.
This comprehensive guide from Tophinhanhdep.com will demystify the process of resizing images in GIMP. We’ll explore two primary methods: scaling the entire image or composition, and precisely adjusting individual layers or selections within a multi-layered design. We’ll also delve into the critical role of resolution for both screen and print, ensuring your visual design projects always look their best. By the end of this article, you’ll be equipped with the knowledge to resize your images with confidence, making them perfect for any display, print, or creative endeavor.

Understanding Image Resizing in GIMP: Why and How it Matters
Resizing an image goes beyond simply making it bigger or smaller. It involves a strategic understanding of pixels, resolution, and aspect ratios, all of which directly influence the final quality and utility of your image. For Tophinhanhdep.com, dedicated to showcasing and enhancing beautiful visuals, precision in resizing is fundamental to delivering top-tier images and photography.
The Crucial Difference: Image vs. Layer Scaling
One of the most important distinctions to grasp in GIMP is the difference between resizing the entire image and resizing an individual layer or selection. This understanding is foundational for any graphic design or digital art project.
When you resize the entire image, using GIMP’s “Scale Image” feature, you are modifying the dimensions of the entire canvas, along with all the layers it contains. Imagine you’ve created a stunning abstract composition with multiple layered elements – a background, text, and several graphical assets. If you use “Scale Image,” every single element will scale proportionally to the new dimensions of the overall canvas. This method is ideal when you need to change the output size of your finished artwork, perhaps preparing a full-page wallpaper for a specific screen resolution or optimizing a complex digital photography piece for a web gallery. It’s a global transformation that affects everything equally.
Conversely, when you resize an individual layer or selection using the “Scale Tool,” you are making a localized change. This means you can adjust the size of a single element within your composition without affecting the canvas or any other layers. This granular control is invaluable for photo manipulation, where you might need to scale a particular object, person, or element to fit seamlessly into a new environment. For instance, if you’re integrating a nature element into an aesthetic background, you can scale that element precisely to match the perspective and size of its surroundings. This method allows for intricate visual design and creative ideas to come to life, offering flexibility to compose and rearrange elements until your image inspiration is perfectly realized.

Choosing the right method depends entirely on your objective. For a quick, universal adjustment of a complete image, “Scale Image” is your go-to. For precise control over individual components within a multi-layered project, the “Scale Tool” is indispensable.
Optimizing Your Visuals for Web and Print
The purpose of your image dictates its optimal dimensions and resolution. This is particularly relevant for high-resolution photography and stock photos, which often need to be adapted for diverse applications, from trending styles in digital marketing to professional print publications.
Resolution is measured in pixels per inch (PPI) or dots per inch (DPI for print). It determines the level of detail an image holds.
- For web usage (e.g., website banners, social media posts, aesthetic backgrounds): A resolution of 72 pixels per inch (PPI) is generally sufficient. Web browsers display images based on pixel dimensions, not physical size, so higher PPI doesn’t translate to better on-screen quality and only increases file size, leading to slower load times. Our goal at Tophinhanhdep.com is to provide fast-loading, beautiful images, making optimal web resolution a priority.
- For print usage (e.g., posters, flyers, professional photography portfolios): A resolution of 300 pixels per inch (PPI) is the industry standard. Print media requires a much higher density of pixels to render smooth lines and fine details without appearing pixelated. If you intend to print your beautiful photography or digital art, setting a higher resolution is crucial for a crisp, high-quality output.
Beyond resolution, the physical dimensions (width and height) of your image also play a vital role. For example, a wallpaper might need specific pixel dimensions (e.g., 1920x1080 for Full HD monitors), while a print photo might need to be sized in inches or millimeters. Understanding these requirements ensures your images are not only visually appealing but also technically optimized for their intended use. This careful consideration aligns perfectly with Tophinhanhdep.com’s commitment to high-quality image tools and superior editing styles.
Method 1: Resizing the Entire Image (Global Scale)
When your goal is to change the overall dimensions of your entire canvas and all its contents uniformly, GIMP’s “Scale Image” feature is the most efficient and straightforward approach. This method is especially useful for standardizing the size of wallpapers, preparing batches of backgrounds, or optimizing high-resolution photography for specific online platforms.
Step-by-Step: Using the Scale Image Feature
Let’s walk through the process of globally scaling your image, ensuring your visuals maintain their integrity while adapting to new size requirements.
-
Start with a New Composition or Open an Existing Image: If you’re beginning a fresh project, go to
File > New. This opens the “Create a New Image” dialog. Here, you can define your initial canvas dimensions (e.g.,1920for width and1080for height, in pixels) and resolution. For web-oriented content like aesthetic backgrounds or trending styles for online display, set your X and Y resolution to 72 pixels/inch. If your final output is destined for print, such as a striking nature photograph for a magazine, opt for 300 pixels/inch. You can always adjust other advanced options like Color Space and Gamma as needed, then clickOK. If you already have an image open that you wish to resize, simply proceed to the next step. -
Access the Scale Image Menu: Navigate to
Image > Scale Imagefrom the GIMP menu bar. This will open the “Scale Image” dialog box, presenting you with the current dimensions and resolution of your entire image. -
Define Your Desired Dimensions and Resolution:
- Width and Height: Input your target width and height values. You can change the units of measurement (pixels, percentage, inches, millimeters, etc.) using the dropdown menu next to the dimension fields. For example, if you’re preparing stock photos for a website, you might target a width of
1200 px. - Aspect Ratio Lock: Crucially, observe the “chain-link” icon located between the Width and Height fields. By default, this icon is usually “locked,” meaning that if you change either the width or height, the other dimension will automatically adjust proportionally to maintain the image’s original aspect ratio. This prevents your beautiful digital photography from becoming stretched or squished, ensuring no distortion. For most resizing tasks, it is highly recommended to keep this locked. Only unlock it if you deliberately intend to change the aspect ratio and potentially distort the image (which is rare, unless for specific graphic design effects).
- X and Y Resolution: Below the dimensions, you’ll find fields for X and Y resolution. As discussed, adjust these according to whether your image is for web (72 PPI) or print (300 PPI).
- Width and Height: Input your target width and height values. You can change the units of measurement (pixels, percentage, inches, millimeters, etc.) using the dropdown menu next to the dimension fields. For example, if you’re preparing stock photos for a website, you might target a width of
-
Apply the Scale: Once you’ve set your desired width, height, and resolution, click the
Scalebutton. GIMP will then process the image, resizing the entire canvas and all its layers to your specified parameters. If you change your mind, theResetbutton reverts to the original settings, andCancelcloses the dialog without applying changes.
Practical Applications for Your Image Collections
The “Scale Image” feature is a cornerstone for photographers and designers working with large collections of visuals.
- Standardizing Wallpapers: Imagine you have a collection of diverse nature or abstract wallpapers that you want to offer in specific resolutions (e.g., 4K, HD, mobile). Using “Scale Image,” you can quickly process each image to fit these standard sizes, ensuring consistency across your offerings.
- Optimizing Web Backgrounds: For Tophinhanhdep.com, fast loading is key. Applying “Scale Image” to a set of aesthetic backgrounds before uploading them to your website ensures they are all optimized to a suitable web resolution (72 PPI) and pixel dimension, drastically improving site performance and user experience.
- Preparing Stock Photos: If you’ve licensed stock photos and need to use them in various sizes for different visual design layouts, “Scale Image” allows you to create specific versions for website headers, social media thumbnails, or print brochures from a single high-resolution original.
- Creating Thematic Collections: When assembling thematic collections or mood boards, you might want all images to have a uniform appearance. Resizing them globally provides this consistency, making your curated content shine.
This global resizing method simplifies the process of preparing images for widespread use, making it an indispensable tool for managing any visual asset collection.
Method 2: Resizing Individual Layers and Selections (Local Control)
While scaling the entire image is perfect for global adjustments, many visual design projects, especially those involving digital art, photo manipulation, or intricate creative ideas, require the ability to resize specific elements independently. GIMP’s “Scale Tool” provides this essential local control, allowing you to manipulate individual layers or defined selections with precision.
Getting Started with Layers and the Scale Tool
Before you can resize individual components, you need a workspace set up with multiple layers. This approach is fundamental to advanced image editing styles and complex compositions.
-
Create a New Composition and Import Layers: Start by creating a new composition (
File > New) with your desired dimensions and resolution. Then, rather than opening images normally, import them as layers. Go toFile > Open as Layers. This allows you to bring multiple images (e.g., a beautiful photography subject, an abstract background, and decorative aesthetic elements) into your single composition, each on its own editable layer. Repeat this until all your desired elements are in your workspace. -
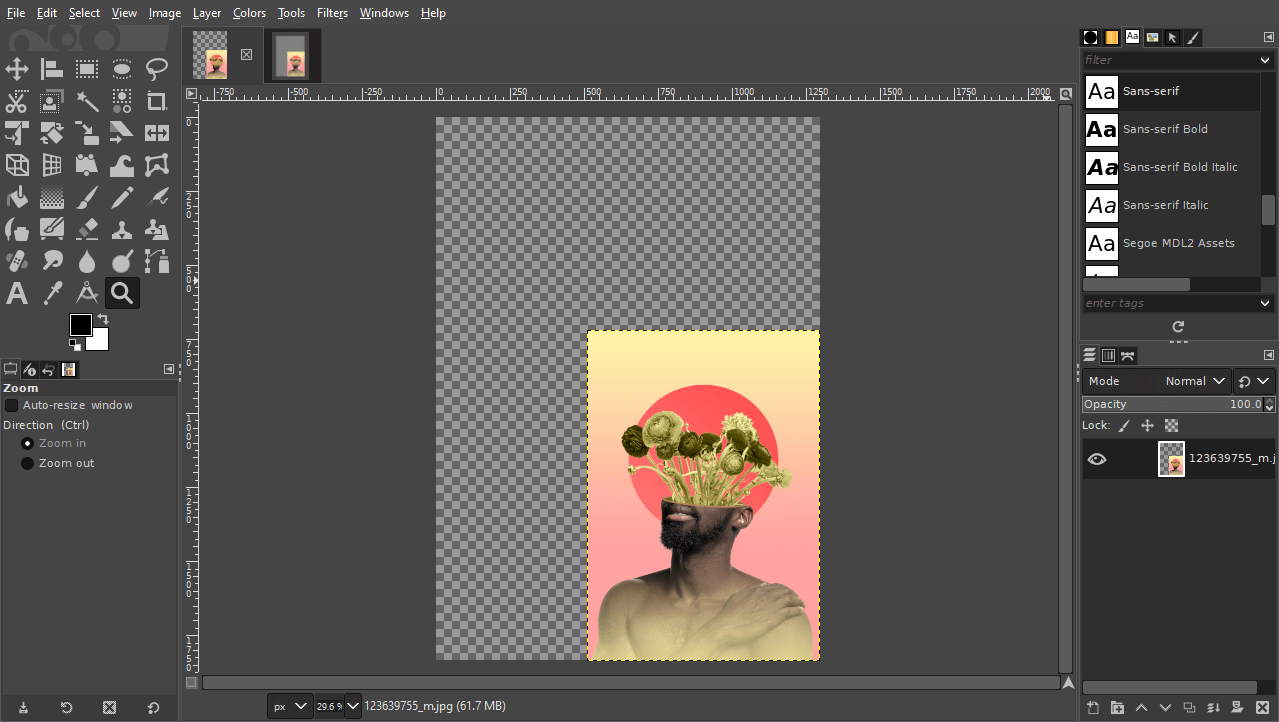
Organize Your Layers: For ease of workflow, especially in detailed photo manipulation projects, it’s highly recommended to rename your layers. Double-click on a layer name in the Layers panel (usually located on the bottom right of your GIMP interface) and give it a descriptive name (e.g., “Pink Background,” “Yellow Subject,” “Nature Overlay”). This organization becomes crucial when dealing with several layers.
-
Activate the Scale Tool: Locate the Scale Tool in GIMP’s Toolbox (typically on the left side of your screen). It often shares a button with other transform tools (like Rotate, Shear, Perspective). You can usually find it within the “Transformation Tools” group. Alternatively, a quick shortcut is to press
Shift + Son your keyboard. -
Select the Target Layer: Before using the Scale Tool, make sure the layer you wish to resize is active. Click on its name in the Layers panel. A highlighted selection around the layer’s name will indicate it’s active.
Precision Scaling with Transform Handles and Guides
With your Scale Tool active and a layer selected, you’re ready to manipulate its size and position.
-
Click on the Layer to Activate Transform Handles: Once the Scale Tool is active and you’ve selected your layer, click directly on the image within the canvas. This action will overlay a grid and a bounding box with square “transform handles” around the edges and corners of your active layer. A “Scale” dialog box will also appear, showing the current dimensions of the layer.
-
Scale Manually with Transform Handles:
- Proportional Scaling: To resize the layer while maintaining its original aspect ratio (highly recommended to prevent distortion of your beautiful photography), click and drag one of the corner handles.
- Scaling from the Center: For a more controlled resize that expands or contracts from the layer’s center point, hold down the
Ctrlkey while dragging a corner handle. This is excellent for positioning elements precisely within a visual design. - Non-Proportional Scaling (Distortion): If you specifically want to stretch or squish your layer (e.g., for a stylized digital art effect), you can uncheck the “chain-link” icon in the Scale dialog box (if it’s not already linked by default) or hold
Shiftwhile dragging a handle. Be cautious, as this can easily lead to undesirable distortion in natural images. - Repositioning: The middle handles within the bounding box (or often, the entire bounding box itself) act like the Move Tool. Click and drag them to reposition your layer on the canvas as you scale.
-
Use Numerical Input for Exact Measurements: The “Scale” dialog box that appears when the Scale Tool is active allows you to input exact numerical values for Width and Height. This is perfect when you have precise dimensions in mind for an element in your graphic design or want to ensure consistency across multiple elements. Remember to keep the chain-link icon locked for proportional scaling.
-
Leverage Guides for Precision: For highly accurate placements, especially in complex creative ideas or multi-panel layouts (like displaying two related images side-by-side), GIMP’s guides are invaluable. Go to
Image > Guides > New Guide (By Percent)orNew Guide. For example, to divide your canvas perfectly in half, create a vertical guide at50%. You can then align your scaled layers precisely to these guides, ensuring a balanced visual design. -
Match Element Sizes: If you’re aiming for a seamless photo manipulation where elements need to appear the same size, you can temporarily adjust the opacity of the top layer in the Scale Tool’s options. This allows you to see the layer beneath it, enabling you to accurately scale and position elements to match. Once satisfied, reset the opacity.
-
Apply the Scale: After you have scaled and positioned your layer to your satisfaction, click the
Scalebutton in the Scale dialog box, or simply pressEnteron your keyboard. Your changes will then be applied to the active layer.
Adjusting Your Canvas for Layer Changes
One crucial aspect of local layer scaling is that it doesn’t automatically adjust the size of your canvas. This means if you shrink a layer, you’ll be left with transparent checkerboard areas, and if you enlarge a layer beyond the canvas boundaries, parts of it will be cropped from view.
-
Shrinking Layers: Crop to Content: If you’ve made a layer smaller and now have unwanted transparent space around your image, go to
Image > Crop to Content. This intelligent feature automatically resizes the canvas to fit the dimensions of your content, removing excess transparent areas and maintaining a clean visual design. This is particularly useful after removing a background or focusing on a specific part of a nature or aesthetic image. -
Enlarging Layers: Fit Canvas to Layers: If you’ve scaled a layer up and it extends beyond the visible canvas, you’ll need to expand the canvas to accommodate it. Select
Image > Fit Canvas to Layers. This option will automatically enlarge the canvas to encompass all parts of all layers, ensuring your entire digital art or photo manipulation is visible.
Remember to switch the Scale Tool’s transform mode back to “Layer” (if you changed it to “Selection” for a specific task) after you’re done, to avoid confusion in future edits!
Essential Post-Resizing Steps: Saving and Exporting Your Masterpiece
Resizing an image in GIMP is a critical step, but equally important is knowing how to save your work to preserve your editable project and how to export it for final use. For Tophinhanhdep.com, ensuring that your beautiful photography and digital art are correctly preserved and prepared for their intended display is paramount.
Preserving Your Work: Saving in GIMP’s Native Formats
When you’re actively working on an image in GIMP, especially one involving multiple layers, graphic design elements, or intricate photo manipulation, you’ll want to save it in a format that retains all your editing capabilities.
-
Saving Your GIMP Project: To save your project with all its layers, masks, effects, and editing history intact, go to
File > Save As. GIMP’s native file format is .XCF (eXperimental Computing Facility). Saving as an XCF file ensures that when you reopen the project, you can continue editing exactly where you left off, making further adjustments to your aesthetic or thematic collections. This is your master file, invaluable for iterative design and future modifications. -
Cross-Platform Compatibility: If you anticipate needing to open your GIMP project in other photo editing applications like Adobe Photoshop or Affinity Photo, you can often choose to save it as a .PSD (Photoshop Document) file. While GIMP’s PSD compatibility is generally good, complex GIMP-specific features might not translate perfectly, but it’s a useful option for collaborative workflows or if you work across different software.
Regularly saving your work as an XCF file is a fundamental best practice for any visual design enthusiast or professional, safeguarding your creative efforts.
Preparing for Publication: Exporting Optimized Images
Once your image is perfectly resized and all editing styles are applied, you need to convert it into a universally viewable format for sharing online, printing, or incorporating into other projects. This process is called “exporting” and is where GIMP’s image tools for compressors and optimizers come into play.
-
Initiating the Export Process: Go to
File > Export As, or use the keyboard shortcutCtrl + Shift + E. This will open the “Export Image” dialog, prompting you to choose a file format and location. -
Selecting the Right File Format: The choice of file format largely depends on the image content and its intended use:
- JPEG (.jpg or .jpeg): This is the most common format for digital photography and beautiful photography without transparency. JPEG uses lossy compression, meaning it reduces file size by discarding some image data. This makes it ideal for web use where smaller file sizes lead to faster loading times for wallpapers and backgrounds.
- PNG (.png): PNG is a lossless compression format, meaning it retains all image data. Crucially, PNG supports transparency (alpha channels). If your resized image includes transparent areas (e.g., a logo, an object with a removed background, or an aesthetic overlay with faded edges), you must export it as a PNG to preserve that transparency. Using JPEG would fill transparent areas with white or black.
- TIF (.tif or .tiff): TIFF files are often used for high-quality archival or high-resolution photography intended for print. They support lossless compression and various color depths, making them suitable for professional print jobs where maximum quality is required.
- PDF (.pdf): While primarily a document format, GIMP can export single-page PDFs, which can be useful for sharing artwork or simple graphic design layouts where the recipient needs to view it without specific image editing software.
-
Compression and Quality Settings: After selecting your file type and clicking
Export, a format-specific dialog box will appear (e.g., “Export Image as JPEG”).- JPEG Quality: For JPEGs, you’ll be able to adjust the “Quality” slider. A common recommendation for web images, particularly for stock photos or aesthetic backgrounds, is to set the quality between 60-80%. This range typically provides a good balance between visual quality and a significantly reduced file size. For Tophinhanhdep.com’s focus on image optimizers, aiming for a final file size of 500 KB or less per image for web use is an excellent target to ensure speedy page loads.
- PNG Compression: For PNGs, you can choose a compression level. Higher compression reduces file size but takes longer to process during export. For most uses, the default or a slightly higher compression is fine.
-
Final Export: Once you’ve set your desired quality or compression, click the final
Exportbutton. Your resized and optimized image will now be saved to the specified location on your computer, ready to be shared, printed, or incorporated into your image inspiration & collections.
By following these saving and exporting guidelines, you ensure that your efforts in resizing images in GIMP translate into perfectly prepared files for any purpose, reflecting the high standards of digital photography and visual design that Tophinhanhdep.com promotes.
Unleashing Your Creative Potential with Optimized Images
The power to precisely resize images in GIMP is more than just a technical trick; it’s a fundamental skill that unlocks a world of creative possibilities. As we’ve explored, GIMP offers versatile tools to handle resizing at both global and individual layer levels, ensuring that your images, from stunning nature photography to intricate digital art compositions, are perfectly adapted for any medium.
For the passionate creators at Tophinhanhdep.com, every wallpaper, background, or aesthetic photograph tells a story. The meticulous process of resizing, adjusting resolution for optimal web or print display, and selecting the correct export format is what elevates a good image to a truly impactful visual. Whether you’re curating thematic collections, developing creative ideas through photo manipulation, or simply sharing your beautiful photography, GIMP provides the image tools necessary to achieve professional-grade results without cost.
By mastering these resizing techniques, you’re not just making pixels bigger or smaller; you’re taking control of your visual narrative, enhancing the performance of your online content, and guaranteeing the fidelity of your high-resolution prints. Continue to explore GIMP’s capabilities, experiment with different editing styles, and let your image inspiration flourish, knowing that your visuals are always optimized for maximum impact.
Discover more tips, tutorials, and stunning image collections on Tophinhanhdep.com to further enhance your digital journey and bring your artistic visions to life.