How to Resize Images Without Losing Quality

In the vibrant world of digital imagery, where stunning visuals captivate audiences and define online experiences, the ability to manipulate images effectively is a cornerstone of success. From breathtaking wallpapers and intricate digital art to high-resolution stock photography and engaging graphic designs, images are the lifeblood of our visual communication. However, a common challenge that many creators, photographers, and webmasters face is resizing images without compromising their inherent quality. The frustration of watching a crisp photograph turn into a blurry, pixelated mess after resizing is an experience far too familiar.
At Tophinhanhdep.com, we understand that every pixel counts. Our mission is to empower you with the knowledge and tools to create, manage, and share visually stunning content, whether it’s a serene nature background, an abstract digital masterpiece, or a collection of aesthetic photos. This comprehensive guide will demystify the process of resizing images without losing quality, ensuring your visual content always looks its best. We’ll explore the fundamental concepts, highlight why quality resizing is paramount for your online presence and creative projects, and walk you through the most effective tools and techniques, including how Tophinhanhdep.com’s own image tools can assist you.
The Core Principles of Image Quality and Resizing
Before diving into the “how-to,” it’s crucial to understand the underlying mechanics of digital images and how resizing impacts them. This foundational knowledge will illuminate why certain methods work better than others and why quality preservation is often a delicate balance.
Understanding Pixels, Bitmaps, and Image File Formats
Most digital images you encounter online—including your JPEGs and PNGs—are “bitmap” images. Imagine a vast mosaic made of thousands, even millions, of tiny colored squares. Each of these squares is a “pixel” (picture element), and it holds specific color and positional information. When you zoom in closely on a bitmap image, you can eventually see these individual squares, particularly if the image is low resolution or heavily enlarged.
The resolution of an image refers to the total number of pixels it contains, often expressed as width x height (e.g., 1920x1080 pixels). A higher pixel count generally means more detail and a larger image dimension, suitable for high-resolution displays or printing.
Different image file formats handle pixel information and compression in distinct ways:
- JPEG (Joint Photographic Experts Group): This is perhaps the most common format for photographs. JPEGs use “lossy” compression, meaning some data is permanently discarded to achieve smaller file sizes. This makes them excellent for quick loading on websites but can lead to a noticeable drop in quality if heavily compressed or repeatedly saved.
- PNG (Portable Network Graphics): PNGs use “lossless” compression, preserving all original image data. They support transparency, making them ideal for logos, graphics, and images where sharp edges and exact color reproduction are essential. However, PNG files are typically larger than JPEGs for photographic content.
- GIF (Graphics Interchange Format): Known for its animation capabilities, GIFs use a limited color palette (256 colors) and lossless compression. They are great for simple animations and graphics but unsuitable for high-quality photographs due to their color limitations.
- WEBP: A modern format developed by Google, WEBP offers superior lossless and lossy compression for images on the web, often resulting in significantly smaller file sizes than JPEGs or PNGs while maintaining comparable quality. Tophinhanhdep.com encourages the use of optimized formats like WEBP for web content.
- TIFF (Tagged Image File Format) / HEIC (High-Efficiency Image Container): These formats are generally used for high-quality photographic originals, offering uncompressed or minimally compressed data. While excellent for archiving, they are too large for direct web use and require conversion and resizing.
Understanding these formats helps you choose the right one for your needs and anticipate how resizing might affect them.
Resizing vs. Resampling: The Key to Preserving Quality
The terms “resizing” and “scaling” are often used interchangeably, but in professional image editing, there’s a critical distinction, particularly when it comes to maintaining quality.

- Resizing (or Scaling): This is the more basic operation. When you simply resize an image, you are telling the software to change its physical dimensions (e.g., from 10 inches wide to 5 inches wide) without changing the total number of pixels. Essentially, the existing pixels are either stretched larger or compressed smaller. If you enlarge an image this way, the pixels become visible, leading to a pixelated or blurry appearance. If you shrink it, the pixels become packed more densely, which can sometimes look acceptable but doesn’t reduce file size significantly if the pixel count remains the same.
- Resampling: This is the method you need to master for resizing without losing quality. Resampling changes the actual number of pixels in the image.
- Downsampling (reducing size): The software intelligently discards pixels. It analyzes adjacent pixels and merges information to create a smaller image with fewer pixels, aiming to retain as much detail as possible. This is crucial for optimizing images for web use, as it reduces file size significantly without visible quality loss if done correctly.
- Upsampling (enlarging size): The software “invents” new pixels. It examines the surrounding pixels and generates new ones based on sophisticated algorithms (known as interpolation methods) to fill in the gaps. This is a much more challenging task than downsampling, as the software is essentially guessing information that doesn’t exist. While modern algorithms and AI upscalers can achieve impressive results, there’s always a limit to how much an image can be enlarged before artifacts or a “painted” look become apparent.
When you’re trying to resize an image “without losing quality,” what you’re really aiming for is intelligent resampling, particularly when reducing an image for web use or upsampling it for a larger print with minimal degradation.
Why Quality Resizing is Essential for Tophinhanhdep.com Users
For anyone creating, curating, or sharing visual content, mastering quality image resizing is not just a technical skill; it’s a strategic imperative. From enhancing user experience to preserving artistic integrity, the implications are far-reaching, especially within the context of a platform like Tophinhanhdep.com.
Elevating Visuals for Wallpapers, Backgrounds, and Thematic Collections
Tophinhanhdep.com prides itself on offering a vast array of beautiful images, including high-resolution wallpapers, captivating backgrounds, and curated aesthetic, nature, abstract, and emotional collections. The visual impact of these images directly correlates with their quality.
- Immersive User Experience: Imagine downloading a stunning landscape wallpaper only to find it pixelated on your screen. Poorly resized images detract from the immersive experience Tophinhanhdep.com strives to deliver. Quality resizing ensures that every wallpaper, background, or aesthetic image maintains its crispness and vibrant detail, regardless of the screen size it’s displayed on.
- Consistency in Thematic Collections: When curating thematic collections—be it “Beautiful Photography” or “Trending Styles”—consistency in image quality is key. Resizing without degradation ensures that all images within a collection feel cohesive and professional, enhancing the overall artistic presentation.
- Appealing to a Discerning Audience: Users of Tophinhanhdep.com are often seeking high-quality visuals. Providing perfectly resized images, optimized for various uses, builds trust and reinforces the platform’s commitment to excellence in visual content.
Optimizing Digital Photography and Ensuring Website Performance
Photography, especially high-resolution digital and stock photos, forms a significant portion of the content ecosystem. Tophinhanhdep.com supports photographers by offering a platform for their work, but poor image optimization can undermine even the most exquisite photographs.
- Showcasing High-Resolution Photography: Photographers spend countless hours capturing perfect shots. When these images are uploaded, they often come in very large, high-resolution formats straight from the camera. Without proper resizing and optimization, these large files can drastically slow down a webpage. Quality resampling allows photographers to present their work online in a web-friendly size while retaining the high-resolution feel.
- Boosting Website Speed and SEO: Page speed is a critical factor for both user experience and search engine optimization (SEO). Large, unoptimized images are one of the biggest culprits for slow loading times. By expertly resizing images (downsampling) to appropriate web dimensions and choosing efficient file formats, Tophinhanhdep.com ensures that pages load swiftly. This not only keeps visitors engaged but also helps in achieving higher search engine rankings, making Tophinhanhdep.com’s extensive image library more discoverable.
- Enhancing User Engagement: Faster loading times mean less waiting and more browsing. Users are more likely to explore more content, from stock photos to inspiring collections, if the experience is seamless and instant.
Precision in Visual Design, Graphic Art, and Photo Manipulation
For graphic designers, digital artists, and those involved in photo manipulation, precise image handling is paramount. Every element must be perfectly integrated, and quality degradation can ruin an entire creative vision.
- Maintaining Graphic Design Integrity: Whether creating marketing materials, website banners, or intricate digital art pieces, graphic designers need images that can be scaled and placed without losing their sharp edges or fine details. Proper resizing techniques ensure that design elements integrate flawlessly.
- Flawless Photo Manipulation: In photo manipulation, blending multiple images and adjusting their sizes is routine. Losing quality at any stage can introduce distracting artifacts, making the final composite appear unprofessional. Understanding how to resample effectively ensures that all components maintain their visual fidelity.
- Enabling Creative Ideas: Many creative ideas rely on precise image dimensions and proportions. Whether fitting an image into a specific layout or preparing it for a unique print project, the ability to resize accurately and without quality loss expands the possibilities for digital artists and designers.
In essence, mastering image resizing without quality loss is not merely about making an image fit; it’s about preserving its aesthetic, optimizing its performance, and upholding its professional standard across all aspects of Tophinhanhdep.com’s diverse content offerings.
Comprehensive Guide to Resizing Images with Leading Tools
The good news is that resizing images without losing quality is not only possible but also relatively easy once you understand the principles and utilize the right tools. Here, we’ll explore both online and desktop software solutions that can help you achieve professional results.
Leveraging Tophinhanhdep.com’s Online Resizer
For quick, convenient, and high-quality image resizing directly from your browser, Tophinhanhdep.com offers a dedicated online image resizer. It’s designed for simplicity and efficiency, supporting a wide range of common image formats and ensuring optimal results for web and general use.
Here’s how to use it:
- Upload Your Image: Visit the Tophinhanhdep.com Image Tools section and locate the online resizer. You can easily drag and drop your image file (GIF, JPEG, BMP, PNG, HEIC, TIFF, or WEBP) directly from your desktop into the upload box.
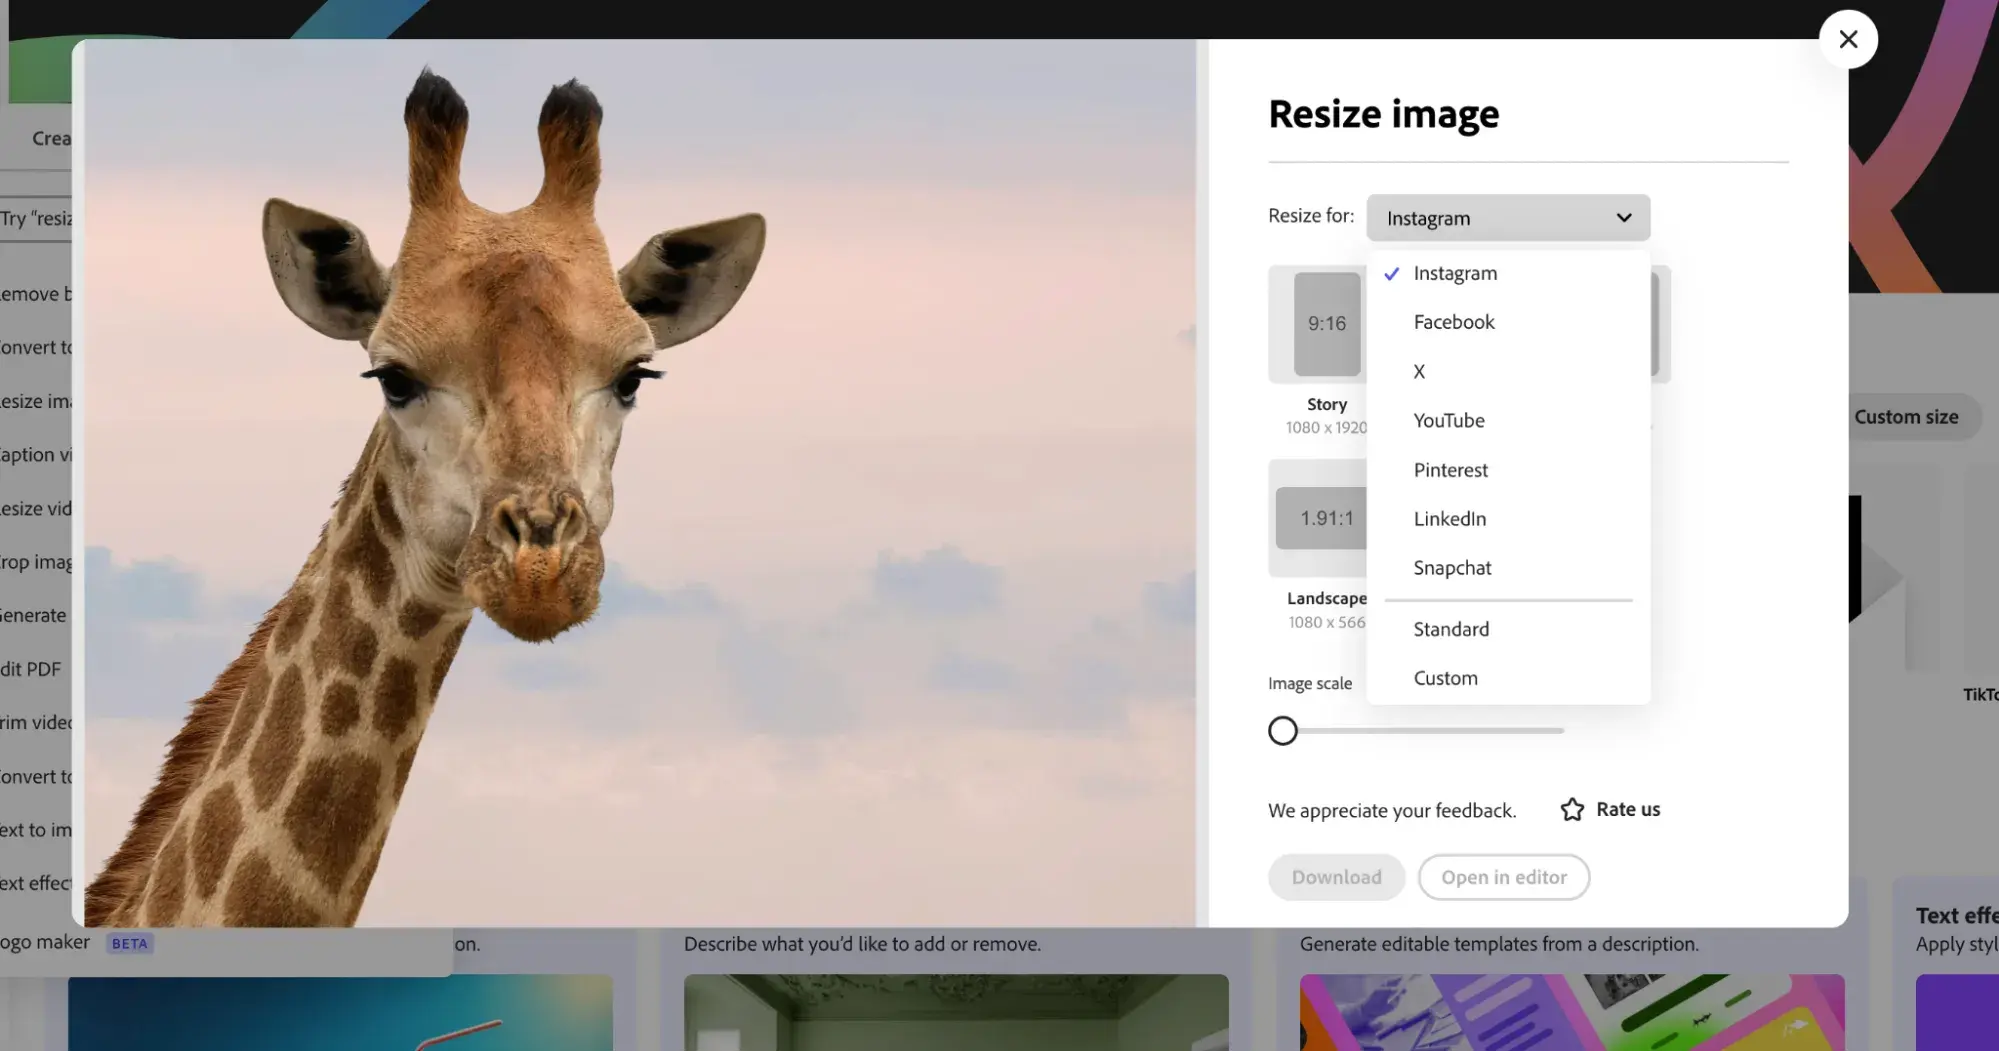
- Choose Your Settings: Once your photo is uploaded, you’ll be presented with customization options. You can specify whether you want the image to be smaller or larger than its original dimensions. Simply enter your desired width and height (often in pixels, but other units might be available). You can also select your preferred output format (JPEG, PNG, or WEBP) and adjust optimization settings for the best balance of quality and file size. Most tools will offer a “lock aspect ratio” option, which is highly recommended to prevent distortion.
- Apply and Download: After setting your preferences, click the “Apply” or “Save” button. The Tophinhanhdep.com online resizer will process your image using advanced resampling algorithms, and your newly resized image will automatically download to your device in seconds, ready for use.
This online tool is perfect for users who need to quickly prepare images for website uploads, social media, or email without needing to install complex software. It’s an excellent way to compress and optimize images for faster page speeds on Tophinhanhdep.com and other platforms.
Mastering Image Resizing in Adobe Photoshop
Adobe Photoshop is the industry standard for professional photo editing and graphic design. While a premium tool, its powerful features make it indispensable for serious creators. Here’s how professionals resize images without losing quality in Photoshop:
- Open Your Image: Launch Photoshop and open the image you wish to resize.
- Access Image Size: Navigate to
Image > Image Size(or use the shortcutCtrl+Alt+Ifor Windows,Cmd+Option+Ifor Mac). This will open the Image Size dialog box. - Set Dimensions and Ensure Resampling:
- Link Icon: Make sure the “link” icon between width and height is highlighted. This locks the aspect ratio, preventing distortion when you change one dimension.
- Units: Choose your desired measurement units (pixels for web, inches/centimeters for print).
- Resample: This is the most crucial setting. Ensure the “Resample” checkbox is enabled. This tells Photoshop to change the pixel count.
- Interpolation Method: Below the “Resample” option, you’ll find a dropdown menu for interpolation methods.
- Bicubic Smoother (enlargement): Generally best for upsampling images.
- Bicubic Sharper (reduction): Often preferred for downsampling images.
- Automatic: Photoshop can intelligently choose the best method.
- For the highest quality results, especially when downsampling for web, experiment with
Bicubic Sharper.
- Enter your desired width and height. Photoshop will automatically adjust the other dimension if the aspect ratio is locked.
- Confirm Changes: Click “OK” to apply the resizing.
- Saving: Save your image (File > Save As…) in an appropriate format. For web, consider
File > Export > Save for Web (Legacy)orFile > Export > Export Asfor more optimization options, including WEBP conversion and quality compression.
Using Free Transform for Layer Resizing:
For individual layers or selections, Edit > Free Transform (or Ctrl+T / Cmd+T) allows you to scale, rotate, skew, and warp. To resize without distortion, hold down the Shift key while dragging a corner handle. While useful for quick adjustments, for precise, quality-preserving resizing of the entire canvas, the Image Size dialog with resampling is superior.
Perfect Resize (Formerly OnOne Resize):
For extreme enlargements, third-party plugins like ON1 Resize (which Adobe Photoshop sometimes integrates or you can use as a standalone) utilize advanced fractal-based interpolation. This technology can enlarge images up to 1000% while remarkably preserving sharpness and detail, making it an excellent option for large prints from smaller originals. If you’re a professional photographer or designer frequently requiring significant upscaling, this tool is highly recommended.
GIMP: A Robust Free Alternative for Quality Resizing
GIMP (GNU Image Manipulation Program) is a powerful, open-source, and free image editing software that serves as an excellent alternative to Photoshop, especially for users who can’t invest in premium tools. While it might have a steeper learning curve for some, it’s fully capable of resizing images without losing quality.
Here’s how to resize an image in GIMP:
- Open Your Image: Launch GIMP and open the image you want to resize.
- Access Scale Image: Go to
Image > Scale Imagefrom the top menu bar. - Adjust Dimensions and Interpolation:
- Chain Icon: Ensure the chain icon next to the Width and Height fields is linked to maintain aspect ratio.
- Dimensions: Input your desired width and height.
- Quality - Interpolation: This is key. From the “Interpolation” dropdown, choose one of the higher-quality options:
- Cubic: A good general-purpose method, often producing smooth results. Also known as “Bicubic” in some software.
- Sinc (Lanczos3): This is often considered one of the best interpolation methods for both upscaling and downscaling, providing sharp and detailed results.
- Click Scale: Once your settings are chosen, click the “Scale” button. GIMP will process the image.
- Save Your Image: Go to
File > Export As...to save your resized image in your desired format (e.g., JPEG, PNG, WEBP).
GIMP is a fantastic choice for those starting with image editing or needing a cost-free solution for quality resizing, offering substantial functionality without the price tag.
Exploring Other Advanced Resizing Software and AI Upscalers
Beyond Photoshop and GIMP, several other tools offer specialized features for resizing and optimizing images, often leveraging advanced algorithms or AI:
- Irfanview: (Windows-only) A lightweight, fast, and free multimedia viewer and editor. While its interface is dated, it’s efficient for basic resizing. Use
Image > Resize/Resample, select “Resample,” choose “Lanczos (slowest),” and check “Apply Sharpen After Resample” for best results. - Fotophire Maximizer / Reshade / A Sharper Scaling: These tools (some free, some paid) often boast proprietary algorithms, including fractal interpolation or advanced AI, designed for significant image enlargement (upscaling) without visible quality loss, some claiming up to 1000% or 2000% increase. They focus heavily on maintaining crisp details and avoiding blur or jagged edges. Many fall under the category of “AI Upscalers” as highlighted in Tophinhanhdep.com’s Image Tools section, using machine learning to intelligently “add” pixels and reconstruct detail.
- Tophinhanhdep.com’s AI Upscalers: For truly groundbreaking image enlargement, Tophinhanhdep.com also offers specialized AI Upscalers as part of its Image Tools. These cutting-edge tools use artificial intelligence to analyze your image and intelligently generate missing pixel information, often delivering superior quality for significant enlargements compared to traditional interpolation methods. They can transform a low-resolution image into a higher-resolution version suitable for printing or larger displays, breathing new life into older or smaller photos.
When choosing a tool, consider the scale of your project, your budget, and the specific needs for upscaling versus downscaling. For simple web optimization, Tophinhanhdep.com’s online resizer or GIMP might suffice. For professional-grade manipulation and extreme enlargements, Photoshop or dedicated AI upscalers are invaluable.
Best Practices for Flawless Image Resizing
Beyond selecting the right tool, adopting a few key best practices can significantly enhance your resizing outcomes and ensure your images consistently meet high-quality standards.
Starting with High-Resolution Originals and Strategic Enlargement
The golden rule of image resizing is: always start with the highest resolution original you have. It’s far easier to downsample a large image beautifully than to convincingly upscale a small, pixelated one.
- Preserve Originals: Before any editing, always create a copy of your original image. This safeguards your master file in case you make irreversible changes or need to revert.
- Avoid Excessive Upscaling: While AI upscalers are impressive, there’s a limit to how much an image can be enlarged before it starts to look artificial. For traditional methods, aim to enlarge gradually, in small increments (e.g., 10-20% at a time), rather than a single massive jump, especially if your software lacks advanced interpolation.
- Assess Megapixels: The megapixel count of your camera directly impacts the ease of enlargement. Images captured with higher megapixel cameras naturally have more pixel data, making them more forgiving when resized upwards.
Understanding Resolution (PPI/DPI) for Web vs. Print
Image resolution is often misunderstood, but it’s crucial for achieving optimal quality across different mediums.
- Pixels Per Inch (PPI): This refers to the density of pixels within a digital image. A common resolution for web images is 72 PPI (or sometimes 96 PPI), as computer screens typically display around this density. Higher PPI for web images doesn’t inherently make them look better on screen; it only increases file size unnecessarily.
- Dots Per Inch (DPI): This refers to the density of ink dots that a printer can place on paper. For high-quality prints, a resolution of 240-300 DPI is generally recommended. If you’re preparing an image for printing, ensure your digital image has enough PPI to translate into the desired DPI for the print size. For example, a 3000-pixel wide image would print at 10 inches wide if set to 300 DPI (3000 pixels / 300 DPI = 10 inches).
When resizing:
- For Web: Focus on actual pixel dimensions (e.g., 1920px wide) and ensure the file size is as small as possible without sacrificing visual quality. PPI is less critical than pixel dimensions.
- For Print: Ensure your image has sufficient pixel dimensions to achieve the desired print size at a high DPI (e.g., 300 DPI). In Photoshop’s Image Size dialog, you can untick “Resample” and change the “Resolution” (PPI/DPI) to see how it affects print dimensions without altering the pixel count.
The Role of Sharpening and Optimal File Formats
Subtle adjustments after resizing can often enhance the final appearance.
- Judicious Sharpening: After downsampling, images can sometimes appear slightly softer due to the pixel merging process. A light application of sharpening (e.g., using an “Unsharp Mask” filter in Photoshop or GIMP) can restore some perceived detail. However, be cautious not to over-sharpen, as this can introduce halos or noise. Sharpening should be the final step in your editing process.
- Choosing the Right File Format:
- JPEG: Ideal for complex photographs with many colors and subtle gradients, especially when minimal file size is a priority. Adjust the quality slider carefully; a setting of 60-80% often provides a good balance for web use.
- PNG: Best for images with transparency, sharp lines, text, or solid blocks of color (like logos and graphic designs). Use PNG-24 for full transparency and color depth.
- WEBP: The most efficient format for web use, offering superior compression to JPEG and PNG. Tophinhanhdep.com encourages its users to optimize images to WEBP whenever possible for faster loading.
- Batch Processing: If you have many images to resize to the same dimensions, utilize batch processing features available in Photoshop (Image Processor Pro) or GIMP (via plugins) to save time and ensure consistency. Tophinhanhdep.com’s online tools may also offer batch resizing capabilities, streamlining your workflow.
By consistently applying these best practices, you’ll ensure that your resized images consistently maintain their quality, clarity, and visual appeal, enhancing all your creative endeavors.
In the dynamic digital landscape where visual content reigns supreme, the ability to resize images without compromising their quality is a skill that directly impacts your success. From high-resolution wallpapers and backgrounds to detailed digital photography and intricate graphic designs, every image tells a story, and its clarity ensures that story is told without distortion.
Tophinhanhdep.com is committed to providing you with the resources, inspiration, and tools you need to excel in the world of visual content. By understanding the fundamentals of pixels and file formats, differentiating between resizing and resampling, and applying proven techniques with powerful tools like Adobe Photoshop, GIMP, and Tophinhanhdep.com’s own online resizer and AI upscalers, you can confidently manipulate your images to suit any purpose.
Remember to always start with the best possible original, choose the right interpolation methods, and optimize your images for their intended use—whether it’s for stunning display on a Tophinhanhdep.com wallpaper, a fast-loading photography portfolio, or a crisp graphic design element. Embrace these insights, explore the comprehensive Image Tools available on Tophinhanhdep.com, and unlock the full potential of your visual creativity. Your audience deserves to experience your images in their full, unblemished glory.