How to Resize Your Image: Mastering Quality and Performance with Tophinhanhdep.com

In the dynamic world of digital content, images are paramount. They capture attention, convey messages, and set the aesthetic tone for everything from personal social media profiles to professional websites. However, the true power of an image often lies not just in its visual appeal, but also in its technical specifications. One of the most fundamental yet frequently misunderstood aspects of image management is resizing. Whether you’re curating a stunning gallery of Nature or Abstract wallpapers, preparing High-Resolution Photography for print, or optimizing an image for a fast-loading website, knowing how to resize your image correctly – without compromising quality – is an indispensable skill.
At Tophinhanhdep.com, we understand the intricate balance required to achieve visual excellence while ensuring optimal performance. Our comprehensive suite of Image Tools, guides on Digital Photography, and vast Image Collections are designed to empower creators, designers, and enthusiasts alike. This guide delves into the essential techniques, principles, and tools for resizing images effectively, ensuring your Visual Designs always look crisp, load quickly, and perfectly serve their purpose.

The Indispensable Art of Image Resizing
The act of resizing an image might seem straightforward, but it’s a nuanced process that directly impacts an image’s quality, clarity, and overall utility. A poorly resized image can appear pixelated, stretched, or blurry, undermining your professionalism and diminishing the impact of your content. Conversely, a well-resized image maintains its integrity, enhancing user experience and reinforcing your brand’s credibility.
Why Correct Image Resizing is Critical
Imagine crafting a beautiful digital art piece, only for it to appear distorted when uploaded as a website banner, or a breathtaking photo background that slows down your entire webpage. These are common pitfalls of incorrect image resizing. For website owners, oversized images are a primary culprit behind slow load times, leading to higher bounce rates and a negative user experience. Search engines also penalize slow websites, impacting your visibility. Our guides on website performance highlight that correctly sized images are a cornerstone of a fast, efficient online presence, contributing significantly to reduced server response times and improved website speed optimization.
Beyond performance, quality and perception are key. High-quality, appropriately sized images demonstrate competence and build trust with your audience. For those sharing their Beautiful Photography or curating Thematic Collections, preserving the original sharpness, clarity, and color accuracy is paramount. Our resources on Aesthetic and inspiring Image Collections consistently emphasize the role of perfectly optimized visuals in captivating an audience and conveying a powerful message.
Understanding Image Quality: Pixels, Resolution, and Aspect Ratio
Before diving into the “how,” it’s crucial to grasp the fundamental concepts that govern image quality and dimensions:
- Pixels: The smallest individual dots of color that make up a digital image. More pixels generally mean more detail and a larger file size.
- Resolution: Typically measured in pixels per inch (PPI) for screens or dots per inch (DPI) for print. It defines the density of pixels within a given area. A higher resolution generally translates to a sharper image, especially for printing. Our guides for printing recommend resolutions no lower than 200 pixels/inch, with 300 pixels/inch being ideal for professional printing.
- Aspect Ratio: The proportional relationship between an image’s width and its height. For example, a 16:9 aspect ratio means the image’s width is 16 units for every 9 units of height. Maintaining this ratio is vital to prevent images from appearing stretched or squashed.
Understanding these concepts is the first step toward mastering Image Manipulation and ensuring your digital art or stock photos always look their best, regardless of their intended use.
Foundational Principles for Resizing Without Compromise
The goal of resizing is to adjust an image’s dimensions to fit a specific space without sacrificing its visual quality. This requires a strategic approach, considering the image’s original characteristics and its final destination.
Maintaining Aspect Ratio: Preventing Distortion
One of the most common mistakes in image resizing is failing to maintain the aspect ratio. When you freely drag the corners of an image in a basic editor, you risk stretching or squashing it, resulting in a distorted, unprofessional look.
The golden rule for preventing distortion is to always constrain proportions when resizing. Most reputable image editing tools, including those we recommend or provide on Tophinhanhdep.com, offer a “lock” symbol or a “constrain proportions” checkbox. Activating this feature ensures that when you adjust either the width or the height, the other dimension automatically scales proportionally, preserving the image’s original shape. Our in-depth guides on Graphic Design and Digital Art consistently highlight this as a fundamental principle for visual integrity.
The Pixels Conundrum: Scaling Up vs. Scaling Down
The ease with which an image can be resized without losing quality largely depends on whether you’re making it smaller or larger:
- Making an Image Smaller (Downscaling): This is generally straightforward. When you reduce an image’s dimensions, you’re essentially discarding pixels. As long as the original image has sufficient detail, downscaling typically results in a clear, sharp image with a smaller file size.
- Making an Image Larger (Upscaling): This is where challenges arise. When you increase an image’s size, you’re forcing the software to “guess” and create new pixels where none existed before. This process, known as interpolation, can lead to pixelation, blurriness, and a noticeable loss of quality, especially with traditional methods. Our articles on Digital Photography often advise starting with the highest resolution image possible – one that’s larger than you might ultimately need – to avoid the need for problematic upscaling.
However, advancements in technology have offered a solution to the upscaling dilemma. Tophinhanhdep.com features cutting-edge AI Upscalers designed specifically to transform low-quality images into higher resolution versions. These intelligent tools use artificial intelligence to analyze the image, predict missing details, and generate new pixels that blend seamlessly, allowing you to enlarge images without the traditional loss of quality. This capability is invaluable for turning older, smaller Sad/Emotional photos into beautiful, printable memories or enhancing Stock Photos for diverse applications.
Bitmap vs. Vector: Choosing the Right File Type
The type of image file you’re working with significantly impacts how easily and effectively it can be resized:
- Bitmap (Raster) Images: These are composed of a grid of pixels. Common bitmap formats include JPEG, PNG, GIF, and TIFF. Most photographs, screenshots, and complex images with gradients fall into this category. The quality of bitmap images is resolution-dependent; enlarging them beyond their original pixel dimensions typically results in a loss of quality.
- Vector Images: These are defined by mathematical equations, not pixels. Common vector formats include SVG, EPS, and AI. Vector images are typically used for logos, icons, illustrations, and graphic designs. The key advantage of vector files is that they can be scaled to any size – from a tiny icon to a giant billboard – without any loss of quality because the mathematical definitions simply recalculate the shapes and lines for the new dimensions.
Understanding this distinction is crucial. While our AI Upscalers can work wonders for bitmaps, vector files offer unparalleled flexibility for Visual Design projects where scaling is a frequent requirement. Tophinhanhdep.com provides various Image Converters that can help you manage different file types, ensuring you always have the right format for your needs.
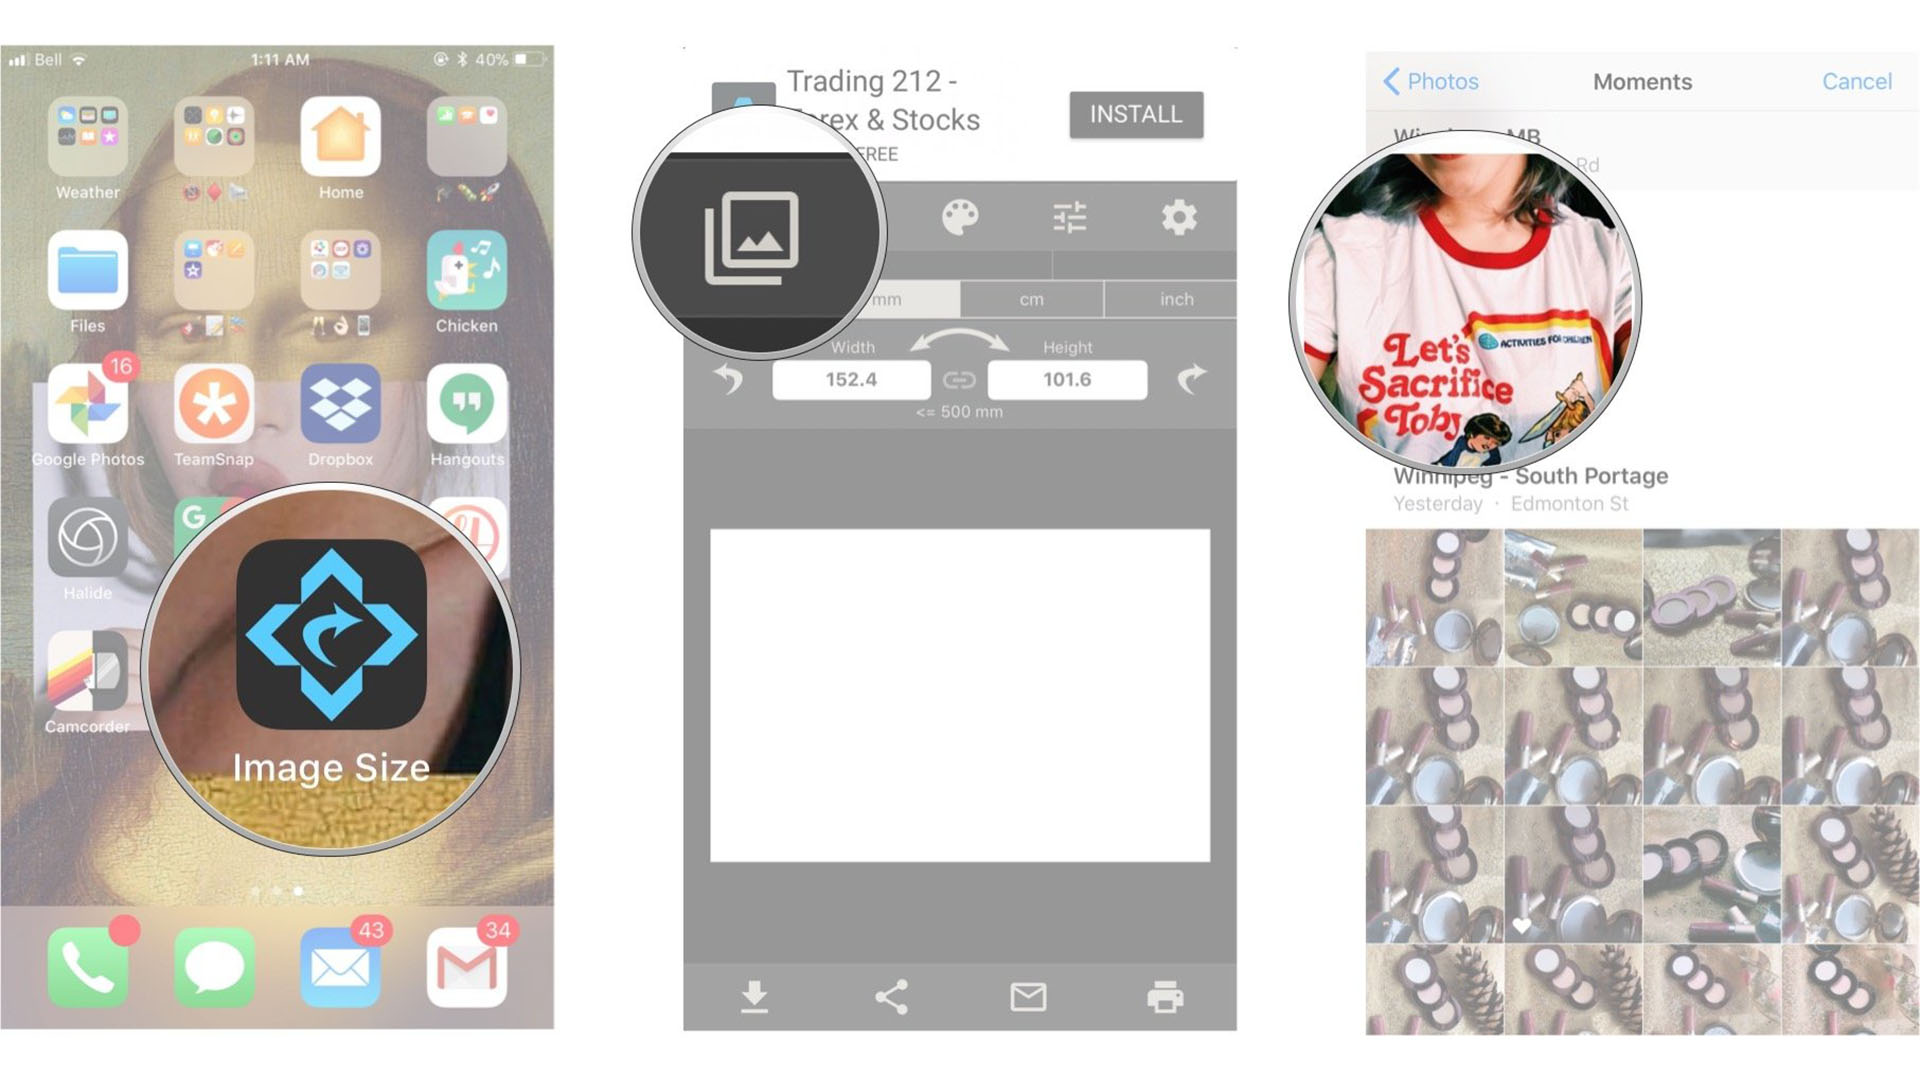
Step-by-Step Guides: Resizing with Tophinhanhdep.com’s Recommended Tools
The digital landscape offers a plethora of tools for image resizing, from basic built-in utilities to sophisticated online platforms. Tophinhanhdep.com is committed to guiding you through the most effective methods, whether you prefer desktop software or convenient online solutions.
Utilizing Built-in Operating System Tools
For quick and simple resizing tasks, your operating system often has tools readily available:
-
For Mac Users (Preview): If you own a Mac, the “Preview” application is a versatile, pre-installed image editor.
- Open your image in Preview.
- Go to “Tools” in the menu bar.
- Select “Adjust Size…”
- In the new window, ensure “Scale proportionally” and “Resample image” are checked to maintain proportions and quality.
- Input your desired width or height (e.g., in pixels or inches).
- Click “OK” and then save your file. We always recommend using “Save As” to preserve your original image.
-
For Windows Users (Paint): PC users can leverage “Paint,” a basic image editor included with Windows.
- Open your image in Paint.
- Click “Resize” in the Home tab.
- Choose to resize by “Pixels” or “Percentage.”
- Select “Maintain aspect ratio” to prevent distortion.
- Enter your desired dimensions.
- Click “OK” and save your file. For more robust features, a free-to-download version with enhanced capabilities, often referred to as Paint.NET, is also available and recommended for more complex tasks.
These built-in tools are excellent for basic adjustments, such as preparing images for emails or simple documents.
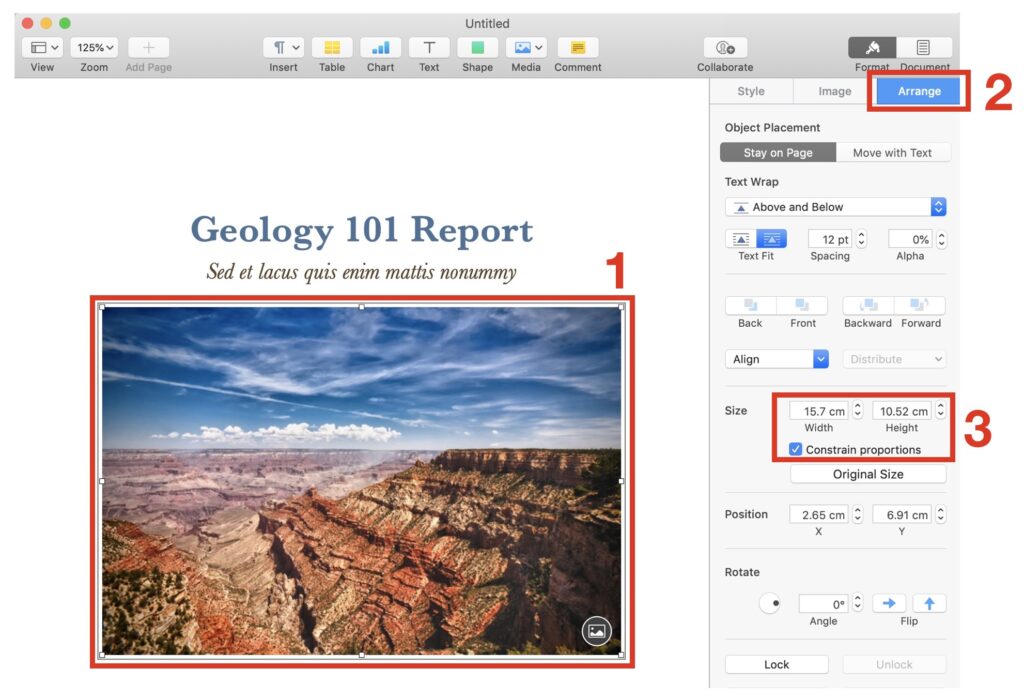
Leveraging Advanced Desktop Software
For professional photographers, graphic designers, or anyone needing precise control over their images, dedicated photo editing software offers unparalleled capabilities. While specific software names are external, the general workflow remains consistent across professional-grade desktop applications often highlighted in Tophinhanhdep.com’s Digital Photography and Photo Manipulation guides.
Here’s a generalized workflow for resizing in professional desktop software, mirroring the detailed steps often found in our advanced tutorials:
- Open Your Image: Launch the software and open the image file you wish to resize.
- Access Image Size: Navigate to the “Image” menu at the top of the window and select “Image Size” (the exact wording might vary slightly).
- Configure Resizing Options: A new dialog box will appear, presenting various options:
- Constrain Proportions: Crucially, ensure this option (often represented by a chain-link icon) is activated to maintain the aspect ratio.
- Units of Measurement: Select your desired units (e.g., pixels for web, inches/centimeters for print).
- Resolution: For print, verify the resolution is set to a minimum of 200 pixels/inch, with 300 pixels/inch being ideal. For web, 72 ppi/dpi is the standard.
- Input Dimensions: Enter your desired width and/or height. With “Constrain Proportions” active, changing one dimension will automatically adjust the other.
- Confirm and Apply: Click “OK” or “Apply” to implement the changes.
- Save Your File: Always use “Save As” and give your resized image a new name. This practice safeguards your original file, allowing you to revert to it if needed.
These powerful tools are essential for intricate Photo Manipulation and creating stunning Visual Designs that require meticulous control over every pixel.
Exploring Online and AI-Powered Solutions
In addition to desktop software, Tophinhanhdep.com offers a range of online Image Tools designed for efficiency and accessibility. These are particularly useful for quick adjustments, batch processing, or leveraging advanced AI capabilities without software installation:
- Simple Image Resizer (Online Tool): For rapid resizing, our online tools like the “Simple Image Resizer” are perfect when you’re in a hurry.
- Upload your image directly to the Tophinhanhdep.com website.
- Select “Dimensions” and enter your desired width or height.
- Click “Resize,” and the tool will generate a proportionately resized image ready for download. Many of our tools are mobile-friendly and can even be accessed as browser extensions.
- Batch Resizing (Online Tool): If you need to prepare multiple images for an online portfolio, an event submission, or a new Image Collection, our batch resizing features are invaluable.
- Upload several images simultaneously to the Tophinhanhdep.com platform.
- Select your desired size preferences (e.g., a specific pixel dimension or a percentage reduction).
- Initiate the “Batch Job,” and all your images will be processed efficiently. While batch mode focuses on resizing, individual editing modes are available for cropping or special effects.
- AI Upscalers: As mentioned earlier, Tophinhanhdep.com’s AI Upscalers are a game-changer for enlarging images. If you have a low-resolution image that you need to make larger without compromising quality, our AI-powered tools employ sophisticated algorithms to add detail and clarity, making the image suitable for larger displays or even printing. This is particularly useful for old family photos, historical images, or digital art pieces that need a boost in resolution.
Our suite of online tools, including Image Converters, Compressors, and Optimizers, ensures that whether you’re a casual user or a professional, you have the right resources to manage your images effectively.
Optimizing for Performance and Specific Use Cases
Resizing is not just about changing dimensions; it’s about optimizing an image for its intended environment. A web image has different requirements than a print image, and understanding these distinctions is crucial for achieving the best results.
Achieving the Balance: File Size vs. Image Quality
The ultimate goal for most digital images is to strike a perfect balance between a low file size (for fast loading) and high image quality (for visual appeal).
- For Websites: Large image files are a major contributor to slow website load times. Our website performance guides consistently recommend aiming for image file sizes of 100KB or less where possible. This size typically offers a good balance between visual quality and speed. Tophinhanhdep.com’s Image Compressors and Optimizers are specifically designed to help you achieve this balance, reducing file size without noticeable degradation in quality.
- For Print: Print requires much higher resolutions and often results in larger file sizes. While web images typically use 72 ppi/dpi, print quality generally starts at 200 ppi/dpi, with 300 ppi/dpi being ideal.
Always consider the end-use of your image when determining the optimal balance.
Navigating File Formats: JPG vs. PNG and Beyond
The choice of file format also plays a significant role in resizing and optimization:
- JPG (Joint Photographic Experts Group): This is a widely used format for photographs and images with many colors and gradients. JPGs use lossy compression, meaning some data is discarded to achieve smaller file sizes. They are generally easier to resize and compress. For most website images (e.g., Wallpapers, Backgrounds, Beautiful Photography), JPG is the preferred format due to its balance of quality and small file size.
- PNG (Portable Network Graphics): PNGs use lossless compression, preserving all image data, which results in higher quality but larger file sizes compared to JPGs. The key advantage of PNG is its support for transparency. If your image requires a transparent background (e.g., a logo, an overlay for Digital Art), PNG is the essential format. Our Photo Manipulation guides often elaborate on working with transparent backgrounds. If transparency is not needed, converting a PNG to a JPG can significantly reduce its file size without much loss in visual quality, a function easily performed by Tophinhanhdep.com’s Converters.
- Other Formats: Tophinhanhdep.com also supports and provides insights into other formats like GIF (for simple animations and limited colors) and TIFF (for high-quality print and archiving). Understanding when to use each format is a core aspect of effective image management.
Essential Tips for Web, Print, and Digital Art
To summarize and expand on best practices:
- For Web:
- Dimensions: Aim for dimensions between 600 and 1200 pixels on the longest side for most screen displays, though tailor this to specific placements (e.g., blog posts, hero banners). Our Image Inspiration & Collections often specify ideal dimensions for various trending styles.
- Resolution: 72 ppi/dpi is standard.
- File Size: Target 100KB or less using JPG format. Utilize Tophinhanhdep.com’s Compressors and Optimizers.
- Responsiveness: Ensure images are responsive to adapt to different screen sizes.
- For Print:
- Dimensions: Size the image to the exact physical dimensions required (e.g., 8x10 inches).
- Resolution: 200-300 ppi/dpi is essential for sharp prints.
- File Format: Often TIFF or high-quality JPG, sometimes PDF.
- Color Profile: Use CMYK if required by your printer, rather than RGB.
- For Digital Art & Graphic Design:
- Start Large: Always begin with a high-resolution canvas.
- Vector Where Possible: Use vector formats for logos and illustrations to ensure infinite scalability.
- Transparency: Use PNG for elements requiring transparent backgrounds.
- Archiving: Save master files in lossless formats (like TIFF or PSD) before creating web or print versions.
By following these guidelines, you can ensure that your images, whether they are Abstract compositions, Aesthetic backgrounds, or professional Stock Photos, are always prepared to perfection for their intended medium.
Tophinhanhdep.com: Your Hub for Image Excellence
Mastering image resizing is a critical skill in today’s visually-driven world. It’s about more than just changing numbers; it’s about preserving quality, optimizing performance, and upholding the integrity of your visual content. From ensuring your website loads swiftly to presenting your Beautiful Photography with pristine clarity, correct image resizing underpins success in various digital endeavors.
At Tophinhanhdep.com, we are dedicated to providing you with the knowledge, tools, and inspiration to excel in all aspects of image creation and management. Our platform offers:
- Extensive Image Collections: Explore diverse categories like Wallpapers, Backgrounds, Nature, and Sad/Emotional images for endless inspiration.
- Comprehensive Photography Guides: Learn about High Resolution photography, Digital Photography techniques, and various Editing Styles.
- Powerful Image Tools: Utilize our Converters, Compressors, Optimizers, AI Upscalers, and even Image-to-Text functionalities to streamline your workflow.
- Visual Design Resources: Discover guides on Graphic Design, Digital Art, Photo Manipulation, and Creative Ideas to elevate your projects.
- Image Inspiration & Collections: Access Photo Ideas, Mood Boards, and Thematic Collections to spark your creativity and stay abreast of Trending Styles.
We invite you to delve into Tophinhanhdep.com and explore the vast resources available. Empower yourself with the skills to resize your images like a professional, ensuring every visual you create is impactful, efficient, and of the highest quality. Your journey to image excellence begins here.